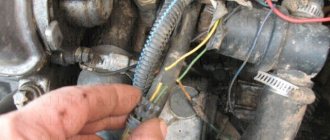
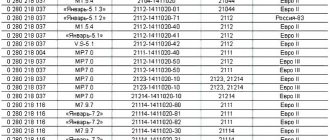
Code P0328 is entered if the following conditions exist:
engine crankshaft speed is more than 1300 rpm; coolant temperature above 60°C; the amplitude of the knock sensor signal is above the threshold. If a permanent malfunction occurs, the “CHECK ENGINE” lamp lights up after 2 drive cycles.
1. The existence of conditions for the occurrence of code P0328 is checked.
2. The serviceability of the screen of wires 2 B and 88 G is checked.
1. Connect the adapter cable to the diagnostic connector. Start the engine and warm up to a coolant temperature of 60°C. Set the engine crankshaft speed to more than 1300 rpm.
Code P0328 is intermittent. If it is currently inactive and there are no other codes, analyze the conditions under which the code occurred. Check by ear the operation of the engine for the presence of extraneous metallic noises and knocking (valves are not adjusted); if found, eliminate them. Make sure that the sensor wiring harness is not routed near high voltage wires. See the “Checking the Knock Control System” card.
2. Check the serviceability of the screen and the connection between the screen and engine ground. Check the tightening torque of the knock sensor mounting nut.
If comments are found, the sensor or controller is faulty.
If there are no comments, fix the problem.
After repair, start the engine, reset the codes and make sure there is no signal from the “CHECK ENGINE” lamp.
The error is entered under the following conditions - in forced idling mode: 1. The amplitude of the DD signal is below the threshold value 2. The computer is operating in detonation control mode. Parameter BK_R is “NO”. 3. crankshaft rotation speed in the range of 2250 - 2350. It is necessary to check the condition of the DD connector for the presence of dust - dirt and engine oil... The error is entered into the ECU memory on the third drive cycle. On cars of the first production, the DD fastening was observed to be tightened with insufficient torque. Check procedure: 1. Turn off the ignition, connect the diagnostic tool, warm up the engine to a temperature of 90 degrees. We are trying to reproduce the conditions under which the error occurred. If the error is not active at the moment, check the tightness of the DD, the correct connection and the integrity of the wiring harness. 2. If the error is active, turn off the ignition, disconnect the wiring harness block from the engine control unit and the computer. We measure the resistance of the wires connecting the ECU and the DD. If the resistance is more than 1 ohm, we eliminate the break. 3. If the resistance is less than 1 Ohm, the motor control unit or ECU is faulty, or there is a weak contact in the wiring harness blocks.
Error 0328 - high signal level of the knock sensor The error is entered under the following conditions - in forced idling mode: 1. The amplitude of the DD signal is above the threshold value 2. The computer is operating in knock control mode. Parameter BK_R is “NO”. 3. The crankshaft rotation speed is in the range of 2250 – 2350. The error is entered into the ECU memory on the third drive cycle. Error 0328 may indicate deterioration or engine malfunction. It is necessary to check the condition of the engine hardware, especially the condition of the timing belt and timing gear. On cars of the first production, tightening of the motor drive fastening with insufficient torque was observed. Check procedure: 1. Turn off the ignition, connect the diagnostic tool, warm up the engine to a temperature of 90 degrees. We are trying to reproduce the conditions under which the error occurred. If the error is not active at the moment, check the tightness of the DD, the correct connection and the integrity of the wiring harness. 2. If the error is active, check the condition of the screen and its connection to engine ground. Check the tightening torque of the DD fastening. 3. If a fault in the wiring screen is not detected, the engine control unit or ECU is faulty; if a fault in the wiring screen is detected, eliminate the fault.
How does the sensor work and why is it needed?
The operation of the mechanism is based on the principle of a piezoelectric element.
This means that if vibration of a different nature occurs in the engine cylinder, a signal will be transmitted to the ECU using electronic pulses. In turn, the final element in this chain will make changes to the operation of the ignition angle. This algorithm of actions allows you to protect components and parts from mechanical damage. On the “fourteenth” in most cases there are broadband mechanisms, but often the manufacturer also installed a resonant type of device, most often on the very first copies of the VAZ-2114
The broadband mechanism is superior to its counterpart in that it has a wider range of capabilities. Such a sensor is capable of capturing noise of various frequencies, which undoubtedly gives the vehicle system additional stability.
The devices operate on different principles, therefore, if the resonant sensor breaks down, it cannot be replaced with a broadband one. The situation is similar in the opposite case. If there is an urgent need to replace or change the operating principle of the mechanism, you will have to purchase a new control unit.
When is it diagnosed?
The conditions for the error to occur may vary for different car models, but general symptoms can be outlined:
- crankshaft speed level over 1300 RPM;
- warm car engine (coolant temperature exceeds +60 °C);
- The knock sensor signal level is below the limit values.
The sensor comes into operation only when fuel detonation occurs, so the absence of a signal from the meter is recorded at high speeds and a warm engine. As already mentioned, the error does not appear immediately - it is entered into the ECU memory only after the second trip in a row with the specified values.
. — , , .
| 2110 | 20:33, 26 51 |
| / 2110, 2115, 406 VSKS0110 VSKS0110 | 22:40, STODETALEY |
| ERA 550489 | 10:42, 22 «-… |
| 2110-12 ERA 550489 | 22:09, 24 |
| FCR2106618200680689/Francecar. Renault Logan, Duster, Sandero, Francecar FCR210661 Replacement of knock sensor Prior 16 valves , Renault Duster, Renault Logan… , 1 | 23:32, 24 |
| (LADA) 2004- | 18:51, KUZOVNOE.TOMSK |
| 406, 4216, . (18.3855) | 01:12, |
| ERA 550489 | 07:32, 20 |
| ERA 550489 | 20:32, |
| ( . -406; 2110 — 2112) 18-3855000-01 16421 | 04:20, 22 … |
| LADA ...: ; Car line 550489, 21123855020 \ LADA | 12:57, 21 Car line |
| ERA 550489 | 08:27, 15 Gabarit |
| , , | 11:24, 16 «» |
| / 2110, 2115, 406 VSKS0110 VSKS0110 | 21:32, AMX24 … |
| ERA 550489 550489 | 15:02, |
| / 2110, 2115, 406 VSKS0110 Startvolt | 12:07, 22 |
| / 2110, 2115, 406 VSKS0110 | 12:04, 21 Car line |
| ERA 550489 | 06:20, 20 |
| / 2110, 2115, 406 VSKS0110 VSKS0110 | 06:51, 1 Gabarit |
| 2110-12, ERA 550489 | 07:25, |
| 2110-12, : ERA 550489 | 03:29, 16 |
| / 2110, 2115, 406 VSKS0110 | 06:53, |
| 06:41, 22 | |
| ERA 550489 | 11:06, 7 AvtoSup |
| ERA 550489 | 16:22, 21 Boost24 |
| Francecar FCR210661 Renault 21/25/Clio/Espace/Kangoo/Laguna/Megane/Safrane/Twingo/Lada Largus FCR210661 , Renault 21, Renault Espace … , 1 | 12:59, 21 |
| 2110-12, Era 550489 | 09:26, 18 … |
| 2110-15, -406 () (50) | 22:26, 17 Autoclub02 |
| / 2110, 2115, 406 VSKS0110 | 21:15, 17 Autoclub02 |
| ERA 550489 | 08:21, 15 24 |
| 2110-15, -406 () (50) | 07:42, 21 MGM |
| 2110-12 Era .550489 | 01:15, — |
| 2110-12 Era .550489 | 22:54, —… |
| 2112-3855020 2110-12 Era. 550489 2112-3855020 | 08:06, —… |
| 2110, 2115, 406 (vs-ks 0110) . VSKS0110 | 07:05, —… |
| 2110-12, Era. 550489 | 04:00, —… |
| 2110, / 406 . 21123855020 | 09:26, —… |
| ERA 550489 | 09:25, CARakoom |
| / 2110, 2115, 406 VSKS0110 Startvolt VSKS0110 | 04:22, — … |
| 2110, / 406 18.3855 . 183855 | 03:39, —… |
| 2110-12 ERA 550489 | 10:51, 21 Jc-Market |
| 2110-12, | 15:11, 13 AutoPart02 |
| 8200680689 Valeo Largus 8200680689 Valeo , Renault Espace, Renault Twingo … | 14:01, 22 -PN1 — … |
| 2110-12 550489 | 07:13, 22 -PN1 — … |
| 2110, 2115, 406 (VS-KS 0110) VS-KS 0110 | 03:11, 22 -PN1 — … |
| 2110, / 406 2112-3855020 | 03:09, 22 -PN1 — … |
| 2110, / 406 18.3855 18.3855 | 03:07, 22 -PN1 — … |
| ( ) | 06:03, 17 |
| 405,406,4216, 2110,2112 () () | 10:22, 13 «… |
| Lada Largus (Renault SA S.) , Renault Clio, Renault Laguna ... | 10:20, 13 «… |
Determining and decoding errors on the VAZ 2114
Error p0171
Self-diagnosis of a car allows you to identify faults, but some of them are rarely identified. An odometer is used for diagnostics.
Self-diagnosis of VAZ 2114
The sequence of actions is as follows:
- Press and hold the odometer button and turn the ignition key to the first position.
- Release the odometer button and press briefly again. As a result, the firmware version will be displayed.
- Now, to see the error codes, you need to press and release the odometer button again.
Error codes are in the form of numbers from 1 to 9 and two-digit numbers, unlike those displayed by the on-board computer. Thus, you can use the odometer to identify some car faults. The most common errors are shown in the table below.
Diagnosis of faults using special equipment
To identify faults, service stations usually use the car’s on-board computer and a laptop with specialized applications. In this case, it is possible to obtain error codes that correspond to various problems. The most common of them are shown in the table.
If errors occur with other codes, you should read the information about them in the file that comes with the car diagnostic application, or search on the Internet.
The controller clears the memory after turning off the engine with the ignition and disconnecting power from the battery for 10-15 seconds. In this way, you can determine after repair whether the malfunction has been eliminated.
Errors in the VAZ 2114 occur quite often, so the ability to recognize them will not be superfluous to carry out proper car repairs. For correct diagnosis, you will need a computer with a special program and an understanding of the on-board computer readings.
On which cars is this problem most common?
The problem with code P0328 can occur on different machines, but there are always statistics on which brands this error occurs more often. Here is a list of some of them:
- Audi (Audi a4)
- Chevrolet (Chevrolet Captiva)
- Hyundai (Hyundai Accent, Elantra)
- Infiniti (Infiniti fx35)
- Kia (Kia Sid, Cerato)
- Lexus
- Mazda (Mazda 2, Mazda 3, Mazda 6, Demio, Premasi)
- Nissan (Nissan Almera, Xterra, Murano, Teana, Frontier)
- Opel (Opel Astra)
- Skoda (Skoda Octavia)
- Subaru (Subaru Outback, Tribeca, Forester)
- Suzuki
- Toyota (Toyota Avensis, Camry, Rav4, Sienna)
- Volkswagen (Volkswagen Passat, Polo)
- VAZ 2109, 2110, 2112, 2114, 2115
- Lada Kalina, Niva, Priora
With fault code P0328, you can sometimes encounter other errors. The most common ones are: P0132, P0152, P0158, P0171, P0183, P0324, P0325, P0326, P0327, P0329, P0330, P0331, P0332, P0333, P0334, P0400, P0451, P0463, P0496.
Source
Error P0325
DmitryCorsten Blog Error codes for on-board computers of the Samara-2 family VAZ 2113, VAZ 2114, VAZ 2115
Error code P0325 has an official name - “malfunction in the knock sensor circuit.” In English it sounds like: Knock Sensor 1 Circuit Malfunction. It signals to the driver that the engine control unit does not receive a signal from the DD. Due to the fact that some problems have arisen in its power supply or signal circuit. The cause of this error may be very low or very high voltage coming from the sensor due to a break or poor contact in the wiring harness block.
Possible causes of the error
There are several reasons why error p0325 may occur. Among them:
- broken knock sensor wiring;
- short circuit in the DD wiring circuit;
- malfunction in the connector (chip) and/or contact DD;
- high level of interference from the ignition system;
- malfunction of the knock sensor itself;
- malfunction of the engine control unit (abbreviated as ECM).
Conditions for recording error code 0325
The code is installed in the ECU memory on a warm engine at a crankshaft speed of 1600-5000 rpm. if the problem does not go away within 5 seconds. and more. The archive of fault error codes itself is cleared after 40 consecutive cycles without fixing a fault.
To find out exactly what problem caused the error, additional diagnostics must be performed.
External symptoms of error P0325
External signs of this error may include the following situations. However, they can also indicate other errors, so you should always perform additional diagnostics using an electronic scanner.
- The Check Engine light on the dashboard is activated;
- the engine control unit operates in emergency mode;
- in some cases, engine detonation is possible;
- loss of engine power is possible (the car “does not pull”, loses its dynamic characteristics, accelerates poorly);
- Unstable engine operation at idle.
In general, the symptoms of failure of the knock sensor or its wiring are outwardly similar to those when the ignition is set late in the car (on carburetor engines).
Error diagnosis algorithm
To diagnose error p0325, it is necessary to have an electronic error scanner (for example ELM 327 OBD-II). The error detection algorithm will be as follows:
- First, you need to make sure that the alarm was not false. To do this, you need to reset the error using the scanner (if there are no others, otherwise you need to deal with them first) and perform a test drive. If error p0325 occurs again, then we continue further.
- You need to check the functionality of the knock sensor. This can be done in two ways - using a multimeter and mechanically. Using a multimeter, you first need to measure the voltage of the sensor when pressure is applied to it. And also check its circuit to the ECU for an open circuit. The second, simpler method is to simply hit the engine at idle speed in the immediate vicinity of the sensor. If it is working properly, then the engine speed will drop (the electronics will automatically change the ignition angle), which is true that this algorithm does not work on all cars and in some cases, reading the BC signal from the DD works under other additional conditions).
- Check ECM functionality. In rare cases, the program may crash. It is unlikely that you will be able to perform the check yourself, so it is better to seek help from an official dealer of your car manufacturer.
How to get rid of error p0325
Depending on what exactly caused the p0325 error, several options are possible to solve this problem. Among them:
- cleaning contacts or replacing wiring connectors (chips);
- repair or replacement of wiring from the knock sensor to the engine control unit;
- replacing the knock sensor itself, most often this is what is done (this unit cannot be repaired);
- flashing or replacing the engine control unit.
Error p0325 itself is not critical, and the car can get to a car service center or garage under its own power. However, there is a risk that if detonation occurs in the engine, the ECU will not be able to react properly and eliminate it. And since detonation is very dangerous for the power unit, you need to get rid of the error and carry out the appropriate repair work as quickly as possible after its occurrence.
Purpose of the knock sensor
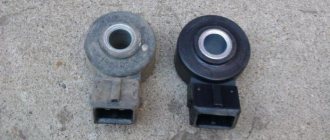
The VAZ 2110 uses two types of knock sensors. Until 2003, a single-contact resonant DD was installed. Since 2002, the VAZ 2110 with an 8-valve and 16-valve engine began to use broadband knock sensors. The new and old type DDs are completely non-interchangeable, since they have different fastenings and operating principles.
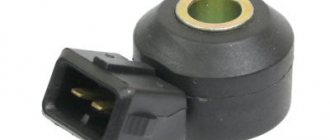
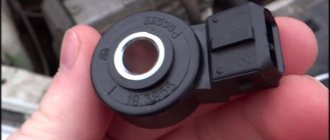
The broadband sensor has the shape of a round torus. There is a hole in its center through which the fastening bolt is inserted. On the side of the DD there is a connector that serves to connect a circuit connecting it to the electronic control unit.
The resonant knock sensor does not require a bolt to secure it to the engine. Directly on its body there is a thread with which the meter can be screwed into the seat.
There is a sensitive element inside the DD housing. It reacts to vibrations. In the case of a resonant meter, monitoring is carried out in a narrow range. Vibrations are converted by meters into an electrical signal with a certain amplitude and frequency.
The electronic control unit constantly receives DD signals. The module controls and analyzes the amplitudes and frequencies of the incoming voltage. Deviation outside the nominal range indicates the occurrence of detonation. In this case, the ECU corrects the operation of the power unit according to the established algorithm.
Eliminating detonation minimizes parasitic destructive loads that affect the cylinder-piston group. Therefore, the main purpose of the DD can be considered to quickly determine the occurrence of vibration and detonation, which is the key to increasing the service life of the VAZ 2110 engine. This is what the knock sensor is responsible for.
Location of the knock sensor on the VAZ 2110
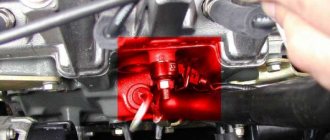
The location of the knock sensor was chosen to obtain the greatest sensitivity. To do this, it is installed directly on the power unit between the second and third cylinders. The oil dipstick can serve as a guide for determining the installation location. Also in close proximity is the air filter housing.
Sensor cost
The original resonant sensor produced by Lada has article number 21120385501001. Its price is 800-1300 rubles. A good analogue for the original is General Motors 21120-3855010-01. Its cost is in the range of 1600-1800 rubles.
The wideband original knock sensor of the VAZ 2110 has article number 18.3855. Its price is 300-330 rubles. You can see good analogues in the table below.
Table - Good analogues of the original knock sensor 18.3855 VAZ 2110
NameArticle Cost, rubles
| Coolant temperature sensor 330082 ERA | 330082 | From 300 |
| Original temperature sensor from AvtoVAZ | UK193 | From 350 |
| Luzar | LS0101 | From 150 |
| PATRON | PE13059 | From 150 |
Methods for checking a knock sensor
If there are signs of a malfunction of the knock sensor, then first of all you need to check the error log in the on-board computer. About DD malfunction they say:
- code 0325, indicates an open circuit in the sensor circuit;
- code 0326 or 0327, reports low signal level;
- code 0328, the amplitude of the voltage coming from the sensor is too high.
You can indirectly check the DD by checking the resistance with a multimeter. For a working sensor it ranges from 1 to 10 MOhm.
You should also check the voltage with a multimeter. To do this, the probes are connected to the contacts, and light blows are applied to the working surface of the DD with a bolt or rod. If there are no voltage surges, the sensor needs to be replaced.
Self-replacement of sensor 21120385501001 on a VAZ 2110
- Replacement of the resonance sensor is carried out according to the instructions below
- Install a new sensor, tightening to a torque of 20 Nm.
- Connect the connector.
Replacing knock sensor 18.3855 on a VAZ 2110
Instructions for replacing the wideband knock sensor are provided.
- Press the latch and disconnect the terminal.
- Unscrew the DD fastening bolt.
- Install a new DD by tightening the fastening bolt with a tightening torque of 25 Nm.
- Connect the terminal block.
— , , .
| 2110 | 20:33, 26 51 |
| / 2110, 2115, 406 VSKS0110 VSKS0110 | 22:40, STODETALEY |
| ERA 550489 | 10:42, 22 «-… |
| 2110-12 ERA 550489 | 22:09, 24 |
| ERA 550489 | 07:32, 20 |
| ( . -406; 2110 — 2112) 18-3855000-01 16421 | 04:20, 22 … |
| ERA 550489 | 08:27, 15 Gabarit |
| / 2110, 2115, 406 VSKS0110 VSKS0110 | 21:32, AMX24 … |
| ERA 550489 550489 | 15:02, |
| / 2110, 2115, 406 VSKS0110 Startvolt | 12:07, 22 |
| / 2110, 2115, 406 VSKS0110 | 12:04, 21 Car line |
| ERA 550489 | 06:20, 20 |
| / 2110, 2115, 406 VSKS0110 VSKS0110 | 06:51, 1 Gabarit |
| / 2110, 2115, 406 VSKS0110 | 06:53, |
| ERA 550489 | 11:06, 7 AvtoSup |
| ERA 550489 | 16:22, 21 Boost24 |
| 2110-15, -406 () (50) | 22:26, 17 Autoclub02 |
| / 2110, 2115, 406 VSKS0110 | 21:15, 17 Autoclub02 |
| ERA 550489 | 08:21, 15 24 |
| 2110-15, -406 () (50) | 07:42, 21 MGM |
| 2110-12 Era .550489 | 01:15, — |
| 2110-12 Era .550489 | 22:54, —… |
| 2112-3855020 2110-12 Era. 550489 2112-3855020 | 08:06, —… |
| 2110, 2115, 406 (vs-ks 0110) . VSKS0110 | 07:05, —… |
| 2110, / 406 . 21123855020 | 09:26, —… |
| ERA 550489 | 09:25, CARakoom |
| / 2110, 2115, 406 VSKS0110 Startvolt VSKS0110 | 04:22, — … |
| 2110, / 406 18.3855 . 183855 | 03:39, —… |
| 2110-12 ERA 550489 | 10:51, 21 Jc-Market |
| 2110-12 550489 | 07:13, 22 -PN1 — … |
| 2110, 2115, 406 (VS-KS 0110) VS-KS 0110 | 03:11, 22 -PN1 — … |
| 2110, / 406 2112-3855020 | 03:09, 22 -PN1 — … |
| 2110, / 406 18.3855 18.3855 | 03:07, 22 -PN1 — … |
| 405,406,4216, 2110,2112 () () | 10:22, 13 «… |
| / 2110, 2115, 406 VSKS0110 VSKS0110 | 05:06, — |
| 2110-12 550489 | 03:46, — |
| 2110-12 ERA 550489 | 17:19, 20 -InsOil… |
| ERA; 550489; 2110-12 | 02:02, 9 45 |
| ERA 2110-12 #550489 | 20:55, — |
| 2110-12 | 05:51, YULSUN |
| 2110-12 ERA 550489 | 21:39, 22 -TODUX |
| / 2110, 2115, 406 VSKS0110 Startvolt VSKS0110 | 14:57, 22 100- |
| Era 550489 | 02:53, 21 54 |
| 2110-15 -406 | 19:48, Autoko - ... |
| / 2110, 2115, 406 vsks0110 . VSKS0110 | 09:15, — … |
| -2110 (18.3855) (. ) | 23:34, — … |
| / 2110, 2115, 406 VSKS0110 | 03:39, — … |
| / 2110, 2115, 406 VSKS0110 Startvolt VSKS0110 | 11:21, 22 reDAuto |
| 07:03, 22 — | |
| ERA 550489 | 09:06, 21 CAReFan |
How to replace the sensor
Replacing the mechanism yourself is not difficult. It is located between the second and third cylinders; you need to open the hood and provide yourself with unhindered access
It is important that the engine is turned off at this time. As soon as the DD is detected, it is necessary to disconnect the plug going to the sensor wires
If the mechanism is broadband, then to complete all the work you will need a key set to “13”. In the case of a resonant device, you should arm yourself with a key set to “22”. You just need to unscrew the nuts from the stud with a “13” wrench or the piezoelectric sensor itself with a “22” wrench. It is also necessary to clean the contacts with sandpaper to remove all dirt and oxidation. This procedure should not be neglected, because the quality of the transmitted signal depends on the state of the contacts.
Oxidation and various types of plaque interfere with the transmission of a high-quality signal. As a consequence, this leads to a decrease in the level and accuracy of the impulse, which will leave its mark on the operation of the car. After which it is necessary to install a new mechanism and reassemble in the reverse order.
Device location
If you have no idea where the VAZ 2110/2112 8 or 16 valve knock sensor is located, then you should not conduct experiments by completely disassembling your car.
Let's say right away that it is quite easy to find. It is located in front of the motor. To accurately determine where it is installed, you just need to know where your dipstick is located. It is in this location that the knock sensor is installed on a VAZ 2110 8 valve or 2112 16 valve car. To be more precise, you can find it between the second and third cylinders.
Error p0328
Error code P0328 by definition means that “the output voltage of the knock sensor is above the threshold value” (usually the threshold value is 4.5 V). In English it is called Knock Sensor 1 Circuit High. This error is similar to the previous one, but the difference is that in this case it may be caused by a break in the signal/power wires between the knock sensor and the electronic control unit or a short circuit of the wiring section to the ECU to “+”. Determining the cause is made difficult by the fact that such an error occurs much more often not because of problems with the chain, but because of poor fuel flow into the combustion chamber (lean mixture), which occurs due to clogged injectors, poor operation of the fuel pump, low-quality gasoline or phase shift and installation early ignition.
External signs
Indirect signs by which it can be judged that error p0328 is occurring are similar to those described above. In particular, the Check Engine light on the dashboard is activated, the car loses its dynamics and accelerates poorly. In some cases, increased fuel consumption is observed. However, the listed signs may indicate other malfunctions, so mandatory computer diagnostics are needed.
The cause must be looked for by studying the symptoms, and the search itself must be done by removing the connector for connecting the knock sensor with the engine running. It is necessary to measure the reading parameters and observe the behavior of the motor.
Causes of error p0328
The causes of error p0328 may be the following malfunctions:
- Damage to the knock sensor connector or significant contamination (ingress of debris, engine oil);
- the circuit of the mentioned sensor has a short circuit or open circuit;
- the knock sensor itself is faulty;
- there is electrical noise in the sensor circuit (interference);
- low pressure in the vehicle fuel line (below the threshold value);
- use of fuel that is unsuitable for the vehicle (low octane number) or its low quality;
- error in the operation of the electronic engine control system (failure).
Another interesting reason noted by car enthusiasts is that a similar error can appear if the valves are incorrectly adjusted, in particular, they have too much clearance.
Possible troubleshooting options
Depending on what caused the p0328 error, the ways to eliminate it will be different. However, the repair procedures are completely similar to those described above, so we’ll simply list them:
- check the knock sensor, its internal resistance, as well as the voltage it outputs to the computer;
- make an audit of the wires connecting the electronic unit and the DD;
- perform an audit of the chip where the sensor is connected, the quality and reliability of the contacts;
- Check the torque value at the knock sensor seat and, if necessary, set the desired value using a torque wrench.
As you can see, the verification procedures and reasons why errors p0325, p0326, p0327 and p0328 appear are largely similar. Accordingly, the methods for solving them are identical.
Remember that after eliminating all faults, you must erase error codes from the memory of the electronic control unit. This can be done either using software (preferably), or simply by disconnecting the negative terminal from the battery for 10 seconds.
How to Troubleshoot or Reset Trouble Code P0328
Some suggested steps to troubleshoot and fix error code P0328:
- Visually inspect the electrical wires and connectors leading to the sensor.
- Check the continuity of the wiring from the PCM to the knock sensor wiring connector.
- Measure the resistance of the knock sensor and compare with factory specifications.
- If necessary, replace the knock sensor.
Please note that there are two types of knock sensors, resonant in the form of a barrel and broadband in the form of a ring-washer.
What you need to know about the phase sensor
So, what is a VAZ 2114 phase sensor, how to find it and what are its signs of malfunction?
Device and purpose
DF installation location
DF is a regulator necessary to obtain data on the functioning of the vehicle engine and transmit this information to the ECU. As for the design, the DF consists of a sensitive component as well as a pulse converter. The design of the latter, in turn, includes an operational amplifier, an output stage, and a bridge circuit.
The sensing component located inside the structure operates on the principle of a Hall regulator. Its purpose is to transmit an impulse at the moment when a magnetically conductive component is located next to the microcircuit. As for the location of the VAZ phase sensor, it is located on the side of the cylinder block, next to the air filter element.
Malfunctions
A device failure can be identified by certain signs:
- increased gasoline consumption;
- malfunctions in the machine’s self-diagnosis;
- decreased dynamics when accelerating a car;
- Errors 0343, 0340 or a Check lamp may appear on the control panel.
The light bulb Check usually appears if the DF is inoperative.
How to connect DF correctly
Check and replacement
To check on an eight-valve engine, you must perform the following steps:
- At the multimeter terminal V1, you need to set the voltage to 13.5 volts; this probe is connected to pin E. At the second pin, which is connected to pin B, you need to set the voltage to 0.9 volts.
- After closing the contacts, a screwdriver or plastic steel should be brought to the end of the regulator. And if the DF is functioning properly, the voltage at output B should drop to 0.4 volts. If the readings differ, then the DF should be replaced (the author of the video is In Sandro’s garage).
As for the sixteen-valve engine, the principle is slightly different:
- The multimeter is set to operating mode V2, the voltage at output E should be set to 13.5 volts, and at output B to 0.4 volts.
- We again bring a screwdriver or plate to the DF body. If the DF is working normally, the voltage level will increase to 0.9 volts
To perform a replacement, you need to do the following:
- First you need to turn off the battery by removing the terminal from it.
- Using a 10mm ratchet wrench, unscrew the screw securing the device to the cylinder block. Disconnect the wires that are connected to the DF.
- Remove the DF and replace it with a new one. It is a good idea to clean the pad contacts from dirt or oxidation.
Device diagnostics
To be sure that the 2110/2112 knock sensor is faulty, it is worth checking it. This is done with a multimeter.
After all, you should understand that not in all cases the knock sensor will need to be replaced. In some cases, cleaning it will help. Sometimes other faults are detected that do not relate to the device itself. For example, an open circuit (network break). But in this case, the working connection diagram is subject to diagnosis.
If you don’t know how to check the device, then just follow the steps presented:
- Turn on the multimeter.
- Connect the wires to the two contacts of the broadband sensor. But there is a small note here: if we are talking about the resonant type, then the negative wire must be closed on the body, but the positive wire is in the center of the sensor.
- Take a screwdriver or any other metal object and start making small impacts on the sensor. But we’ll look at what this affects a little lower.
The thing is that, based on the force of the blows applied, the values on the measuring device will gradually change. They should fluctuate between 40–200 mV. This is the norm, which corresponds to the fact that the device is in good condition. But any serious damage to it will be reflected on the multimeter screen as a zero value.
Note that checking the knock sensor does not end there. Now you will need to identify the cause of the problem. Moreover, you need to look for it in the wires. In some cases, you may only need to replace the pad. The thing is that it is the one that is most exposed to the environment, which leads to corrosion on the contacts.
If you are interested in the question of how to diagnose an 8-valve injector, then you should note that in this case the process is more labor-intensive. The thing is that sometimes you need to spend extra time to remove it.
- Dismantle the device.
- Set the multimeter to measure the applied voltage at about 200 mV.
- Place one probe on the connector of the device, and the second on the opposite connector.
- Start tapping with a screwdriver, as you did in the previous case. But focus your attention on the force of the blow, since the stronger it is, the higher the signal level should be.
- Finally, check the resistance of the piezoelectric element.
In general, the VAZ 2110 8-valve injector sensor breaks down extremely rarely. The most common reason for the absence of a signal on the ECU is a break in the connection circuit.
If this device is seriously damaged, you should consider purchasing a new one. But you definitely need to familiarize yourself with how to replace the knock sensor, because installing it incorrectly can lead to the problem not being resolved.
Nuances of self-diagnosis of the VAZ 2114
When carrying out diagnostics at specialized service stations or independently, various results and error codes can be obtained. Not all drivers know that faults can be identified without an on-board computer. An odometer is used for this. A significant drawback of such diagnostics is the addition of error numbers into a single sum. For example, if an error of 8 and 1 occurs, the odometer will display the number 9. The device's memory is not automatically cleared, so error codes will be displayed until manually reset by disconnecting the battery terminals for a few seconds.
Resetting the "checkengine" error
As you can see from the video, the error can be reset by following these steps:
- Turn off the engine, but leave the car's ignition on.
- Disconnect the car battery terminal and wait a few seconds.
- Reinstall the terminal and start the engine.
The error will be reset after these steps, but if it is caused by serious malfunctions in the engine, it will occur again. In this case, the best option would be to contact a service station.
Diagnosis and problem solving
Begin your diagnosis by visually inspecting all system-related wiring harnesses and connectors. Inspect electrical circuits, sensors, and connectors that are contaminated with engine oil, coolant, or power steering fluid.
Petroleum-based liquids are known to corrode the protective insulation of wires and cause short circuits or open circuits. This may cause the P0328 code to appear.
Sensor test
To test an older style knock sensor, connect a multimeter set to AC voltage between the sensor output wire and ground. Tap the engine near the sensor. You should see the AC voltage reading on your DMM. Otherwise, the sensor is faulty and must be replaced.
To check the resonant type sensor, we connect a digital multimeter in the same way. But instead of knocking on the engine block. The fuel pump relay must be removed to prevent the engine from starting.
Crank the engine, shift into gear, and keep your foot on the brake. As soon as the car starts to run out of fuel, it will start knocking and stalling. You should then see the AC voltage output. Otherwise, the knock sensor is faulty and must be replaced.
Checking electrical circuits
If the knock sensor is working fine but the P0328 code is still on, you need to check the sensor circuit. Using a digital multimeter set to resistance, connect one side of the meter to the harness side of the sensor connector. And the other to the knock sensor input terminal on the PCM. This will check the continuity between the sensor and the PCM.
Now you need to check the grounding. Old style knock sensors are grounded through the sensor itself, while newer style knock sensors usually have a separate ground circuit. Connect the red lead of the multimeter to the positive terminal of the battery and the black lead to ground. You should see a reading of around 12 volts, indicating a good ground. Otherwise, you need to look for a circuit fault.
