To protect the injectors and piston group from contamination and corrosion, it is necessary to thoroughly clean the incoming fuel from foreign particles, moisture and resins. This function is performed by a filter element that is installed between the tank and the pump.
The fuel filter in a car performs the function of purifying the fuel from foreign impurities.
... about the signs of a clogged filter
The most common signs of a clogged fuel filter are high fuel consumption and reduced engine power, so the layer must be changed regularly.
Causes of a clogged fuel filter
The most common causes of fuel filter contamination are:
- low quality gasoline or diesel fuel;
- penetration of water into the tank with subsequent formation of ice crystals at low ambient temperatures;
- surface corrosion with release of metal particles and oxides;
- accumulation of resins and foreign impurities from oil and additives;
- accumulation of dirt and bottom sediments in the fuel tank;
- very dusty air, frequent off-road trips.
Clogging of the fuel filter can occur due to its corrosion and poor quality gasoline.
Trouble
The symptoms when the fuel filter is clogged are very monotonous; the above situations actually happen due to the clogging of this very filter. This can especially come like a bolt from the blue for beginners who have purchased their first car second-hand.
Of course, when buying a car this way, you save a lot (from time to time), but not all previous car enthusiasts bothered to change consumables. Moreover, given the quality of gasoline
, you can’t help but be surprised as soon as the car’s components “tolerate” it.
So, if you are an avid fan of refueling your car at gas stations of unknown origin
, welcome to the service for replacing consumables. After all, remember that selling gasoline is, first of all, a big business that requires a good return on investment, and this can only be achieved by renowned fuel suppliers. And small and, often, medium-sized offices are forced to add various additives, and even worse, resins.
Self-diagnosis
Filter diagnostics include assessing engine performance during operation, measuring fuel pressure and visual inspection. Measurements are taken through the ramp fitting, which distributes fuel to the injectors.
For this you will need:
- hose with internal diameter 9 mm;
- fastening clamp;
- a device for determining gasoline pressure or a pressure gauge with a value range of 7-10 bar.
A special device can be purchased at a car store. The pressure gauge is connected to the hose and tightened securely with a clamp. To ensure the tightness of the contact, sanitary flax is used. The hose is connected to the fuel pressure fitting, after first removing the plug from it and removing the nipple.
You can determine the degree of clogging of the fuel filter using a pressure gauge.
After this, measurements are taken in various engine operating modes (at idle, after starting, with the drain tube pinched).
...about fuel system diagnostics
The indicator after turning on the ignition should be at least 3.8-4 bar. After the measurement, you need to turn off the engine and wait 20-30 minutes for the regulator to gradually reduce the pressure in the ramp.
After this, disconnect the pressure gauge and reinstall the nipple and plug.
What do we need?
In order to carry out the operation of replacing the filter, please be patient, a wrench, a set of screwdrivers, pliers and, perhaps, you may need a socket wrench. Also take into account the fact that, structurally, the filter may be located in an inconvenient place and additional tools will be required, but we are talking about the general principle of replacement.
Remember about safety - gasoline is highly flammable and also extremely toxic, so open air, rubber gloves and safety glasses. Please take this into account.
The filter is usually located near the fuel tank
, but again depends on the car model. Once the filter is found, you need to pull out the fuse to relieve the pressure. Also disconnect the battery. Next, the filter is simply unscrewed with the cartridge and a new one is inserted in its place. The symptoms when the fuel filter is clogged are varied, but we continue to work.
Be sure to determine the direction of fuel flow for the new filter and place it together with the cartridge in place of the old one. That's all, but if you are not sure, it is better to turn to specialists.
The filter element is a consumable item and requires periodic replacement. Many car enthusiasts forget about this and face the unpleasant consequences (symptoms) of a clogged fuel filter. For example, when overtaking a truck, the driver presses the gas pedal, and the car picks up speed very slowly.
The first symptoms of a dirty fuel filter depending on the engine type
The degree of influence of the filter on engine operation depends on its type. Carburetor gasoline engines practically do not react to contamination of the cleaning layer. Minor changes can only be observed in the power and stability of the internal combustion engine.
The injector is more demanding on the pressure in the fuel line, so a decrease in filter capacity is immediately manifested by a drop in engine power. The most obvious symptom becomes at high speeds.
A dirty fuel filter directly affects a decrease in car engine power.
Motors that run on diesel fuel are the most sensitive to foreign particles and impurities. Their power and stability of operation directly depend on the level of pressure in the fuel line. When it decreases, startup delays and sudden jerks while driving are observed. In some cases, the engine turns on only after several attempts.
... about the purpose of the fuel filter
The sensitivity of engines to pollution is largely due to their requirements for the degree of fuel purification. Filter elements for diesel engines should not allow particles larger than 4-5 microns to pass through, for injection engines - 10 microns, and for carburetor engines - 20 microns.
Purpose
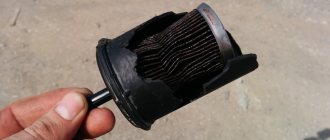
Condition of the new and old filter elements (new on the left).
The main task of a fuel filtration device is to clean fuel from harmful impurities: particles of dust, dirt, insects, plants, resins, and condensate. The presence of water in the fuel system leads to rusting of the injectors and contributes to the development of corrosion, which is very detrimental to the normal operation of the engine; these harmful impurities can clog the fuel system. This device allows you to clean low-quality fuel from particles of resins and various additives added to fuel by unscrupulous manufacturers.
Depending on the technological features and type of injection, various fuel filters are distinguished:
We recommend watching a video demonstrating the symptoms of a clogged fuel filter:
The main signs of a clogged fuel pump filter
The main signs of a clogged layer in front of the pump are a decrease in vehicle power, loss of control stability and increased failures when starting the engine. In the initial stages, these symptoms only appear under certain conditions (such as driving uphill, accelerating, or idling), but over time the problem begins to worsen.
Reduced engine power
A decrease in engine power when the filter is dirty is due to the fact that the fuel pump and cylinder do not receive enough fuel. In this case, under increased load, the engine begins to turn off and stall. Sometimes the power of the power unit is not even enough to start.
The engine runs rough at idle
A decrease in pressure in the supply system may be accompanied by uneven idling, spontaneous shutdown and delayed re-ignition of the engine.
Violation of the functional stability of the engine is caused by a poor air-fuel mixture.
Increased fuel consumption
When starting with clogged filters, the internal combustion engine and pump experience increased load, and the composition of the fuel-air mixture deviates greatly from the optimal one. This affects fuel consumption and the wear rate of parts.
A clogged fuel filter often causes increased fuel consumption.
When fuel consumption increases, it is necessary to check all installed filters: gasoline (diesel), oil and air.
Power loss when driving at high speeds
When accelerating, the car begins to move jerkily, and if there is a strong drop in pressure in the tank section, the pump completely stalls. For a short time, the engine completely stops responding to the accelerator. After this, the car picks up speed abruptly and continues moving.
Engine stalls when shifting to neutral
Another possible sign of clogged filters is the engine turning off when shifting into neutral. At this moment, you can notice a sharp decrease in speed on the tachometer.
...about fuel filter diagnostics
When this symptom appears, the air and fuel filters are checked first, but only because of the ease of diagnosis.
It may also indicate an incorrect signal from the crankshaft position sensor, valve failure, malfunction of the idle air control, etc.
The car doesn't go well uphill
If a decrease in engine power only appears when driving uphill and at high speeds, then a clogged filter is the most likely cause of the malfunction. Increased load on the engine requires more frequent pump cycles, and a clogged layer interferes with the flow of fuel into the fuel system.
If your car has difficulty going uphill, a dirty fuel filter may be the likely cause of the problem.
SergAggro › Blog › How to identify and eliminate fuel system faults?
One of the most important mechanisms of a car, responsible for the uninterrupted supply of fuel to the engine, is the fuel system. Over time, its components become unusable due to natural wear and tear or improper use. Determining the cause of a fuel system problem can sometimes be difficult and may require careful step-by-step diagnostics. The fact is that signs of malfunction that are not always noticed indicate problems in the fuel supply mechanism; problems can arise in the cylinder-piston group, the ignition system, as well as in the power supply circuits. Let's talk about what are the signs of fuel system problems, what can cause them, how to identify and eliminate them.
Signs of malfunction Failures of the power system usually occur due to the regular use of low-quality fuel, which contains water or dirt. To clean it from foreign impurities, fuel filters are installed. These cleaners have a limited shelf life indicated in the documents and must be changed after a certain mileage. If the car owner is not sure of the quality of the fuel used, it is recommended to change the filters 1.5-2 times more often. In addition, it is necessary to periodically clean the nozzles, tank and other components of the mechanism from contamination. The following are the most common signs of a malfunctioning fuel supply system:
The engine starts with difficulty or does not start at all. The engine does not develop the required power and the number of revolutions does not increase. Malfunctions occur in the operation of the power unit (diesel or gasoline). There is a noticeable dip in engine function if you press the accelerator quickly. The on-board computer displays the corresponding error codes. The fuel gauge is lying. Spark plugs are coated with deposits. Fuel consumption increases. When the engine is running, the smell of gasoline or diesel fuel is felt inside the cabin. When examining the hoses and tubes, as well as the joints, traces of leakage are visible on them; the surface of the fuel system parts may be wet. If the leaks are large enough, traces of leaked fuel can be seen under the car. The appearance of one or more of these symptoms is a reason for a serious check of the nutritional mechanism and associated systems.
Causes of malfunctions Malfunctions in the operation of the fuel system occur for the following reasons:
Use of low quality fuel. Water and dirt getting into the tank (usually along with fuel). Clogged elements of the power system: filters, pipelines, injection nozzles, fuel pump, carburetor (injector). Complete or partial loss of function of the drain pipeline. Pump failure (if the supercharger is a submersible type, then due to frequent trips with a small amount of fuel in the tank it may overheat). Pump performance deterioration. A rapid drop in fuel pressure after the ignition is turned off (the cause is a faulty supercharger check valve that cannot withstand the pressure). Failure of the fuel pressure regulator. Deterioration of the pump power supply elements or poor contact at the electrical circuit connections. Wear of carburetor metering parts or injector nozzles. Loose clamps at hose attachment points. Mechanical damage to rubber or metal pipelines. Failure to adjust or failure of the injector (carburetor). Failure of sensors (mass air flow sensor, DC sensor, fuel sensor). Fuel meter malfunction. Violation of the tightness of gaskets and seals. A thorough inspection is necessary to determine the exact cause of the problem. As already mentioned, the cause of problems can be not only the fuel supply system, but also the mechanisms associated with it.
Diagnostic procedure Before starting an in-depth study, you need to make sure that:
There is enough fuel in the gas tank. The spark plugs are in good working order (produce a good spark). There are no obvious traces of leaked gasoline (diesel) under the car. If any of these points are not met, the check can be completed without starting. If there is enough fuel in the tank and sparking is normal, you need to check the fuel supply mechanism.
When checking for a spark, you should carefully inspect the surface of the spark plugs. If there are dark spots on it, the injectors are faulty or the pressure is low. If the spark plugs turn red, your usual refueling location should be changed.
To simplify and speed up the diagnostic process, you should first carry out three control procedures, dividing the search for system problems into sections. To do this you need to check:
Fuel pump function. Quality of injection nozzles. Completeness of fuel supply to the carburetor (injector), as well as pressure level. Checking the pump You can tell that the electric pump is working by the subtle buzzing sound that is heard after turning on the ignition. If the supercharger is located not in the tank, but in the lower part of the car, you can feel a slight vibration that the electric motor transmits to the body when you touch the bottom with your hand.
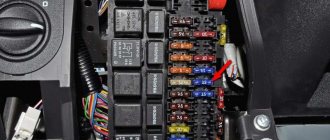
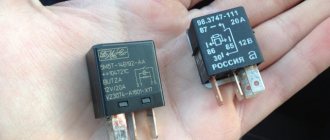
If the electric pump does not work, you must first check the fuse associated with it. If the fuse has not blown, you need to make sure that the corresponding relay is working (when it is triggered, a sound is heard and the element body vibrates slightly).
It happens that the supercharger does not work even with a working relay and an intact fuse. In this case, you should knock on it (but not very hard) - sometimes the mechanism of this unit “freezes”, and such a shake helps to bring it back into action. If this does not help, check the voltage supply by connecting a voltmeter to the electric pump terminals. If the potential difference is at a normal level, the supercharger has failed. Zero will indicate problems in the power supply cables.
If the pump is operating normally, you need to check the pressure of the supplied fuel (if the pumping device is of the submersible type), or, if the unit is external and there is normal access to its terminals, measure the level of the incoming voltage. This is done using a voltmeter connected to the terminals. In this case, you should not disconnect the block, since the data obtained in this case will not correspond to the real ones that occur under normal conditions. The normal voltage for passenger cars is 12V, for trucks it is 2 times higher - 24V. If the potential difference under load is lower than normal, then this explains the reduced function of the electric pump.
Before you start checking the pressure that the supercharger produces, you need to remove the corresponding fuse (or disconnect the connector) and start the engine, which should run until it stalls. This will help to release any remaining fuel in the engine supply line and thus relieve any residual pressure.
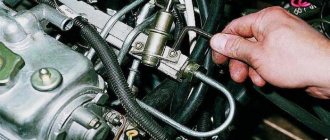
Carrying out measurements in the fuel rail As a rule, the fuel rail is equipped with a fitting, to which, if necessary, a pressure gauge is connected. If it is not there, then the pressure gauge must be connected to the fuel line at the section separating the ramp from the fuel filter. Then the power supply to the pump is restored, after which the ignition is turned on. The operating time of the supercharger in pumping mode is approximately 2 seconds - this is enough for the pressure level to rise to the operating level (usually 2.5 - 3.5 MPa). If the pumping mode is not provided for by the design of the electric pump, then it can be turned on forcibly. To do this, the contacts on the relay must be closed.
If the data shown by the pressure gauge is too small, or increases unacceptably slowly, the cause must be determined. Problems may include a worn-out supercharger, a clogged filter element, or a malfunctioning FPR (fuel pressure regulator). The latter is the easiest to check - just use a clamp to clamp the drain line and take measurements with a pressure gauge. If they increase, the RTD has failed.
If the pressure level is higher than normal, you need to disconnect the drain pipeline, first placing a container under it, and see how the measurement results change. If they remain the same, the reason is a malfunction of the RTD; if they decrease, the drain line is clogged.
After starting the internal combustion engine, the pressure inside the ramp should decrease slightly (by approximately 0.5 MPa), and if you quickly press the accelerator, it should remain the same.
Then you need to briefly clamp the adapter tube after the pressure gauge or the drain line. With a working fuel supercharger, this should lead to an increase in pressure of approximately 2 times. If after pinching it does not increase (working is normal), it should be concluded that fuel does not flow through the drain pipeline, and an extremely worn electric pump cannot “push through” the RTD valve. There is a second option - there is a fluid leak in the fuel supply hose located in the tank.
The pressure level may rise too slowly if the fuel filter is clogged.
When taking measurements, you need to pay attention to how the pressure gauge needle behaves when the power unit is idling. If the system is not malfunctioning, it should shake slightly. A significant amplitude of needle oscillations is an indicator of a clogged fuel supercharger grid or, in more rare cases, a malfunction of the RTD.
Then the ignition must be turned off. After stopping the engine, the pressure reading should remain the same. Its fall indicates the possible presence of the following problems:
Failure of the electric pump check valve. Depressurization of injection nozzles. RTD failure. To establish the exact cause, the engine must be started and turned off again, after squeezing the fuel supply line. If the pressure decreases, the injectors have lost their tightness, but if it remains unchanged, the RTD is faulty.
When troubleshooting the fuel supply mechanism, it is also worth checking what the performance of the fuel supercharger is, and then comparing it with the values specified in the manufacturer's documentation. This is done as follows. Disconnect the fuel line behind the filter and turn on the electric pump, directing a stream of fuel into the measuring container. The blower should run for 1 minute. If the volume of leaked liquid is less than indicated in the documentation, this may indicate a dirty fuel filter or a loss of pump performance. You can accurately determine the cause by disconnecting the purifier and checking again. If the pump is faulty, it should be replaced.
Troubleshooting procedure It should be remembered that even a single malfunction can lead to a chain reaction. For example, pouring low-quality or dirty fuel into a tank may result in the need to clean the fuel tank, as well as the fuel inlet grid, injectors and pipelines. In addition, you will have to change the fuel filter and drain the sediment accumulated in the settling tanks.
The main activities that are carried out during the repair of the fuel mechanism include:
Replacement of faulty parts of the electric pump power supply system (fuse, cables, relays, as well as plug connections). Replacing a broken fuel pump. Cleaning the contacts of the electric pump, relay and air flow meter, followed by treatment with preparations for maintaining electrical connections. Replacement of seals and gaskets that have lost their tightness. Blowing the fuel line using a compressor towards the tank. To do this, you need to unscrew the cap of the fuel tank and remove the hose from the suction fitting of the pump. After applying pressure to it, you should hear fuel bubbling in the gas tank. After the purging is completed, it is necessary to clean the fuel intake screen. Replacement of damaged pipelines, as well as loose fasteners at joints. Removing water that has entered the fuel tank. To do this, you need to drain the fuel, which contains water, or add special additives to the gas tank that will bind water molecules and prevent them from causing harm to the power unit if they enter it. Technical alcohol can be used as such an additive. Draining the sludge (if the machine has sedimentation tanks). Removing the tank and then cleaning it, after which the container is washed and dried. This should be done if contamination is detected, or as a preventive measure (but not often, on average once every 5-7 years). Periodic cleaning of the fuel system, as well as injection nozzles, using special additives that must be added to the fuel in accordance with the manufacturer's instructions included with the product. Cleaning the fuel inlet mesh located inside the gas tank. Replace the fuel filter in a timely manner. If there are doubts about the quality of the fuel used, the purifier is changed 1.5-2 times more often. An unscheduled replacement of the filter element should also be carried out if severe contamination occurs at the same time. Replacement of faulty RTD, mass air flow sensor, fuel and oxygen sensors. Replacing the fuel gauge located on the dashboard (if it is noticed that its readings do not correspond to reality). Cleaning clogged or replacing worn injection nozzles. Carburetor (injector) overhaul with replacement of faulty elements, cleaning and purging of components. Adjustment. It must be remembered that detected malfunctions in the fuel supply system should be eliminated without delay. A fuel leak can cause a vehicle fire.
Source
Signs of a clogged restrictor
Coarse filters (restrictive meshes) are designed to capture the largest particles. They are installed on the neck of the fuel tank, intake, inlet fitting or directly in the fuel pump. Diesel engines are additionally equipped with sedimentation tanks that capture not only dirt, but also condensate.
Signs of a clogged filter include unstable engine operation, engine shutdown without the driver's desire, and problems with starting. During the process, the protective mesh may partially clear spontaneously, which will allow the car to start, but the effect will not last long.
Differences in engines
Fuel filter problems do not arise out of the blue. Which symptoms appear first depends on the type of power unit.
Although the first signs do not seem so important, they cannot be ignored. You should listen to any changes in the operation of the engine and replace the filters in a timely manner.
If your car has a diesel engine, and you have enough experience and skills in handling the car, then you can replace the fuel filter yourself. If the car has an injection or carburetor system, then it is advisable to immediately contact a service center.
The nuances of replacing the fuel filter with your own hands
To replace the filter you will need a set of wrenches, a screwdriver, a fuel container, a pump and gloves. The location of the elements depends on the model and type of engine. For example, to repair the system on a car with an injection engine, it is often necessary to remove the rear seat, disconnect the hoses through a special hatch, remove the pump connector and dismantle part of the fuel line.
... about replacing the fuel filter
Disposable filter elements are replaced entirely, and sedimentation tanks and meshes for rough cleaning are thoroughly washed with clean fuel.
Disposable fuel filters must be completely replaced.
It is better to replace it in the fall or in preparation for the cold season. This will facilitate the passage of thickened fuel to the pump.
To extend the life of the filter, you must:
- refuel at trusted stations;
- do not fill the fuel supply into rusty and dirty cans;
- avoid refueling immediately after filling the gas station from the tank;
- wash the tank at least 1-2 times a year, regularly clean the coarse filter and drain the sump;
- When driving a diesel car, switch to winter fuel in a timely manner.
... about replacing the fuel filterBefore a long trip, it is advisable to include a fine filter in the list of spare parts that you need to take with you.
Safety precautions for replacement
If the driver nevertheless decides to replace the filter himself, he must adhere to safety measures. The procedure is best carried out in a spacious, ventilated room, since the work takes place with fuel vapors. They tend to catch fire from a small spark.
It is best to keep a fire extinguisher near you and also refrain from smoking. Before removing the filter, the pressure must be released. It still remains even after turning off the engine. To prevent sparking, you need to remove the battery terminals.
The listed rules will help you carry out the procedure quickly and safely.
Where are the purifiers located?
The location of fuel filters on VAZ models depends on the engine. On injection and carburetor systems they are located in different places.
Filter location on carburetor internal combustion engines
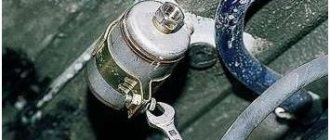
On carburetor VAZs, the fuel purifier is located under the hood. It is installed under the brake reservoir (main), secured with 2 clamps.
The filter for carburetor VAZs is located under the brake cylinder
Location of the cleaner on the injector
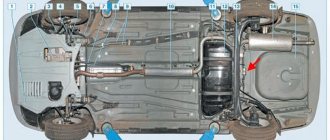
On a VAZ with an injection system, the FTO is installed under the car, at the rear near the muffler. It is mounted in the form of a cartridge in the fuel line. To inspect or dismantle it, you have to lift the car onto an overpass or pit.
How to clean the fuel pump yourself
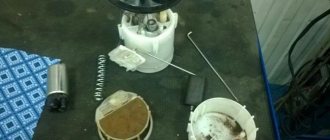
Let's start with the fact that the mesh filter for the fuel pump is a coarse filter and is designed to capture large particles and deposits that are in the fuel and inevitably accumulate in the fuel tank. It turns out that the fuel pump has its own additional fuel filter mesh, which prevents debris from entering the fuel system from the tank parallel to the usual fuel filter. The process of cleaning or replacing the fuel pump mesh is almost similar to the general scheme for replacing the pump itself:
- The fuel pump is installed directly into the gas tank. You can get to the pump from the passenger compartment, as it is located under the rear seat. To gain access to the fuel pump, you need to remove the rear seat cushion or fold down half of the sofa (if possible).
- The fuel pump is usually located on the right and covered with a special plastic cover. The specified cover must be removed.
- Before removing the fuel pump itself, it is necessary to relieve the fuel pressure in the system. To do this, you will need to disconnect the power connector from the fuel pump, and then turn the engine with the starter.
- The next step is to remove the negative terminal from the battery, after which the tubes from the fuel pump are disconnected. These tubes are “supply” and “return”, they are secured with clamps that need to be pressed out. You should be prepared for the fact that a certain amount of gasoline may spill after removal. For this reason, safety precautions must be observed!
- Next, you need to unscrew the special pressure ring-cover of the fuel pump. It is very difficult to unscrew this cover manually. There is a special fuel pump cover puller for removal. If there is no such puller, then you can try to carefully unscrew the ring using improvised means. We strongly recommend that you first study on specialized auto forums how to remove the fuel pump cap on a specific car model.
- After unscrewing the cap, you can remove the fuel pump. Before complete removal, the remaining gasoline should be drained from its body, and the sealing ring should be removed.
- Now you can begin disassembling the fuel pump housing. To clean, you will need to remove the bottom part. There is often dirt in the indicated lower part of the housing.
- After this, remove the fuel pump screen. To remove the mesh, just pry out the filter at the place of attachment to the pump body using a regular screwdriver. The fuel pump strainer usually becomes completely clogged, especially on cars with high mileage.
- Then the fuel pump mesh can be replaced with a new one or cleaned. It is better to wash the fuel pump mesh first with carburetor cleaner. Mechanical cleaning is done with a soft brush. Then the mesh should be dried and blown. The bottom of the pump housing and the cleaned mesh are finally washed again with gasoline.
- The final step is to reassemble the fuel pump and install the device in the gas tank. To facilitate installation, it is better to invite an assistant, as it may be necessary to ensure high-quality pressure of the pump to the tank. The fact is that many gasoline pumps have a special spring, the force of which must be overcome. At the same time, you need to make sure that the rubber seal is in place and at the same time screw in the pressure ring-cover of the fuel pump. When tightening the clamping ring with a puller or improvised means, do not exceed the tightening torque. If you tighten it too tightly, the fuel pump cap may burst; if you tighten it too weakly, the fuel pump will wobble due to poor fixation.
Please note that when installing a fuel pump on many car models, you need to be careful not to bend the fuel level sensor in the gas tank
It is also important to adhere to the position in which the pump was originally located.
In order to determine the correct position of the fuel pump, there are special indicators. Such indicators are made in the form of arrows and are located on the fuel pump, the gas tank body and the pressure ring. The correct installation of the fuel pump can be considered when all the arrows are in the same line. We would like to add that if the gasket is installed incorrectly, gasoline may leak out if you fill the tank full.
Now all that remains is to connect the fuel supply and return pipes to the fuel pump, while simultaneously checking that the clamps are securely fastened. The completion is to connect the electrical power connector to the fuel pump, after which you can start the car for testing.
Types of filter elements
Depending on what fuel the vehicle is oriented towards, a specific filter device is installed in it. Let's talk about them in a little more detail.
Carburetor filter
Since a carburetor engine has low pressure, the working mixture enters the engine through special rubber hoses. It is into them that the filter element “crashes”. This can be a product made of plastic or metal. The product has 2 tubes (inlet/outlet). For maximum reliability, the hoses are secured using special clamps.
Injector filter
The peculiarity of this element is the transfer of key functions to the central electronic unit. The working mixture enters the engine under high pressure, and this requires the presence of metal fuel lines of the highest quality. If we talk about the fuel pump itself, it is made of steel or other particularly durable metals. Threaded elements are used as connectors.
Diesel filter
Diesel engine fuel is considered the “dirtiest” of those existing today; it requires increased purification from all kinds of impurities. Paraffins pose the greatest danger to the internal elements of a car. They, transforming into crystals, clog the main gaps in the parts. Therefore, vehicles running on diesel fuel are usually equipped with two filtering devices – the main one and the additional one. This allows you to clean the fuel from unnecessary impurities by 100%.
Types of filters
In addition, filter elements installed on vehicles differ in the following characteristics:
- degree of cleaning (coarse/fine);
- type of casing (metal/plastic);
- working pressure (high/low);
- type of fuel (diesel/gasoline).
Why is it needed?
There is a coarse filter that comes first from the gas tank. After all, first the lid where the fuel tank is located is opened, a gun is inserted there, the magic button is pressed and the fuel flows. Yes, it takes a lot of your money along the way, but what can you do? The location of the tank can be on the left or right, but this does not play a special role. Coarse cleaning, which is a mesh that traps large particles of debris.
This is followed by a fine filter. This is exactly what we will talk about. This element is called a fuel filter. With its help, small particles are retained. But even they can penetrate your diesel engine or gasoline injector.
Dust, dirt, debris, rust elements. All this can penetrate the system, causing a clogged pipe, tube, valve, fuel hose, or fuel pump components. Nothing good will come of this if timely replacement is not made.
To understand how to replace the filter, which element to choose and how to choose an analogue for the device you are going to change, you need to have at least a basic understanding of such an important component of the car.
I suggest starting with varieties.
Modern fuel filters installed on Ford Focus, Nissan Almera, Hyundai Solaris, Nexia, Mazda, Opel, BMW e60, Renault Logan and Megane, Kia Rio and many others have at least two degrees of purification.
- First degree. This is a rough cleansing that allows you to get rid of large contaminants. Not to be confused with a regular mesh in the tank, which is not available everywhere.
- Second degree. Fine cleaning. This is the main task that falls on the shoulders of the filter.
And here you probably have the main question - where is the filter device located? I don't know. No, I can answer, but if you tell me specifically what make of your car or what year of manufacture. After all, on the same Chevrolet Niva, different Opel, Toyota, Mazda models, on the Volkswagen Passat B3, as well as on the domestic VAZ 2114, 2112 and 2110, the location may differ.
However, they are always located somewhere between the engine and the gas tank, since the filter's job is to prevent contaminants from entering the engine while the fuel moves from the tank to the engine. What's in the gas tank itself? That's right, a coarse cleaning device. This is an additional filter element so that any unscrupulous gas stations do not spoil your car.
Now let’s talk about the types of filters themselves. What element will be on the car? It depends on the type of engine. There are three of them, as you know. Except for electric motors. Well, there is no need for a fuel filter, as you understand.
Therefore, there are three types of filters:
Location
So you bought yourself a brand new sedan and you think it’s time to change the filter for this engine. Want to choose the best? Well then, take a closer look at Cummins devices. Mann, Hertz. They have proven themselves well, and they cost quite a bit.
You probably know whether your engine is diesel, injection or carburetor
This is important to understand the location of the fine filter, that is, our today's hero
- Carburetor. In these engines, the TF (fuel filter) is placed in front of the carburetor itself, and is often in a transparent housing to control contamination. These are the most basic devices, because the carburetor is the least demanding on the quality of fuel.
- Injector. It uses nozzles and therefore requires high-quality filtration. And the fuel is supplied under high pressure. Therefore, the filters are enclosed in durable metal housings. The TF has to be regularly maintained, cleaned and monitored for its condition. They are placed mainly under the bottom of the car to make it easier to dismantle and replace.
- Diesel. A diesel engine also needs high-quality purified fuel, since the system is quite sensitive. Diesel fuel has a higher moisture content than gasoline. The TF is designed to filter debris and remove accumulated moisture. A separator is provided for this purpose. The location is quite simple - between the engine and the pump that pumps fuel.
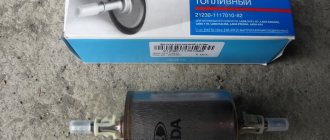
Any fuel system must include a TF. They are replaced assembled, that is, there is no point in removing the filter elements themselves (usually special paper), leaving plastic or metal. Be sure to look at the number and article number of the filter that is installed on your machine, and check the operating manual from the factory. This is the only source of truthful information regarding the maintenance of your particular vehicle in this configuration and with this type of engine.
