Unfortunately, the habit of sending each other regular paper letters is gradually becoming obsolete. More and more people are using modern methods of electronic communication: email and mobile phones.
However, mailboxes continue to do their job. Many people continue to subscribe to periodicals. The boxes contain advertising brochures, mailings and receipts for payment for various services. What to do if you urgently need to receive correspondence, but the key is not at hand? Today we will talk about how to open a mailbox lock without breaking it. To do this, you will need several items that are in any home:
- small kitchen knife;
- a piece of thin wire;
- medium sized scissors;
- hairpin.
Here is a detailed description of how to open a mailbox lock. Let us immediately inform you that it is advisable to use them only to open your mailbox. But it’s better not to touch your neighbors’ correspondence, because it will smell like theft.
Feel like a burglar
Of course, digging through a mailbox lock isn't very pleasant, but it can make you feel like a thief.
The first way to extract the correspondence you are interested in does not involve the use of any tools. If the drawer is shallow and the magazine or newspaper is large enough, you can remove it by hand by carefully inserting your fingers into the slot.
The second way to open a mailbox lock is to create a key. To do this, take durable, thin and flat utensils, such as a thin knife. Insert it into the groove where the locking mechanism is installed. Use some kind of leverage to apply light pressure on the tab. With persistence and desire, you can move it and open the door. This method has a significant drawback - with strong pressure, you can easily damage not only the lock, but also the door.
A safer, but more time-consuming way to unlock a mailbox is to use a master key. This keyless lock opening method is more effective against constipation than the old post. The functions of a master key can be performed by a variety of elements:
- hairpin;
- small nail scissors;
- thin thread;
- knitting needles and so on
Carefully insert the items you have chosen as a master key into the keyhole and try to turn it in the direction of unlocking the lock. Take a closer look at how the castle behaves. If you feel that it can be unblocked, then you are doing the right thing. If all else fails, pick up another item or try even harder.
Forethought as a reliable method of getting rid of unforeseen problems
In this article, we have presented the most effective ways to open a mailbox without a key without picking the lock. They are suitable for common constipation. If a new modern lock has been installed on the box, it is almost impossible to open it using the methods described above.
If you are just waiting for correspondence that interests you, you can wait for the postman. They usually run in the morning or evening. You can also leave a note in the mailbox asking for mail to be dropped off at a neighbor's mailbox if you have made arrangements with them in advance to use their cell phone.
To completely avoid such problems and not have to look for ways to open a mailbox lock, it is recommended to keep a spare key or a copy of it in a desk drawer or closet. So even if you lose the primary key, you will always have another one that can be multiplied later.
Dismantling
1. Remove the top trim of the control panel
CAR INTERIOR DETAILS, REPAIR WORK, Upper control panel trim - driver's side.
2. Remove the lower control panel trim.
CAR INTERIOR, REPAIR WORK, Lower control panel trim on passenger side.
3. Remove the 2 Torx screws that secure the glove box to the bottom of the control panel.
4. Open the glove compartment.
5. Remove the 5 Torx screws that secure the glove box.
6. Disconnect the connector block from the glove box lamp.
7. Disconnect the cable from the glove box lock.
8. If installed in a vehicle: Remove the 2 Torx screws that secure the CD changer to the glove box.
9. If installed in a vehicle: Remove the CD changer from the glove box and disconnect the cable terminal and both connecting blocks. Remove the CD changer.
10. Remove the glove box assembly.
NOTE. Do not perform further disassembly if a component is removed only for ease of access.
11. Remove the fuse puller.
12. Remove the clips from the glove box.
13. Remove the fuse box cover.
14. Remove the backlight cover.
15. Remove the 2 screws that secure the lock to the glove box.
16. Remove the lock plate and lock from the glove box.
Removing the heater radiator
After gaining access to the device, you need to:
- Prepare a low container that can be placed on the ground to drain the remaining coolant in the system;
- Prepare an additional 5-liter container for overflowing coolant;
- Place rags on the floor to avoid getting dirty;
- Disconnect the wires from the heater motor;
- Unscrew all visible radiator mounting nuts;
- Loosen the two clamps to secure the radiator pipes and carefully begin to remove them;
- Allow all remaining coolant to gradually drain, pour excess liquid into an additional 5-liter container;
- We ask an assistant to lift the side panel with the glove box, since the heater radiator is on the floor, and carefully pull it out.
To adjust the outflow of residual coolant from the system, you can use a flat-head screwdriver, which can be used to bend the edges of the pipes without removing them completely.
Removing the glove compartment
Provided that the glove box lid mechanism is working properly, removing it will not take much time.
The method of action is as follows:
- We close the glove compartment and crawl under the bottom of the torpedo, where we see two screws.
- Screw the bottom of the glove compartment to the front panel body, then unscrew and remove the lid closing mechanism.
- There is now a line of 2 top bolts (open the cover and look up, you won't lose them).
- After this, gently pull the lid, the entire structure of the glove box will calmly fall into your hands for you.
- After complete disassembly, all that remains is to unscrew the 2 bolts on the sides and remove the two fasteners. The first ones are located at the junction of the cover with metal fixing strips, the latter - at the junction of the cover and the body.
- The mechanism is completely disassembled and you can see the design of the lock, otherwise (this happens, depending on the glove compartment model) you need to unscrew 2 additional screws that are located inside the lid.
IMPORTANT! When reassembling, be sure to secure the cover and tighten all necessary bolts. If you put the body on first, and only then put on the roof, you can’t do without the torment associated with the left bolt - the torpedo will not let you get there.
Analysis of the glove compartment lid VAZ 2113 - 2115
Ask questions if something is not clear. Submit your ideas.
Dismantling the glove compartment lid of a VAZ 2114
REPAIR OF VAZ GARDENER
2110, g, Ns 2111, g, Ns VAZ 2112 WITHOUT REPAIR KIT. THE GLOVE BOX IS BROKEN, SHE GIVES IT. HOW TO DO...
In conclusion
Now you understand how to disassemble the glove box on a VAZ 2114 and what to do if it breaks. The main thing to remember is that if the handles do not fit the guides, turning them 90 degrees from the center of the lid and putting them on in a hooked motion will make the job much easier.
Below see the technical characteristics of the VAZ 2114, the glove compartment is broken, how to open it. Express your opinion about the car in the article reviews.
Answer from car owner Vseslav: The cost of acquisition and operation is unrealistically low! Yes, compared to the cheaper VAZ 2105! There are many times fewer breakdowns and breakdowns than imported cars. And in terms of comfort and controllability, especially after investing 60,000 rubles in tuning the engine, chassis and brakes, it is quite comparable to a Mercedes. Only there is no air conditioning. My stove in winter will give an advantage in terms of warmth in the interior of any imported car. There are absolutely no irreparable defects, like on the VAZ 21099.
Posted by admin: at the request of Decim
Category: The most useful tips for driving a car
Description: The dimensions are as follows: length - 3517, width - 1100, height - 1208 mm. Wheelbase - 2124 mm. Ground clearance - 184 mm. The car is equipped with a hybrid power unit. The 4-cylinder engine is equipped with a system that ensures the engine's power output. There are 4 valves per cylinder. The diameter of one cylinder is 71 mm, the piston stroke is 79 mm. The crankshaft accelerates to 4000 rpm. Maximum torque is maintained up to 4000 rpm.
Release date: March 17, 2022
Laughter in the topic: - I woke up... I looked: something is wrong... Also “Something is wrong” I woke up and finished: - I want coffee! I want coffee!
Heater valve malfunctions: replacement and necessary tools
In addition to replacing the radiator, the VAZ 2114 sometimes requires the installation of a new heater valve. Most often, replacement is carried out due to the fact that the faucet is “jammed” or a leak appears. In both cases it needs to be replaced. For motorists, a leak will be a more unpleasant accident, since its elimination may not be limited to replacing the element. If the driver does not notice the leak in time, antifreeze can flood the entire interior of the VAZ 2114. Identifying this is not so difficult:
- The appearance of wet marks on the floor in the car (the radiator could also be the cause);
- There is a smell of coolant inside the car.
If any of these points are present, you should immediately inspect the heating system of the VAZ 2114 and replace the part, as well as check the radiator. To do this, you will need a flashlight; a visual inspection of the heating valve and the cabin floor will suffice. Coolant leaks can be caused by cracked hoses or radiator hoses. To replace the faucet you need to have on hand:
- a new heater radiator valve for the VAZ 2114. It is better to take the ceramic version;
- a set of screwdrivers – flat and Phillips;
- set of keys: keys must be both socket and ring;
- wire brush;
- penetrant WD-40;
- lift or inspection pit.
- silicone sealant;
- empty coolant container;
Important points regarding replacing the VAZ dashboard
People decide to remove the dashboard from a VAZ-2114 for subsequent replacement because of a recent accident, which most often leads to the fact that further use of the torpedo becomes impossible. There are also cases when the decision to remove the control panel comes due to the appearance of unsightly cracks on it.
In any case, this procedure will have a number of difficulties, and first of all, this concerns the connection of receivers, since many drivers often do not pay attention to any plugs, which is why the device then does not work.
Another difficulty is to remove everything correctly, since you can always break some device or individual fastener. But if you follow the instructions and do everything carefully, you can save yourself from most risks, quickly remove the dashboard and carry out all the necessary operations to give the car an attractive appearance.
If the lock is broken
Without exception, all models of the “tenth” series “suffer” from a broken handle. Why exactly it breaks is not entirely clear - take it as a design feature. The question: “how to open the glove compartment of a VAZ 2114, the buttons are broken” is very popular, and since the handles themselves are made of fragile plastic, no different in strength from the material of a torpedo.
When solving this difficulty, variation is possible, because both the tips of the handles and the latch under the lid can break.
In the first case, you are lucky:
- You need to take with you at least tools with rounded handles that require compression (pliers are excellent);
- turn the tool over and insert the tips of the handles into the finger recesses on the lid;
- you need to press very hard on the handles and their tips will go along the length of the tab and the lid will open.
As a second solution to this difficulty, a regular screwdriver is suitable, along the length of which you can drive the broken tongue and press on the second with your fingers.
If your internal latch breaks, things get even worse:
- first you need to open the handle and pull the open edge towards you so that it does not get stuck;
- you then need to use a narrow screwdriver (preferably a knife) to slowly push the closed guide into the lid.
ADVICE! The easiest way is to push the guide with two knives, since the gap when folding one side of the lid is sufficient. With one end of the blade, press on the guide, preventing it from returning to the torpedo, and with the other, carefully push it inside.
Possible reasons for restricting access:
Access is limited by court decision or on other grounds established by the legislation of the Russian Federation.
A network address that allows you to identify a site on the Internet is included in the Unified Register of domain names, page indexes of Internet sites and network addresses that allow you to identify sites on the Internet containing information the distribution of which is prohibited in the Russian Federation.
A network address that allows you to identify a site on the Internet is included in the Register of domain names, indexes of pages of sites on the Internet and network addresses that allow you to identify sites on the Internet containing information distributed in violation of exclusive rights.
In cars of the “tenth” family, problems often arise with the glove compartment, so today we will look at how to open the glove compartment of a VAZ 2114 and what to do if its handles are broken. The need to remove this part of the torpedo may arise without the handle being broken.
So, during the autumn preparation of the car for the winter season, problems may arise with the heating system of the car (antifreeze leakage, problems with the heater faucet, etc.). Any action related to the complete (partial) dismantling of the “fourteenth” torpedo implies working with the “pocket” of the car and a reasonable question: “how to remove the glove compartment on a VAZ 2114?”
Actually, yesterday I closed the glove compartment and couldn’t open it. Maybe something got caught between the fasteners and the piece of iron, or maybe it just broke. In any case, you need to open it, but how? I read that you need to press some kind of spring, I pressed everything until there was a crack and the effect was zero :(. Has anyone encountered this and how did they solve the problem?
PS> Well, there is absolutely nowhere else to store rubber, you need to open it.
Break it! I thought that only I could have such crap happen to me))) Either something got between the tongue and the bracket, or this very tongue makes a sound! I tried to open it carefully, I tried for a long time, it only raised my nerves ( there were the necessary papers there), he couldn’t stand it and insolently used his thickest screwdriver. Then I really had to go to the collective farm, I pulled it out of the Koronov glove compartment and with minor modifications it’s still working properly for four years now. Try it, maybe you’ll succeed :-)
Whoops, at least I’m not the only one :). No, I had the idea of stupidly sticking a screwdriver under the tongue and poking at it until smoke comes out of my ears, but I don’t remember if it’s possible to screw something up or not? Moreover, I think you need to find the lock first, otherwise I don’t really want to drive with the glove compartment constantly open :).
Sore of hundredth Corollas and not only.
Yes, there’s nothing special to break except this very tongue, the mating part is a metal bracket, I generally drove without it for a week and a half! (on the doors, and on the seats I pushed everything)
Glove box repair kit
The cost of this package is 60-100 rubles, which is still cheaper than almost 1000 for the latest case, but the problem is that it is very rarely found in stores. His set comes with 2 pairs of guides and handles, but it doesn't come with a spring, so if it breaks, you'll need to find a "replacement craft" for it. The repair of the storage compartment of the VAZ 2114 itself does not take much time; the parts, except for the design of the grooves, are not fixed, so changing them will not be difficult.
Once the replacement is complete, begin assembly and remember the tips above.
What will be needed for repairs
If the front door of the VAZ 2114 does not open from the outside, then an analysis of the problem is carried out, based on which the optimal repair method is selected. Most often, work requires:
- key to 10;
- Screwdriver Set;
- hammer;
- pliers;
- Silicone Grease;
- marker;
- knife;
- anti-corrosion substance.
If it is determined that the problem is in the closing device, then a cylinder or a solid lock is purchased. Disassembly will show whether there is a chance to repair or adjust the device.
How to change the heater radiator on a VAZ 2114
This job should be done using the following list of tools:
- Screwdrivers of different sizes. They can be cross-shaped, notched, of different lengths and sizes.
- Bunch of keys.
- Well, also patience and accuracy.
Before starting this work, do not forget to take a small container; you will need to drain the coolant. And you also need to understand that in order to completely remove the stove, you will have to completely disassemble the dashboard. To remove only the heater core, the panel can only be disassembled halfway.
So, how to remove the radiator of the VAZ 2114 stove:
- Drain the antifreeze/antifreeze. The first step is to remove the expansion tank cap and drain the antifreeze from the main radiator, after which it is important not to forget to unscrew the cap in the cylinder block and drain the liquid from the block.
- Then remove the radio.
- Remove the cap, then unscrew the frame mounting screws (all four screws). In this case, there is no need to remove the dashboard.
- Remove all handles from the stove control unit.
- Remove the steering column cover.
- At this stage, you need to remove the diagnostic connector cover (it is located under the cigarette lighter).
- Disconnect the cigarette lighter connector.
- Be sure to disconnect all plugs located on the center console. To avoid confusion during assembly, experts recommend sticking tags.
- You need to remove the alarm unit by first unscrewing a couple of screws. Once the central frame of the instrument panel is free, you can begin disassembly. In such a situation, it will be quite easy to reach the cigarette lighter suspension plug; you need to disconnect it.
- The glove box is secured with six screws and must also be removed.
- It is necessary to unscrew the bolts securing the engine control unit bracket, as well as the bolts located at the bottom of the iron frame.
- It is also important to unscrew the screws that secure the stove control unit.
- If you pay attention to the gap between the panel and the steering column, you will notice that there is a screw there that also needs to be unscrewed. Once you have the entire panel loosened, slide it towards the seats and up a little. If you have a diamond jack, you can use it to secure the panel. This way you will be able to get to the heater radiator.
- We find clamps on the heater radiator pipes, so they need to be loosened. After this you need to disconnect the pipes. It is better to place a rag under them, as the remaining liquid can be absorbed by the floor covering.
- The heater radiator is mounted on three screws; to obtain it, unscrew the screws.
At this stage, all that remains is to install the new radiator and reassemble it.
Experts advise checking before assembling the dashboard. As soon as you install the heater radiator, secure the pipes, fill in the coolant, then you can start the engine. We carefully check whether the antifreeze is flowing and whether the heating system of the BAZ 2114 is working. More precisely, the air in the car should warm up in a matter of minutes, which means that the radiator replacement was successful. Next, we proceed to the complete installation of the remaining parts.
Why did it happen so?
Perhaps the automatic requests do not belong to you, but to another user accessing the network from the same IP address as you. You need to enter the characters into the form once, after which we will remember you and be able to distinguish you from other users exiting from this IP. In this case, the page with the captcha will not bother you for quite a long time.
You may have add-ons installed in your browser that can make automatic search requests. In this case, we recommend that you disable them.
It is also possible that your computer is infected with a virus program that is using it to collect information. Maybe you should check your system for viruses.
If you have any problems or would like our support team, please use the feedback form.
Many owners of VAZ 2110 cars have encountered the following problem - it becomes very difficult to open the glove compartment, especially in winter. In some cases, in severe frost, you have to use a special tool to open a tight glove box. This problem can be solved by lubricating it.
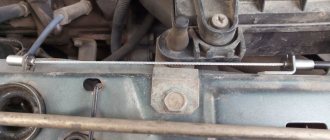
First, we need to remove the glove compartment of the VAZ 2110; to do this, unscrew two bolts. We disconnect the connectors from the glove compartment lamp and pull it out from there in a slightly ajar state. In order to get to the glove box lock mechanism, we will have to unscrew the small bolts from the inside of the glove compartment. Turn the lid over and with a little force remove the latches from the grooves. Next, take out the metal rod and remove the buttons.
Most likely, the factory grease has already turned into a black thick mass, which is what makes the lock difficult to operate. We completely remove the old lubricant and apply a new one, for example, graphite lubricant, to the rod. If desired, you can slightly enlarge the holes in the buttons to ensure better glide. Before installing the glove compartment in place, we check the operation of the lock. If everything is in order, we reassemble the glove box, this is done in the reverse order. If you don’t want to repair the glove compartment, but you still need it, then you can put another one in its place; this element is sold in specialized stores. You can also change the lighting in the glove compartment, for example, to LED.
This article is from the website https://lada2111.rf/ - there is the most up-to-date information on tuning 2111