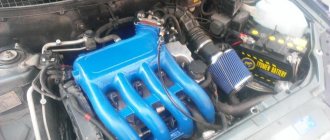
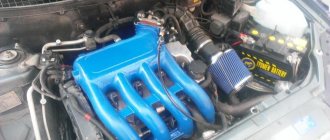
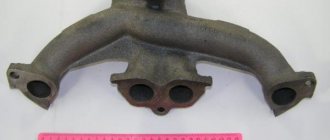
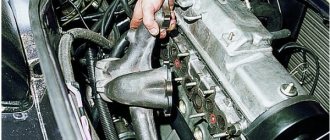
We dismantle the fuel rail if it is necessary to remove the injector, as well as in other cases when repairing the engine.
Before performing the operation, read the safety rules when servicing and repairing the power system (see “Safety precautions when servicing and repairing the power system”).
1. Relieve the fuel pressure in the fuel line (see “Fuel line - pressure relief”).
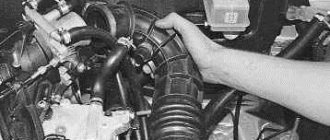
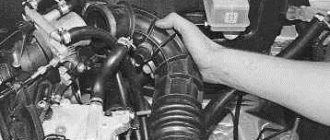
2. Remove the intake pipe (see “Intake pipe of engine 21124 (1.6i 16V) - removal and installation, replacement of o-rings”).
3. Disconnect the wiring harness connectors from the injectors (the photo shows a view from the radiator side).
4. Cut the two clamps securing the wiring harness to the fuel rail and move the harness to the side.
5. 17 mm
Unscrew the fuel pipe fitting from the rail, holding the hex end of the fuel rail with a wrench of the same size.
6. Using a Phillips screwdriver, unscrew the screw securing the fuel pipe tube.
7. Remove the end of the fuel line tube from the fuel rail.
If the fuel pipe O-ring is damaged, it must be replaced.
8. Remove the rubber sealing ring from the fuel line tube.
5mm hex wrench
unscrew the two bolts securing the fuel rail to the cylinder head.
10. Remove the fuel rail assembly with injectors.
11. Remove the injector retainer from the fuel rail.
12. Remove the nozzle from the ramp.
13. Similarly, remove the three remaining injectors.
Assembly and installation
We assemble and install the fuel rail in the reverse order.
Before assembly, coat the rubber O-rings with a thin layer of engine oil.
Checking and replacing injectors on VAZ 21124, 21126 engines
Signs of injector malfunction may include: - Difficulty starting the engine; — unstable engine operation; — the engine stops at idle; — reduced crankshaft rotation speed at idle; — the engine does not develop full power, the engine’s response to the throttle is insufficient; — the engine lowers when the car moves; — increased fuel consumption; — increase in CH content in exhaust gases. You will need: 5-size hex wrench, flat-blade screwdriver, 17-size wrench (two), automatic tester. 1. Disconnect the injector wiring harness connector and the engine wiring harness connector by pressing the latch. 2. Perform an initial check of the injector windings. To do this, connect the ohmmeter to the contacts of the pads one by one.
The block has five contacts: four for supplying a control signal to the injectors and a common “+12 V” (a crimson wire with a black stripe is connected to it).
3. Connect the four control contacts in turn to the common contact and measure the resistance in each case. It should be 11-15 Ohms. If the resistance value differs from the value indicated in one or more measurements, the injectors being tested or their wiring may be faulty.
4. For a more accurate check and replacement of injectors, remove the fuel rail from the car (see “Removing and installing the fuel rail”). 5. Using a screwdriver, pry up the injector retainer, remove the retainer, and remove the injector from the fuel line. Remove the remaining injectors in the same way. 8. To determine the faulty injector, connect an ohmmeter to the injector contacts. It should show a resistance of 11-15 ohms. If the winding resistance is incorrect, replace the faulty injector as it cannot be repaired.
Note Check the injector for the shape of the flame of the sprayed fuel and for leaks at specialized service stations, since such a check directly on the car is very dangerous for fire.
The injectors of the VAZ-21126-00 engine of the VAZ-2170 Lada Priora have an original design and are not interchangeable with the injectors of VAZ injection engines of other models. Buy new attachments with exactly the same markings.
6. When removing injectors, be sure to replace the O-rings on all side guide injectors. Using a screwdriver, carefully pry up the edge of the ring, remove the O-ring from the nozzle, and remove the ring from the sprayer side in the same way. 7. When installing old injectors, wash the injectors thoroughly with solvent or carburetor cleaner. Warning
Carefully install the new O-rings without using tools, lubricating them with engine oil.
Note The sealing rings on the injectors are identical to other rings installed on the first VAZ models with fuel injection systems and are interchangeable with them.
8. Before installing the injectors, lubricate the O-rings with engine oil or WD-40. 9. Install the injectors in the reverse order of disassembly, securing them with clamps on the ramp, after squeezing them lightly.
10. After installing the fuel rail, connecting the fuel line and connecting the seat belt buckle, secure the negative terminal to the battery, turn the ignition key 3-4 times to the “I” (ignition) position at intervals of 2-3 seconds between starts and check the tightness of the hose connections and injector gaskets. 11. Install all removed parts in the reverse order of removal.
Replacing and removing injectors on a VAZ-2112 16 valves yourself
The injector in a car is perhaps the most important element of the fuel system. Indeed, in their absence, the engine will not be able to operate properly.
The following video describes in detail how to remove injectors on a 16-valve VAZ-2112 engine:
Operating principle and structure of the injector
VAZ 2110 how to clean the injector yourself
Below are the operating principles:
- There is a channel inside the injector that is filled with gasoline;
- the shut-off needle regulates the injector channel and thus controls the supply of gasoline;
- the locking needle is pressed by a spring so that it fits tightly to the injector channel;
- when the needle is raised, a wide stream of fuel is formed, which drips onto the engine cylinders, having previously been well mixed with air;
- the outlet (from where the fuel comes) closes when the needle is lowered, thus stopping the fuel supply;
- The injector contains an electromagnetic coil that regulates the position of the needle: when current is supplied, the needle rises, when there is no current, it lowers.
Note. If possible, the landing spring inside the injector should be made of high-quality metal, which should conduct current well and be resistant to corrosion. If it is not financially possible to purchase one, then it is necessary to regularly treat the landing spring with an anti-corrosion coating.
Diagnostics of the functioning of the injector and obvious signs of a malfunction
Objective signs of injector clogging, when you need to immediately flush the injector on a VAZ 2110:
- as the temperature outside dropped, the engine cooled down and began to start with great difficulty;
- at idle the engine is extremely unstable;
- when you press the gas pedal, you can objectively feel its complete or partial failure;
- reduction in acceleration speed and overall engine power;
- increase in gasoline consumption;
- increased toxicity of engine gases (emissions);
- since the fuel mixture receives an insufficient amount of oxygen, the temperature in the internal combustion chamber rises, which in turn entails a significant increase in engine detonation;
VAZ 2110 injector cleaning
- Popping noises can be objectively heard directly in the exhaust system itself with constant frequency;
- failure of various sensors, including the catalytic converter, and prematurely.
Note. In practice, it is not necessary that all of the above symptoms will be observed when the injector is clogged; the manifestation of at least one is sufficient. Flushing the injector is a simple procedure, however, it must be done on time. Since late flushing of the injector may be ineffective and most likely it will need to be completely replaced.
Step-by-step work order
- The most important thing is to remove the air filter housing, the mass air flow sensor (MAF - approx.) and the hose.
- Then you need to relieve the pressure in the fuel system. If you have set yourself a goal, so as not to suffer, and to do this work easier, put a rag under the nozzles and loosen the connections. This will quickly release the pressure and allow the remaining gas to flow down the rag.
Using two wrenches, close the fuel line.
Power is off.
How to remove injectors on a VAZ 2112 16 valves.
Remove the removed screws in a safe place.
To remove the ramp, you need to make an effort.
When removing the fuel rail, we carry out dismantling work on a specific injector:
Replacement or cleaning?
To understand what needs to be done with the nozzle, changed or simply cleaned, it is better to carry out diagnostics on a special stand. Under such conditions, it can be tested in operation at various pressures, and also clearly seen how tightly it closes and is not “snotty.”
If it is necessary to replace one of the injectors, you must purchase a new one with exactly the same position number as the old one. Also, when installing clean injectors, it is necessary to replace all o-rings (2 pieces for each injector - approx.).
KEY-DOP
Installation is carried out strictly in the reverse order, similar to the removal procedure.
Fuel rail can be removed
- Removed the fuel rail:
This is how it looked:
- I removed the injectors and wiped them of dirt:
Soaked them in carburetor cleaner:
- While the injectors were soaking, I put together a diagram for cleaning them:
The light bulb in the circuit was 10 W, a simple halogen. I brought the button without locking and the wire from work. I didn’t use anything to supply the cleaner to the nozzle - I just put the nozzle on the can and it fits quite tightly.
ready-made cleaning scheme
The injector is connected as follows: the left contact is positive, and the right contact is negative.
Then I cleaned each nozzle in two passes of 10-15 sprays. I didn’t take a video or photo of the spray torch - it was inconvenient to take pictures, because... he did everything alone. In principle, the nozzles were not dirty - the spray pattern did not change much, and from the very first presses it sprayed normally. Then I checked the winding resistance of all injectors. Values in the region of 11.9-12.2 Ohms are within the norm.
You can start assembling, but before that you replaced the O-rings on the injectors - replaced 4 out of 8, because half of the rings were in excellent condition (at the injector-ramp transition). I removed the ones to replace:
- Assembling the ramp with injectors:
ready to install
And put the ramp in place:
At the same time I cleaned the cylinder head cover
- Before installing the receiver with the throttle valve, I also cleaned the valve; since the last cleaning it has become quite dirty:
before cleaning
Also, when removing the receiver, two pillows to which it is attached fell apart - I had to go get new ones:
- We collect everything, check it and start it.
Started with half a kick. Since in general the injectors were not dirty, I didn’t expect much of an effect, but here I was pleasantly surprised. According to the first sensations, the engine began to run more softly, and responded somehow better to the gas pedal. Let's check whether this procedure helped during a cold start in the cold winter. But the most unexpected effect was a decrease in average consumption by almost a liter.
If before this my average consumption recently was consistently 9.2-9.4 liters per 100 km, then after five days of commuting to work the average consumption is already 8.6 liters per 100 km. And at XX it used to be 0.8-0.9 l/hour, but now it’s 0.7-0.8 l/hour. So it was not in vain that I climbed into the injectors and spent several hours.
Injector malfunctions
The most common causes of injector failure may include the following:
- The injector nozzle is notched - in this case, there is an increase in fuel consumption, the vehicle's dynamics have decreased, and it is difficult to start the engine at negative ambient temperatures. Otherwise there are no differences.
- The injector valve does not close tightly (“snotty” injector - approximately) - there may be an increase in fuel consumption, “three” or more detonation (according to the method of checking the knock sensor here), unstable idle.
- The valve is blocked - the motor troits. To perform diagnostics with the engine running, disconnect the power unit from each injector in turn. No changes in engine performance will be observed when the injector is not working, but a decrease in speed will occur when the injector is working.
If you find an injector on your car that is not working or needs to be cleaned, you need to know how to properly disassemble it. You can already read about this above.
Injectors are part of the VAZ 2112 injection system. They serve to supply fuel to the combustion chamber and create an air-gasoline mixture. To do this, a very thin hole is made in the nozzle. Passing under pressure through this nozzle, gasoline is divided into small droplets, turning into an aerosol. We see the same process, for example, "zigzag" with spray deodorant.
Problems with injectors
The first thing that can happen to the injectors is that the internal passages become clogged. Even the smallest speck, which is difficult to see with the naked eye, will enter the injector and stop the engine.
Engine injectors
Given the "high" quality of our gasoline, the injectors need to be cleaned regularly, at least every 50,000 kilometers or so. There are several cleaning methods.
Cleaning the injectors
The simplest method of cleaning injectors is to fill the fuel system with a special liquid that removes impurities, working instead of gasoline. This method requires additional devices. The advantage of this method is that there is no need to remove the injectors. The method is quite effective.
If this method is not available, the injectors are usually removed for cleaning. After removal, the injectors are also cleaned in different ways. The fact is that the design of the injectors is non-separable. This makes the task very difficult.
The general principle of such cleaning: it is necessary to drive a cleaning liquid, such as Carb Cleaner or solvent, through a nozzle under a pressure of several atmospheres. This is done in different ways. In this case, current from the battery is supplied to the power connector of the electromagnet, opening the injector. An ultrasound therapy machine is also used. But after the ultrasound, you still need to blow out the nozzle.
Replacing injectors
But there are also more serious breakdowns of injectors, failure of the magnet, etc., when all that remains is to remove the injector and replace it with a new one. It's a pretty simple process. Anything obstructing access to the fuel rail must be removed, the rail removed, and the injector replaced.
It is not difficult to determine which injector is faulty. With the engine running, it is enough to disconnect each of the four injectors in turn and remove the terminal from it. If the injector is faulty, there will be no noticeable changes in engine performance. Vice versa.
16 valve engine
As you know, VAZ 2112 cars are equipped with engines with 8 and 16 valves. Of course, their design is significantly different. Replacing injectors is also a little different. If we have a VAZ 2112 engine with 16 valves, we proceed as follows:
- Unscrew the plastic manifold.
- We move it to the side.
Replacing injectors on an 8-valve engine
Here is a slightly different scheme of work. First, remove the negative terminal from the battery. Next we need to relieve the pressure in the fuel rail. After removing the cap, press the valve with the tip of a screwdriver (see photo).
Let's put the hood back in place. Loosen the manifold clamps and remove them from the air filter. There's no need to remove it, just turn it on its side.
Using two 16mm wrenches we unscrew the fuel lines. It is important to mark them somehow so as not to confuse them when connecting.
Disconnect the ramp power connector. Unscrew the bracket securing the fuel pipes. Unscrew the ramp holder using a hexagon. Remove the tube from the pressure sensor.
Carefully lift the ramp together with the attachments. And gently pull to the side, to the right.
Remove the mounting brackets and remove the injectors.
Removing the injectors
Be sure to replace all O-rings, gaskets, and washers. After replacing the injectors, we put everything back in the reverse order.
Video
This article describes step by step how to correctly replace the nozzles of a washing machine on a VAZ 2112. And the features of maintenance and adjustment of these devices are also fully disclosed. Some measures are proposed to improve the performance of injectors in general. Many motorists and professionals often encounter such a problem as improper operation of the windshield washer nozzles. In unfavorable weather conditions, any defect in the washing machine nozzles can cause a lot of problems. Impaired visibility of the road is a very serious problem, and all problems associated with it must be eliminated in advance. In this case, replacing the nozzles of the VAZ 2112 washing machine is not a panacea for the above problem. This is worth thinking about in connection with activities such as maintenance and adjustment of this device.
Car service Automaster Stavropol
Auto repair. Maintenance. ONE HUNDRED. st. Grizodubova, 53, No. 115, tel. 8-918-770-02-02
- Car repair home
- Chassis repair
- Camber - Toe
- Cleaning the injector
- Carburetor cleaning
- Computer diagnostics
- Engine repair
- Transmission repair
- Glass replacement
- Welding work
- Articles
- Oscilloscope
- Video
- Repair of generator, starter.
- Photos
Cleaning the injector of VAZ 2110.
Cleaning the VAZ 2110 injector.
The operating principle of the injector is approximately the same for all cars. There is a slight difference that affects fuel consumption. VAZ cars with a DIS ignition system differ from engines with individual ignition coils.
The module, or ignition coil for 4 cylinders, supplies a spark to 2 pistons at once. At the same time, a spark is supplied to cylinders 1 and 4 and similarly to cylinders 2 and 3. Also, the injection system has different control units. Let's look at the module and ignition coil of a VAZ.
The VAZ 2108 engine is fuel-injected and has an ignition coil. You can find a car with a module in the ignition system. What is the difference? High-voltage coil for 4 cylinders, has a secondary ignition winding. Keys in the form of transistors are located in the car's ECU.
The ignition module for 4 cylinders has a secondary winding and keys to the primary winding in the module housing. As a result, the ignition module is twice as expensive as the coil. The advantage remains with the ignition module. Shorting the secondary winding of the ignition module can damage the input keys of the primary winding, which preserves the serviceability of the ECU.
Emergency closing of the ignition coil can damage the keys in the form of transistors in the control unit. Cleaning the VAZ 2110 injector is not fundamentally different from other cars.
Defective injectors
First of all, the machine must be installed in a place convenient for work. An injector malfunction is detected by simply igniting it. Using the switch lever on the steering column, you need to turn on the VAZ windshield wiper and observe the operation of the nozzle.
List of problems with washer nozzles
- Washer fluid does not flow through the nozzle at all.
- Washer fluid pressure is very low.
- The jet of liquid supplied is directed to the side and does not guarantee complete cleaning of the windshield.
- The pump supplying washer fluid or its motor is faulty.
- The washer fluid supply hose is damaged.
- The nozzle is mechanically damaged.
- The injector nozzle is clogged with foreign material.
- Nozzle is not aligned.
Causes of problems
Attention: To quickly determine the location of the defect, it is recommended to disconnect the washer fluid supply hose from the nozzle and turn on the washing machine. If the fluid supply pressure is normal, the problem is in the injector.
Repair
Before removing the injectors from the dismantled rack, it is advisable to check their functionality. To check you will need:
- four identical containers,
- tester,
- wires.
Functionality check
- Connect the gasoline supply and drain hoses and the power connector to the rail with injectors.
- Place the rack over the measuring cups.
- Crank the engine with the starter.
- Evaluate the performance of the sprayers. The shape of the cloud should be approximately the same for all nozzles. The amount of fuel in the measuring containers should not differ much. Significant differences indicate contamination and changes in performance. Coked with resinous deposits and clogged, they require cleaning. A complete lack of fuel at the nozzle outlet indicates a valve malfunction and the need for replacement.
The shape of the cloud should be approximately the same for all nozzles
- Turn off the ignition. Disconnect the power connectors from the injectors.
- Measure the electrical resistance of the winding of each part. Its nominal value is 11–15 ohms. Deviations from the norm indicate the presence of hidden problems in the solenoid valve, which indirectly affect the shape of the torch and performance. It is advisable to replace such an injector.
- Turn on the ignition. Make sure the injector valves are tight. If a part is leaking, it should be replaced or at least try to wash it and check its functionality again.
- It is difficult to check the injector for unstable valve hanging, since this malfunction can occur quite rarely. To identify, connect the electrical connector of the injector with separate wires to the battery. Periodically turning the voltage on and off, watch the spray pattern. The shape and intensity of the torch of a working injector is the same every time; periodic changes occur when the valve does not open completely. If the background sometimes “accidentally” does not work, it must be replaced.
Removing the nozzle
In order to provide quality service, restore the functionality of the nozzle or replace it, you first need to turn off the wind cushion or, as it is popularly called, the “frill”. Or rather, its upper part. To do this, you will need a 10-point flathead screwdriver and a Phillips screwdriver.
How to remove the upper part of the windshield
- Using a 10 mm socket, unscrew the two nuts located at the edges of the casing.
- Next, unscrew the four screws that secure the cover. Self-tapping screws are located under the covers.
- Then you need to disconnect the sound insulation, which is attached to the windshield trim with six self-tapping screws.
- Carefully remove the top of the wind mat.
Having thus gained access to the washer nozzles, they are immediately removed.
To disassemble the injectors you must:
- Disconnect the washing machine hose from the tee.
- Unscrew the screws of the injectors, as shown in the photo above.
- We remove the injectors.
Now all further operations can be performed with the nozzles. Assembly is performed in reverse order.
Cleaning the injectors
Before replacing the injectors, if they are completely clogged, you can try to revive them. To do this, you need to flush the injectors. The service manual for the components and assemblies of the VAZ 2112 does not indicate how to wash the injectors. But, even for a novice car enthusiast, this procedure will not be difficult. It requires:
- Soak the nozzle in white spirit for 3-4 hours.
- Clean the nozzle with a thin, soft thread.
- Flush the supply line with high pressure water.
- Blow out the channel with compressed air.
If necessary, the procedure must be repeated several times. In particular, on a VAZ 2112 car, washing the injectors does not take much time. And it’s not the cost of the problem that’s troubling here. Much more important is the knowledge and experience that we gain in the process of performing these works.
Attention: Do not clean the nozzle with a sewing needle. The tip of the needle may break and severely block the washer fluid path.
Adjusting the nozzles
If you managed to wash the injectors on your VAZ 2112 yourself, then you will cope with the task of confidently adjusting them. To do this, you need to understand a little about the design features of this device. The VAZ 2112 car uses two types of washing nozzles - jet and fan. In turn, nozzles can be: single-jet, two-jet and four-jet. This terminology is defined by the method of spraying washer fluid onto the windshield. The nozzles have a hinged socket at the outlet of the washer fluid. This is a ball with a through hole. Toothed nozzles are equipped with a narrow grooved socket. Now let's start adjusting the injectors with our own hands:
- The direction of the jet in the nozzles is adjusted by turning the rotating bell.
- Pass a thin thread through the hole in the ball and turn the bell in the desired direction.
- Adjustment of fan nozzles according to their design is carried out only in a vertical position; the bell rises or falls in the desired direction. But it doesn’t matter, they can also be turned to the right or left.
And in general, no instruction can prohibit you from implementing any technical solution that will improve the performance of vehicle components.
Limited visibility
Visibility conditions can be caused not only by insufficient natural (sun, daylight) illumination on the road. The driver can also move in such conditions when his visual view is blocked by any objects, or he is moving along a road with a complex profile.
The rules call this mode limited visibility.
Definition from traffic rules (clause 1.2):
“Limited visibility” is the driver’s visibility of the road in the direction of travel, limited by the terrain, geometric parameters of the road, vegetation, buildings, structures or other objects, including vehicles.
Physical limitation of visibility is a criterion for limited visibility. Let us give the most typical examples.
1. A sharp turn in the road.
2. The section of road at the very end of the climb.
3. Location of objects that do not provide an adequate overview (buildings and even vehicles).
Unfortunately, the traffic rules have not fully addressed the issue regarding the specific distance that would characterize limited visibility. But the text of the Rules itself (in sections 8, 10, 11, 12) gives the answer: limited visibility is visibility of the road less than 100 meters
.
In conditions of limited visibility, the driver is prohibited from performing a number of maneuvers (for example, overtaking, turning, etc., and there are also restrictions on stopping and parking). We will talk about this more specifically when commenting on the relevant sections of the Rules.
In conditions of limited visibility, the driver is advised to reduce speed. And it’s clear why: he must see the section of the road he is entering for the sudden appearance of any objects on it (for example, obstacles or vehicles).
Injector maintenance
To ensure proper functioning of the injectors, it is necessary to periodically pay attention to them. Over-inspecting the injectors won't hurt. If the injectors have not been turned on for a long time, it is necessary to check their operation. Clean and adjust if necessary. In winter, it is necessary to use washer fluid with antifreeze. Freezing of injectors leads to their wear and premature failure. If you follow the recommendations proposed in this article, you will not need to replace the nozzle of your VAZ 2112 washing machine for a long time. And the windshield will be washed as in the video.
Options for solving the problem
Removing the injectors
Today, every vehicle owner can choose one of three possible options for cleaning injectors:
- use automotive chemicals;
- resort to the services of a service station;
- Remove and clean the injectors on the VAZ 2110 yourself.
In our article we will dwell in detail on the third option for resolving the issue. Self-cleaning is safer and more effective compared to the effect that occurs after using automotive chemicals. The economic benefits of cleaning injectors yourself are also an obvious fact, given the prices prevailing at service stations.
It is recommended to carry out this procedure yourself only if you have at least a general understanding of the internal structure of the machine. Otherwise, it is advisable to entrust cleaning of injectors to specialists.
Removing and cleaning VAZ 2110-2112 injectors
Cleaning the injectors of a VAZ 2110-2112 is a job that should be carried out only if necessary, because the ramp on which the injectors and the injectors themselves are located is practically the heart of the engine.
That is why they need to be cleaned only if there are problems with the engine: increased fuel consumption, jerking, or a significant decrease in power. Only when there is reason to believe that the injectors are clogged can they be cleaned.
There are fuel injector cleaner additives on the market that you add to gasoline, but they don't always do their job or do it well. And in some cases, they can damage the engine because all the dirt from the injector gets into it or reacts with the components of the engine oil.
Removing the VAZ 2110-2112 ramp
Important! All work on removing the VAZ 2110-2112 ramp should be carried out in a cold state. First of all, disconnect the wires from the fuel pump, thereby de-energizing it. Then we start the engine and wait until it goes out.
We start again and so on - we repeat the procedure until it stops starting. Therefore, we relieve the pressure in the fuel system. After this, you can begin to remove the ramp.
First of all, turn it off by turning off the power: the general wiring is located on the side of the passenger compartment. Then we unscrew the fuel lines and all electrical components connected to the fuel rail of the VAZ 2110-2112 - idle speed regulator, pressure regulator, throttle position sensor.
Next, unscrew the two hex bolts holding the fuel rail in place. Basically, we can now remove the fuel rail. It can be removed upwards, but it’s unlikely to be possible without improvised means. The fuel rail is very narrow and must be removed strictly parallel to the ground, since any distortion will only complicate the task.
Cleaning nozzles VAZ 2110-2112.
All work on cleaning VAZ 2110-2112 injectors should be carried out on a clean surface - for this it is recommended to spread a clean piece of cloth on the ground or on a table. In addition, you will need to assemble a simple circuit from a 12V light bulb, a pipe, wires and a switch. We constantly connect the light bulb, nozzle and switch, after which you can start cleaning the nozzle.
It is best to use a regular plastic clamp to attach a 20-30 cm long hose to the injector inlet and turn it on, pour in carburetor cleaning fluid (Liqui Moly, RunWay, Hi-Gear or others) and observe the change in spray pattern.
The nozzle may expand or contract (depending on the level of contamination), which will signal that the hole in the nozzle is expanding and the dirt is being washed away. When the sprayer stops changing its spray angle, the nozzle is clean.
Unfortunately, the quality of fuel in our country leaves much to be desired. Thus, cleaning VAZ injectors can become a periodic procedure that must be repeated every 40-50 thousand km. So it’s better to learn how to do it yourself: you will not only save money, but you will also be one hundred percent confident in the quality of your work.
How to remove parts from the engine
Dismantling steps:
- Remove the air filter box (it will interfere with free access to the engine).
- Remove the wiring harnesses from the injectors.
- Then you will need to disconnect the wires from the idle speed control and from the throttle sensor.
- Next, remove the vacuum seal from the pressure regulator (it has a white braid).
- Using a 17 key, unscrew the bolts that secure the fuel frame to the body. To make it more convenient, you can remove the gas cable.
- It is better to unscrew the fasteners of the plate with which the ramp is pressed using a hexagon.
- The fuel rail must be removed very carefully, with the nozzles facing up.
- On a 16-valve engine, dismantling will take longer, since the ramp has a more complex structure and several types of fasteners.
- Next, you can remove the injectors themselves - to do this, disconnect the fastening brackets of the electrical connector with your finger, and then the injector bracket. During removal, gasoline may leak; it is recommended to place a cloth under the ramp.
To install a new injector, the socket is first thoroughly cleaned of dirt and fuel, and only then can the product be screwed in. It is better to drop a few drops of gasoline onto the rubber ring before installation - this will make the nozzle fit into the mounting hole more easily. All work is then carried out in reverse order.
