03 March 2015 Lada.Online 95 777 3
Some owners, after purchasing a LADA car, notice malfunctions in the operation of the doors. For example, the back door doesn't open well. You can cope with the problem yourself by adjusting the locks and door geometry. The defect can also be corrected under warranty from an authorized dealer.
Malfunctions that owners of LADA cars (and other car brands) encounter when the door locks are not adjusted:
- the door does not open or close;
- the door closes/opens poorly (tight);
- large gaps between the door and the body (water gets into the cabin, rattling and whistling appear at speed).
Door adjustment on all LADA cars (XRAY, Vesta, Largus, Granta, Priora, Kalina Niva 4x4) is performed in the same way. There are no fundamental differences.
Car doors do not open well
The most common manufacturer defect is that the rear and front doors on Kalina are difficult to open. The flaw occurs in used cars and those that have just come off the assembly line. The reason is incorrect or insufficient adjustment of the door handle or the door itself. In used cars, the doors become loose over time. Uneven gaps form at the joints with the housing components.
The problem can be solved with the help of a service center or fixed by yourself. The second option is more acceptable for experienced drivers, experienced auto mechanics and those who like to experiment with their car.
First of all, it is important to find out the reason why the back door on a Viburnum does not open well. An external inspection of the defect is carried out and a comparison with the original position of the part is carried out. Based on the results of the check, you can adjust the elements yourself.
In a similar way, malfunctions of the front and rear doors are eliminated, including the trunk door, if the car has a hatchback or station wagon body, but in this case there are nuances.
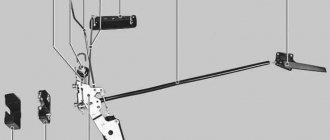
Straightening tool
Body parts can be restored either using the simplest tools or using professional tools and stands. Simple tools for restoring body geometry include:
- hammers and mallets of various types;
- all kinds of supports (anvils, metal bars of all sizes);
- special spoons for pulling out metal:
- levers and hooks;
- grinding tool.
There is also more complex equipment, as well as entire sets of tools. A standard set of straightening equipment usually contains:
- hydraulic pumps and cylinders;
- nozzles of all shapes;
- impact plates;
- adapters.
In professional body repair, rack-and-pinion platform stocks and special stands are used. Using special equipment, when restoring the geometry of a body element, the impact on damaged areas is achieved with greater force and precision, the metal is straightened faster and with less labor costs, and the straightening is of a higher quality.
Door adjustment process
To eliminate defects in the operation of door elements, it is necessary to find out the cause of its occurrence. In some cases, treating moving parts of the mechanism with lubricants helps. The seals between the trim and the body are subject to wear and tear, and they also require replacement periodically. If manipulation of the replaced elements is not enough, technical intervention is required. Regulation is necessary for the following factors:
- the gap in the extreme part of the structure causes the door on the Kalina car to not close tightly;
- The problem is caused by a faulty door lock.
Violation of the geometry of the structure in the doorway is the most common cause of the defect. Gaps can appear in any part of the joint with the body. Most often this happens from above and below. The adjustment in these cases is similar, but has minor differences.
Adjusting the bottom of the door
First of all, it is necessary to establish access to the inside of the lock from the outside. To do this, the glass is completely lowered. The door closes with light blows on the bottom of the casing. During the process, the size of the gap in the lower part of the structure is controlled. When the correct result is achieved, the door is carefully opened and slammed shut. If necessary, repeat the procedure. It is worth monitoring the force of impact and correcting the geometry of the doorway.
This method is used at manufacturing plants at the final stage of car production. The only difference from regulation at home is the availability of technological devices and tools.
Pulse programming
When connecting a central lock, it is not enough to perform all the steps in the correct sequence; you also need to select the required pulse duration for the locks to operate. If it is too large, the actuators will overheat; if it is insufficient, it will not be enough to open and close. In the luxury configuration, all electronics usually “fall asleep” after 15 minutes of inactivity. To awaken it, an additional impulse is needed.
Central locking is a simple device, but it can secure your car from criminals much more effectively than a police cap on the passenger seat. The centralized door lock system is the most convenient way to quickly open and close them. If this security system is supplemented with a good car alarm, this will prevent you from ending up in a situation where your car is stolen or damaged.
Door lock adjustment
A car lock is used to prevent the door from opening spontaneously and is a protective element of the security system. The standard Lada Kalina lock consists of two parts: mechanical and electronic. It often becomes the reason why the door handle is difficult to open; Kalina sometimes has such a defect already from production. As in the case of adjusting door gaps, there are two options for correcting the deficiency:
- Take your car to a service station and trust the professional technicians. Recommended for beginners and inexperienced car owners.
- Fix the problem yourself using available tools. Suitable for car enthusiasts with extensive driving experience and basic training.
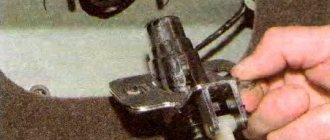
Adjusting the lock at home is done using a Phillips screwdriver. Before starting manipulations, it is recommended to mark the original position of all elements for possible return to their original state.
To move the lock module, loosen the three screws that secure it. The bracket is now not fixed and can move in the plane. Once it is in the correct position, the screws are tightened into place. The structure is treated with lubricant and undergoes mandatory testing by opening and closing doors.
The procedure should be performed extremely carefully so as not to damage the body paint and trim elements.
If the lock is the reason that Kalina’s door does not open well, and the adjustment did not help, resort to more stringent means:
- The locking bracket is pulled out 3 - 5 mm and secured in this position. The method allows you to use this additional distance for a smoother door movement. It is important to find the optimal size for the structure to bulge from the body. If the door is extended excessively, it will make sounds on uneven sections of the road and allow dust and moisture into the interior.
- Reducing the area of the locking hook. This is usually achieved by filing the mechanism and restoring the locking system to its original state. The size of the cut area affects the ease of opening the doorway. If too much volume is removed, the door may open and close on its own. During processing, it is advisable to round off the sharp tip of the lock tooth.
Replacing the larva in Kalina
First of all, replacing the lock elements means that the door trim will be completely missing. Therefore, first we will figure out how to dismantle the trim on Lada Kalina cars. The second chapter is devoted to how to remove the larva and install a new one in its place. The last step will actually be the simplest.
Removing the door trim yourself
The casing is attached not only to screws, but also to plastic pistons. The number of screws holding the part in question is four:
Numbers here indicate all fastening elements. But to get to them, you need to remove the screw cap “3”, as well as the inner door handle. The pawl handle also needs to be unscrewed.
If these actions are completed successfully, the casing begins to be dismantled, moving it away from the metal
Dismantling is carried out starting from any of the corners, but care must be taken: the pistons holding the plastic are fragile
If the package includes power windows, you will need to disconnect the connector connected to the button block. Also, another similar connector is present in most trim levels - where there is a central lock. Both connectors must be disconnected.
All the steps described here involve electronics in any case.
Therefore, at the stage before dismantling the trim, you need to open the hood, take the “10” key and unscrew the negative terminal. We are talking about the battery terminal, which can be connected last (when the last screw is screwed in). Anyone who breaks this rule will look for blown fuses. Draw a conclusion.
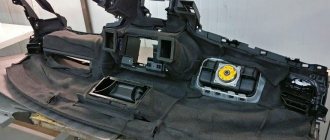
How to get to the door mechanism
According to the recommendation of the magazine "Behind the Wheel", in the absence of casing, access to the lock is always available. Simply put, there will be no need to remove the inner lining made of metal. The steel sheet is simply bent to the side.
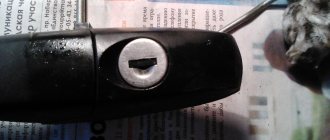
The rotating part with the protrusion is called the “drive”, and this is what you will need next.
Replacing the larva will be easy:
- The key in the cylinder currently fixed in the door is turned 90 degrees;
- Using a steel ruler, knife or thin screwdriver, you need to press the locking tongue located opposite the slot in the body of the cylinder. You need to place a screwdriver between the rotating and stationary parts of the mechanism. Know that in the driver's door the slot is made from the bottom (looks “to the floor”), in the passenger doors - from the top!
- By pulling the key towards you, the larva is pulled out;
- The new cylinder is installed like this: with the key inserted, it is pushed into the lock until it stops. The locking tab will need to be pushed inward.
Read more: Granta timing marks photo
The following photo illustrates the “second step”.
The slot itself, when the mechanism is assembled, is located between the drive and the lock body (at least that is how it is designed). You need to manage to squeeze a screwdriver into the space between these parts. Sometimes this action does not lead to a positive result, and then the lock has to be removed as an assembly.
Loose door hinges and how to fix them
Sometimes there is no need to adjust body structural elements. The problem of closing the door is caused by play in the hinges. Their role is performed by standard bolts. The hinge axes weaken due to frequent use, play occurs, the door begins to make sounds when driving, and perform vertical movements.
The defect is eliminated with a wrench. The bolts are tightened with a smooth force and, if necessary, replaced with similar fasteners of a modified design. After the hinges are aligned and the gaps disappear, the door is inserted into place, the size of the gaps on the right, left, and sides is carefully monitored.
Hydraulic body repair
In straightening work, hydraulics are often used - hydraulic braces and jacks, hydraulic cylinders, pumps. The hydraulic tool is included, the extension allows you to create a force of up to 5 tons. Using hydraulics, car trunks and hoods are straightened, sills are leveled, and distortions in doorways are corrected.
How the back door on a Lada Kalina should work correctly
When operating domestically produced cars, you have to deal with both acquired and factory defects. The rear door of the Lada Kalina is more often than other body elements exposed to physical impact during driving, includes a number of technically complex devices, and has a high percentage of defects during assembly line assembly. The main components of the normal operating process of the door:
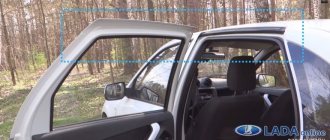
- Correct geometry of fit of the lateral and vertical sides to the body, drain, sills of the car, equal gaps between them.
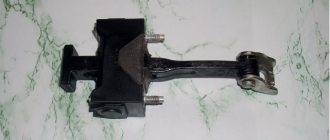
- Clear operation of the locking mechanism, installed door closer, and central locking lock.
- No extraneous sounds when moving the machine, including over rough terrain or dirt roads.
Careful car care increases its service life. Sometimes, if problems arise, it is enough to change the seal, tighten the fasteners, and lubricate the components and body parts.
Collection of “people's councils”
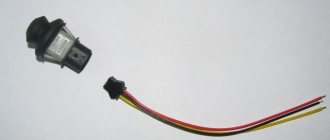
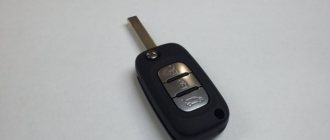
If the central locking is not working properly, but you know that the key fobs are fully functional, you can try the following steps:
- The power supply circuit of the central locking controller is protected by fuse F22. This element can be replaced or simply disabled and then installed back;
- Let's say no current flows to the actuator of one door. Then find the terminal block by opening the door 90 degrees. In order for the broken contact to be restored, sometimes it is enough to disconnect the mating connector and connect it again;
- Even if the key fob is working, check whether the self-tapping screw is screwed in all the way. It is recommended to loosen the fastening a little, and then everything works reliably.
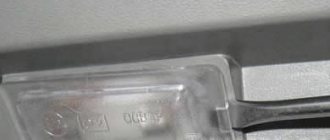
To follow “tip number 1”, look for the fifth fuse from the top in the mounting block. The rating of this element is 15 Amperes.
Here is the correct fuse