Tips for replacing the flywheel on a VAZ 2109
It’s not for nothing that VAZ cars are considered long-lived on domestic roads.
And that is to say - they have been used as “folk” for several decades, and many copies have actually become real technical rarities. However, long-term (or multi-decade) use of any mechanism requires an attentive approach to it, competent technical support, repair and replacement of spare parts. Moreover, it is obvious that replacing entire units will cost more than replacing individual elements. So, for example, if extraneous knocks, creaks and other sounds are heard during engine operation, the car should be diagnosed to find out the cause. And, quite possibly, you can eliminate it yourself. Thus, one of the elements of the vehicle’s propulsion system can be considered the VAZ flywheel, and more specifically, the crown of the VAZ flywheel. Replacing the entire flywheel can cost a hefty sum, while replacing the flywheel crown yourself will take relatively little time and require a small amount of investment.
Replacing the flywheel crown is a multi-level process, including:
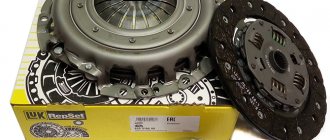
- removing the clutch basket;
- removing the gearbox;
- Removing the flywheel.
You will find detailed instructions on how to remove the clutch basket and gearbox in the relevant materials on our website. Here is some advice for those who no longer need to explain elementary truths.
To remove the gearbox quickly and without additional costs (including the cost of draining the oil and refilling it), you can perform just a few steps: unscrew the trailing arms or “sabers” (even at this stage the transverse travel of the struts is sufficient to disconnecting the gearbox from the engine; now it is enough to remove the starter, disconnect the rocker, gearbox supports and ground contacts of the reverse sensor - and place the removed transmission on the floor, providing the most convenient access to the clutch and flywheel.
Advice: to carry out work on dismantling the flywheel, the latter must be properly fixed. This is best done using a clamp specially designed for this purpose, or a homemade device made in the likeness of this industrial part. Only after this should you begin to unscrew the flywheel bolts.
Before removing the flywheel, record (and it is best to make special notes) the relative position of the flywheel relative to the crankshaft. This will help during subsequent installation, because position matters.
Tip: It is best to put a new ring on the flywheel while it is warm. You can use a regular fire or, if you have such a system in your garage, a heater, which could help heat the crown to the desired temperature (approximately at the limit of human physical capabilities).
Advice: it should be remembered that the crown on the flywheel is always put on with an internal chamfer to the latter. The easiest way to place the crown on the flywheel is by gently tapping it with a hammer.
When assembling the flywheel, the bolts are tightened with a force of 62-89 N*m, when installing the basket - 19-31 N*m, and all bolts, in order to avoid deformation of the units, are tightened in a checkerboard pattern. But the transverse arm and stabilizer fasteners are tightened only under load (that is, after the car is lowered from the lift to the ground).
How to install a clutch disc: step-by-step instructions
The clutch performs the most important function - it ensures smooth gear shifting, so that the car starts smoothly, the transmission and engine function correctly and do not fail ahead of time.
Due to the fact that the clutch experiences increased loads, it has to be changed quite often, every 100,000 kilometers. How do you know when it's time to install a new clutch disc?
The following signs indicate that this element has become unusable: slippage appears, the clutch does not disengage completely, gears are difficult to shift, the clutch pedal becomes too tight or falls, and the car loses traction.
Not every car owner is well versed in how to properly replace this element. What happens if you install the clutch disc incorrectly? The result of such a repair will be the following: you will have to disassemble the unit again, because the disk will not be able to function properly and will begin to malfunction.
Most often, a new clutch basket is also installed, but there are situations when you can get by with replacing one disc. Although this is generally not a very complicated procedure, many car owners do not know how to properly install the clutch disc. There are 2 methods for performing this operation:
- install the clutch after removing the gearbox;
- install a new part without removing the gearbox.
Of course, the second method is much simpler. By the way, if the car is rear-wheel drive, then even a beginner can handle this job. Installing the clutch if the car has front-wheel drive will not be easy, but if you apply the right amount of effort, you can do it yourself. Let's figure out how to install the clutch correctly step by step.
To install the clutch yourself, the car is driven onto an overpass or a hole in the garage. Before you begin dismantling, you should place a special stop under each wheel to prevent the car from rolling away.
- To install the clutch, first of all we disconnect the cardan from the box, as well as the slave cylinder. Then we disconnect the limit switches of the reverse light switch wiring.
- Using a spanner, unscrew the bolts that secure the gearbox mount. Then remove the pillow.
- Now we move the gearbox as far as possible from the engine, while the switch should rest against the bottom. This way the transmission will rest on the inlet pipe of the exhaust system. Therefore, the rear gearbox must be supported with a jack or support.
- We remove the flywheel and unscrew the six bolts that secure the clutch basket. To get to them, you will have to turn the crankshaft from time to time.
- After this, a groove will appear into which you will need to slide the clutch basket, so the disc will be removed. To remove the basket, move it towards the engine. Then remove the fork, as well as the release bearing.
- To install the clutch, proceed in reverse order. It is necessary to apply lubricant in advance to the bearing hole of the gearbox input shaft. The area that the pressure disc comes into contact with should be wiped with a cloth.
Is it possible to put the clutch disc in reverse? Which side should it be on? It must be installed so that the protruding part faces the basket. In this case, you should first apply marks to the housing and flywheel. Subsequently, they must be combined; this is the only way to install the clutch correctly.
We recommend
When carrying out this procedure, the driven disk should be centered relative to the crankshaft axis. To do this, use the rule, it will play the role of the splined part of the input shaft. Once installation is complete, the rule should be easy to remove.
The bolts that secure the casing must be tightened one at a time with the same force, otherwise it will move out of place. On the side of the casing there are rectangular recesses that are evenly distributed over the entire surface.
Three pressure plate hubs should fit into these recesses. This design allows torque to be transmitted to the disc as efficiently as possible, while it can be shifted relative to the axis when the clutch is engaged.
There are 18 springs located in pairs between the casing and the pressure plate. They have turns, they are made in different directions. Thanks to this solution, the mechanism never jams. To prevent distortion of the working disk and achieve the required force, all installed springs must be from the same group.
To prevent the springs from overheating when the clutch slips, washers are used. They are made of pressed asbestos; this material is not afraid of high temperatures and effectively removes heat.
In addition, there are spherical nuts at the ends of the tail forks, as well as cone-shaped springs. As a result of this, a rolling mechanism appears; it is necessary to level the gap between the axles when the disk is retracted.
Removal, installation and troubleshooting of the flywheel on VAZ 2108, VAZ 2109, VAZ 21099 cars
First remove the gearbox and clutch from the VAZ 2108, VAZ 2109, VAZ 21099 (see section 5 “Transmission”).
1. Remove the six flywheel mounting bolts. At the same time, use a screwdriver to hold the flywheel from turning, having first screwed in one of the gearbox mounting bolts.
2. Together with the last bolt, holding the flywheel, remove the bolt locking plate.
3. Remove the flywheel from the crankshaft flange.
4. Check the condition of the flywheel rim teeth and, if damaged, replace the flywheel.
5. Replace or repair the flywheel if the contact surfaces of the clutch driven disc or...
6.... risks and scuff marks were found on the crankshaft flange. The flywheel can be checked and repaired in a workshop that has special equipment. The non-flatness of surface 3 (Fig. 4.4) of the contact of the clutch driven disc should not exceed 0.06 mm. The non-parallelism of the contact surfaces of the driven clutch disk and surface 2 for fastening the clutch should not exceed 0.1 mm. The flywheel runout on surfaces 3 and 1 should not exceed 0.1 mm. To remove deep marks and burrs, the surface 3 of the flywheel can be machined, and the layer of metal removed should not exceed 1 mm. Simultaneously with surface 3, it is necessary to grind surface 2, maintaining the size between them (0.5+0.1) mm. When grooving, maintain the parallelism of surfaces 3 and 1.
Self-replacement of the VAZ 2109 flywheel crown
Often, after a long period of use, the engine begins to experience unidentifiable knocking or squeaking noises. Perhaps the reason for this is a failed flywheel crown .
The cost of a new crown is about 200 rubles, which is cheaper than assembling a flywheel in detail. Next we will talk about replacing the flywheel crown on VAZ 2109 cars yourself.
To replace the flywheel crown, you need to dismantle the clutch basket, gearbox, and the flywheel itself.
How to replace the flywheel crown of a VAZ 2109
- To remove the transmission without draining the oil and disabling the drives, you need to remove two trailing arms (“sabers”).
- Dismantle the starter, disconnect the rocker, two gearbox supports. Then disconnect the ground wires of the reverse sensor.
- After disabling the cross-travel levers, there will be enough construction to disconnect the box from the engine.
- Place the removed gearbox on the floor. The flywheel and clutch are now free to access.
- Fix the flywheel (there is a special lock for this), unscrew its bolts. If you don’t have a special tool, you can do something similar with your own hands. As an option, drill holes in the north pillar guide and bolt it to the flywheel using the basket mounting bolts. This device makes it possible to avoid turning the flywheel.
Also check out
- Before removing the flywheel, marks must be made to show the relative positions of the flywheel and the crankshaft.
- Use a punch and a hammer to knock off the old crown.
- Install a new crown of the VAZ 2109 flywheel. To do this, the new crown needs to be heated (alternatively, wrap the flywheel in paper and set it on fire).
- After warming up, carefully put the crown on the flywheel (it is necessary to install it with an internal chamfer towards the flywheel). Then you need to install the part in place.
- Assembly must be performed in reverse order. The bolts should be tightened with a torque of 62-89 N*m, and the basket bolts should be tightened with a torque of 19-31 N*m. To avoid skewing the tightening, you need to do it in a checkerboard pattern.
- To center the driven disk, you need to use a 1/4 extension with a layer of electrical tape, bringing it to a diameter of 15 and 20 millimeters.
Regular, damper flywheel and its other types
Structurally, the following types of its execution are distinguished:
The most common is the solid flywheel. In fact, it is an ordinary metal disk with a crown on the end.
Different car models have their own design, usually the disc diameter is thirty to forty centimeters. As an example, we can cite the VAZ 2101 disc, its weight is 6.7 kg, and the clutch diameter is two hundred mm, while for the VAZ 2110 it weighs 6.3 kg. There is no single option for any model; all VAZs, for example, such as 2112, 2114, 2110, have their own version.
How to replace the flywheel crown of a VAZ 2109 with your own hands
Long-term operation of the engine does not pass without a trace, and over time it begins to remind you of this, for some with a knock, for others with a squeak. In my case, the engine started making both the first and second noises; after detailed diagnostics, I came to the conclusion that the flywheel crown was irretrievably destroyed.
The price of the crown is approximately 200 rubles, which is much cheaper than the assembled flywheel. Today I will talk about how to replace the flywheel crown with your own hands, using the example of a VAZ 2109.
In order to replace the flywheel crown, you need to remove the clutch basket, gearbox, and, of course, the flywheel itself.
Why don't they pour it completely along with the teeth?
I also asked myself the same question - after all, it seems easier to just take and pour a ready-made flywheel in the form of a gear, and not “bother” with various crowns! Just? But no!
It's all about weight, strength and price - the crown, as a rule, is made of heavy and durable metals, it can be cast iron (or its alloys), some types of steel, etc. This metal is not light, and it must also withstand loads. If you make the entire “blank” from such metal, it will turn out strong, but much heavier and more expensive!
Replacing the flywheel crown of a VAZ 2109 with your own hands
- I decided to cheat a little and remove the transmission in a more convenient and simpler way - without draining the oil or disconnecting the drives. To do this, you need to completely remove both trailing arms, which are more often called “sabers”.
- Next, remove the starter and disconnect the rocker, both gearbox supports and the reverse sensor ground wires.
- When the levers are removed, the transverse travel of the struts is sufficient to disconnect the box from the engine.
- Place the removed gearbox on the floor, you should now have full access to the flywheel and clutch.
- To unscrew the flywheel bolts, you need to secure the flywheel itself well. There is a special clamp for this; if you don’t have one, you can make something similar. I made a homemade analogue for myself from a guide, which was taken from a server rack, with holes made in it. Afterwards, the guide was screwed to the flywheel using the basket mounting bolts. Use this improvised device to hold the flywheel from turning.
Replacing the ring gear on the engine flywheel
Let's look at how to replace a worn ring gear on the engine flywheel of VAZ 2108, 2109, 21099, 2105, 2107. Wear on the ring teeth is one of the reasons for the inability to start the engine. The starter simply turns idle. The Bendix teeth simply have nothing to grab onto. Wear on the teeth on the flywheel of VAZ 2108, 2109, 21099, 2105, 2107 cars usually appears on both sides (since the engine crankshaft stops mainly in two positions).
Therefore, in some cases, it is advisable not to replace the ring gear with a new one, but simply rotate it relative to the flywheel 90 degrees, placing the sides with intact teeth under the Bendix. The factory crown may still serve, but the new part may be too soft and fail in a matter of months.
The procedure for replacing the flywheel ring gear on VAZ 2108, 2109, 21099 vehicles
Before replacement, you should remove the gearbox, the clutch “basket” and the flywheel itself.
— Heat the ring gear to a temperature of 150-200 degrees
This can be done using a gas burner, blowtorch, fire, etc. We heat the crown, trying to heat the flywheel itself as little as possible.
— We knock the crown off the flywheel with a hammer
The crown only gets knocked in one direction (from the collar on the flywheel into which it rests).
— Heat the new ring gear on fire to 150-200 degrees
— We put it on the flywheel
Using light blows of a hammer, we ensure that the crown is seated on the flywheel until it touches the shoulder. The heated crown fits onto the flywheel easily. If it is difficult, then you should remove it and warm it up a little more. There is no need to score with force.
That's it, the flywheel ring gear has been replaced, all that remains is to install it on the engine.
Notes and additions
— Increased wear of the flywheel ring teeth is caused by erroneous activation of the starter while the engine is running.
— Cranking of the starter at idle can also be a consequence of a breakdown of its drive, the Bendix. Therefore, before you begin disassembling and repairing the flywheel, you should remove the starter and make sure that the Bendix gear does not rotate in the opposite direction.
Relationship with timing belt
The next feature is that the flywheel is directly connected to the gas distribution mechanism.
If a serial engine has a regular heavy product, as in our case, and a serial, non-tuning, timing belt, which ensures good cylinder filling and torque at low speeds, the engine operates in normal mode.
But if you replace a heavy flywheel on a conventional engine with a light analogue, then it turns out that at the lower end the inertial energy of the product will not be enough for the car to move smoothly in normal mode, since the cylinders will not be filled with the fuel mixture well.
But at the same time, high speeds will not appear on a standard engine because the gas distribution mechanism will be immediately crushed and, as in the first case, will also not have time to efficiently fill the cylinders with the fuel mixture.
Therefore, the choice of flywheel and the degree of its lightening will directly depend on the timing, i.e. depending on the speed of the engine.
If, on the contrary, you install a heavy flywheel and a tuned wide camshaft, then you can forget about the high-quality bottom end of the engine. High speeds, at the same time, will also be bad, since the motor will have to rotate a large mass of the flywheel and this will create an obstacle to high-quality filling of the cylinders.
Therefore, the speed mode of the engines primarily depends on the gas distribution mechanism, and all other parts, including the weight of the flywheel, are adjusted to this timing belt.
It all depends on the specific layout of the intake and exhaust tracts, the width of the valve timing, the number and diameter of valves, and so on.
Flywheel in a VAZ 2109 transmission
The VAZ 2109 flywheel is part of the transmission of this car. It is located between the engine and the clutch. This unit is the output point of the internal combustion engine (ICE) and the input point of the car drive; it is connected to the drive shaft of the gearbox (Gearbox). In a car, the flywheel performs three functions:
- Increases the uniformity of rotation of the engine crankshaft, smoothes out fluctuations in the amount of torque transmitted from the pistons of the combustion chambers through the crank mechanism to the crankshaft of the internal combustion engine. The fact is that with each revolution of the crankshaft, two explosive acts of combustion of the fuel-air mixture take place in the car’s cylinders, and if not for the flywheel, the crankshaft would twitch violently twice for each revolution. The flywheel smoothes out these pulsations, accumulating and releasing kinetic energy of rotational motion.
- Provides transmission of torque from the engine to the gearbox. This unit is the primary, driving disk of the clutch mechanism. When the clutch pedal is released, the driven disk is pressed against the flywheel, ensures rotation of the gearbox output shaft and causes the driving front wheels of the VAZ 2109 to rotate.
- When starting a car, the flywheel transmits torque from the starter to the engine crankshaft. When the ignition key is turned to the “starter” position, the starter gear engages with the ring teeth, thus spinning the flywheel and crankshaft. An ignition spark is supplied to the cylinders and the engine starts. The ignition key returns to the “ignition” position and the starter gear disengages from the ring gear.
What is a flywheel for?
- As an element of the internal combustion engine. The main, so to speak, is its very first application. A photo will help you understand the functions performed in this case.
Here: 1 – connecting rod journal, 2 – counterweight, 3 – flywheel with crown 4 – main journal, 5 – crankshaft.
The operation of a four-stroke internal combustion engine implies that the energy from fuel combustion appears unevenly due to the fact that this process occurs at different times in different cylinders. This supply causes a time-varying moment on the internal combustion engine shaft. To smooth out these pulsations, as well as any unevenness during crankshaft rotation, a flywheel is used, which acts as a kind of accumulator of kinetic energy. The resulting torque must be transmitted to the wheels, and again in this process you cannot do without a flywheel. This purpose is based on the fact that it is used as the clutch input shaft, as shown in the photo:
Removing transmission elements
Repairing and replacing the VAZ 2109 flywheel are procedures of medium complexity and can be done on your own if you have some experience. In addition, you will need a workshop with an inspection pit, a standard set of plumbing tools, a gas burner to warm up the crown when installing it, and a torque wrench for tightening the bolts with a calibrated force.
How to remove the flywheel with minimal effort? The design of the VAZ 2109 gearbox and clutch makes it possible to dismantle them without draining the oil and disassembling the gearbox. To remove the transmission, perform the following operations:
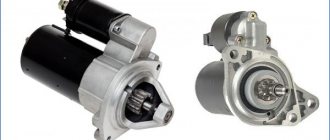
- Remove both trailing arms (often called sabers) and remove the starter.
- Disconnect both box supports and the rocker. Don't forget to disconnect the reverse sensor contacts.
- Remove the gearbox disconnected from the engine. This will give you access to the flywheel. Before dismantling, carefully mark its current position in relation to the crankshaft.
- When unscrewing the flywheel mounting bolts, it is advisable to ask someone to hold it to avoid it falling out. Be careful, it weighs about six kilograms.
Place the removed flywheel on a round podium so that the crown hangs above the working surface of your bench. Gently knock down the crown using a drift and a medium-sized hammer, without applying excessive force. Some car enthusiasts try to help themselves by heating the part. Replacing the flywheel crown on a VAZ 2109 does not require this - it heats up along with the flywheel, and the coefficient of thermal expansion of the parts practically coincides and no thermal gap is formed.
How to change a flywheel without heating? Unfortunately, no way. The reverse installation of the crown involves the use of heat shrinkage. In order to install the new crown in place, it is necessary to heat it to approximately 200 degrees. This can be done with a portable gas burner. Smoothly move the burner flame along the rim of the crown, ensuring uniform heating of the part to the specified temperature. The procedure will take you approximately 10-15 minutes.
Once the crown is properly warmed up, grab it with pliers and place it on the flywheel with the chamfer facing down. Using light hammer blows, press the part until it fits snugly against the flange. Let cool quietly in the air.
