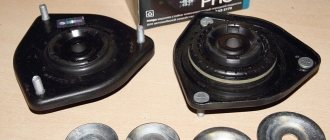
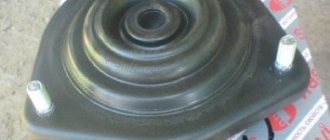
The support bearing serves to absorb and distribute shock loads coming from the wheel through the shock absorber strut to the car body. It is the main working element of the upper support of the front shock absorber, designed to connect the body and the strut.
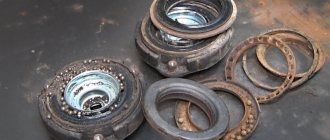
The design of the “support” is a bearing consisting of a rubber cage with metal balls placed in it, and two thick rubber gaskets that protect it from above and below.
In Lada Priora cars, support bearings are installed in the “cups” of the front shock absorbers, located in the engine compartment above each of the wheels.
Removing the shock absorber strut and disassembling it
We remove and disassemble the shock absorber strut to replace the upper support, bearing, spring, and telescopic strut.
The telescopic stand is non-removable and cannot be repaired. There are two options for removing the shock absorber strut. The first allows you to avoid subsequent adjustment of the steering wheel alignment angles, the second method requires less work, but after it requires adjustment of the steering wheel alignment angles. We replace the telescopic stand according to the second option. In the first option, remove the strut together with the steering knuckle, without loosening the nuts of the lower and upper (adjusting) bolts securing the strut to the steering knuckle. At the same time, we disconnect the tie rod end from the swing arm of the shock absorber strut (see “Replacing the outer tie rod end”), the ball joint from the steering knuckle (see “Removing the ball joint”), and remove the outer CV joint from the wheel hub (see “Removing front wheel drives"), and also remove the pad guide with the caliper and cylinder (see "Removing the front wheel brake disc")... ... and tie it with a cord to the holes in the wheel arch, making sure that the hose is not stretched. For ease of operation, remove the brake disc and brake disc shield (see “Removing the front wheel brake disc”). If the rack is supposed to be disassembled...
... use a 22mm wrench to loosen the rod nut, holding the rod from turning with a 6mm hexagon.
Using a socket or a 13mm wrench, unscrew the three nuts securing the upper strut support to the body...
...and remove the shock absorber strut along with the steering knuckle. To remove the shock absorber strut using the second method, disconnect the tie rod end from the swing arm of the shock absorber strut (see “Replacing the outer tie rod end”) and the front wheel brake hose from the holder on the strut (see “Replacing the front wheel brake hose”).
Use a center punch or paint to mark the location of the adjusting bolt.
...relative to the strut bracket. By aligning the marks during assembly, we will ensure that the deviation of the wheel camber angle from the original value will be insignificant.
Using a 19mm socket, unscrew the nuts of the bolts securing the strut to the steering knuckle, holding the bolts with a 17mm wrench. We remove or knock out the bolts with a soft metal drift.
This is what the top bolt and washer for adjusting the camber look like.
We remove the steering knuckle from the strut bracket. Having unscrewed the nuts securing the upper support, as shown above...
...remove the shock absorber strut. We install two ties on the spring, diametrically opposite to each other, so that they engage three turns of the spring. By evenly rotating the tie screws, we compress the spring. After the spring stops pressing on the support cups, unscrew the rod nut.
Remove the rebound limiter of the upper support.
Remove the top support.
Remove the upper spring cup assembly with the bearing and spring gasket.
Remove the spring with ties. Particular care must be taken when working with a compressed spring.
Remove the compression stroke limiter of the upper support.
Remove the front suspension compression buffer with a protective cover. If necessary, disconnect the compression stroke buffer and the protective cover.
Remove the bearing from the upper spring cup.
Remove the protective ring from the upper bearing ring.
Separate the spring gasket and the upper cup. We assemble and install the shock absorber strut in the reverse order. In this case, we insert the flange of the protective cover into the annular groove of the compression stroke buffer of the front suspension.
We install the spring so that the lower coil of the spring rests against the protrusion of the lower spring support. When assembling the upper support bearing, add grease to it. We set the head of the adjusting bolt securing the steering knuckle to the shock absorber strut to its previous position according to the previously applied marks. After installing the shock absorber strut, adjust the wheel alignment angles at a service station.
The support bearing serves to absorb and distribute shock loads coming from the wheel through the shock absorber strut to the car body. It is the main working element of the upper support of the front shock absorber, designed to connect the body and the strut.
The design of the “support” is a bearing consisting of a rubber cage with metal balls placed in it, and two thick rubber gaskets that protect it from above and below.
In Lada Priora cars, support bearings are installed in the “cups” of the front shock absorbers, located in the engine compartment above each of the wheels.
Types of shock absorbers
In a traditional MacPherson strut suspension design, the strut plays a major role. It performs both a supporting function and the function of a shock absorber (dampens body vibrations from driving over uneven roads). The unit, which in addition to the shock absorber itself also includes its support, spring, cup and slewing bearing, experiences considerable loads and requires attention and careful operation.
Signs of a unit malfunction are noises and knocking when driving over small uneven surfaces, squeaks, difficulty turning the steering wheel, hydraulic fluid leakage, body swaying on large potholes. Depending on the type of working environment and rigidity, shock absorbers are of three types:
- gas;
- oil;
- gas-oil.
Racks with gas and gas-oil working media are the most technologically advanced and reliable products, provide good vehicle stability and are adapted to a wide range of ambient temperatures. However, they are more expensive and have higher rigidity than oil shock absorbers. The latter are recommended for lovers of a comfortable, quiet ride due to their softness, but their service life is shorter, especially at low temperatures.
Self-replacement
- Park the car on a level surface.
- Using a jack, lift it from the desired side and remove the corresponding wheel.
- Pull out the cotter pin of the steering tip nut and unscrew it (19mm wrench).
- If you have a pin remover, use it. If you don't have such a tool, use a small pry bar and a hammer to press it out. Don't damage the pin thread!
- Having pre-treated with anti-rust liquid, unscrew the 2 nuts securing the strut in the steering knuckle (19mm wrench).
- In the engine compartment, remove the “cup” cover and unscrew the 3 nuts securing the upper support to the “cup”.
- Pull out the entire shock absorber from underneath.
- Using a pair of spring clips, compress the shock spring to relieve the load on the upper mount.
- Unscrew the nut securing the support to the rack (22 wrench and 9 wrench).
- Remove the support, disassemble it and remove the support bearing.
- Replace the old “support” with a new one, and secure the support to the shock absorber.
- Carry out assembly work in reverse order.
In order not to waste your time, it is recommended to replace both support bearings, and then be sure to adjust the angle of the front wheels.
Basic faults
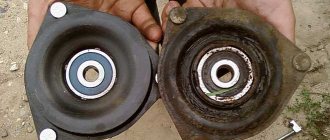
The main sign of a failed “support” is a knocking sound at the top of the support when driving on an uneven road. It may be a consequence of deformation or mechanical damage to the bearing gaskets, as well as a violation of the integrity of the bearing itself.
A malfunction of the “support” can be caused by:
- long service life;
- exceeding permissible dynamic loads;
- moisture or dirt entering the structure.
You can determine that the support bearing has become unusable in the following way. Lift the hood, remove the protective cover on the “glass” of the pillar, place your palm on its support, and rock the car up and down. If the bearing is faulty, you will hear a characteristic knocking sound accompanied by corresponding vibration. In this case, the “support” must be replaced.
The maximum bearing life for the Priora is 100 thousand km, however, given our roads, it wears out much faster. Therefore, the optimal mileage from replacement to replacement is 50 thousand km. In addition, the bearing must be replaced if any of the above faults are detected.
Replacement cost
The minimum price of a “supporter” for a Priora is 300 rubles. This is how much an original VAZ spare part costs (catalog number 2170-2902821). But there are also improved models produced by other manufacturers, such as TRACK, FENOX, SS-20, ASOMI, etc. Their prices can reach 800 rubles apiece.
If you want to change the entire upper support, be prepared to pay from 1200 to 3000 rubles.
To replace one “support” at a service station, you will be asked to pay at least 500 rubles. But you don’t have to pay for the work by carrying out the replacement yourself.
Preparing for work
This process is best carried out in the light if we are talking about the street. A bearing is a miniature component. It will be ideal if you drive Priora into the inspection hole. We will disassemble the front hub part, since this is more difficult than carrying out the same operation with the rear hub, especially without removing the strut. And now to the tools:
- Spanners for 17, 19.
- A bearing puller is the main tool, so without it you will have to dismantle the strut and perform a wheel alignment.
- The head is 30, it is desirable that it be equipped with a reliable wrench.
- The frame is usually a homemade tool, which is a cut of a pipe of a certain size. With its help we will knock out the hub.
- WD-40 lubricant.
Lada Priora, like other passenger models of this brand, is a front-wheel drive vehicle. There are many more parts in the front, hence the more complex process of removing the bearing. The rear support component of the hub is removed in the same way; you will need less time to do it, so the instructions describe the rear support bearing.
Consequences of late repairs
A worn shock absorber mount will reduce the service life of shock absorbers, springs, connecting rods and steering rods. The operation of the ABS system is disrupted, the wheel alignment angle is lost and, as a result, the steering wheel wobbles and uneven wear of the tire tread appears.
It is worth noting that replacing the front shock absorber supports must be done in pairs. This opinion is shared by the overwhelming majority of service stations. If it's time to change the right support, then the left one too, even if it is still serviceable. Otherwise, body roll may occur when turning, and the car will begin to pull to the side.
When replacing shock absorbers, it is also recommended to replace the supports.
Bearing replacement
- The process begins with flaring the hub nut, after which you can pull off the fastener. We will have to disassemble almost the entire hub, so each fastener that needs to be unscrewed should be lubricated with WD-40;
What are the best bearings to install on Priora?
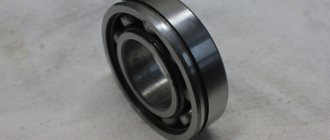
You have already figured out how the replacement takes place without dismantling the rack. But some owners of Lada Priora have a question: what is better to choose - a standard part or an alternative one. The most important thing is that it is a ball component; roller ones are not as durable. If there is no option for Lada Priora in the store, then it is better to take a part for Kalina. Some motorists recommend buying cheaper bearings for the “ten”, but it is better to look for more modern options.
Video on replacing the wheel bearing on a Priora is below.
