The installed equipment for receiving radio waves must be correctly connected to the head unit. The sensitivity of the radio receiver and the quality of playback depend on the correct installation. When driving, vibration occurs in the car antenna plug in the mounting socket.
If the installation is loose, interruptions in signal reception occur, which lead to failures in radio reception or the appearance of noise or interference.
Outdoor
To install an external antenna, fix it through a hole or with a magnet. The cable from the magnetically supported equipment is routed into the interior through the door seals. Because of this, the insulation of the cord is frayed, which leads to interference. In addition, a deformed seal allows water to enter the vehicle interior.
To install the antenna on the roof, you need to drill a mounting hole and a channel for introducing the wiring harness into the cabin. The connecting cable must be shielded with a design resistance of 75 Ohms. To place the equipment on the roof, you will need to remove some of the pads located on the racks, and then move the one-piece molded headliner a little. The element is removed carefully, since the deformation will be visible on the flat surface of the panel.
After drilling holes, it is necessary to apply a protective mastic, which will reduce the risk of corrosion. The antenna housing is mounted on the roof through a rubber gasket, additionally lubricated with sealant for external use.
This method reduces the amount of water entering the car interior.
The signal cable is attached to the active element through a set of plates made of copper and fluoroplastic.
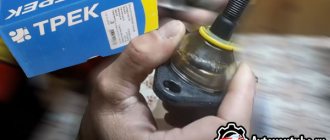
Set of spare antennas for BOSCH car antennas
Set of spare antennas for BOSCH car antennas. Self-adhesive flexible antenna for windshield antenna. Standard receiving elements of the BOSCH antenna are 50 cm long. The whisker manufacturing technology is similar to that of Robert Bosch Gmbh.
Completeness:
- Flexible mustache 50 cm long: 2 pcs.
- Mustache clamp: 4 pcs.
- Antenna clamp: 1 pc.
- Box: 1 piece
- Wet wipe: 1 pc.
Payment to Sberbank VISA card
The most convenient and profitable payment method for you. Payment can be made through the Sberbank Online system, through a payment terminal (Sberbank ATM), provided that you have a card from this bank. If you are not a client of this bank and you do not have a card, then you can top up your balance at any bank branch through an operator; they will accept cash payment and top up your balance. Commission from 0 to 1%
Re: Blaupunkt AutoFun Line Radio AR G 01-E
The laws of physics have not been repealed and miracles do not happen. Optimal for receiving frequencies of 88-108 MHz would be a passive pin on the roof of 75 cm, or 37 cm, 19 cm... (half, quarter wave, etc.) but then you need an RF amplifier. I would like to note that it is important that the length of the pin is a multiple of the received wavelength. I often see people thoughtlessly cutting off pins at their own discretion. You need to understand that a pin 25 cm long will receive worse than 19 cm. Moreover, the higher the K gain, the better and more durable the amplifier circuit should be. Otherwise, he himself will “plant” interference. The pin receives the electrical component of the wave. This subject most likely receives the magnetic component of an electromagnetic wave. Pros: cleaner reception and less interference. Minus: low efficiency (sensitivity) - you need a good amplifier, but even that cannot solve this problem. Conclusion: a good option for the city with strong signal levels from radio stations. Outside the city is not an option!
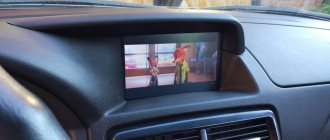
Step-by-step instructions for installation inside the cabin
Installation depends on the configuration of the selected model, but the general principles are practically no different. All features will be additionally indicated by the manufacturer.
- Degrease the antenna installation area with an alcohol wipe or other product.
- We place the triangle included with the device at the installation site, which facilitates correct positioning of the antenna.
- In the phases of the triangle, install the mounting disk and remove the triangle.
- Glue orientation strips that will help you correctly position the receiving parts of the antenna.
- The signal receiving antennae are installed on the pin of the mounting disk by gradually peeling off the film and fixing it in accordance with the reference stripes, after which they can be immediately removed.
- To lay the cable, remove the side trim of the car.
- We secure the wires using zip ties to the car's standard wiring or to the glass washer hose.
- For the convenience of further installation, it is necessary to dismantle the glove compartment of the car.
- We remove the radio from the socket to gain access to the connectors and wires.
- The blue power wire from the ISO connector connects to the power wire of the antenna amplifier.
- We connect the wire responsible for sending the signal to the corresponding connector on the rear panel of the head unit.
- The quality of work performed and signal reception are checked.
- All wires are neatly placed in the landing window of the radio.
- The radio is installed in place and fixed.
- The glove compartment and the removed lining are mounted back.
Laying the antenna cable. Lay the antenna cable under the…
- Image
- Text
Laying the antenna cable.
Route the antenna cable under the rubber seal around the windshield and down, or under the side pillar cover.
The grounding tape... ... should not form too large a loop, ... should not cause tensile stress on the housing, ... should not be too long, ... try to make it as short as possible. Do not use anodized screws. Make sure there is good contact with the ground. Alternative grounding methods are specified in paragraphs 7.1, 7.2, 7.3.
Sun visor or rear view mirror.
Unscrew the holder screw a little and pass the end of the grounding tape under the base of the holder. Then tighten the screw back until it penetrates the ground strap.
Grounding under the windshield seal/side pillar covering.
Lift up a small section of the windshield seal (or, if necessary, the side pillar cover). Scrape some paint off the contact area of the side post and apply a protective lubricant to the metal. Attach the grounding strip to the contact area. Place the clamp over the edge of the side post and the grounding strap. Lower the cover into place and press the gasket back in.
Grounding in another area.
Through the windshield frame or side pillar: drill a 2mm hole.
Electrical connections. Connect the antenna cable (HF) to the car radio. The cable is designed for a 12 V source. The connection is made through the automatic antenna input of the car radio. This connector is fused and the antenna is controlled in conjunction with the radio.
Antenna power + 12 V
Housing installation
First, slide it onto the bottom pin of the mounting disc, then press the top part down. Secure the housing with a screw.
Radio interference suppression.
Skillful suppression of radio interference generated, for example, by engine operation, etc. is the most important condition for the full operation of your car radio. Carefully follow all relevant instructions from the manufacturer of your radio in its operating instructions.
Printed in Russia
Comments
Select → I found the instructions for my car audio here! #manualza
- Click →
Addition to the instructions for the export version of the TT pistol: - Not intended for playing Russian roulette.
The antenna instructions say otherwise
The instructions for this Bosch active antenna say differently. According to the instructions, the antennae and the antenna body itself must be installed from the edge of the car body at least 6 centimeters. But I did it almost closely, and I didn’t notice any deterioration, everything works great. I wish you good luck too!
Installing or replacing the player requires connecting various cables that ensure the operation of the car multimedia system. When installing audio equipment yourself, the user needs to know how to connect the antenna to the radio. Erroneous actions lead to incorrect operation of the radio, as well as failure of electronic components or fuses.
Before connecting the antenna to the car radio, you need to find out the type and design features of the equipment used. Products for receiving radio signals or other waves may have a built-in amplifier that connects to the vehicle’s on-board network. A special filter is installed in the design of standard equipment to remove background noise and improve the quality of received signals. The device is located under the interior trim and has additional power from the vehicle battery.
On vehicles that have standard equipment or preparation for placing an acoustic system, the choice of antenna is made by the manufacturer. The vehicle owner may remove the existing product or not use it to receive radio signals. Additional equipment is installed when using the head unit with a television receiver or navigation module. Additionally, modification or replacement of the existing antenna will be required when placing special CB radio stations, which are used by drivers of heavy trucks.
Comments • 37
Very cool video, especially looking at the bottom of the car and the commentary there.
Fuck the yellow plus, connect it to the blue plus wire and the antenna will turn off with the radio
Thank you very much.
Thank you, this video was useful to me, I bought myself exactly the same one.
The black on the antennas is the housing. It's on the body of the car. I could attach it to the sun visor screw. Then there will be less interference.
Thank you this video helped me a lot
I don't understand why you're under salt.
Thanks bro. Briefly and clearly