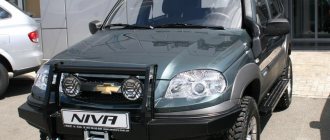
The bumper of any car sometimes has to be dismantled. This circumstance is due to the fact that this structural element is subject to frequent damage during an accident. In addition, performing various types of repair work also requires a similar procedure, since it creates obstacles to access to various components and assemblies of the machine during their repair. It will also need to be removed if the car owner decides to carry out tuning and replace the standard device with a non-standard one. That is why he must know how to remove the front bumper on a Chevrolet Niva.
Removing the front bumper
To dismantle the front bumper, follow the following algorithm:
- Disconnect the negative terminal from the battery to de-energize the Chevrolet (required so as not to short-circuit the electrical network).
- Remove the Niva wheels. This will be needed to provide access to the screws holding the front bumper.
- Remove the radiator trim by unscrewing the 4 screws. Be careful not to damage the radiator.
Removing the radiator grille on a Chevrolet Niva
- Using a Phillips screwdriver, remove the trim on the headlights without touching the optics.
- Using a 10mm spanner, unscrew the top bolts securing the beam.
- Remove the license plate from the Chevy and remove the screws underneath it.
- Turn off the fog lights. To do this, you will need to disconnect the terminal block, unscrew the bolts, and remove the headlights so that they do not interfere with the removal of the buffer.
- Remove the fasteners and the bumper itself.
- Don't forget to remove the temperature sensor located in the beam - it can be easily damaged. After this, you can dismantle the beam itself.
After removing the product, it can be painted, puttyed or any other manipulation. It is necessary to attach it back only after the applied compounds have dried.
When might this be needed?
First, let's look at situations where it may be necessary to remove the bumper. This will allow you to understand whether you need to do this work.
Most often this part is dismantled due to damage. It could be a crack or chip. Typically, such work is required after an accident, or due to an unsuccessful encounter with a curb. In any of these cases, you will have to replace the bumper. Here it is worth looking at the integrity of the fasteners; sometimes it is necessary to restore the possibility of securing the part.
Another case when it is necessary to dismantle the bumper is body work. Cars often start to rot. Parts covered with plastic are especially affected. The thing is that moisture and reagents accumulate under the plastic, which leads to accelerated rotting of the metal. Therefore, drivers are often faced with the need to digest aprons located under the bumper. To avoid such a problem, it is recommended to remove this part at least once every six months and treat the body against corrosion.
Removing the rear bumper
The rear bumper on the Niva is removed as follows:
- De-energize the Chevrolet in the same way as when removing the front bumper.
- Use a screwdriver to unscrew the screws holding the bumper trim to the body, as well as the nuts that secure the mudguards.
- Remove the cover fastening screws located at the top.
- After holding the clamps, remove the elements that reflect light.
- Using a 10mm wrench, unscrew the nuts on the Chevrolet Niva that secure the structure under the license plate and the reflective elements.
Removing the rear bumper on a Chevrolet Niva
- Remove the nuts located on the bottom of the Chevy rear bumper beam trim.
- Disconnect the wiring responsible for the license plate illumination.
- Moving the trim to the side, remove the wiring harness through the body hole.
- Remove the trim, unscrew the upper and lower bolts with which the beam is attached to the Chevrolet Niva body. Remove the rear beam.
Installing the rear bumper is done in the reverse order.
Removing the front and rear bumpers of a Chevrolet Niva
The bumper on a Chevrolet Niva needs to be removed when it needs repairs (painting, putty) or replacement. Before dismantling it, you need to know that this part is made of plastic. This means that it requires careful handling and can be easily scratched. In the Chevrolet Niva, like any other car, it is possible to remove the front and rear bumpers. To carry out the work you will need:
- key 10*12;
- hammer;
- Screwdriver Set;
- grinder (required if the fasteners are rusty).
It is best to remove the structure with your own hands when the car is standing in a pit. Car service centers also use lifts for convenience. Self-conducted dismantling of the structure takes up to half an hour.
In order not to get confused in all the fasteners and not to lose them, draw up a diagram of the location of screws and nuts on the structure, indicating their size and quantity - this way you will carry out installation work faster.
Repair
Often the body kit is removed due to its failure. Most often, drivers prefer to replace the bumper with a new one. But, in fact, in many cases it is possible to restore the bumper. This will avoid unnecessary costs for purchasing spare parts.
If there are minor scratches
, then you can simply polish this section of the bumper. This way you can restore the appearance of the part. If the damage is deep, you may need to use putty. After which the scratch is sanded, painted and polished.
Cracks are usually sealed. To do this, use a special device that slightly melts the plastic. But, when carrying out this work, it is worth stopping the further propagation of the crack. To do this, holes are drilled at its ends to the entire depth of the plastic. After which you can solder it.
Another common damage is broken pieces. But, even in this case, you can restore the bumper. Especially if a small piece of the body kit is lost. To do this, use fiberglass and PVA glue. The lost section of the part is formed from this mixture. After hardening, the bumper is sanded and painted.
Removing the front bumper
To dismantle the front bumper, follow the following algorithm:
- Disconnect the negative terminal from the battery to de-energize the Chevrolet (required so as not to short-circuit the electrical network).
- Remove the Niva wheels. This will be needed to provide access to the screws holding the front bumper.
- Remove the radiator trim by unscrewing the 4 screws. Be careful not to damage the radiator.
Removing the radiator grille on a Chevrolet Niva
- Using a Phillips screwdriver, remove the trim on the headlights without touching the optics.
- Using a 10mm spanner, unscrew the top bolts securing the beam.
- Remove the license plate from the Chevy and remove the screws underneath it.
- Turn off the fog lights. To do this, you will need to disconnect the terminal block, unscrew the bolts, and remove the headlights so that they do not interfere with the removal of the buffer.
- Remove the fasteners and the bumper itself.
- Don't forget to remove the temperature sensor located in the beam - it can be easily damaged. After this, you can dismantle the beam itself.
After removing the product, it can be painted, puttyed or any other manipulation. It is necessary to attach it back only after the applied compounds have dried.
Removing the rear bumper
The rear bumper on the Niva is removed as follows:
- De-energize the Chevrolet in the same way as when removing the front bumper.
- Use a screwdriver to unscrew the screws holding the bumper trim to the body, as well as the nuts that secure the mudguards.
- Remove the cover fastening screws located at the top.
- After holding the clamps, remove the elements that reflect light.
- Using a 10mm wrench, unscrew the nuts on the Chevrolet Niva that secure the structure under the license plate and the reflective elements.
Removing the rear bumper on a Chevrolet Niva
- Remove the nuts located on the bottom of the Chevy rear bumper beam trim.
- Disconnect the wiring responsible for the license plate illumination.
- Moving the trim to the side, remove the wiring harness through the body hole.
- Remove the trim, unscrew the upper and lower bolts with which the beam is attached to the Chevrolet Niva body. Remove the rear beam.
Self-production of thresholds
For some reason, store-bought products may not suit car enthusiasts, so some car owners make them themselves.
To do this, take two tubes with the diameter you need; for greater reliability, a special insert is made on them, which can protect the driver from slipping during rain or snow. They are secured using a step and bolts, and the step itself is connected to the threshold by welding. As you can see, you can make thresholds for a Chevrolet Niva with your own hands without any problems. For additional protection of the thresholds, as well as to give them a better design, special linings are installed, which come in several types:
- Plastic. This type is the most common. Their main advantage is low price, quality and aesthetics.
- Chrome plated. They are more reliable and attractive; when installing them, you can be sure of their durability.
- Decorative. As a rule, they are made of fiberglass and are very popular. Quite high quality products that are quite reasonably priced.
- With backlight.
To install door sill covers on a Niva Chevrolet, you need to study the instructions that come with them, then degrease the surface with acetone and attach the cover.
To summarize, we can conclude that there are a large number of accessories that can be used to further protect the car body. Since the choice is quite large, when choosing, you can rely on your personal preferences and financial capabilities.
Sources used:
- https://infokuzov.ru/kuzov/snyat-bamper-na-shevrole-niva
- https://chevroletov.ru/remont/niva7/1357-demontazh-zadnego-bampera-na-restaylingovoy-shevrole-niva.html
- https://carfrance.ru/snimaem-perednij-bamper-na-niva-shevrole-svoimi-rukami/
- https://expertniva.ru/kuzov/snatie-bampera.html
- https://djeeprus.ru/shevrole-niva/kuzov/bamper-na-nive-shevrole
How to remove the front bumper of a Niva Chevrolet Bertone
Today we have a 2016 Chevrolet Niva car for repair, on which the bumper was cracked after a minor accident, we will replace it and show how it is done correctly. A new bumper was purchased in the same color (liquid glass). Open the hood, unscrew the 3 screws on top (Torx T30). We dismantle the right wheel. We remove the eyelash, it is secured using a T20 Torx bolt. We remove the license plate, two bolts are hidden under it, unscrew them using a 10mm socket. We remove the second undamaged eyelash, it has a special “window” where we insert a screwdriver or other tool of suitable size:
Squeeze the clamp to the side and lift the eyelash up. Move the bumper a little to the side and see the main fastening of the eyelash on Torx T20:
Loosen the fastening screws from below. “Move” the bumper a little forward and turn off the fog lights.
Video of replacing the front bumper in a Chevrolet Niva:
Backup video on how to replace the front bumper in a Niva Chevrolet:
In the interior developments of the Italian design studio Bertone, special attention was paid to Chevrolet Niva bumpers. We are talking about the modernization of the car, which took place in 2009. If we consider separately the initial version of the Chevrolet Niva and the version after restyling, it is not so easy to notice the differences. However, they are quite significant and primarily affected the front and rear bumpers.
See also related news
| Ventilated brake discs for Samara (2108, 2109, 2113, 2114, 2115) |
| Typical operational defects of shock absorbers and methods for their elimination |
| Electrical diagram of Lada Kalina 2 (models 2192, 2194) |
| Replacing Bosch 7.9.7 ECU with January 7.2 |
| Wiring diagram VAZ 21214 Niva |
- climate control;
- electric windows;
- heated mirrors;
- heated seats;
- rain sensors.
In fact, there are a lot of comfort systems in cars. Nowadays people treat cars with personality. They want there to be a twist in each of them. That's why they create a custom look for each car. The main part of a car's appearance is its bumper. It not only has the function of exterior but also protection. If earlier automakers created a metal body for good strength, now almost all automakers create plastic bodies, and a metal body reinforcement is placed underneath it.
Under the body there is not only an amplifier, but also many sensors. It is for the purpose of replacing or repairing sensors that sometimes it becomes necessary to remove the front bumper. There is also a little space behind the bumper, which is why when tuning a car or adding new parts to it, this free space behind the bumper can be useful. Also, sometimes in small traffic accidents, only the bumper is damaged, which is why it needs to be removed and replaced or repaired. Sometimes it is much more convenient to remove the bumper at home, since, for example, you can replace the sensor at home. You will learn how to remove the front bumper of a Chevrolet Niva in this article.
Restyled Niva-2009
The launch of the first Chevrolet Niva model occurred in 2002. Until 2009, about 300,000 cars rolled off the assembly line. Market analysis showed that the product of the united company “GM-AvtoVAZ” won the hearts of Russian consumers, but it was impossible to stop there. Although the “experience” of the new Niva was practically insignificant compared to the number of years that representatives of the classic family lasted in production. The company's management decides to modernize the model by changing the interior. They decided to leave the technical part without any major changes.
At the end of 2008, the GM-AvtoVAZ company submitted an order to the Bertone design studio. The performers had specific tasks:
- Create a modern design that matches the Chevrolet style, while minimizing financial costs.
- While maintaining the geometry of the body, emphasize the kinetic characteristics of the car. Modernize the interior.
- The headlights, taillights, and radiator grille have undergone changes. But the Chevrolet Niva bumpers played a key role in finding the style.
Letter of the law
Just recently, car owners were shocked by the fact that in Russia the government banned the use
metal kenguryatniks. This is what beginners call literally everything that protrudes from the front of the car and is made of metal.
But remember that there is nothing in common between a bumper and a power bumper. These are different concepts with their own nuances. Regarding legislation, there is no clear law that would prohibit you from putting a body kit on your car. But if you want to make such a change to the design, you will have to take care of the corresponding entry in the PTS. It's not that difficult, don't worry.
Just recently, car owners were shocked by the fact that in Russia the government banned the use
Front bumper
The lines of the front buffer on cars produced before 2009 corresponded to classical ideas about the purpose of this body part. The plastic cladding was distinguished by the correct shape, which was inherited by European cars of the late 90s. It was conventionally divided into two parts. The upper part is represented by a simple plastic box with a casting for attaching a license plate. At the bottom there are air intakes and rectangular fog lights.
A gap formed between the bumper and the radiator grille, which revealed errors in the body assembly. In fact, this gap was not a mistake by the assemblers at all and was part of the design idea. Already in the reviews of the first owners there were such shortcomings as the lack of radiator protection and the relatively trivial design of the front bumper as a whole.
After restyling, the front buffer began to consist of more sections, which gave the car a modern style. The upper part is now made together with the radiator grille. As a result of this decision, the ill-fated gap completely disappeared. The air intake in the new version is covered with a decorative grille. It not only serves as part of the external design, but also has practical significance. The lower part of the radiator is protected from flowers, grass and other debris. Pursuing a commitment to the Chevrolet Captiva style, the designers decided to change the PTF frame. Round fog lights are installed on modern cars of the European and Asian automobile industry. The lower part of the front bumper is made of black plastic. There is one more detail that appeared after restyling. This is a bottom mounted amplifier.
Such amplifiers are designed to protect the radiator and engine crankcase. Usually installed on powerful SUVs.
Here they serve only a decorative function, but with them the car has its own special style. The amplifier emphasizes the status of an SUV.
Types of protection
Chevrolet Niva bumper protection is made of metal and comes in two types:
Simple. It consists of one or more one-and-a-half tubes, which are located no higher than the fog lights. They have a variety of designs, so each driver chooses the one he likes best. There are options that are made from more durable and expensive metals, and there are regular ones that can protect the bumper from small obstacles such as grass
This type of protection is preferred by drivers who do not want to attract attention to themselves. Difficult. This element received this name due to the complexity of its design; it is capable of protecting the front of the car from almost any impact.
Made from expensive and durable metal. As a rule, it is prohibited to use a crash guard in urban conditions, since in the event of a collision, great damage is caused to another car. For this reason, many manufacturers use reinforced plastic for production, and for this reason this element has more of a decorative function than a protective one.
Also, to strengthen and additionally protect the side of the car, porges are installed that perform the following functions:
- Protects the side of the body from dirt and small stones
- Serves as a footrest, this is especially important for children
- Improves the appearance of the car
They come in two types:
- Decorative. The price for this type of product is low, this design is quite easy to install. The main disadvantage of this design is its unreliability; if there is a strong enough blow it can burst.
- Power. The price for them varies from 3 to 5 thousand rubles. But as for reliability, they are able to withstand quite heavy loads.
Replacement of Niva Chevrolet thresholds, as well as installation, occurs as follows:
- First of all, the plastic plugs are removed from the inside of the side pillars
- Mortgages are threaded through a special technological hole in the side members. A wide mortgage is attached to the outside of the car, and a narrow one to the outside
- Installation is carried out from the rear of the car; an inspection hole is best suited for these purposes. A pair of nuts that secure the reaction rods are unscrewed and the thresholds are installed on the bolts
- Then, in the front part, fastening nuts are attached in the central part of the mortgage, and then in the outer part. On the extreme side there is adjustment.
Rear bumper
The rear bumper of the restyled Chevrolet Niva model does not have many distinctive elements, but there are practical innovations. The first thing that catches your eye is the horizontal insert in its upper part. Theoretically, it should serve for convenient loading or unloading of the trunk. But even if the owner doesn’t find any use out of it, it looks quite stylish. When the trim is painted in body color, the insert remains black. The rear bumper, like the front, has a lower part made of black plastic. The imitation buffer protection is also a license plate bracket. The air intake slots, even if they are not functional, give the car a semblance of GT styling.
By the way, in the updated version, body kits appeared on the wings and sills. The bumpers have smooth transitions under the linings, which creates a unified picture around the perimeter of the body.
Replacing a part or part of it
If there is more serious damage, removing dents will not help restore the integrity of the part. In this case, the body element, or its most severely damaged part, is replaced with a new one. When replacing, it is necessary to find a part identical to the one being replaced. If a specific area is being replaced, the patch is cut from the same metal. Next, it is welded to the part being restored.
Minor damage to the body, chips, scratches and dents on the car can be repaired independently without repainting. Parts of the body that were not previously damaged are subject to restoration. If paint cracking, breaks or kinks appear, repairs without painting will not be possible.
How to remove Chevrolet Niva bumpers
In order to dismantle the buffer from the car, you do not need any special devices, however, it is recommended to carry out the work using a lift or inspection pit.
Removing the new front bumper
- Remove the three screws at the top of the radiator grille (in the area of the hood latch).
- Unscrew the two bolts under the license plate.
- The bottom of the bumper is attached to the cross member with two bolts. They need to be unscrewed. But before this, it is necessary to dismantle the cover simulating the amplifier.
- After removing the front wheel, you should unscrew the 6 screws of the front part of the arch protection and 2 nuts with which this protection is additionally tightened.
- There is a decorative trim under the headlight. It needs to be moved to the side. This will give you access to two more screws.
- On the opposite side the work is duplicated. After this you can remove the bumper.
Removing the old front bumper
The algorithm for removing the front bumper from a car produced in 2002-2009 is somewhat different.
- First, the radiator grille is dismantled, since it is installed separately.
- The headlight covers are secured with screws that must be removed.
- It will not be difficult to find 4 bolts from above. They need to be unscrewed.
- Unscrew the 4 nuts from the bottom of the bumper.
- Unscrew the screws of the side fastenings.
- Remove the license plate and unscrew the mounting screws.
- Remove the bumper.
Removing the rear bumper
Removal of the rear bumper for all samples follows the same procedure.
- The mudguards are removed.
- Unscrew the screws on each side that secure the fender liners to the bumper.
- To remove the reflectors, you need to squeeze the latches from the inside. Under the reflectors, unscrew one bolt at a time.
- Remove the number and unscrew the 2 bolts underneath it.
- Unscrew the two nuts from the bottom.
When removing the bumper, care must be taken, since wires are attached to it from the inside, which are subsequently removed. Removing the bumper is not difficult. You just need to know where the fasteners are located.
Dent removal algorithm
Repairing a dent on a plastic bumper is carried out in accordance with the following algorithm:
the part is dismantled in order to have equal access to both its outer and inner surfaces; The dent area is thoroughly washed and dried, making sure that its entire surface is dry and clean on both sides. Traces of rust, dirt, and fungus that could interfere with the normal course of the restoration process are strictly excluded; After preliminary preparation, it is necessary to level the bumper with a hairdryer, gradually warming it up
The entire repaired area must be uniformly heated to a temperature at which the plastic bumper softens, but there is no need to bring it to the melting point and you should press on it carefully during the work process. If this rule is not followed, the bumper will have to be repainted; warming up the product with a hairdryer, or pouring hot water on it, pull out the dent with gradual circular movements, pressing on it from the side
It would be great if this type of dent straightening is done using a blunt metal object. After warming up the bumper, you should wait a few minutes before straightening the dent, since under the influence of high temperatures, it can begin to straighten itself, returning to its previous state; after the part has taken on the old or received a new shape, and the dent has been eliminated, the bumper needs to be cooled at the site of damage using a wet rag, as well as a can of compressed air.
Separately, it is worth noting that in the manuals devoted to the topic: how to remove a dent on a bumper, it is specifically stated that some types of plastics have “shape memory.” It lies in the fact that when repairs are carried out a relatively short time after the bumper has received damage, it can return to its previous shape somewhere in 10-15 minutes after the end of heating the product. If the bumper is cooled in time, it will be fixed in a new state and will never return to its previous state. As for putting it back in place, this can only be done when the damper has completely cooled down and is not afraid of serious mechanical impacts.
Removing the front bumper
To dismantle the front bumper, follow the following algorithm:
- Disconnect the negative terminal from the battery to de-energize the Chevrolet (required so as not to short-circuit the electrical network).
- Remove the Niva wheels. This will be needed to provide access to the screws holding the front bumper.
- Remove the radiator trim by unscrewing the 4 screws. Be careful not to damage the radiator.
Removing the radiator grille on a Chevrolet Niva
- Using a Phillips screwdriver, remove the trim on the headlights without touching the optics.
- Using a 10mm spanner, unscrew the top bolts securing the beam.
- Remove the license plate from the Chevy and remove the screws underneath it.
- Turn off the fog lights. To do this, you will need to disconnect the terminal block, unscrew the bolts, and remove the headlights so that they do not interfere with the removal of the buffer.
- Remove the fasteners and the bumper itself.
- Don't forget to remove the temperature sensor located in the beam - it can be easily damaged. After this, you can dismantle the beam itself.
After removing the product, it can be painted, puttyed or any other manipulation. It is necessary to attach it back only after the applied compounds have dried.
Removing the rear bumper
The rear bumper on the Niva is removed as follows:
- De-energize the Chevrolet in the same way as when removing the front bumper.
- Use a screwdriver to unscrew the screws holding the bumper trim to the body, as well as the nuts that secure the mudguards.
- Remove the cover fastening screws located at the top.
- After holding the clamps, remove the elements that reflect light.
- Using a 10mm wrench, unscrew the nuts on the Chevrolet Niva that secure the structure under the license plate and the reflective elements.
Removing the rear bumper on a Chevrolet Niva
- Remove the nuts located on the bottom of the Chevy rear bumper beam trim.
- Disconnect the wiring responsible for the license plate illumination.
- Moving the trim to the side, remove the wiring harness through the body hole.
- Remove the trim, unscrew the upper and lower bolts with which the beam is attached to the Chevrolet Niva body. Remove the rear beam.
Installing the rear bumper is done in the reverse order.
Removing the front bumper
To dismantle the front bumper, follow the following algorithm:
- Disconnect the negative terminal from the battery to de-energize the Chevrolet (required so as not to short-circuit the electrical network).
- Remove the Niva wheels. This will be needed to provide access to the screws holding the front bumper.
- Remove the radiator trim by unscrewing the 4 screws. Be careful not to damage the radiator.
Removing the radiator grille on a Chevrolet Niva
- Using a Phillips screwdriver, remove the trim on the headlights without touching the optics.
- Using a 10mm spanner, unscrew the top bolts securing the beam.
- Remove the license plate from the Chevy and remove the screws underneath it.
- Turn off the fog lights. To do this, you will need to disconnect the terminal block, unscrew the bolts, and remove the headlights so that they do not interfere with the removal of the buffer.
- Remove the fasteners and the bumper itself.
- Don't forget to remove the temperature sensor located in the beam - it can be easily damaged. After this, you can dismantle the beam itself.
After removing the product, it can be painted, puttyed or any other manipulation. It is necessary to attach it back only after the applied compounds have dried.
Removing the rear bumper
The rear bumper on the Niva is removed as follows:
- De-energize the Chevrolet in the same way as when removing the front bumper.
- Use a screwdriver to unscrew the screws holding the bumper trim to the body, as well as the nuts that secure the mudguards.
- Remove the cover fastening screws located at the top.
- After holding the clamps, remove the elements that reflect light.
- Using a 10mm wrench, unscrew the nuts on the Chevrolet Niva that secure the structure under the license plate and the reflective elements.
Removing the rear bumper on a Chevrolet Niva
- Remove the nuts located on the bottom of the Chevy rear bumper beam trim.
- Disconnect the wiring responsible for the license plate illumination.
- Moving the trim to the side, remove the wiring harness through the body hole.
- Remove the trim, unscrew the upper and lower bolts with which the beam is attached to the Chevrolet Niva body. Remove the rear beam.
VESKO-TRANS.RU
AutoNews / Reviews / Tests
- Home
- Auto garage
- How to Remove the Rear Bumper of a Niva Chevrolet
How to Remove the Rear Bumper of a Niva Chevrolet
Place the car on a lift. Raise the hood, disconnect the ground wire terminal from the battery. Unscrew three screws 1 (Fig. 8-11) of the upper bumper mounting.
Removing the bumper on Niva Chevrolet
Rice. 8-11. Attaching the bumper to the upper cross member of the front end:
Unscrew two bolts 1 (Fig. 8-12) securing the bumper (in the license plate area).
Rice. 8-12. Attaching the bumper to the upper cross member of the front end:
3.5. shiny overlay.
Unscrew two nuts 1 (Fig. 8-13) of the lower bumper mounting.
Rice. 8-13. Attaching the bumper to one of the front cross members (bottom view):
Unscrew 6 screws 1 (Fig. 8-14) and two nuts 3.5 securing the protective casing, right/left, front wheel arch and remove the protective casing 3.
Rice. 8-14. Attaching the bumper and right/left wheel arch protective cover:
Disconnect block 1 (Fig. 8-15) of the front wiring harness from the fog lights.
Unscrew one screw 1 (Fig. 8-16) of the unfamiliar wheel arches, fastening the headlight covers 1 (Fig. 8-17).
Rice. 8-15. Placement of fog lights right/left:
Installing a bumper on a Chevy Niva
Rice. 8-16. Attaching the headlight cover to the bumper:
Remove trim 1 (Fig. 8-17) of the right and left headlights, overcoming the resistance of the double-sided adhesive tape.
Removing the front bumper of a Chevrolet Niva
Unscrew two bolts 1 (Fig. 8-18) of the upper one. side mounting of the bumper to either the upper cross member of the body and remove the bumper 2.7.
Rice. 8-18. Side bumper mount:
Removing the front bumper beam.
Unscrew one screw 1 (Fig. 8-19) of the side fastening of the bumper beam.
Rice. 8-19. Side mounting of the front bumper beam:
2. front bumper support.
Unscrew the four nuts 1 (Fig. 8-20) securing the front bumper beam and remove the support.
Removing the bumper on a Chevrolet Niva
Installation of beam and front bumper.
Install the beam and front bumper in the reverse order of removal, at the same time ensuring uniform gaps in the interface of the bumper with the lights and front fenders.
The support and the bumper must be secured to which it remains for our client to make the attachment points provided for by the design.
Dismantling the front bumper.
Unscrew the 5 screws 1 (Fig. 8-21) securing one of the bumper trim, remove the trim
Rice. 8-21. Removing either the upper bumper trim:
4.5. lower bumper trim.
Unscrew the two screws 1 (Fig. 8-22) securing the fasteners and remove the fasteners 5.
Rice. 8-22. Fastening the mounts:
1. fastening screws;
Disconnect the 20 latches 1 (Fig. 8-23) securing the upper grille and remove the grille 3.5, disconnect the 6 iron latches from the upper grille and remove the shiny trim 2.4 (Fig. 8-12).
Rice. 8-23. Bumper upper grille mounting:
5. upper bumper grille.
Unscrew three screws 1 (Fig. 8-24) securing the fog lights, remove headlights 3, right and left. Unscrew two 3.5 screws each of the fastening or the upper grille.
YouTube Premium
Do you want to save this video?
- Complain
Report a video?
Liked?
Did not like?
In this lesson, we repair a stock bumper from a Chevrolet Niva using flat BAMPERUS electrodes. material PP+EPDM More information about the technology on the website of the developer and manufacturer of materials: https://bamperus.ru/ We carry out repairs using flat electrodes for PP plastics. Information about the material and where to buy: https://bamperus.ru/ploskie-elektrody-. buy the tool here: https://bamperus.ru/instruments.html
Description of materials for radiator repair on the manufacturer’s website here: https://bamperus.ru/dlya-remonta-sopol. There you can buy both the material and the recommended tool with postal delivery to your city. Description of the tool used for repairs here: https://bamperus.ru/instruments.html
If you haven’t found a working representative in your city here: https://bamperus.ru/predstaviteli.html, then write to us, we will send the necessary tools and materials for repairing radiators, bumpers and other auto plastics to your city or country. We ship tools and materials all over the world. Dear Friend! We are developers and manufacturers of unique materials for professional repair of bumpers, radiators and other auto plastics. Deliver unique materials by mail to any country of Europe, USA, Australia, the African continent. Payment we accept PAYPAL for Your orders send in English here: https://bamperus.ru/dlya-fizicheskikh-.
Such materials for the repair of plastics you will not find anywhere else in the world!
Chevrolet Niva rear bumper
Rice. 8-24. Mounting the fog lamp:
1. screws for securing the fog lamp;
4.5. screws for fastening or the upper grille;
3. left fog lamp.
Disconnect seventeen latches 1 (Fig. 8-25) of the fastening or upper decorative grille of the bumper, remove grille 4.
Rice. 8-25. Attaching one of the bumper grilles:
2.4. lower bumper grille.
Cut off the factory symbol 2 with string (fishing line) 1 (Fig. 8-26), overcoming the resistance of the double-sided adhesive tape (string, nylon twisted thread).
Assemble the front bumper in the reverse order of disassembly.
Removing the rear bumper assembly.
Place the car on a lift. Raise the hood, disconnect the ground wire terminal from the battery. Open the tailgate, remove caps 1 (Fig. 8-27) from the bolt heads, unscrew the 5 bolts of the upper bumper fastening, remove the upper trim 2.4.
Rice. 8-27. Rear bumper upper mount:
4.5. upper bumper trim;
Unscrew two nuts 1 (Fig. 8-28) of the central fastening of the bumper in the area where the license plate is installed.
Rice. 8-28. Attaching the rear bumper in the license plate area:
Unscrew the three screws 1 (Fig. 8-29) securing the mudguard, unscrew one screw 1 (Fig. 8-30) and two nuts 2.4 of the unfamiliar wheel arches, remove the pressure plate 4 and the apron 3.
Rice. 8-29. Apron attachment:
1. screw; 2. rear bumper; 3. Dirt-proof apron.
Attaching the apron to Niva Chevrolet
Rice. 8-30. Apron attachment:
Unscrew two screws 1 (Fig. 8-31) securing the bumper to the right/left rear wheel arch.
Rice. 8-31. Attaching the bumper to the rear wheel arch right/left:
1. screws; 5. bumper assembly.
Unscrew two screws 1 (Fig. 8-32) of the lower bumper mounting to the bumper support.
Rice. 8-32. Lower bumper mount:
Bend back the trunk trim on the left, disconnect terminal 1 (Fig. 8-33) of the license plate light harness from the body and block 5 of the license plate light wiring harness from the rear wiring harness.
Rice. 8-33. License plate light harness wires
:
1. ground wire terminal of the license plate light harness;
2. license plate light wiring harness connector to the rear wiring harness.
Remove the reflectors, unscrew one nut 1 at a time (Fig. 8-34), remove the bumper.
Rice. 8-34. Side bumper mount:
1. nut; 2. rear bumper.
Removing the rear bumper beam
Unscrew one bolt 1 (Fig. 8-35) of the side fastening of the rear beam 4.5.
Unscrew two bolts 1 (Fig. 8-36) securing the rear bumper beam to the body and remove support 4.5.
Rice. 8-36. Attaching the rear bumper beam from below:
1. bolts; 5. rear bumper support.
Installation of beam and rear bumper
Install the beam and rear bumper in the reverse order of removal; in this case, ensure uniform gaps between the bumper and the rear fenders and lights. The support and bumper are fixed to it, so our client can make the attachment points provided for by the design.
Unscrew three screws 1 (Fig. 8-37) and remove the right and left bumper extensions 2.4, unscrew three screws 3, fastening the deflectors 4 of the rear bumper and, overcoming the resistance of the double-sided adhesive tape, remove the deflectors.
