Most owners of passenger cars of the Lada Samara 2 family are wondering how to remove the front bumper on a VAZ 2114/2113/2115 on their own. For drivers who are well versed in technology, removing and replacing the part is not difficult. If the bumper is damaged, they do not go to specialized auto repair shops or service stations; such repair work is performed with their own hands.
This review is intended for new car enthusiasts who want to understand the mechanics of a car, save money and carry out minor repairs on their car themselves.
How to replace a VAZ 2114 bumper
The VAZ bumper is an energy-absorbing device in the form of a bar, located in the front and rear parts of the Lada Samara 2 car. This important safety element is a mandatory part of the body and gives the car a beautiful appearance.
Body kits have 2 functions:
- Decorative. The car looks more improved. The manufacturer developed inflated body elements as styling for the VAZ 2114. They look aesthetically pleasing and at the same time increase downforce when driving at high speeds, which improves safety.
- Protective. The bumper protects the car from light impacts and damage, protects the reinforcing beam, body and other parts.
VAZ 2113/2114/2115 models are equipped with 2 bumpers:
- in front of him;
- rear
Body kits are made from 2 types of plastic material:
- thermoplastic;
- thermosetting.
Thermoplastic plastic can be easily softened and is combined into a homogeneous structure during repairs. Thermosets cannot be repaired by welding.
The material marking is located on the inside of the body element.
As the vehicle is used, various collisions and obstacles may occur, followed by deformation of the body kit. Replacing the front bumper of the VAZ 2115 in this case is mandatory.
If you leave the damaged part, then with a possible next impact, all the energy will be directed to the car body, as a result of which many mechanisms will fail:
- radiator, its grille;
- fan;
- wheel arch liners
In case of minor damage, such as scratches, small cracks, the body kits can be glued, puttied and painted. The reasons for removing this part are as follows:
- deformation of an element as a result of a collision or impact;
- engine repair, reinforcement beam, radiator replacement;
- installation of a protective mesh, decorative lining;
- replacement of headlights, installation of optics.
The rear body kit of the VAZ 2114 differs from the front one in the absence of holes for the vehicle registration number.
The reasons for repairing and replacing the rear bumper of a VAZ 2114 are the same as for the front element:
- integrity violation;
- body deformation;
- chips, cracks.
When choosing a body part, the car owner must adhere to the following recommendations and rules:
- Thickness. Thicker material increases quality and protection.
- Color. A painted body kit is selected to match the color of the car, while an unpainted body kit is used for major body repairs with full individual car painting.
- Compatibility. All elements must fit in size. It is better to choose ones with holes for fog lights, especially for the VAZ 2114.
- Manufacturer. There are brands from different manufacturers on the market, but for VAZ 2113-2115 it is recommended to buy a new domestic bumper.
- Price. The cost of Russian bumpers is lower, and the quality is higher than that of foreign ones.
By applying these recommendations in practice, the car owner will be able to choose an excellent option according to his preferences and budget.
Reasons for withdrawal
How to remove the front bumper on the Lada Kalina yourself
In fact, there can be many reasons for removing the front end of your car. Everyone has their own views on this issue.
But let’s still name the main reasons why car owners most often turn to car services or decide to dismantle and even replace the front bumper on their own.
- The replacement was caused by damage to the element as a result of a collision or accident. The integrity of the structure is compromised, and driving with a broken front end is not particularly pleasant.
- Dismantling work with the subsequent return of elements to their place can be carried out due to engine repairs, when replacing the radiator and other components of the engine compartment.
- External modification in the form of tuning the front of the car.
- Replacement of headlights, installation of new optics.
- Installation of decorative overlays, mesh.
Dismantling works
If the bumper is broken, then you have two ways to solve this issue - replace it with a new one or try to restore the old one. This largely depends on the desire and degree of breakdown of the previous element.
How to choose
When choosing a new bumper for the front of your car, you should adhere to several of the most important, but fairly simple rules and recommendations.
We will be happy to share them with you.
| Selection criterion | Peculiarity |
| Plastic thickness | Try to choose elements made from the thickest layer of plastic. This has a positive effect on quality and protection |
| Color | If you buy a bumper that is already painted, carefully match it to the body color of your car. If it's unpainted, then you'll have to guess with paint |
| Compatibility | Many people purchase body parts from other VAZ models or from foreign cars. For the 2114, many people call the Sniper bumper, designed for the VAZ 2115 model, ideal. Moreover, choose a design with holes for fog lights |
| Manufacturer | There are many companies producing bumpers today. But experts agree that native elements are best suited for VAZ |
| Price | The cost of domestic native bumpers is significantly lower compared to imported analogues. Moreover, the quality may be even higher than that of foreign models. The average price for a VAZ front end is 2000-2500 rubles |
An unpainted bumper is usually 500 rubles cheaper, but there may be problems finding suitable paint. Therefore, we advise you to pay a little more. AvtoVAZ produces elements painted exactly to match the colors of the cars they produce. Problems may arise here with foreign analogues.
Front bumper
Replacing the front bumper of a VAZ 2114 with your own hands takes a little time. If it is necessary to replace the radiator or grille, the procedure takes longer. Removing the body kit for all VAZ 2113-2115 models is carried out in the same way.
Tool
To replace the body kit you will need the following tools:
- Screwdriver Set;
- open-end wrenches 8 and 10 mm;
- 13 mm ratchet head with crank.
Step-by-step removal
To remove the front bumper of a VAZ 2114, place the car on a viewing hole or a lift. The algorithm for dismantling the body kit is as follows:
- The electrical connections to the license plate and fog lights must be turned off before any work can be done.
- The fastening bolts and nuts are treated against rust, as well as for better loosening, with VD-40 aerosol.
- Unfasten the front wheel fenders.
- Unscrew the fender liner mounting plate with a 10 mm wrench.
- Remove the 3 screws that are attached to the body kit.
- Using a 8 key, remove the 6 screws securing the fender liner to the front fender.
- Pull back the fender liner.
- Remove the radiator and headlight trims.
- Using a 10 mm wrench, unscrew the 2 nuts securing the left side of the bumper.
- Pull it a little to the side so that the studs come out of the body bracket.
- In a similar way, you need to unscrew the right side of the bumper.
- Using a Phillips screwdriver, remove the mounting screws under the license plate and unscrew the 2 screws located below. Disconnect the license plate.
- Remove the bumper.
If the amplifier is damaged, replace it. Using a 13 mm socket, unscrew 2 nuts on each side. The amplifier is adjusted during installation using shims.
Installation
Before installing a damaged body kit, it is necessary to repair it and paint it. Installation of the front bumper on a VAZ 2114 is carried out in the reverse order of dismantling. Remember this rule: when we install the bumper in place, it is necessary to check all the gaps between the amplifier, fender, body, headlights, grilles and only then attach it.
Removal and replacement
Now let's talk directly about how to remove and replace the front bumper on a VAZ 2114 car. We advise you to first watch the training video, which will give you a visual idea of the upcoming work.
To work you will need a certain set of tools. It includes:
- A set of screwdrivers or a Phillips screwdriver;
- Open-end or socket wrench 10 by 8 millimeters;
- Head with a 13 mm collar;
- Free time;
- Pit or lift.
Clearly in need of restoration
On average, the replacement job takes about an hour. But if you are new to this business, then get ready to spend a little more on the procedure. Regardless of the time spent, you can save a lot on car workshop services. In addition, you can never be completely sure that specialists will do a better job than you could do with your own hands.
Amplifier
The sequence of work is now as follows.
- Unscrew the protection on the front wheels. To do this, remove three screws using a screwdriver.
- Move the protection aside and give yourself access to the inside of the bumper.
- Using a 10 mm wrench, unscrew the two mounting nuts located inside.
- Carry out dismantling work on the side of the second wheel in the same way.
- Remove the license plate. Everything is simple here. Unscrew two screws under the number and two more of the same screws in the windows just below the license plate.
- Using a little force with your hands, remove the front end.
- The assembly procedure is performed in reverse order. You can first repair the damaged bumper, or immediately install a new body element. The choice is yours.
Amplifier replacement
In the case of the front bumper, everything is very clear with the fasteners and their dismantling. But before installing a new body element, be sure to check the condition of the amplifier. If it is damaged, we strongly recommend that you replace the front end component.
To replace the amplifier yourself you will need:
- Remove the front bumper following the instructions above.
- Remove the two mounting nuts using a 13mm socket. In the case of the VAZ 2114, there are two such nuts on each side.
- Leave the adjusting washers on the studs.
- Unscrew the brackets located on the sides from the old bumper and install them on the new one. There are a total of three screws on each side.
- Adjust the new amplifier to the required height, set the gaps between the amplifier, fender and headlights. This is done through slits.
- Put the entire structure back together.
Obviously, removing the front bumper is not that difficult. This must be done if this element of the front part of the car is damaged. Operating a car with a damaged bumper can lead to serious consequences.
Loading …
Rear bumper
In the VAZ 2114, as in other models 2113 and 2115, it is not difficult to remove the rear bumper, but outside help will be useful. The amplifier is removed along with the body kit to check the condition.
Dismantling
The rear bumper on VAZ 2115, 2114 and 2113 is mounted on the rear beam using brackets. To remove the rear bumper of a VAZ 2114, you must perform the following steps:
- Remove the rear wheel fenders.
- Use a metal brush to clean off dirt, grease, and oil, and inject VD-40 aerosol while working.
- Using a 10 mm socket with a wrench, unscrew the 4 bolts on which the bumper should be attached, 2 bolts on each side.
- Unscrew the 3 nuts of the bracket for fastening the reinforcement beam using a 13 mm wrench.
- The beam with the bumper must be dismantled.
- Unscrew the screws and disconnect the beam.
The damaged bumper is ready for repair or replacement.
We install it in place
After the rear body kit has been repaired or replaced, it must be put back in place. All procedures for installing the rear bumper on a VAZ are performed in the reverse order of removal.
The bumper is attached carefully so as not to damage it. Structural elements must be installed correctly, without changes in the gaps between parts. When performing work, be careful, follow the recommendations and you will be able to complete the procedure without special skills and knowledge.
Dismantling and installation
We have discussed all the preliminary points, so we can proceed directly to solving the issue of a deformed, damaged rear body element.
- Raise the car using a jack.
- Using a Phillips screwdriver, unscrew all the screws that hold the fender liners. After this you can easily remove them.
- Using a 10 mm wrench, unscrew the mounting bolts located on the wing arch. There are two of them in total and they secure the bumper.
- We proceed in the same way with fasteners on the other side.
- Now take a 13 mm wrench (preferably a socket) and remove the three bracket nuts. It holds the reinforcing beam.
- Next, you can remove the entire bumper along with the beam.
- The bumper on the amplifier is held on with self-tapping screws. If you unscrew them, you can separate the two elements.
- The reinforcing beam can be put aside for now if there are no signs of damage on it. If there are any, think about what would be the best course of action - repair or replace with a new one.
Dismantling works
- Assess the condition of the plastic part. Some cracks can be sewn up, puttied and covered with a new coat of paint. If the damage turns out to be more serious, then there is no point in repairing it. It's easier to simply purchase new plastic components for the rear of your car.
- After repairing or purchasing a new element, begin the installation procedure. To do this, simply follow the instructions in reverse order.
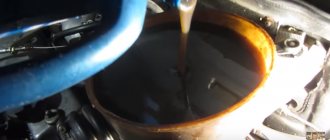
- At the same time, be sure to lubricate all mounting bolts with grease or regular machine oil.
- Carefully tighten the bolts. Make sure that the same gaps are maintained between the bumper and the body.
https://youtube.com/watch?v=6ZjYGLzagy8
The rear of the body should be inspected regularly, even in the case of minor impacts. Scratches will only lead to the need to paint the bumper, but cracks can lead to much more serious problems and financial costs.
If, as a result of a collision or a reversing collision, even a slight blow to the rear body element was caused to some object, we advise you to remove it and inspect the condition of the plastic, the reinforcing beam and the body of your car itself. Small dents may not seem dangerous, but they can become a source for the development of corrosion and cover an impressive part of the body with rust. Is it worth the risk?!
A bumper is a part of a car designed to absorb and absorb part of the energy when colliding with any obstacle. If we talk about the VAZ 2114 car, then both the front and rear here perform a purely decorative function - their design does not provide for the damping of impact energy. Therefore, any collision, even the mildest one, requires repair or replacement of the front or rear bumper.
VAZ 2114 owners most often encounter the following problems:
- loss of integrity due to a collision;
- chip or crack - greatly spoil the appearance of the vehicle;
- deformation of the body, leading to the destruction of the bumper.
Due to all of the above factors, it is often necessary to replace the front or rear bumper.
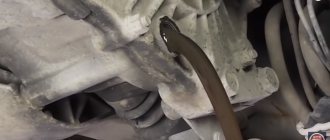
The rear bumper of the VAZ 2114 car is made of plastic, so there is simply no need to talk about its protective qualities. Fastening is carried out on the reinforcing beam and the car body using nuts. Its difference from the VAZ 2114 model is also that it does not have holes for the registration number.
Attaching the rear bumper (1) to the rear beam (2) using brackets (3)
How to remove and replace the front and rear bumpers on a VAZ 2114
In accordance with the general trend, on Russian-made VAZ 2113–2115 cars, bumpers made of plastic and painted in the color of the car are installed. These are the most vulnerable body elements, located low above the road surface and taking on all kinds of mechanical loads. The front body kit suffers especially, where stones often fly from under the wheels of oncoming traffic, which is why parts have to be removed for repair or replacement. But thanks to the simplicity of the design, any motorist with the time and desire can handle the removal. Let's consider the task of removing the front and rear bumpers using the example of the VAZ 2114 and analogues.
Selecting a new part
When replacing, it is necessary that the new part exactly matches the dimensions of the original product. It often happens that the sides of the VAZ-2114 bumper, when replaced, do not reach their seat, and the joint with the front fender turns out to be ugly. This happens because manufacturers of non-original parts make the bumper slightly smaller than the factory one - the price to pay for a cheaper part. Another problem with aftermarket bumpers is that over time the paint and varnish will flake off the surface. This happens due to non-compliance with the dyeing technology.
The best option is to purchase an original part. Even in this case, the purchase will cost less than repairs.
Why remove bumpers on VAZ 2113-2115
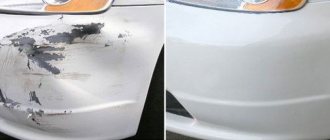
What kind of “blows of fate” do the front and rear body kits experience during operation? Either a stone will fly, then someone in the parking lot will catch it and scratch it, or even the driver himself will drive into a snowdrift where an iron pipe is hiding. Not to mention such little things as traces of insects crashing on the front. Some of the listed defects can be eliminated without removing parts from the car, but in case of serious damage, dismantling is inevitable.
Such damage cannot be repaired, the body kit is easier to change
A separate story is a collision during an accident, as a result of which the bumper often turns into outright trash, unsuitable for repair. Fortunately, spare parts for Russian cars are freely available and their prices are quite affordable.
Reference. The cost of the front and rear body kits is almost the same and starts from 2,600 rubles. for an unpainted part. Prices for products with color coating start from 3,250 rubles.
The main reasons why owners of the “thirteenth” and “fifteenth” VAZ models have to dismantle the bumpers are as follows:
- It is necessary to completely repaint the car and perform body repairs.
- To repair or replace a broken body kit.
- It is easier to install fog lights on the removed front element.
- You need to get to other body parts located under the bumper.
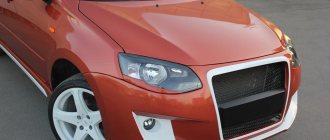
- It was decided to throw away the stock factory body kits and install beautiful elements of the original shape, that is, to do partial styling of the car.
This is what the VAZ 2114 styling front body kit looks like
Note. To this day you can find budget black bumpers on VAZ 13-15 series cars. The owners of these cars, as soon as possible, remove unsightly parts in order to paint them in the desired color or replace them with painted ones.
The first 2114 models came with black body kits
When do you have to remove body kits?
Most often, motorists have to dismantle the front bumper of the VAZ 2110-2112, since it is the first to reflect impacts from stones, unsuccessful runs onto curbs and other obstacles. The element is especially often damaged in winter due to unremoved snow, which turns into an icy mess. In the best case, the paint is scratched from contact with ice; in the worst case, the bumper simply breaks, because the plastic becomes brittle at low temperatures.
For repairs, it is better to remove such a body kit from the car.
Reference. The rear and front body kits of the VAZ 2110, 2111 and 2112 models differ little in shape and are attached to the body almost identically. At the same time, the rear one from the tens cannot be replaced with a part from the VAZ 2112, but the front one can.
As a rule, such problems plague inexperienced drivers who have little sense of the dimensions of their “ten”. The paintwork of the rear bumpers does not suffer as much; cracks usually appear on them due to collisions with various obstacles when reversing. An extreme case is damage as a result of an accident.
It is very difficult to repair such a crack.
Removal of the rear and front body kits on VAZ cars of the “tenth” family is carried out for the following reasons:
- When you need to get to the main body parts covered by a plastic bumper.
- For complete painting or polishing of a car.
- You can remove small chips and scratches on the coating of elements directly on the car, but for more serious repairs and repainting it is better to remove them.
- In case of replacing standard parts with more attractive styling body kits, giving the car an original appearance.
- For mounting and connecting fog lights.
This is what the Brooklyn styling rear element looks like
Note. The rear element of the VAZ 2110 has a license plate illumination lamp built into it. Sometimes the bumper has to be dismantled to deal with the wiring or other problems with this light.
What is important to know when purchasing new products for VAZ 2113, 2114 and 2115
Unlike foreign-made cars, it is easy to buy the necessary spare parts for the VAZ 2113, including new bumpers.
In the retail chain, these parts are found in two forms:
- black, without painting;
- painted in any color of your choice.
Body kits of different colors and shapes
Advice . If you decide to change body kits because of their unpresentable appearance, then it is easier and cheaper to buy ready-made products painted in the color of the car. The difference in price is 700-900 rubles. will not allow you to save a significant amount on painting a black bumper.
Unpainted parts are usually taken during a major body repair with full painting or in the case of repainting the car in some individual color. It is also appropriate here to remember those owners whose cars were equipped from the factory with unpainted elements, which, if they break down, are easily replaced with similar ones.
Standard front bumper VAZ 2113—2115
When choosing a new bumper for VAZ 2113 (2114, 2115), consider several recommendations:
- There are several manufacturers on the market that use various raw materials, including recycled ones, to produce plastic body parts. Therefore, when purchasing, pay attention to the elasticity of the plastic. If it is initially rigid, then at negative temperatures it will become very brittle.
- Before purchasing a new product, remove the old body kit to check the condition of the amplifier underneath. If the disassembly was caused by the plastic breaking due to an impact, then the amplifier could also be damaged. In addition, it will be possible to compare the factory bumper with the part offered in the store.
- Check the element for minor paint defects. It happens that plastic parts are damaged during transportation.
- If you notice that the design of the new bumper is additionally reinforced from the inside, then buy it with confidence, since such products are more reliable in operation.
- Please note that there are openings for installing fog lights. There are products on sale for the VAZ 2114 that are not equipped with holes.
- When purchasing, make sure that the items fit your car in size. You should not purchase bumpers for a VAZ 2115 from a VAZ 2114 and vice versa, since they differ in dimensions, although they are mounted in the same way.
Factory bumper VAZ 2113—2115
Wanting to give their cars individuality, their owners often do partial styling, replacing the stock (factory) body kits with more original and attractive ones that differ in shape. As a rule, such elements can be easily installed on standard mounts and do not require modifications.
Reference . The prices of serial styling bumpers are not much higher than stock ones and start from 3,500 rubles. (for an unpainted product). Original works can cost significantly more.
The rear styling kit looks impressive
Why are overlays needed?
Such parts are usually used as an elegant and beautiful addition to the overall look of the car. Such a tuning detail for 2114 will not be considered superfluous, as it will have a large number of advantages.
The first of them is, of course, appearance
The car will be transformed and will attract the attention of passersby. It will also take on a more dynamic appearance. Every motorist is quite capable of purchasing exactly the trim that, in his opinion, will correspond to the overall style of the car
And in addition to its decorative function, the front element is also additional protection from minor scratches and damage and improves the aerodynamic characteristics of the car
Every motorist is quite capable of purchasing exactly the trim that, in his opinion, will match the overall style of the car. And in addition to its decorative function, the front element also provides additional protection from minor scratches and damage and improves the aerodynamic characteristics of the car.
The main material for the manufacture of linings is the popular ABS plastic, which is also a very high-quality material. A more budget option are chrome inserts. They are rectangular cutouts that run parallel to the wheels and look very nice. In addition, their task is to create additional air flow, which will cool the rear brake discs. Usually such products are attached in special places and give a sporty and elegant look to the car. Options for the rear bumper element are also possible.
Design Features
The design and method of attaching body kits on Lada 13-15 series cars differs from other models of the “tenth” VAZ family.
Design features are as follows:
- Additional metal brackets for fastening to the body are installed inside the plastic elements;
- the brackets are held on by threaded connections and screwed to the bumper with self-tapping screws;
- plastic latches appeared on the central part of the front bumper;
- the edges of the rear body kit are pulled to the body by nuts hidden behind the wheel arches;
- It is easier to remove the front and rear parts together with the amplifier, and then unscrew it if necessary.
Front bumper design
The listed features make it somewhat difficult to dismantle elements from the machine, since the threads located next to the wheels become covered with dirt and rust during operation. Over the years, corrosion also eats away at bare metal brackets that are not protected by any coating.
The rusted bracket needs to be replaced
Hence the advice : when disassembling, take your time and do not apply much force, otherwise you will break the bolts. It is better to replace rusty brackets with new ones, but they must first be coated with a primer and painted in any color.
Repairs are canceled
Breakage of plastic car body kits is a fairly common occurrence. Apart from cases of obvious collision, the bumper can be easily damaged by snow. In cold weather, plastic parts lose their plasticity. A slight push is enough for the bumper to crack.
Prices for plastic parts for cars of the Samara family nullify the economic feasibility of bumper repairs.
The cost of repairing plastic body kits with further painting will cost much more than a new body element. Moreover, the bumper can be purchased in the same color as the car.
Of course, doubts arise: will the new element exactly match the body color? There is no need to worry, because even new cars that come off the assembly line have only slight differences in the color of plastic elements and the body.
Instructions for dismantling the front body kit with your own hands
To disassemble the bumper mounts you will need the following tool:
- Phillips screwdriver;
- 8 mm socket wrench;
- the same, size 10 mm.
Disassembly tool
Advice. Instead of separate keys during disassembly, it is more convenient to use heads with an extension and a wrench equipped with a ratchet.
It is more convenient to work with sockets and a ratchet wrench
Since most threaded joints are likely to be rusty, you will need to use WD-40 spray lubricant to rotate them. Apply it to all bolts and nuts before unscrewing.
It is more convenient to work with the lower mounts of the front body kit from the inspection ditch, from where they are clearly visible, although if necessary, you can dismantle the bumper without a pit. At the final stage, when the element is removed from the machine, it is worth having an assistant support the part by the second edge.
If the car is equipped with fog lights, the process begins by disconnecting the battery from the on-board network.
Further work is performed in the following sequence:
- Open the hood and use a screwdriver to unscrew the 4 screws holding the upper part of the radiator grille. Remove it from the car.
- The lower part of the radiator grille is held in place by 4 self-tapping screws - a pair from the outside and two more from the engine compartment. Unscrew them and remove the grille part.
- Unscrew the 6 screws of the lower body kit mounting. They are located on the rounded parts of the element, 3 on each side.
- Remove the plastic protection installed under the wheel arches by unscrewing the bolts and nuts with a 10 mm wrench. For greater convenience, you can remove the wheel. Unscrew the front part of the fender liner.
- Now you have access to the bracket, where you need to loosen and unscrew 2 10 mm nuts. Don't forget to treat the joints with WD-40.
- Remove the license plate, underneath it you will find 2 more front mounting bolts. Unscrew them, as well as the 2 screws located near the air intake opening.
After disassembly, you will see plastic latches on the horizontal plane of the body kit. Unlock them and, together with an assistant, remove the bumper from the car, pushing it forward and holding it on both sides. Before doing this, disconnect the power wires for the fog lights so that you don’t have to do it while hanging.
Note : After dismantling the element, access to the plastic amplifier mount will open. If it is damaged and needs to be replaced, you need to unscrew the 4 nuts with a 13 mm socket and remove the part from the studs.
If you need to install a new body kit instead of a broken one, then you need to twist the metal brackets from the latter. To do this, just unscrew the 3 fastening screws. The brackets themselves should be cleaned of rust and painted so that they do not rot prematurely. The bumper is installed in the same way, only in reverse order.
The order of work in the photo
3 screws for bottom fastening
This is what the side bracket looks like
The top panel above the radiator is held on by two screws
How to remove the rear bumper
To replace the rear body kit, an inspection ditch is not needed, since there is fairly easy access to the lower nuts and screws.
But the set of necessary tools will have to be supplemented:
- 13 mm head;
- jack;
- wheel wrench;
- wooden stands for the rear wheel hubs.
Advice . It doesn’t hurt to stock up on a brush with metal bristles to clean the fasteners from dirt or anti-corrosion coating.
The problem is that with the wheels installed, it is difficult to get to the threaded connections located on the back side of the wheel arch. Therefore, before carrying out work, you need to secure the car at the front with wheel chocks and remove both rear wheels, resting the hubs on stands.
The next procedure is as follows:
- Remove the plastic wheel arch protection by unscrewing the screws holding it. Perform the operation on both sides.
- Looking under the back of the arch, you will find 2 studs with tightened nuts. Treat them with a brush and WD-40, and then unscrew the socket 10 mm. Remove the plastic trim. Repeat on the other side.
- Loosen and unscrew the 4 13mm socket nuts that secure the bumper reinforcement to the steel body parts. They are located under the body kit in pairs.
- Together with an assistant, grasp the edges of the bumper, remove the side mounting studs from the holes and remove it by pushing it backwards.
Note : In this way, the part is removed along with the amplifier. If you want to dismantle only the body kit, you will have to lie under the car to unscrew the 4 mounting screws, which is inconvenient.
When the element is removed from the car, it is easy to dismantle the amplifier and brackets and move them to a new bumper. There are no electrical wiring or lampshades here, so you don’t have to disconnect the battery or disconnect the connectors.
With the rear body kit removed, the condition of the steel body elements is clearly visible. If you find traces of corrosion, then there is no better time to remove it and touch up the paint. Pay attention to the condition of the side bumper mounting brackets; replace them if necessary. The element is placed back together with an assistant, the task is to simultaneously insert the studs into the holes of the arches. You can tighten the nuts and screws in any order; at the end, put the protection and wheels in place.
Photo instructions for dismantling
It's difficult to get to the mounts without removing the wheel.
Amplifier mounting screws, 4 in total
The attachment of the body kit is hidden behind a plastic protection.
Replacing bumpers on VAZ 2113–2115 cars will take a maximum of an hour for car service specialists. The owner of the car will need twice as much time to disassemble it independently, but will be able to save at least 2,000 rubles on the cost of work. Hence the conclusion: it is not advisable to contact a car service center with such questions, unless you do not have the required amount of time.