Long-term operation of the vehicle over rough terrain, extreme temperature conditions, and aggressive driving style contribute to premature wear of the paintwork and peeling.
Ultimately, cosmetic repairs and a number of restorative procedures are required. Obviously, we are not talking about deformation, damage after an accident, collision, or traffic accident. In practice, based on the results of an inspection by a service station technician, a decision is made to replace the plastic “protection.” The cost of purchasing a new one is approximately comparable to partial repairs.
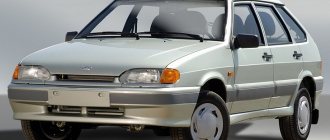
Characteristic differences between sedan and liftback bumpers
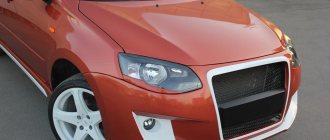
The front/rear “plastic” of both modifications is completely identical in terms of the mounting method. The main difference is in the exterior, color, and shape of the radiator grille. You can visually distinguish the first generation from the second by the color of the front grille of the cooling system.
In the first generation, she is in her original color - the natural color of plastic. In the second - to match the main color of the car. This rule also applies to the Grant liftback model, the so-called “bolt on” landing. This is such slang among motorists.
Typical bumper mounting locations:
- front: four bolts in the upper perimeter, two in the middle, four at the bottom, on each side;
- rear: two side fasteners, four upper and the same number of lower.
Materials, equipment and facilities
When carrying out a process such as self-repairing a plastic bumper, you will need to prepare special tools and materials. Among the most basic of them are the following.
- Special hair dryer for vehicles. This accessory is used for drying applied compounds. Unlike a conventional device used to dry hair, it produces hotter air, which, if necessary, can not only dry, but also melt the plastic.
- Soldering iron. Any device is suitable here, even one intended for use at home. If possible, it is better to buy or rent a more powerful device.
- Metal grid. The material is necessary for high-quality and durable fastening of individual parts of plastic. If it is not possible to purchase a mesh, you can use material from a previously used and no longer needed air filter.
- Primer. This is a special composition that is sold in ordinary cylinders. It is advisable to ensure that you have a special compressor or gun for convenient application of the primer.
- Putty. This product is necessary to eliminate cracks of different sizes and depths. You need to know that the composition can only be used in places hidden from outsiders.
- Sandpaper. Required for grouting the applied putty during the final stage of repair work. To work with the bumper, it is better to purchase sandpaper No. 800.
- Rags - you will need it for washing the bumper and for treating the surface with a hairdryer, preventing the risk of burns from the flow of hot air.
Well-thought-out protection will allow you to comprehensively protect your respiratory organs, eyes and hands from exposure. This automatically guarantees that the body will not be harmed by the spray of harmful substances in the air and from high temperatures.
What is needed for a successful renovation
To remove the Grant liftback bumper you will need: a set of automotive tools, a Phillips-head screwdriver, rags, rust remover WD-40, restoration components.
Related link:
Review of manufacturers and tips for installing parking sensors on the Lada Granta Liftback
The decision on the type of repair is made by the workshop specialist based on the results of a comprehensive diagnostic. If the impact occurred “head-on” at a speed of over 60 km/h, then replacement with a new one is guaranteed. When the scale of the damage is not large, the structure of the plastic fasteners is not damaged - restoration of the standard element is allowed.
Do-it-yourself front bumper removal
- We install the car on a flat platform, an inspection channel. In this case, it is not at all necessary to use an electric lifting mechanism;
- open the hood;
Unscrew the top row of mounting bolts (4 in total), two in the middle, four at the bottom.
First turn the steering wheel to the side for ease of work. We remove the front bumper of the Grant liftback, the dismantling process is completed. Subsequently, the master (car owner) carries out preventive maintenance, replaces the plastic product, and installs additional equipment as necessary.
Algorithm for step-by-step installation of the front bumper
- after diagnostics, prevention of fastening points, we install a new “plastic”, it must be painted in the original color of the car;
- we hang the upper perimeter, then the lower one, followed by snapping the plastic clips;
- Having made sure that the fit is tight, we proceed to fastening it with bolts.
DIY installation is complete.
Results
In general, the process of dismantling the Lada Granta bumper is not very complicated. You just need to keep in mind that you are working with a fragile material that can break very easily. To prevent this, never leave the bumper without support, especially when it has already lost some of its fastenings.
In addition, you do not need to pull the bumper too much. If it doesn't snap off, it means something is blocking it. You can find out by once again inspecting all the fastening points.
And, of course, the help of another person will not be superfluous, with whom the chance of breaking the bumper will be much lower.
Removing the rear bumper
The process is the same as above, except for the placement of the fasteners.
So, how to remove the rear bumper of a grant liftback:
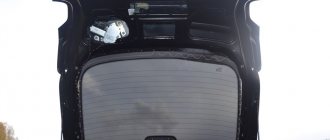
- Place the car on a level platform, open the trunk lid;
- remove the plastic latch, remove the lamps, unscrew the three nuts, remove the left/right lamp one by one;
- Having done the work described above, we proceed to unscrewing eight bolts in the upper perimeter and four in the lower. First remove the mudguards in the wheel arches;
- Carefully tear off the plastic clips and remove the bumper.
We carry out planned work, preventive maintenance, cleaning, etc.
Removing and installing the front body kit
Since the bumper of the Lada Kalina car is attached in many places, including from below, it is most convenient to carry out work in the inspection hole. If necessary, you can do it without it, but then you will have to look for the lower screws by touch or lie under the car to see them.
The list of tools for disassembly is quite short:
- Phillips-head screwdrivers of different lengths;
- 10 mm socket wrench or socket;
- extension cord and ratchet wrench.
Article on the topic: Crossover from Aston Martin - first details
At the moment, there are 2 generations of VAZ 1118 cars, and they are disassembled in different ways. Therefore, the order of work must be considered separately for each modification.
Kalina 1
If you have fog lights installed, then before starting work, disconnect the battery and follow this algorithm:
- Open the hood lid and unscrew the 3 screws holding the plastic radiator grille and carefully remove it.
- Do the same with the bottom grille, removing the 2 screws that secure it.
- Behind the grille there are 2 screws securing the bumper itself, unscrew them.
- Move into the inspection hole and unscrew the 3 lower bolts located in the center.
- Remove 2 pairs of lower screws located on the sides. They attach the body kit to the fender liner from below.
- There are 2 more pairs of screws located in the front of the wheel arches; unscrew them last.
- When all the fasteners are unscrewed, the bumper continues to be held on by plastic latches. To remove it and not break off the latches, pry the side edge of the element (near the wheel) with your hands and gently pull it to the side, disengaging the latches.
- Move the body kit forward a little and remove it from the car. At this time, the assistant must support the other end of the part, preventing it from falling.
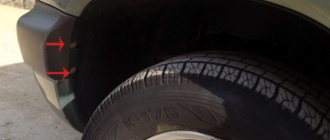
Corrosion of body parts is often found under the removed element. To see the whole picture, remove the plastic amplifier (you need to unscrew 3 bolts) and remove the rust, then touch up these areas.
In case of corrosion of body parts, remove the plastic reinforcement and remove the rust
An important point when installing a new bumper is that you need to put it in place correctly and secure the latches.
- Put on one side of the element immediately, and pull the other side together with an assistant. He should press on the corner of the part from the front, and you - from the side, until a characteristic click is heard.
- Then screw all the screws into place.
- Connect the connectors.
- Install gratings.
Photo of the attachment points of the part
3 bolts press the bumper to the body from below 2 pairs of self-tapping screws secure the body kit along the edges 2 self-tapping screws connect the element to the fender liner Top fastening points To remove the grille, you need to unscrew the countersunk screws Access to these bolts opens after removing the grille
Front bumper on Kalina 2
On the new Lada Kalina model, the front body kit is attached differently: the lower screws are located far from the plumb line of the element, so it is very inconvenient to unscrew them without an inspection ditch. But you don’t need to dismantle the radiator grilles to get to the hidden fasteners. The removal operation is performed as follows:
- Open the hood and remove the negative battery terminal.
- From the inspection hole, unscrew the 3 bolts screwed to the bottom of the car. Two of them are in the center, the third is to the side (to the right in the direction of travel).
- Unscrew 2 pairs of lower screws located at the edges of the bumper.
- As in Kalina 1, unscrew 2 pairs of screws connecting the part to the fender liner and located in front of the wheel arches.
- Unscrew the 6 bolts of the upper mounting of the body kit; they are located on the horizontal panel above the radiator.
The procedure for dismantling and replacing the front body kit is carried out together with an assistant, as described above. Immediately after removing the element, disconnect the power supply connectors for the fog lights, and when installing, do not forget to connect them back.
Where is the fastener located - photo
The bolts on Kalina 2 are located quite deep A pair of screws connect the fender liner to the bumper 6 upper mounting bolts Article on the topic: At what speed is it better to drive a diesel engine
DIY rear bumper installation
Replacing the Grant liftback bumper, hanging the upper perimeter, snapping the side and bottom, tightening the bolts. At this stage it is important to maintain the integrity of the plastic clips. In case of damage or deformation, tightness to the surface is not guaranteed.
Related link:
Description of colors Lada Granta Liftback
If you accidentally damage the clip, consult a specialist. Restoring without experience does not always lead to guaranteed success. Self-replacement of the rear bumper on a Lada Granta liftback is completed.
General questions about body kit 2190
Let's answer a couple of basic questions about Granta bumpers.
Why you may need to replace the bumper
Possible reason for replacing the body kit on a VAZ 2190:
- Minor (or major) accident;
- Installation of a non-original body kit;
- Installation of additional devices: emergency parking sensors, rear view camera, etc.;
- Curiosity.
There are many options for non-standard body kits for Lada today.
Non-native body kits are made unofficially. This can lead to problems with joints and color mismatches.
Where to find the front bumper amplifier
Unlike pre-restyling Kalinas, Grant comes with a bumper reinforcement from the factory. Many people confuse it with a regular mount. You will gain access to the part only after dismantling the front body kit.
The amplifier on the Lada is rather symbolic, like the factory crankcase protection. But there is no such thing on Kalina.
Video instructions on how to shoot
Here are videos with the work process:
In what cases is it necessary to replace the bumper?
- the consequence of a frontal collision, an accident, when the structure of the plastic is deformed, standard fasteners are destroyed, subsequent use is not rational;
- manufacturing defects at the assembly line stage;
- negative consequences of operation in critical negative / positive temperatures;
- mechanical damage caused by the driver;
- combustion, melting;
- installation of tuning elements, local upgrade, insertion of non-standard designs.
Regardless of the type of damage, carry out preliminary diagnostics in order to assess the general technical condition of the machine, components, and assemblies. Based on the results, choose the recovery method.
Assess the condition of the machine either independently or by turning to service station specialists for help.
Damage to the plastic bumper
It is easy to guess that the bumper can be damaged with a high degree of probability if the car is used quite intensively and even with very careful use.
The bumper can be damaged not only due to lack of driving experience, but for reasons such as:
- actions of other careless and inexperienced drivers;
- the ejection of small stones from the movement of other vehicles.
Regardless of the cause and nature of the damage, the appearance of the vehicle after a bumper breakdown is significantly worse. The car owner automatically has a desire to solve such a problem by repairing the bumper with his own hands.
Methods for eliminating the problem and mechanical damage directly depend on what kind of defect was applied to the car part. Among the most basic types of damage are the following.
- Scratches, which can be superficial and deep, that is, reaching the ground or the main layer of the part. This damage must be repaired immediately, as cracks may subsequently appear at the site of the scratch.
- Cracks are more serious damage to a car part, which is classified as dangerous. It is not recommended to operate the machine without eliminating it.
- Dents are formed through strong mechanical impact on the bumper. These injuries are very often accompanied by other unfavorable manifestations. Scratches and cracks almost always appear next to dents.
- Chips and breakdowns. These are special through damage that have a fairly large area. They most often appear along the edges of the bumper after a car collides with a certain obstacle.
Of course, you can contact any service center, but in this case the cost of restoring the bumper, even with minor damage, becomes significantly higher than the cost price. Of all the options listed above, self-repair will be the optimal and affordable method of bumper restoration.
The concept and purpose of the front bumper amplifier on the Lada Granta
Many motorists practice strengthening the frontal structure of the car in order to minimize possible risks. One way is to install a metal amplifier. It is fixed on standard fasteners in the middle, covering the radiator and fan. A plastic bumper is placed on top of the metal tire. The location of the tire is secretive, invisible to the eye.
In the event of an accident or collision, the metal protection will take the blow, minimizing damage to the engine compartment. In the event of a frontal collision at a speed of no more than 50 km/h, the protection will maintain the integrity of the plastic. The maximum that can happen is damage to the paintwork.
| Catalog article / OEM number | Price, rub.) |
| 21900280313100 | 430 — 460 |
| 21900280313118 | from 450 |
| 21900280313279 | from 450 |
| (21911428459) rear bumper Grant liftback article number | from 4500 |
general information
Manipulating the body kit takes no more than 20 minutes, even for a novice auto mechanic. Bolts with soured threads can complicate the situation and prolong the work time. Most often this happens with the four screws that secure the radiator and body kit. The bolts sit as if rooted, and it takes no effort to move them. In such cases, a penetrating lubricant such as WD-40 comes in handy. It must be applied in advance, right under the bolt head. After a short period of time, the lubricant will do its job, and the screw will easily unscrew.
When installing the body kit, it is recommended to lubricate the screw threads with grease or grease, such as “Universal” or “Mobile”. Thanks to this treatment, it is possible to avoid souring and corrosion of fastening joints. This will make it easier to remove the bumper again and extend the life of the screw elements.
A removed body kit is a good reason to inspect devices and parts to which access was denied. Check the condition of the wires, fasteners, inspect the power bumper, etc. If rust is detected on the body, the area is treated with anti-corrosion treatment. This will prevent further damage and hole formation.
There are many reasons to remove the body kit - a minor accident or tuning. There are many options for Grant - at a price of ten to twenty thousand you can buy a set of ABS plastic and transform your car. Yes, and minor rubbing in is not uncommon. This means that it is important to know how to remove the bumper on a Grant.
Subtleties that everyone should know about
If the plastic clips are damaged, tightness is not guaranteed. The gap at the joint will increase and waviness will form on the surface.
As soon as this is discovered, be sure that the clip is damaged. It is better to replace it with a new one yourself or contact a service center.
Related link:
Recommendations from experts for installing speakers on your Lada Granta liftback yourself
Purpose of headlights
A car headlight is designed to illuminate the cavity of the front and side parts of the road surface. It provides the necessary visibility and also performs road safety functions.
Reasons why headlight removal may be necessary
The reasons for removing the headlight on a Lada Grant can be many factors, namely:
- Damage to the structure of the surface or body due to an accident, as well as exposure to external factors.
- Dismantling for repair of adjacent parts.
Disassembling the headlight for repair - Restoring the surface or soldering fasteners.
- Replacing the headlight.
Tuning headlights for Lada Granta
All these or other factors contribute to the need to remove the Lada Granta headlight.
Types of headlights for Lada Granta
There is an original headlight and several of its analogues, which can be used as an alternative or tuning optics. Let's look at the catalog numbers and descriptions for all:
Installing a lens into a standard headlight
Thus, it can be seen that there are several options for standard headlights on the Lada Granta, which do not require alteration of the mounts for removal and installation.
Reviews from car owner forums
flint334 (https://www.drive2.ru/l/8196664/): a new liftback from Grant is installed on the first generation. The car takes on a new look, streamlined, aerodynamic;
serov-ak: the side mirrors are especially attractive, they are larger, with an increased viewing angle;
Lucifer174: installation takes place within 10 minutes, fixation method is “bolt on”;
vellsvel (https://www.drive2.ru/l/6123257/): new bumper, electrically driven, heated mirrors, repeaters - this is luxury.
Dismantling tools
Naturally, to work you will need to acquire some tools. Most likely, you already have them, but preparing them in advance will not be superfluous even in this case.
The list of required tools includes:
- Phillips screwdriver with Phillips head;
- open-end wrench size 10. It can be replaced with a spanner wrench of the same size;
- In addition, you will need another pair of keys such as TORX T-20 and TORX T-30.
It would also be a good idea to take care to place cardboard or cloth under your back so as not to get it dirty and catch a cold. If the car is installed on a lift or overpass, then such safety measures will not be necessary.
Procedure for work
Placing the vehicle within the perimeter of the repair area;
- Open the hood/trunk lid;
- Unscrew the mounting bolts one by one. In the case of the rear bumper, first remove the rear lights to provide access to the bolts;
- Remove the plastic bumper and carry out maintenance;
- Put on a new one and secure it with clips.
DIY installation is complete.
Bottom line The process of replacing the front / rear bumper yourself is not at all difficult. If you have tools, equipment, and spare parts, prevention will take no more than 15 minutes. When it comes to the negative consequences of an accident, impact, collision, the time interval is impossible to predict. Before removing the Grant liftback bumper, be sure to conduct preliminary diagnostics using digital scanners to determine the geometry of the body.
Possible methods of repairing damage
The scheme according to which the repair of plastic bumpers will be carried out depends directly on the degree and level of damage. The following recovery techniques may be applicable:
- Bonding – used for parts produced by cold molding. A special polyurethane-based adhesive is used here.
- Heat sealing – suitable for bumpers that were made by hot molding. The bumper fragments are connected using special welding equipment.
- Lamination is a method suitable for restoring lost fragments with similar ones. A special reinforcing mesh and putty are used here.
- Use of flat electrodes. The technique is based on the use of a special construction hair dryer, which melts the electrodes and effectively seals cracks.
- Soldering is the best option for repairing a bumper at home. You will need to use a soldering iron, sandpaper and paint.
- Soldering with reinforcement - suitable for repairing large cracks. The process is based on the use of double-sided soldering and simultaneous reinforcement with special staples or metal mesh.
- Sealing - repairing the crack is done using fiberglass and epoxy glue. The restoration material is applied to the glue and strictly on both sides of the bumper.
Below is a description of the most common and labor-intensive methods for restoring a car bumper, depending on the damage caused.
Putty
The previously prepared putty must be prepared according to all the rules of the instructions, and a special hardener must be added. After this, the resulting mass is applied to the area of the bumper where the damage is located. You need to wait about 10 minutes, take sandpaper No. 80 and use special circular movements to grout the composition. The result becomes visible after several manipulations.
Primer
Priming work is no less simple. You need to take the prepared rags and rinse the bumper very well. Once the surface is dry, you need to inspect the entire bumper for correct shape. If there are no dents, you can start priming. This process is carried out according to the following rules:
The primer must be applied in a circular motion towards the left or right side of the element. The composition must be allowed to dry completely. After this, take sandpaper No. 800 and rub everything down thoroughly. Using a regular water bottle you need to wash the bumper
It doesn’t matter where the crack or other damage occurs, the bumper must be washed completely. As soon as one layer is completely dry, the plastic automatically takes on a matte finish.
The top soil is then completely washed away. Only after this can a second layer of primer be applied.
Once all the applied layers have dried, you will need to carefully inspect the part using a lamp. The layers should be completely even and form one whole together.
Painting
If, after examining the part, it becomes clear that all coatings have been applied as efficiently and evenly as possible, you can proceed to a process such as painting. The room must be prepared, all surfaces that need to be protected from the paint used are covered. The pigment is applied strictly in two or three layers. Drying time between each coat should be between 5 and 10 minutes.
After applying the required paint coating, two layers of varnish are applied to the surface of the bumper. Intermediate drying is also important here. Upon completion of the painting work, you need to check the quality of the applied compounds again; if smudges are detected, you need to lightly sand and thoroughly polish the surface.
We also additionally recommend studying our expert’s article on polishing a car with your own hands.
You may also be interested in an article from our specialist, which talks about how to carry out chrome plating at home.
Reminder
Let's summarize:
- To remove the front/rear body kit, it is better to use a lift ;
- You will need: a Phillips screwdriver, a 10mm socket wrench, a 20/30 Torx sprocket, a ratchet with a set of sockets;
- Simple, but important: wash the car before work, since we will be tinkering with the dirtiest part of the car;
- After dismantling all mounting points, check and disconnect all wiring, such as PTF, license plate lights or parking sensors.
Do you like working with Granta? See other articles. For example, how to install acoustics yourself.
Write comments . This is important - otherwise we will miss details or lose motivation.
Lada Granta has managed to become one of the most popular domestic cars. This was largely due to the affordable price of the car, which is closer to the cost of the “classic” line. But many technical innovations came from “older” car models. So, there are features of dismantling the Lada Grant bumper, and they need to be taken into account.