Most owners of passenger cars of the Lada Samara 2 family are wondering how to remove the front bumper on a VAZ 2114/2113/2115 on their own. For drivers who are well versed in technology, removing and replacing the part is not difficult. If the bumper is damaged, they do not go to specialized auto repair shops or service stations; such repair work is performed with their own hands.
This review is intended for new car enthusiasts who want to understand the mechanics of a car, save money and carry out minor repairs on their car themselves.
Why you may need to remove and replace the bumper with a new one
There are a huge number of different reasons when it may be necessary to remove the front bumper, but some of them are more common. It is because of them that car owners have to seek professional help or solve the problem on their own.
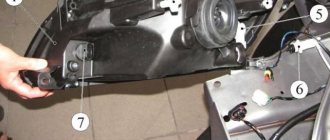
What are these reasons?
- Damage to the bumper that could have occurred during an accident. Very often, after a frontal collision, the integrity of the structure is so severely compromised that urgent replacement is required.
- Engine repair is another reason to remove the bumper. Many engine compartment components can only be accessed by removing the bumper.
- Sometimes car owners want to tune the front part of their car. There is no way to do this without removing the bumper.
- Installation of new lighting elements.
- Installation of mesh, as well as various decorative overlays.
When the bumper is still broken, there are only two options to solve the problem:
- Replace the old bumper with a new one.
- Try to restore a functional old bumper using all available methods.
Problems when paying with bank cards
Sometimes difficulties may arise when paying with Visa/MasterCard bank cards. The most common of them:
- There is a restriction on the card for paying for online purchases
- A plastic card is not intended for making payments online.
- The plastic card is not activated for making payments online.
- There are not enough funds on the plastic card.
In order to solve these problems, you need to call or write to the technical support of the bank where you are served. Bank specialists will help you resolve them and make payments.
That's basically it. The entire process of paying for a book in PDF format on car repair on our website takes 1-2 minutes.
If you still have any questions, you can ask them using the feedback form, or write us an email at [email protected]
Removing and replacing the old bumper with a new one. How to remove the bumper on a VAZ 2114
In order to begin the removal process, you need to acquire a whole range of auxiliary tools.
Among them:
- Screwdrivers.
- Lift.
- Phillips screwdriver.
- Socket wrench 10 by 8. Alternatively, you can use an open-end wrench.
- Head with a 13 mm collar.
Additional Information. Replacing a VAZ 2114 bumper is a simple procedure. In order to complete it, it may take 60 minutes, but if a person does not understand anything about replacing body parts, then he will have to spend much more time. In any case, the car enthusiast will save on the services of specialists from service centers. It is recommended to carry out this procedure on your own, since not every master is responsible enough to replace body elements.
Motor modification
Tuning the VAZ-2114 engine can consist of both partial improvements and fundamental modifications. If we consider the first option, then it is the one that is most popular among car owners. There are relatively few opportunities to increase the power of the VAZ engine, since there is no turbocharging.
The most that can be achieved is the regulation of fuel supply and ignition timing (the gain in performance is no more than 8%). Chip tuning of the VAZ-2115 gives slightly better results. It is also practiced to change fuel and air filters and a number of other elements. Note that the goal of the work is both to increase power and reduce fuel consumption, and to achieve greater smoothness in engine operation.
How to remove the front bumper of a VAZ 2114 in order to install a new one
- At the first stage, you will need to open the protection, which is located on the front wheels. To do this you will have to remove 3 screws. The easiest way to do this is to use a screwdriver.
- Now you need to remove the protection to the side and open access to the inside.
Dismantling the protection
- A 10 mm wrench is required to unscrew the 2 fastening nuts inside.
- In exactly the same way, you need to dismantle it from the side where the second wheel is located.
- After this, you can remove the license plate. Some are afraid to perform this procedure due to the possibility of damaging the sign. In order to avoid any damage, you should unscrew several screws that are located under the number, and then remove 2 more screws located in the windows.
We remove the license plate
- Now it's time to remove the front. This requires a little effort. After that, all that remains is to install a new bumper. Installing a VAZ 2114 bumper will not cause difficulties if the car enthusiast managed to remove the old bumper.
This can be done if you perform the entire procedure described in reverse order, however, before installing a new front bumper, it is recommended to check the condition of the amplifier.
This component must be in good condition. If this is not the case, then the car owner will need to replace the amplifier before installing a new bumper.
In order to complete this procedure as quickly as possible, you need to immediately remove several mounting nuts after removing the bumper. This can be done using a 13 mm socket. All adjusting washers must remain on the studs, and all brackets that are located on the side must be unscrewed. They can be used when installing a new bumper.
Once this is done, you can begin adjusting the new amplifier to the desired height. Then you need to set the gaps between the headlights, the amplifier itself and the fender. This can be done using slots.
Removing the bumper of a VAZ 2114
After this, assembly of the entire structure should begin.
Instructions for dismantling the front body kit with your own hands
To disassemble the bumper mounts you will need the following tool:
- Phillips screwdriver;
- 8 mm socket wrench;
- the same, size 10 mm.
Disassembly tool
It is more convenient to work with sockets and a ratchet wrench
Since most threaded joints are likely to be rusty, you will need to use WD-40 spray lubricant to rotate them. Apply it to all bolts and nuts before unscrewing.
It is more convenient to work with the lower mounts of the front body kit from the inspection ditch, from where they are clearly visible, although if necessary, you can dismantle the bumper without a pit. At the final stage, when the element is removed from the machine, it is worth having an assistant support the part by the second edge.
If the car is equipped with fog lights, the process begins by disconnecting the battery from the on-board network.
Further work is performed in the following sequence:
- Open the hood and use a screwdriver to unscrew the 4 screws holding the upper part of the radiator grille. Remove it from the car.
- The lower part of the radiator grille is held in place by 4 self-tapping screws - a pair from the outside and two more from the engine compartment. Unscrew them and remove the grille part.
- Unscrew the 6 screws of the lower body kit mounting. They are located on the rounded parts of the element, 3 on each side.
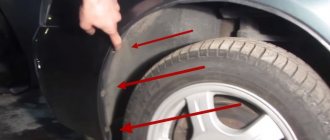
- Remove the plastic protection installed under the wheel arches by unscrewing the bolts and nuts with a 10 mm wrench. For greater convenience, you can remove the wheel. Unscrew the front part of the fender liner.
- Now you have access to the bracket, where you need to loosen and unscrew 2 10 mm nuts. Don't forget to treat the joints with WD-40.
- Remove the license plate, underneath it you will find 2 more front mounting bolts. Unscrew them, as well as the 2 screws located near the air intake opening.
After disassembly, you will see plastic latches on the horizontal plane of the body kit. Unlock them and, together with an assistant, remove the bumper from the car, pushing it forward and holding it on both sides. Before doing this, disconnect the power wires for the fog lights so that you don’t have to do it while hanging.
If you need to install a new body kit instead of a broken one, then you need to twist the metal brackets from the latter. To do this, just unscrew the 3 fastening screws. The brackets themselves should be cleaned of rust and painted so that they do not rot prematurely. The bumper is installed in the same way, only in reverse order.
The order of work in the photo
3 screws for bottom fastening
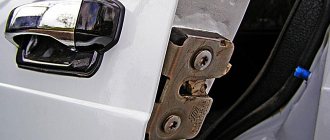
This is what the side bracket looks like
The top panel above the radiator is held on by two screws
Features of the work
New versions of the car have some differences. They touch the bumper reinforcement. It has teeth under the headlights and also under the grille. They are put on with special slots. As a result, in order to remove the bumper without any damage, you will also need to remove the headlights along with the grille. This is very inconvenient, but you can’t do without it.
If you still need to replace the bumper with a new one, you should carefully select the model of the new bumper. Under no circumstances should you buy metal bumpers. They pose a serious threat to the driver during an accident. It is better to give preference to bumpers made of plastic.
We must not forget about color. It must perfectly match the color of the entire body, otherwise a car with multi-colored elements will look simply terrible.
Advice. Some car enthusiasts are trying to save money on buying a new bumper and buy an unpainted bumper. It does cost somewhat less, but finding the right paint for this body element can be extremely difficult.
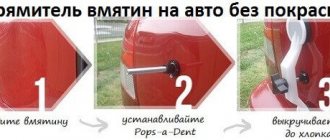
How to repair a bumper
If the damage is minor, then there is no need to spend money on a new element.
The following defects can be eliminated independently without problems:
- dents;
- scratches;
- small holes.
It would be advisable to repair only a bumper that has not lost its integrity. Now stores sell special kits that include everything you need.
Cracks and holes are fixed on the reverse side with fiberglass and liquid plastic. Next you need to sand the damaged areas with coarse sandpaper. This should be done without much fanaticism, so as not to damage the plastic. The defect is masked with universal putty. The surface is lightly sanded again, but with very fine-grained sandpaper. Afterwards you need to wipe with a damp cloth - this will remove dust.
The prepared surface is treated with an aerosol primer. It must be applied in two layers. Each will take half an hour to dry. Finally they are coated with paint. At least 3 coats will be required. It is important to choose it exactly by color. A single coat dries completely in about 30 minutes. In order for the composition to be sprayed evenly, the container must be kept at a distance of 20 centimeters.
The result is fixed with two layers of colorless varnish.
Functions
The front bumper has three main functions that it performs:
- Decorative;
- Protective;
- Covering other elements of the car.
In addition to the front bumper that we see, there is a beam or reinforcement hidden behind it. It creates the necessary degree of protection that allows you to avoid serious injuries and damage in collisions. Therefore, if the front end was broken, you should definitely pay attention to the current condition of the amplifier. This will allow you to understand whether, in addition to the plastic lining, you also need to change the beam.
Reasons for withdrawal
In fact, there can be many reasons for removing the front end of your car. Everyone has their own views on this issue.
But let’s still name the main reasons why car owners most often turn to car services or decide to dismantle and even replace the front bumper on their own.
- The replacement was caused by damage to the element as a result of a collision or accident. The integrity of the structure is compromised, and driving with a broken front end is not particularly pleasant.
- Dismantling work with the subsequent return of elements to their place can be carried out due to engine repairs, when replacing the radiator and other components of the engine compartment.
- External modification in the form of tuning the front of the car.
- Replacement of headlights, installation of new optics.
- Installation of decorative overlays, mesh.
Article on the topic: Checking the ignition module on a VAZ 2114: a multimeter and control to help
Dismantling works
If the bumper is broken, then you have two ways to solve this issue - replace it with a new one or try to restore the old one. This largely depends on the desire and degree of breakdown of the previous element.
How to choose
When choosing a new bumper for the front of your car, you should adhere to several of the most important, but fairly simple rules and recommendations.
We will be happy to share them with you.
| Selection criterion | Peculiarity |
| Plastic thickness | Try to choose elements made from the thickest layer of plastic. This has a positive effect on quality and protection |
| Color | If you buy a bumper that is already painted, carefully match it to the body color of your car. If it's unpainted, then you'll have to guess with paint |
| Compatibility | Many people purchase body parts from other VAZ models or from foreign cars. For the 2114, many people call the Sniper bumper, designed for the VAZ 2115 model, ideal. Moreover, choose a design with holes for fog lights |
| Manufacturer | There are many companies producing bumpers today. But experts agree that native elements are best suited for VAZ |
| Price | The cost of domestic native bumpers is significantly lower compared to imported analogues. Moreover, the quality may be even higher than that of foreign models. The average price for a VAZ front end is 2000-2500 rubles |
An unpainted bumper is usually 500 rubles cheaper, but there may be problems finding suitable paint. Therefore, we advise you to pay a little more. AvtoVAZ produces elements painted exactly to match the colors of the cars they produce. Problems may arise here with foreign analogues.
How to choose the right new bumper
Nowadays, stores sell not only products produced directly by VAZ, but also many replicas manufactured by various companies. Quite handicrafts are also often found.
To avoid purchasing low-quality goods, you need to use the following recommendations:
- the thickness of the plastic should be the same as the old one, or better yet, even greater;
- It is important to guess the shade if it is sold already painted.
Of course, no one forces the car owner to replace a damaged bumper, but it significantly spoils the appearance of the car. Moreover, if another accident occurs, then he will no longer be able to protect anyone or anything.
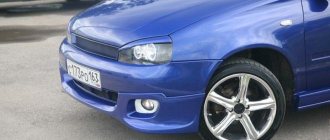
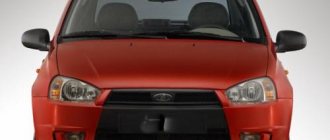
Front bumper VAZ 2114
The simple design makes it easy to dismantle the front bumper with your own hands, and then fix the repaired or purchased one in its original place. However, from an economic point of view, it is cheaper to restore an old cracked bumper than to purchase a new one. Structurally, the front bumper is quite simple. It is a plastic protective and decorative structure that is attached with nuts to the reinforcing beam, and then to the front part of the car body.
The front bumper is easy to remove with your own hands
Replacing the front bumper of a VAZ 2114 will not cause problems if you study in detail the technological instructions for dismantling and attaching the bumper. Let's look at the technology for removing the front protection and the features of installing the bumper.
How to remove the 2114 bumper from the front of the body
Before removing the front bumper on a VAZ 2114, it is advisable to familiarize yourself in detail with the step-by-step instructions for performing the work. Agree, there is no need to go to a car repair shop and involve other specialists in performing the work if removing the front bumper of a VAZ 2114 can be done independently in a personal garage in a fairly short time. After all, the whole job will take no more than one hour.
Remove the front protective and decorative element of the machine according to the following algorithm:
- First, we independently remove the wheel protection, which is secured with self-tapping screws. To do this, use a screwdriver to unscrew 3-4 screws securing the front fender liners;
- then we remove the wheel arch liners and free access to the inner surface of the bumper. Next, you will need to unscrew two locking nuts 10 on each side of the bumper. It is necessary to pull each side of the bumper so that the mounting studs come out of the holes in the brackets;
- You will also need to remove your license plate number. After all, under it there are two 10mm fixing bolts. They will need to be unscrewed, as well as a couple of screws located in the cavities under the license plate.
Don’t forget to disconnect the fog lamp wires, remove the trims and unscrew the headlight mounting screws if they are attached to the car’s bumper. After performing these operations, all that remains is to carefully remove the front without applying much effort.
The bumper on a VAZ can be removed without much effort
After dismantling the bumper, check that there is no deformation on the metal amplifier. If there are cracks or dents, the amplifier will need to be restored to its previous condition by welding, straightening or replacement.
To replace the amplifier, you will need to unscrew the fastening nuts with a 13 mm socket. After restoring the power bracket, its position should be adjusted to the required height, ensuring equal gaps between the wing and the reinforcement bracket. The grooves make it easy to complete the task.
Fastening the VAZ 2114 bumper - installing protection on the front of the car
Installation of the front bumper of the VAZ 2114 is carried out according to the above algorithm, but in the reverse order.
Follow the specified procedure when attaching the front bumper of the VAZ 2114 after repair:
Bumper adjustment
When reinstalling the front bumper of a VAZ-2114, the first thing you need to pay attention to is the correct position of the amplifier. You may have to try the bumper on several times to figure out how to adjust it to the optimal position.
In addition to the adjusting washers, the amplifier can be adjusted in height by adjusting it in the mounting holes. This way you can press the bumper more tightly to the headlights and front fenders. This will eliminate the gap between them and give the car a cleaner look.
Adjustment using washers is more difficult. In order to raise the front part of the bumper, you need to place washers between the body and the amplifier on the lower studs. But there is a nuance here: if the thickness of the washer is excessive, then the side parts of the bumper will not fit well with the front fenders. There will be excessive clearance and the front end will be pushing too far into the headlights.
If the owner wants to tune the front bumper of a VAZ-2114 by adding a decorative mesh to the design, this will not affect the adjustment and subsequent installation. And if the tuning is due to a non-standard bumper, then, most likely, serious problems will arise both with fit and installation.
Installation of the front bumper of the VAZ-2114 occurs in the reverse order. The only difficulty is in the adjustment. To avoid displacement of the body kit relative to the body axis, immediately when installing the amplifier you need to pay attention to its alignment. Otherwise, the bumper may be shifted to the right or left, which will be noticeable against the background of the car's headlights.
Bumper replacement process
Front bumper diagram
The front bumper of the car performs a protective function, which is the first to absorb a possible impact. Recently, the trend among automakers is that it should have a decorative and aerodynamic function. In this case, what should take the hit?
For this purpose, a special metal amplifier was developed, which performs exactly this role.
Before starting the replacement process, you need to decide on the tools. Which one will you need: a screwdriver with sets of attachments or a set of screwdrivers, open-end and socket wrenches for 8 and 10, a ratchet with a head for 13, a new bumper.
So, when the motorist has collected everything, you can proceed directly to the process.
Step by step process
Let's consider the step-by-step process of replacing the front bumper of a VAZ-2114:
- We install the car so that it is possible to freely approach from below to perform operations. A pit or lift is ideal.
- Unscrew the radiator grille mounting bolts.
Radiator grille bolt pattern
Dismantling the side mounts of the front bumper
Selecting a part for the VAZ-2114 (article)
Rear bumper VAZ 2114
Removing and attaching the rear bumper of a VAZ 2114 is slightly different from performing similar operations with the front bumper of a car. To replace this car part yourself, there is no need to involve professional auto mechanics if you carefully study the sequence of actions.
How to remove the bumper on a VAZ 2114 from the rear of the car
So, remove the rear bumper of the VAZ 2114 following the following procedure:
- Place the car on a level surface;
- place stops under the front wheels;
- place two jacks under the rear of the body;
- extend the jack rods to an equal height;
- remove the rear wheels of the car;
- disconnect the license plate light wiring;
- unscrew the self-tapping screws or screws securing the license plate;
- unscrew the screws securing the rear wheel fender liners;
- remove the fender liners from the arched openings;
- loosen the two bumper mounting bolts on the right side of the fender;
- perform a similar operation on the left side of the body with a 10 key;
- unscrew with a 13mm head the three nuts of the reinforcement beam fixation bracket;
- dismantle the bumper assembly with the supporting beam.
Now all that remains is to unscrew the screws connecting the beam to the bumper and remove the beam. If during work you have a problem with unscrewing the fasteners, use WD-40 fluid.
Rear bumper installation
Replacing a VAZ 2114 bumper is a fairly simple operation that home craftsmen can handle. After restoration and painting of the rear power part, it should be installed in its original place, performing the installation work in the reverse order.
After dismantling the damaged bumper, you should assess the level of damage and decide whether it can be restored or whether it is advisable to replace it with a new part. You should not skimp on this, since the bumper not only provides the car with attractiveness and aerodynamics, but is also, first of all, responsible for safety.
Conclusion
Attaching the front bumper of the VAZ 2114 will not present any difficulties if you follow the instructions provided strictly. Installing a completely new bumper will restore the car to its original appearance and also increase the level of safety while driving.
Published on January 17, 2022Home / Catalog / Lada / Lada / VAZ 2113 / VAZ 2114 / VAZ 2115 with 1.5i-liter and 1.6i-liter engines, repair book in color photos in electronic form / ...Show book contents
Content
Introduction
Emergency procedures
- Wheel replacement
- Actions in case of engine overheating
- Starting the engine from an additional power source
- Circuit breakers
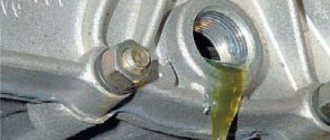
- Emergency pressure drop in the engine lubrication system
- Turning on the low battery indicator
- Turning on the engine system malfunction indicator
- Turn on the brake warning light/parking brake warning light
Daily checks and troubleshooting
Operating a car in winter
A trip to the service station
Operation and Maintenance Instructions
- Technical information
- Controls, instrument panel and interior equipment
- Car care
- Vehicle maintenance
- Fuels and lubricants
Warnings and safety rules when working on a vehicle
Basic tools, measuring instruments and methods of working with them
- Basic set of necessary tools
- Methods of working with measuring instruments
Engine and its systems
- General information
- Servicing the engine without removing it from the car
- Engine disassembly and assembly
- Ignition and engine control system
- Supply system
- Lubrication system
- Cooling system
- Intake and exhaust system
- Chapter Appendix
Transmission
- General information
- Clutch
- Transmission
- Drive shafts
- Chapter Appendix
Chassis
- General information
- Front suspension
- Rear suspension
Steering
- General information
- Steering wheel
- Steering gear
- Steering rods
Brake system
- General information
- Car service
- Front wheel brakes
- Rear wheel brakes
- Parking brake
Body
- General information
- Front bumper
- Rear bumper
- Hood
- Front door
- Rear door (VAZ 2114/2115)
- Body dimensions
Gas equipment
Car electrical equipment
- General information
- Generator
- Starter
- Egnition lock
- Replacing steering column switches
- Replacing the power window switch
- Outdoor lighting devices
Fault codes
- Controller JANUARY-4
- GM Controller (IFSI-2S, ITMS-6F)
- OBDII protocol controllers
Electrical circuits
Dictionary
Useful tips for car owners
How to pay and download
Repairs are canceled
Breakage of plastic car body kits is a fairly common occurrence. Apart from cases of obvious collision, the bumper can be easily damaged by snow. In cold weather, plastic parts lose their plasticity. A slight push is enough for the bumper to crack.
You may be interested in: Car “Lifan” – country of origin, technical specifications and reviews
Prices for plastic parts for cars of the Samara family nullify the economic feasibility of bumper repairs.
The cost of repairing plastic body kits with further painting will cost much more than a new body element. Moreover, the bumper can be purchased in the same color as the car.
You may be interested in: Six secrets of Lamborghini engines
Of course, doubts arise: will the new element exactly match the body color? There is no need to worry, because even new cars that come off the assembly line have only slight differences in the color of plastic elements and the body.
Selecting a new part
When replacing, it is necessary that the new part exactly matches the dimensions of the original product. It often happens that the sides of the VAZ-2114 bumper, when replaced, do not reach their seat, and the joint with the front fender turns out to be ugly. This happens because manufacturers of non-original parts make the bumper a little smaller than the factory one - the price to pay for a cheaper part. Another problem with aftermarket bumpers is that over time the paint and varnish will flake off the surface. This happens due to non-compliance with the dyeing technology.
The best option is to purchase an original part. Even in this case, the purchase will cost less than repairs.
What should you consider when choosing these materials?
It is worth considering that polystyrene foam and polyurethane foam have several significant disadvantages. Foam is an aggressive substance that can have a negative effect on paintwork and other surfaces. That is why those areas of the coating that are in close proximity to the work should be protected.
Sidebar: Important: Polystyrene foam can be dissolved by epoxy resins that may be used during the process. That is why certain surface protection technology should be used. Otherwise, it will not withstand the impact and will change its shape.
Do-it-yourself dismantling and installation
To replace the front bumper of a VAZ-2114 with your own hands, you can use a flat platform. Although the best option is to work on a lift or in a viewing hole.
Before starting work, you need to prepare a place for the new bumper. This is either a special table or a flat, clean floor surface. Before installation, the new part should not be removed from its packaging: the painted surface can be easily damaged. The car itself must be washed before starting work, including the wheel arches.
The dismantling procedure is as follows:
On the side of the front wheels, you need to unscrew one screw at the top of the bumper. Remove the 6 screws securing the bottom of the bumper to the fender liners on each side. For further work, the locker can be removed completely. This will give freer access to the side brackets. You can also simply bend the fender liner to the side, but then further work will have to be done blindly. Using a “10” wrench you need to unscrew the 4 nuts of the side brackets. Dirt getting into these places causes the nuts to stick tightly, and attempts to unscrew them lead to the stud breaking. To avoid these troubles, you need to thoroughly clean the fasteners of dirt and treat them with aerosol lubricant. Leave to sit for 10 minutes, then start turning away. Remove the license plate and plastic plate. Under them you will find 2 large screws for a Phillips screwdriver. They attach the bumper to the amplifier. You also need to unscrew 3 screws in the deflector area.
Amplifier
The fastenings of the front bumper of the VAZ-2114 are all unscrewed, but nevertheless it is impossible to remove the outer part. The reason lies in the plastic latches, which are located on the inside of the bumper in its upper part. Several clips are located under the headlight eyelashes. To separate them, you need to press the plastic from the inside with a pry bar or a long screwdriver. In the middle part there are also clamps under the radiator trim.
The amplifier may be damaged in a collision. It is the connecting link between the body and the front bumper of the VAZ-2114. It is also necessary to replace it if there is damage.
To remove the amplifier, unscrew 4 nuts to “13”. Be sure to use a long wrench. Using a short one will not allow you to reach the mount.
Under the amplifier there are 4 studs screwed into the side member of the car. They often have one or more wide shims. They are selected in such a way that the upper part of the bumper fits tightly to the eyelashes of the headlights. Therefore, when dismantling, you need to pay attention to how many washers were on each stud.
Rear body kit
In order to tune the rear body kit, you need to use the same technique as with the front one. Only, when lengthening this part, it is worth remembering the muffler. If the extension is about 40 mm, then the rear bumper will simply cover it. Therefore, there are two options to resolve this problem. The first is to redo the exhaust system itself, lowering the muffler a little lower, or directing its outlet downward. The second is to change the rear body kit itself, make it either shorter so that it does not cover the exhaust hole, or make a semicircle under the muffler. Otherwise, the tuning operation is no different.
How to remove the rear bumper of a VAZ 2114, VAZ 2115
- If the car has fender liners, unscrew the screws securing them to the bumper, or remove the rear wheel fender liners.
- Using a 10mm socket wrench, unscrew the two nuts for the side fastening of the bumper on the right side of the car and remove the trim. In the same way, unscrew the two nuts on the side fastening of the bumper and remove the trim on the other side.
- Using a 13mm socket, unscrew the two nuts securing the right bumper bracket to the body.
- Holding the bumper, unscrew the two nuts securing the left bracket to the body.
- Remove the bumper from the car.
- Install the bumper in reverse order.
Adjusting washers are installed on the bumper mounting studs.
Design Features
The design and method of attaching body kits on Lada 13-15 series cars differs from other models of the “tenth” VAZ family.
Design features are as follows:
- Additional metal brackets for fastening to the body are installed inside the plastic elements;
- the brackets are held on by threaded connections and screwed to the bumper with self-tapping screws;
- plastic latches appeared on the central part of the front bumper;
- the edges of the rear body kit are pulled to the body by nuts hidden behind the wheel arches;
- It is easier to remove the front and rear parts together with the amplifier, and then unscrew it if necessary.
Front bumper design
The listed features make it somewhat difficult to dismantle elements from the machine, since the threads located next to the wheels become covered with dirt and rust during operation. Over the years, corrosion also eats away at bare metal brackets that are not protected by any coating.
The rusted bracket needs to be replaced
Hence the advice : when disassembling, take your time and do not apply much force, otherwise you will break the bolts. It is better to replace rusty brackets with new ones, but they must first be coated with a primer and painted in any color.
How to remove the front bumper of a VAZ 2114, VAZ 2115
- Remove the front wheel fenders.
- Using a 10mm wrench, under the left front fender, unscrew the two nuts securing the bumper on the right side.
- Using a 13mm socket, from the inside, unscrew the two nuts securing the bumper bracket to the body. Similarly, unscrew the two nuts of the right front bumper mounting.
- If necessary, we disassemble the bumper. Using a screwdriver, unscrew the four screws securing the front bumper amplifier of the VAZ 2114/2115 and remove it.
- Unscrew the three screws securing the side bracket and remove it. Similarly, remove the second bracket.
- We assemble and install the bumper in the reverse order.
What is important to know when purchasing new products for VAZ 2113, 2114 and 2115
Unlike foreign-made cars, it is easy to buy the necessary spare parts for the VAZ 2113, including new bumpers.
In the retail chain, these parts are found in two forms:
- black, without painting;
- painted in any color of your choice.
Body kits of different colors and shapes
Advice . If you decide to change body kits because of their unpresentable appearance, then it is easier and cheaper to buy ready-made products painted in the color of the car. The difference in price is 700-900 rubles. will not allow you to save a significant amount on painting a black bumper.
Unpainted parts are usually taken during a major body repair with full painting or in the case of repainting the car in some individual color. It is also appropriate here to remember those owners whose cars were equipped from the factory with unpainted elements, which, if they break down, are easily replaced with similar ones.
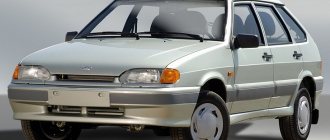
Standard front bumper VAZ 2113—2115
When choosing a new bumper for VAZ 2113 (2114, 2115), consider several recommendations:
- There are several manufacturers on the market that use various raw materials, including recycled ones, to produce plastic body parts. Therefore, when purchasing, pay attention to the elasticity of the plastic. If it is initially rigid, then at negative temperatures it will become very brittle.
- Before purchasing a new product, remove the old body kit to check the condition of the amplifier underneath. If the disassembly was caused by the plastic breaking due to an impact, then the amplifier could also be damaged. In addition, it will be possible to compare the factory bumper with the part offered in the store.
- Check the element for minor paint defects. It happens that plastic parts are damaged during transportation.
- If you notice that the design of the new bumper is additionally reinforced from the inside, then buy it with confidence, since such products are more reliable in operation.
- Please note that there are openings for installing fog lights. There are products on sale for the VAZ 2114 that are not equipped with holes.
- When purchasing, make sure that the items fit your car in size. You should not purchase bumpers for a VAZ 2115 from a VAZ 2114 and vice versa, since they differ in dimensions, although they are mounted in the same way.
Factory bumper VAZ 2113—2115
Wanting to give their cars individuality, their owners often do partial styling, replacing the stock (factory) body kits with more original and attractive ones that differ in shape. As a rule, such elements can be easily installed on standard mounts and do not require modifications.
Reference . The prices of serial styling bumpers are not much higher than stock ones and start from 3,500 rubles. (for an unpainted product). Original works can cost significantly more.
The rear styling kit looks impressive