Failures in the power supply system are associated with premature wear of the generator brushes on the Lada Grant. The malfunction is quite common, appears unexpectedly, and often overtakes the driver on the road.
The process of restoring the generator's functionality is simple, but requires care.
You can independently replace the generator brushes on the Lada Grant in two ways: by dismantling the generator and without disassembling the voltage converter. In order to provide methodological assistance to inexperienced owners, we will consider both possible options.
general information
The generator is designed to transform the mechanical energy received from the crankshaft into electrical energy. It is also designed to charge the battery, while simultaneously acting as a power source for all electrical equipment of the car.
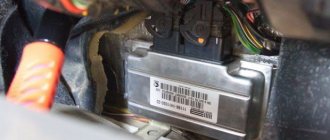
This unit consists of a pulley, a casing, a coupling bolt, a terminal on “B+” and a connector “L”, as well as front and rear covers. Each generator is equipped with a diode bridge and a voltage regulation unit operating in parallel with the battery. It is thanks to these elements that the alternating current is converted into direct current, and at the output the electric current receives the required voltage.
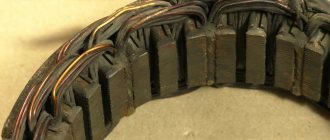
The main components of the generator include a stationary stator and a rotor, which is driven by the crankshaft. The rotor is separated from the stator by a layer of air, their main working elements include the winding and magnetic circuit, all other elements are designed to provide the required level of rigidity, cooling, etc. The stator is fixed on the generator cover, the back of the cover is covered with a plastic casing, and the rotor shaft rotates at 2 installed in bearing caps. The stator includes three-phase windings connected to the rectifier block, and the diodes are pressed into 2 horseshoe-shaped holders.
Changing bearings in Lada Kalina
The rectifier units present in the designs of generator sets of the AvtoVAZ model range have received a considerable number of negative reviews during operation. This statement is also true for the Lada Kalina we are considering. These modules can break down even after a mileage of 10 thousand km, which requires repair or replacement of the device.
It has also been revealed in practice that the cause of most malfunctions is the generator set bracket. However, bearings can also fail prematurely. It is gratifying that the owners are able to cope with such a problem on their own.
To repair the generator module, it will require preliminary disassembly. For this purpose, we “grab” the tips of the stator cables with a screwdriver and slightly pull them out of the springs present in the diode bridge. Next, you need to unscrew the bolts holding the bridge itself. In addition, unscrew the connecting bolt.
Having disassembled the body of the LADA Kalina generator set, we resorted to checking the integrity of the rear bearing. Here you will need to twist its outer ring. If it rotates without noticeable difficulties or sounds, and is not inclined to emit play, then we ascertain the serviceability of the bearing. When the slightest signs of wear are evident, we change it without hesitation.
The next step is to dismantle the generator unit bracket. Using the same screwdriver, we pry up the stator and remove it from the casing. The bracket design contains a bearing, which is also subject to inspection and replacement (if necessary).
The bearing of the front part of the LADA Kalina generator is rolled inside the casing. The manufacturer does not recommend replacing it. However, experts still advise performing this procedure, since if it breaks down, you will have to replace the entire generator, which is very expensive.
This bearing can be removed, but you will first have to remove the pulley and the plug present here. Next, using a hammer with a rubber striker, we excavate the rotor. Note that the front lining of the product will have to be clamped with a vice. We remove the bearing with special care.
Possible faults
Generator breakdowns can lead to battery discharge, or, conversely, to its overcharging, causing the battery to boil over. In both the first and second cases, it will no longer be possible to operate the car.
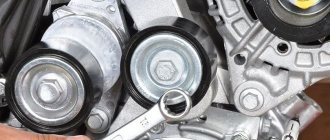
The degree of belt tension is very important. Thus, an over-tightened belt can lead to problems over time due to high levels of bearing wear. Insufficient belt tension, in turn, leads to periodic slipping, leading to a decrease in the level of charge received by the battery.
A fully operational generator should produce 14.5 V, any excess of this figure is usually a symptom of a faulty voltage regulator. If you do not immediately replace the specified element, then constant recharging of the battery will cause the lead plates to shed and break the battery. If the generator cannot produce a positive voltage, and its indicator is below 13 V, then the cause of the problem is not only a breakdown of the regulator, but also wear of the brushes, as well as possible damage to the windings and diode bridge.
Among the typical and most common generator breakdowns are:
- The control lamp does not light up. The cause of this malfunction is most often a break in the power circuit;
- Also, the warning light may not go out after the engine has been started. Reasons: the generator belt does not have enough tension, the brush assembly is worn out, the diode bridge is broken, the voltage regulator may have broken down, or a short circuit is possible;
- The device is not able to provide the required charge. Reasons: the battery terminals have oxidized or are broken, the alternator belt does not have enough tension, the voltage regulator or diode bridge may be broken;
- The battery began to recharge. Most often, such a malfunction is caused by a breakdown of the diode bridge and voltage regulator already mentioned above, or a sharp drop in voltage in the generator-battery section of the circuit.
Purpose of the regulator relay VAZ 2107 injector and carburetor
The main purpose of the voltage regulator relay on the VAZ 2107, and any other car, is to maintain a stable and sufficient charging current for the on-board network and the car battery, as well as to level out voltage surges in the generator.
Variations in the generated voltage would occur as the generator rotates at different frequencies. When the power drops below 12V, the battery stops charging, and the entire bot network no longer functions at 100%. If the voltage exceeds 16 Volts, this can lead to boiling of the battery, as well as failure of on-board devices.
New Lada: Expanding the functionality of the standard MMS Lada Vesta using software » Lada.Online - all the most interesting and useful about LADA cars
On early production VAZ cars of the carburetor type, the voltage regulator is located on the left arch of the engine compartment. Such devices are also called external, since they were installed outside the generator structure. To be more precise, a brush mechanism was installed in the generator, and control was carried out via a printed circuit board, which was installed outside the product.
Most VAZ 2107 cars of the carburetor and injection type are equipped with generators with built-in charging relays. The charging relay on such VAZ 2107 vehicles is located directly on the side of the generator opposite the pulley.
To maintain an acceptable battery charge, the alternator requires 13.6 to 14.6 volts of power. The voltage regulation circuit is carried out using an electrical circuit, which is located on a printed circuit board (chocolate board) or in the form of a single semiconductor module (tablet) with brushes.
The switch located inside the generator is usually not able to adequately respond to the ambient temperature due to its location close to the running engine. The built-in relay is sometimes replaced with a three-level voltage regulator, which is due to the greater efficiency of the product due to manual adjustment of the output voltage.
Preparing the car
To fix problems with the Lada Granta generator, you will need to remove this device. Removing it has certain difficulties, but performing this procedure on your own is quite possible. In addition, dismantling has some features caused by differences in engine configuration (8 or 16 valves), as well as the presence of air conditioning.
To remove the generator from an eight-valve and sixteen-valve Granta that is not equipped with air conditioning, you will need a mounting blade and wrenches 8, 10 and 13. To carry out the same manipulation on a car equipped with air conditioning, you will need a jack, four socket wrenches (a wrench for 18), WD-40 and a wheel wrench.
What is it needed for?
As mentioned above, any vehicle is equipped with such an important device as a generator. If it fails, the operation of the vehicle will be impossible. Therefore, special attention should be paid to the performance of all elements of the device, be it a Lada Kalina with a 16- or 8-cl. engine, with or without air conditioning. What is the component size? How is the roller strap adjusted and replaced? How to tighten up? You can find out the answers to these questions in the article.
Car Lada Kalina tuning
Before answering questions that interest Lad Kalin owners, you should understand why this component is needed. Not every motorist knows what role he plays in the functioning of the car.
In modern cars, this belt is the only element that allows you to transmit crankshaft rotation to the generator. When the crankshaft transmits rotation to the device pulley, energy appears in the vehicle's electrical network, thanks to which all electrical equipment operates.
We recommend: Do-it-yourself anti-rain for your car
Instructions for removing the generator
Let's start by describing the process of removing the generator from an eight-valve car that is not equipped with air conditioning. You need to start by disconnecting the “ground” from the battery, for which you remove the negative terminal (this manipulation must be carried out when removing this unit from any modification of the Grant, this will help to avoid a short circuit). Further actions are performed in the following order:
- the bolts on which the motor protection is attached are unscrewed, after which it is removed;
- disconnect the block with wires from the generator;
- after removing the protective cap of the nut holding the power drive, the nut itself is unscrewed and the wire is disconnected from the generator;
- then the upper mounting nut of the generator is unscrewed, and the unit is pressed out using a mounting spatula, and the upper mounting bolt is also removed at the same time;
- the lower fastening nut is unscrewed, the generator is carefully moved away from the engine, and the fastening bolt located below is pulled out;
- the generator is shifted to the right mudguard, the belt is removed from its pulley, the generator itself is pulled out;
- The process is completed by removing the belt from the crankshaft pulley.
Now let's look at a similar process carried out on a sixteen-valve Grant without air conditioning. Such machines are equipped with belt tensioners, and therefore the work described has some differences. So:
- First, the mounting bolts are unscrewed and the block is disconnected from terminal “D”;
- then the cap covering the “B+” terminal is removed;
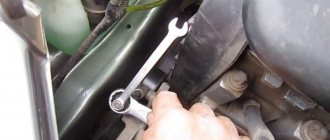
- then the nut holding the wire tip is unscrewed and the nut holding the tension bar is loosened;
- the adjusting bolt of the tension mechanism is turned counterclockwise, and at the same time the belt tension is loosened with a 10 key;
- the generator is moved towards the motor, and the belt is removed from the pulleys;
- then the tension mechanism adjustment bolt is unscrewed and removed, and the tension bar is dismantled;
- the fastening nut located at the bottom is unscrewed;
- the spacer sleeve is removed, after which the mounting bolt located at the bottom is removed out;
- Finally, remove the tension bar and remove the generator out.
Now let's move on to describing the process of removing the generator from a car equipped with air conditioning. Since the air conditioning devices installed on Grants operate from the generator belt, they must be carefully moved to the side, after which you can proceed directly to the removal itself.
To successfully carry out this procedure, you must sequentially perform the following steps:
- to begin with, all the bolts that hold the cushions and bracket are treated with WD-40;
- then the mounting bolts are unscrewed and the protection is dismantled;
- after the WD-40 starts to work, unscrew the bracket nut;
- the jack is installed in front of the car, on the right, while the bolts holding its right front wheel are loosened;
- lift the jack, while hanging the wheel, and then remove it from the car;
- Next, the tension roller is dismantled, then the bolts that secure the pillow are unscrewed;
- the car is carefully lowered, hanging it (thus, the cushion moves towards the motor, opening a direct path to the generator).
At the final stage of work, you will need to remove the generator using one of the methods described above.
The sequence for replacing a failed relay regulator
Before starting work, you need to decide what type of regulator is installed on the VAZ 2106: the old external one, or the new internal one. If we are talking about an outdated external regulator, then removing it will not be difficult, since it is attached to the arch of the left front wheel.
If the VAZ 2106 has an internal regulator installed (which is most likely), then before removing it you will have to remove the air filter from the car, since it interferes with access to the generator.
- On the external relay, use an open-end wrench to unscrew the two bolts holding the device on the left wheel arch.
- After this, all wires are disconnected manually, the regulator is removed from the engine compartment and replaced with a new one.
There are a couple of important points that cannot be left out. First of all, there is a problem with external regulators for the VAZ 2106. These are very old parts that have been discontinued a long time ago. As a result, they are almost impossible to find on sale. Sometimes a car owner has no choice but to buy an external regulator in person, using an ad on the Internet.
Of course, the car owner can only guess about the quality and actual service life of such a part. The second point concerns the removal of internal regulators from the generator housing. For some unknown reason, the wires connected to the regulator on the generator side are very fragile.
Most often they break “at the root,” that is, right at the contact block. Fixing this problem is not so easy: you have to cut the block with a knife, resolder the broken wires, isolate the solder points, and then glue the plastic block with universal glue. This is very painstaking work
Therefore, when removing the internal regulator from the VAZ 2106 generator, extreme caution should be exercised, especially if repairs have to be carried out in severe frost
So, in order to check and change a burnt-out voltage regulator, the car owner does not need special skills. All he needs is the ability to use a wrench and a screwdriver. And basic understanding of how a multimeter works. If all this is present, then even a novice car enthusiast will not have any problems replacing the regulator. The main thing is to strictly follow the recommendations outlined above.
Selection of components
Until recently, the Grants produced by the Volzhsky Automobile Plant were equipped with KZATE 115A generators with a rated voltage of 14 V and a maximum electric current of 115 A. Car owners often complained about the low quality of the diode bridges of these units, and many other questions also arose, for example, regarding the quality of its assembly.
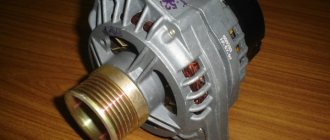
A much more reliable, and now the most widespread, generator is the Bosch 135 Ampere generator, which all Grants have been equipped with over the past few years. Such generators cost approximately 5,000 rubles, but do not have any serious complaints in terms of quality. A fairly powerful unit 9402.3771-06 with a maximum current of 90 A is also suitable for Granta. It is designed for installation on VAZ-1117-1119 Kalina cars, its approximate price is from 4,000 rubles. and higher.
Separately, it is worth mentioning the generator belts. Their recommended service life on Grants is similar to the warranty period of the car, but, as experience shows, the belt breaks after about 5,000 km. However, preventing belt rupture is quite possible; this is facilitated by regular checks of its condition, ideally carried out before each trip. The belt should not be over-tightened, but it should not sag too much. Normally, when you press it, the belt is slightly pressed, and when you try to turn it over, it turns over on its edge without any problems.
It is also important for the owner of the Grant not to miss the moment of replacement. It is not difficult to understand that a possible belt rupture is imminent - it begins to make whistling sounds when the engine is not warmed up and in damp weather. If a similar problem occurs to you on the road, check the degree of belt tension - quite often it only needs to be tightened a little, after which you can safely drive on. But you will still have to replace such a belt.
Reviews
| № | Positive |
| 1. | Vladimir: I’ve been actively using the car in taxis for a year and a half, no complaints. All mechanisms work properly. I made no investments, with the exception of consumables, filters, oils. |
| 2. | Kirill: at 55,000 the alternator belt whistled, I contacted the service center and they tightened it up. Since then, no comments. |
| 3. | Slavik: two years have passed since I bought the car, I perform regular maintenance, fill in high-quality oils and fuel. The technique works like a clock. |
| 4. | Gennady: I have driven over 65,000 km, there are no comments on the car. It starts with a half turn, operation is smooth, without jerking. |
| 5. | Ignat: I heard negative reviews about Granta, I can’t confirm. I've been driving the car for a year and a half, no complaints. Yes, there are minor breakdowns, but this is natural. I don’t contact service, I fix small things myself. |
| 6. | Vasily: at 80,000 km the converter bearing began to creak, took it to a service center and had it replaced. I expected it to last up to 100,000 km, but nothing, this is enough for domestic transport. |
| 7. | Vladislav: a year has passed since the purchase of the car, the investment is minimal, it works properly. I strictly follow the manufacturer's recommendations, fill with high-quality oils, fuel, and moderate driving style. |
| Negative | |
| 8. | Nikolay: I do not recommend Grant for purchase. During a year and a half of operation, it was repaired twice unscheduled due to defects in the manufacture of parts. |
| 9. | Dmitry: the alternator belt went off at 45,000 km, replaced it. After several more visits to the service station for diagnostics and repairs. |
| 10. | Sergey: It hasn’t traveled 100,000 km yet, but it’s already undergone unscheduled repairs at a service center; the quality of the parts is low. Most likely, I will sell the car and buy a Renault Logan. |
Generator installation
To install the generator, you will need to do everything described in the “Removing the generator” section, but in reverse order. In addition, you will need to replace the alternator belt, the cost of which is approximately 800 rubles. To carry out this manipulation, you will need a mounting blade, a 13mm wrench and a knife (you will use it to cut off the old belt). A minimum of metalworking skills would also be useful in such work.
The belt is changed with the engine not running; before working with the battery, the terminal must be removed. The order of actions you perform will be as follows:
- To begin with, the front wheel and mudguard are removed, for some modifications it is necessary to remove the crankcase protection, and for an injection engine, the crankshaft position sensor is removed;
- The belt tension is weakened; for this purpose, the tensioner nut (or the generator itself) is loosened;
- Remove the old belt from the upper pulley and compare it with the one being installed, making sure they are identical;
- If necessary, find out the cause of the belt malfunction and eliminate it;
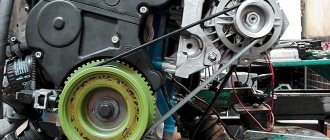
- The new belt is installed as follows: start with the crankshaft pulley, then throw the element onto the generator, and then onto the water pump, adjust its tension (the belt should not sag excessively when pressed);
- Reinstall the battery terminal, then start the engine and turn on the heater, headlights, air conditioning and other large consumers of electrical current and observe their operation (normally there should be no whistling sounds or extraneous noise, and the headlights should maintain equal illumination at any speed);
- After this, the previously removed elements must be installed in their original places.
Alternator belt replacement process
- key "8"
- key "10"
- key "13"
- key “18”,
- wheel wrench for wheel removal,
- as well as a special device, the catalog number of which looks like 67.7834-9703. In principle, if you don’t have this device, you can do without it. But the likelihood of belt damage increases.
If you are getting ready to replace the alternator belt on the A/C version, then make sure you have all of the above tools on hand.
A Gates MICRO-V 6PK995 was installed on the Granta with air conditioning from the factory.
- Use a 13mm wrench to loosen the nut.
- Now a “10” wrench comes to the rescue, with which the adjusting bolt is unscrewed.
- Next, you need to shift the generator and replace its belt. To do this, carefully move the generator to the side towards the engine.
- Thus, we open up the possibility of further work, which consists of unscrewing the front right wheel. It must be completely removed from the vehicle.
- Similar actions must be done with the corresponding fender liner. Now you can freely remove the old alternator belt and replace it with a new one.
Features on version with air conditioning
As for the features that characterize working on a car with air conditioning, they are present. We are talking about the fact that initially you will have to wet the bolts securing the motor mount and bracket. For this, a standard WD40 mixture will be sufficient. The action time of the mixture will be about a quarter of an hour. After this, you can carefully unscrew the bracket nut.
We take a jack, which we place under the right front part of the car. Use a wheel wrench to loosen the nuts, then unscrew the front right wheel, completely dismantling it. Lower the car again by unscrewing the tension roller. Now we can bend the belt and unscrew the bolts that secure the pillow.
Speaking about moving the pillow, you need to take into account that the car must be lowered as carefully as possible so that it begins to hang out only a little. After this, the pillow moves towards the power unit. Only a little effort will be enough for the alternator belt to be completely exposed to our eyes, and we can remove it, after which install a new belt.
And, of course, do not forget to put the wheel in its place. To do this, the car must be jacked up so that the engine can be lowered. Try to control the position of the pillow, as well as the alternator belt. After this, the pillow bolts must be installed and tightened to their maximum. The same applies to the bracket fixing nut. And only after that you can put on the wheel and lower the car on all fours.
Features on the version without air conditioning
Replacing the alternator belt in the regular version is much simpler; some Grant drivers change the belt without removing the wheels or jacking up the car.
Features of belt tension on Lada Granta
Initially, the bracket must be installed and the belt must be put on the crankshaft pulley with the generator pulley. Next, use a suitable spanner type wrench to fix it on the hexagon of the adjusting pin of the tensioning device.
While holding the stud with a wrench, you need to slightly loosen the locknut and rotate the adjusting pin counterclockwise. At this point, the tension roller will press a little harder on the upper part of the belt, which will tighten it.
We tighten the belt while tightening the stud locknut. If the force is 10 kg/s, then the belt should bend by ten millimeters.
Please also take into account that after using the belt for a short time, it needs to be tightened, as there is a natural sagging factor.
Additional Tips
After removing the old belt and before installing the new one, compare the two belts to ensure they are identical.
There have been cases that, even if the catalog numbers matched, the belts were completely different. And the performance of the car and the duration of its service depend on this.
After replacing the belt, you need to start the engine and put the maximum load on the car's electrical network. To do this, you need to turn on the high beams, headlights, and heating devices. At this time, actively “pump up the gas.” If there is a whistle, then this indicates the need to tighten the belt, as it is sagging.
Overrunning clutch
An overrunning clutch is a mechanism that prevents the transmission of torque from the driven shaft to the drive shaft when the first one rotates too quickly. Does Grant need to be equipped with such a device? Let's try to figure it out.
As you know, the engine produces torque in jerks - when the fuel mixture is burned, the crankshaft begins to rotate rapidly, after which it slows down. Also, accelerated wear is caused by the generator itself, which is caused by the inert rotation of the armature. As a result, the belt is exposed to constant pulling forces, which significantly reduces its service life. To prevent such phenomena, overrunning clutches are installed. Its advantages include the ability to significantly reduce the negative inertial influence and ensure silence and a minimum of vibrations during engine operation.
The installation process is simple. First, remove the generator itself (according to the instructions above), after which the generator pulley is removed. To do this, fix the pulley with an adjustable wrench, and then unscrew the nut with a 24mm wrench.
Then install the coupling, having previously treated the threads and seat with graphite lubricant. Having installed the part in its proper place, tighten the nut with a special wrench. The installation of the generator completes the work. The entire replacement process takes approximately one and a half hours.
What is a generator
Any car generator consists of several parts:
1. A rotor with an excitation winding, around which an electromagnetic field is created during operation.
2. A stator with three windings connected in a star configuration (alternating voltage is removed from them in the range from 12 to 30 Volts).
3. In addition, the design contains a three-phase rectifier consisting of six semiconductor diodes. It is worth noting that the VAZ 2107 generator voltage relay-regulator (injector or carburetor in the injection system) is the same.
But the generator will not be able to operate without a voltage regulation device. The reason for this is the voltage change over a very wide range. Therefore, it is necessary to use an automatic control system. It consists of a comparison device, control, executive, master and special sensor. The main element is the regulatory body. It can be either electrical or mechanical.
Maintenance and repair work
In conclusion, we will consider some effective measures for prevention and self-repair of the generator, because if you have the desire, you can implement them without much difficulty.
Repair and preventive measures are as follows:
- First, unscrew the mounting bolts, then pull out the lock and remove the stator winding terminal. The remaining terminals are undocked in the same way, after which the nut of the power bolt is unscrewed, and the rectifier unit is disconnected from the generator;
- Visually inspect the stator, paying special attention to signs of wear or mechanical damage;
- Do not forget to monitor the rotor and stator windings for open circuits or short circuits to the housing;
- It is also recommended to periodically check the health of the diodes using a multimeter.
- Any deviation from the norm indicates a malfunction of the rectifier unit and the need to replace it;
- Inspect the bearing periodically, making sure it rotates easily. If you find any grease leaks or damage on it, replace the part.
The measures listed above will significantly increase the service life of your car’s generator.
Removing mudguards on the Lada Granta Springs for the trunk lid of the Lada Granta Body problems on the Lada Granta Eliminating rattling side windows on the Lada Granta Fuel consumption on the Lada Granta Removing the door of the Lada Granta and Lada Kalina
Types of wipers
There are two types of wipers for the Lada Granta:
- Frameless. Such products are better pressed against the surface of the windshield, which allows for better cleaning. Due to the absence of a frame, such devices practically do not freeze during the frosty season, which greatly simplifies their operation in winter. In addition, when operating at high speed, frameless products produce an order of magnitude less noise.
- Frame. This option is older, since it was previously widely used on many cars. Their cost is lower, but they are equipped with a frame, which in any case will freeze during cold weather. However, products of this type tend to cause less damage to the surface of the windshield, since they are not pressed against it as tightly, unlike frameless options.
There is also a hybrid version of the product, but it has the same characteristics as frame wipers, so we do not recommend choosing it. The most technologically advanced option is frameless products, but their cost is higher (the author of the video is the remgar channel).
What kind of generator is installed on the Lada Granta
At the factory, a device with the designation: KZATE 115A is installed in the car. The standard generator has the following characteristics:
- Rated voltage – 14 V.
- Maximum current – 115 A.
- Shaft rotation speed without load is 1200 rpm.
- The maximum shaft rotation speed is 6000 rpm.
The cost of the original generator model ranges from 5,000 to 6,000 rubles. In addition to the main device, analogues can also be used. The names, articles and prices of other generators are given in the table.
| Generator | vendor code | Cost, in rubles |
| Generator LADA Granta | ALQ0652RN | 5500 |
| Generator Lada Granta 2011 | 2170370101013 | 2000 |
| Generator (115A) LADA Kalina / Granta / Priora | 21700370101082 | 5400 |
| Generator Granta (110A) (BOSCH) | 21700-3701010-13 | 5300 |
The last of the Bosch 110A analogues is extremely popular among Lada Granta owners.
Grant generator prices
Below is a table with prices for generators for Granta.
| Name | vendor code | Price, (rubles) |
| StarVolt | LG 0190 | 7300 |
| Auto tycoon | AM-05G | 4400 |
| HOFER | HF 633623 0119-78 | 4650 |
| ATE | 9402.3771-14 | 4000 |
| ELTRA | 5162.3771 | 4500 |
Generator replacement
Almost every owner of a Lada Granta knows that the standard generator often fails. And you can verify this by starting to operate this car. The reason for the failure lies in the unfinished design, which the manufacturers know about and which they do not want to correct.
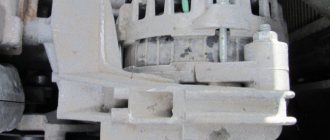
Usually, it is not the generator itself that fails, but its support bearings or brushes, resulting in extraneous noise and an unpleasant grinding sound of parts rubbing against each other during a trip. It is also worth noting that in almost all Lada Granta models the generator is located in the engine compartment on the left side.
To eliminate the annoying sound and, in principle, get rid of the problem, you will need to dismantle the generator, diagnose the device and system, and, if necessary, replace worn elements or the entire generator. When viewing, it is important to pay attention to the electrical and mechanical components.
The procedure for replacing the generator depends directly on the vehicle configuration. However, in any case, the process involves carrying out preparatory and basic work. A detailed description of the replacement for each Lada Granta configuration is presented below.
List of online stores selling generator brushes (Moscow, St. Petersburg, Kyiv)
| № | Name | Address |
| 1. | "Service - Master" | https://starter.ms/ |
| 2. | "Starter" | https://www.svstarter.com.ua/ |
| 3. | "Transstarter" | https://transstarter-spb.ru/ |
| 4. | "Flagma" | https://sanktpeterburg.flagma.ru/ |
| 5. | "SpetsKomZapchast" | https://speckomzapchast.ru/ |
| 6. | "AvtoBiz" | https://autobiz.ru/ |
Review of manufacturers, cost of brushes
| Manufacturer article number | Price, rub.) | Resource (thousand km) |
| Bosch 2170-3701010-13 (F000 BL0 652) | From 4300 | 95 — 105 |
| Standard KzATE 115A 9402-3701000-03 | From 3900 – 4100 | 75 — 85 |
| Pulley FENOX OP6034 | From 1700 | 65 – 75 |
| OP6020 | —/— | —/— |
| INA 535 0105 10 | —/— | —/— |
| INA 535 0102 10 | —/— | —/— |
| Brushes Cargo BX2132 | From 150 | 80 — 95 |
| —/— TRT5 10142 | —/— | —/— |
*prices are current as of October 31, 2018.
Recommendations for the selection of parts and components
If possible, replace the standard converter on the Lada Grant from BOSCH. The declared service life of 95,000 km does not correspond to reality. In practice, KZATE does not last more than 65 - 70 thousand. For a domestic car this is not enough.
Often the cause of failure of elements of the power supply system is the standard converter. To avoid purchasing non-original products, use the services of official representative offices and dealership centers.
Purchase spare parts differentiated: domestic for a domestic converter, imported for an imported one. Foreign parts are not always compatible with domestic equipment.
Lada Granta with 8-valve engine
The preparatory stage includes collecting the following tools and materials:
- metal spatula;
- rags;
- liquid to eliminate corrosion.
The main replacement stage involves performing the following steps:
- First, the car owner must place the car within the perimeter of the work area, and also take care of the safety of the work being carried out. To do this, for example, you need to fix the wheel chocks. You will also need to remove the battery terminals to prevent a short circuit during operation.
- The second step involves removing the oil pan by unscrewing the 8 mounting bolts. Additionally, it is necessary to disconnect the block with wires from the generator.
- The third step is to remove the rubber cap and the connecting terminal. Next, use a key set to “13” to unscrew the upper mounting bolt, which is responsible for fixing the position of the converter, and move the device towards the radiator until it stops. To finally remove the generator, you will need to unscrew one more bolt.
The final step will be to remove the generator, inspect the device and replace all worn parts. It is also recommended to clean the surfaces of the elements from rust before reinstalling the structure.
Starter 63
Wholesale of starters and generators, and their components
Consultations on product selection and order processing daily from 9-00 to 21-00
- home
- Wholesalers
- Shop
- Guarantees
- Stock
- Shipping and payment
- About company
- Service
- Contacts
- Basket
- Generators Generators assemblies
- Diode bridges
- Generator commutator
- Front covers
- Rear covers
- Rear covers (plastic)
- Relay regulators
- Generator rotor (armature)
- Generator stator (winding)
- Generator pulley
- Various generator parts
Starters
- Starter assembly
Bushings Drive fork Planetary gears Drive (Bendix) Starter gear Retractor relay Front covers Rear covers Stator (winding) Brushes Brush assembly Anchor Various parts of the starter
Search by Cargo, CS519
Lada Granta with 16-valve engine
To carry out a replacement on a Grant with a 16-valve engine, you will need the same materials and tools as when replacing a generator on a car with an 8-valve engine. A distinctive feature of the converter design in this case is the presence of an alternator belt tensioner, and this must be taken into account.
The main stage consists of the following steps:
- The car must be placed within the perimeter of the repair area, the position must be fixed, and the battery terminals removed.
- In exactly the same way as in the previously described sequence, you will need to use the key at “13” to lower the upper lock of the generator and move the device all the way.
- The third step involves replacing the belt. This will require unscrewing several fasteners to release the tension.
- Next, you need to unscrew the lower mount of the generator and remove the bushing.
Only then will it be possible to dismantle the unit, inspect it and replace it.
General questions about working with the Grant generator
Let's consider general questions: everything except replacement.
Tension check
There are two approaches: visual assessment and physical.
Visual assessment of condition:
- the car is on a flat surface, the gear is in neutral, the handbrake is off, the hood is open;
- We don’t start the car - we put it in 5th gear;
- We opened the hood and found a generator: we push the car back, resting against the bumper;
- We inspect the required part along its entire length: are there any breaks or cracks? It needs to be changed.
Poor quality will lead to unexpected problems on the way. Physical assessment :
- if you have a tool that measures pressure force: press the belt with a force of 10 kg*s - the deflection should be no more than 10 mm;
- there is no special tool: we try to turn it across - it should turn no more than 90 degrees.
How to tighten the alternator belt on a Grant
This section applies only to machines with a tensioner. No - change the part or see above how to install it.
Subsequence:
- we use ring wrenches 8, 19;
- Throw key 19 onto the lead screw;
- wrench 8 for locknut;
- we touch;
- Now you can turn the lead screw: clockwise to loosen, counterclockwise to tighten;
- got the desired result - tighten the locknut.
It is better to take ring wrenches, since a head with a ratchet or a wrench will not work.
When to change: technical regulations for replacing a VAZ 2190 belt
AvtoVAZ requires checking the condition of this part every 15,000 kilometers .
every 30,000 kilometers, regardless of condition.
Checking and replacing the voltage regulator on the Lada Granta generator
Tools:
- Open-end wrench 8 mm
- Open-end wrench 10 mm
- Open-end wrench 12 mm
- Open-end wrench 13 mm
- Open-end wrench 19 mm
- Ratchet wrench
- 8 mm head
- 13 mm head
- Medium flathead screwdriver
- Large flat-head screwdriver (for alternator without tensioner)
- Knife (for generator without tensioner)
- Vernier calipers (or ruler)
- Test instrument with ohmmeter and voltmeter functions
- Torque wrench
Parts and consumables:
- Battery (or 12V power supply)
- Connecting wires with terminals
- Indicator lamp 12 V
- Voltage regulator (replacement if necessary)
Notes:
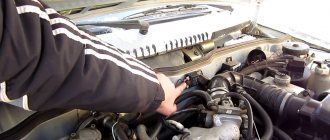
Initially, check the voltage regulator without removing the generator from the car. For this:
1. Move the rubber boot aside and connect the plus wire to the volts, and the minus wire to the generator housing.
Replacing brushes on a Bosch generator (f000 blo 652)
- set of car keys;
- rags;
- additional lighting;
- side cutters, pliers;
- new brushes with pressure springs from VAZ 2110;
- liquid for removing deposits WD-40.
Sequence of actions when replacing brushes on the generator:
- We exactly repeat the steps described above to disassemble the converter from its original location.
- Unscrew the back part and remove the brushes assembled with the diode bridge.
Note to the driver! In the BOSCH modification, the diode bridge of the generator is crimped around the perimeter with metal loops (6 in total). Carefully separate them with pliers and remove the diode bridge.
- Using the “8” socket, unscrew the four bolts and remove the slip rings.
- Use a medical scalpel to disconnect the winding from the rotor.
- We replace slip rings.
Slip rings
- Use a socket on “17” to press the bearing in and tighten the bolts.
- Buying original brushes from BOSCH will cost 1000 – 1500 rubles, we will replace them with domestic analogues. We lift the top black cap, we see two contacts with the ends of the brushes on the relay, and disconnect them.
Brush ends on relay
Top black cap
- We clean, degrease, wipe contacts.
- We turn the relay over, the standard brushes fall out along with the springs.
- We insert new ones into the brush mechanism, cut off the excess wire, and solder the ends to the antennae.
Soldered ends
- We apply sealant to the surface of the contacts to insulate the wiring.
Changing the generator regulator relay on Lada Kalina
A three-phase voltage regulator (charging relay) is installed on the generator. Responsible for maintaining the voltage of the on-board network within a given limit in all operating modes.
The output voltage may be affected by changes in rotor speed, electrical load, and ambient temperature.
Failure is considered one of the most common problems associated with the operation of the generator. Replacing an element does not require practical skills.
Replacement process
The process of removing the generator on Kalina depends on whether it has a tensioner on it or not. A belt without a tensioner can only be removed together with the generator or simply cut (if it’s old).
- Disconnect the negative wire from the battery.
- Loosen the generator and remove the belt.
Use a 13 key to loosen the tensioner and remove the belt.
Voltage regulation in generators with electromagnetic excitation
Methods of regulation
. If the main magnetic field of the generator is induced by electromagnetic excitation, then the electromotive force Eg of the generator can be a function of two variables: the rotor rotation frequency n and the current Ib in the excitation winding - Eg = f(n, Ib).
It is this type of excitation that takes place in all modern automobile alternating current generators that operate with a parallel excitation winding.
When the generator operates without load, its voltage Ug is equal to its electromotive force EMF Eg: Ug = Eg = SFn (1).
The voltage Ug of the generator under the load current In is less than the emf Eg by the value of the voltage drop across the internal resistance rg of the generator, i.e. we can write that Eg = Ug + Inrg = Ug(1 + β) (2).
The value β = Inr/Ug is called the load factor.
From a comparison of formulas 1 and 2 it follows that the generator voltage Ug = nSF/(1 + β), (3) where C is a constant design factor.
Equation (3) shows that both at different frequencies (n) of rotation of the generator rotor (n = Var), and with a changing load (β = Var), the constant voltage Ug of the generator can be obtained only by a corresponding change in the magnetic flux F.
The magnetic flux Ф in a generator with electromagnetic excitation is formed by the magnetomotive force Fв = W Iв of the excitation winding Wв (W is the number of turns of the winding Wв) and can be easily controlled using the current Iв in the excitation winding, i.e. Ф = f (Iв). Then Ug = f[n, β, f(Iv)] 1, which allows you to keep the voltage Ug of the generator within the specified control limits for any changes in its speed and load by appropriately selecting the regulation function f(Iv).
The automatic regulation function f(Iв) in voltage regulators comes down to reducing the maximum value of the current Iв in the excitation winding, which occurs when Iв = Uг/Rw (Rw is the active resistance of the excitation winding) and can be reduced in several ways (Fig. 1): by connecting to winding Wв in parallel (a) or in series (b) with additional resistance Rд: by short-circuiting the excitation winding (c); rupture of the excitation current circuit (d). The current through the excitation winding can be increased by short-circuiting the additional series resistance (b).
All these methods change the excitation current in steps, i.e. There is intermittent (discrete) current regulation. In principle, analogue regulation is also possible, in which the value of the additional series resistance in the excitation circuit changes smoothly (d).
But in all cases, the generator voltage Ug is kept within the specified control limits by corresponding automatic adjustment of the excitation current value.
Discrete - pulse control
In modern automobile generators, the magnetomotive force Fb of the excitation winding, and hence the magnetic flux F, is changed by periodic interruption or an abrupt decrease in the excitation current Ib with a controlled interruption frequency, i.e. discrete pulse regulation of the operating voltage Ug of the generator is used (previously analog regulation was used, for example, in carbon voltage regulators).
The essence of discrete-pulse regulation will become clear from a consideration of the principle of operation of a generator set, consisting of a simple contact-vibration voltage regulator and an alternating current generator (ACG).
Rice. 2. Functional (a) and electrical (b) diagrams of a generator set with a vibration voltage regulator.
A functional diagram of a generator set operating in conjunction with an on-board battery (AB) is shown in Fig. 2a, and the electrical diagram is in Fig. 26.
The generator consists of: phase windings Wph on the stator ST, a rotating rotor R, a power rectifier VP on semiconductor diodes VD, an excitation winding Wв (with active resistance Rw). The generator rotor receives mechanical rotational energy Am = f(n) from the internal combustion engine. The vibration voltage regulator RN is made on an electromagnetic relay and includes a switching element CE and a measuring element IE.
The FE switching element is a vibrating electrical contact K, which makes or breaks an additional resistance Rd, which is connected in series with the excitation winding Wb of the generator. When the switching element is triggered (opening contact K), a signal τRд is generated at its output (Fig. 2a).
The measuring element (IE, in Fig. 2a) is that part of the electromagnetic relay that implements three functions:
- comparison function (CS) of the mechanical elastic force Fn of the return spring P with the magnetomotive force Fs = WsIs of the relay winding S (Ws is the number of turns of the winding S, Is is the current in the relay winding), and the result of the comparison is the period T formed in the gap with = tр + tз) armature oscillations N;
- the function of the sensitive element (SE) in the feedback circuit (DSP) of the voltage regulator, the sensitive element in vibration regulators is the winding S of the electromagnetic relay, connected directly to the voltage Ug of the generator and to the battery (to the latter through the ignition key VZ);
- the function of a master device (SD), which is implemented using a return spring P with an elastic force Fп and a support force Fо.
The operation of a voltage regulator with an electromagnetic relay can be clearly explained using the speed characteristics of the generator (Fig. 3 and 4).
Rice. 3. Change in Ug, Iv, Rb over time t: a - dependence of the current value of the generator output voltage on time t - Ug = f (t); b - dependence of the current value in the excitation winding on time - Iв = f (t); c - dependence of the arithmetic mean value of the resistance in the excitation circuit on time t - Rb = f(t); I is the time corresponding to the frequency (n) of rotation of the generator rotor.
While the voltage Ug of the generator is lower than the voltage Ub of the battery (Ug Ub), the magnetomotive force Fs of the relay winding becomes greater than the force Fp of the return spring P, i.e. Fs= Is Ws > Fп. The electromagnetic relay is activated and contact K opens, and additional resistance is connected to the excitation winding circuit.
Even before contact K opens, the current Iв in the excitation winding reaches its maximum value Iв max = UгRw > Iвб, from which, immediately after contact K opens, it begins to fall, tending to its minimum value Iв min = Uг/(Rw + Rд). Following the drop in the excitation current, the generator voltage begins to decrease accordingly (Ug = f(Iv), which leads to a drop in the current Is = Ug/Rs in the relay winding S and contact K is opened again by the force of the return spring P (Fp > Fs). By the time of opening contact K, the generator voltage Ug becomes equal to its minimum value Umin, but remains slightly higher than the battery voltage (Ugmin > Ub).
Checking and replacing the Lada Granta voltage regulator
To make sure that the voltage regulator is working properly, turn off all consumers except the high beam headlights and measure the voltage at the battery terminals.
It should be in the range of 14.4 - 15.1 V, at an engine speed of 3000 min -1.
If the voltage differs from the specified one, the regulator must be replaced.
You can remove the brush holder with the regulator without removing the generator from the car.
1. Disconnect the wire terminal from the negative terminal of the battery.
2. Disconnect the wiring harness block from the generator.
3. Remove the protective rubber cover...
...and use a 13 mm socket wrench to unscrew the nut securing the wire lugs to the “B+” terminal of the generator.
About the principle of operation of a car generator
The operation of the Lada Kalina generator unit is based on the following principle: an alternating current is induced in the stator winding, which is subsequently transformed into direct current through a rectifier module located on the body of the unit. The generator cover is also equipped with an electronic voltage regulator and a brush holder. The rotor of the device receives torque from the crankshaft pulley. The transmission link is a poly V-belt.
The basic characteristics of the generator set include the following parameters:
- maximum generated current – 85-90 Amperes;
- operating range of on-board voltage – 14.4-15.1 Volts;
- rotation ratio of the motor and rotor – 1:2.4;
- right-hand direction of rotation.
The housing of the unit is held together by pins that tighten the stator with the covers. The mounting sockets of the indicated covers contain bearings, which ensure the ability of the rotor to rotate. The rear bearing is installed inside the cover with a minimum gap. The front element is equipped with the ability to slide along the surface of the rotor shaft. It is fixed inside the front cover with a slight interference fit, and a pressure plate covers it from the outside. The back of the device is protected by a plastic casing.
Let's move on to the switching diagram of the generator with the on-board network. The connection diagram is very simple. After turning on the ignition, power begins to flow to the voltage regulator through the battery discharge lamp circuit. When the motor starts, the excitation winding is supplied with supply voltage from three diodes mounted in the rectifier unit.
Using the indicated signal lamp, the generator unit can be checked. If the device is working properly, the lamp lights up when the ignition is on. It goes out when the engine starts. When this phenomenon is not observed and the lamp continues to shine, the generator set should be diagnosed for the presence of malfunctions. In some cases, replacement is required, and many are interested in how to remove the generator?
Generator Lada Granta - problems and solutions
Lada Granta cars appeared on our roads relatively recently, however, unfortunately, many owners of this model of the Russian automobile industry have already noticed the presence of many chronic “sores”, among which one of the most unpleasant is the low reliability of the standard Lada Granta generator.
As always, the most correct method of solving a problem is, at the same time, the most radical. In this case, it means replacing the 9402.3701 generator with a more reliable and advanced product, for example, a 110 Amp generator from Bosch. Such modernization does not require structural changes and will help to get rid of problems associated with power supply for many years, although it must be recognized that such modifications will not be cheap.
As a preventive measure, you can slightly improve the energy generation system on the Lada Granta by replacing the clearly unsuccessful bracket on it and, in this case, we can advise installing a Lada Kalina bracket, which includes a special roller for adjusting the belt tension. Despite its outward insignificance, such a simple modification can significantly extend the service life of the generator bearings.
However, if you have the desire and some practical skills, then it is quite possible to repair the Lada Granta generator yourself.
Lada Granta generator voltage regulator - check and prevention
- To check the functionality of the regulator, it is necessary to unscrew the rubber cover and connect the “positive” wire of the will, respectively, “throw the negative wire” onto the generator housing;
- We start the engine and turn on any significant load (for example, headlights);
- After about fifteen minutes of engine operation and reaching a stable average speed, measure the voltage, which should be in the range of 14.4-15.1V;
- The serviceability of the capacitor is checked with a megohmmeter or tester with a measurement scale of 110 MΩ, while the probes of the device are connected directly to its terminals. At the moment of connection, the device should demonstrate infinite resistance, then the resistance decreases and again begins to tend to infinity;
- With the removed regulator, the smooth movement of the brushes is monitored, as well as the degree of their abrasion - the brushes must protrude by at least 5 mm, otherwise the brushes are replaced together with the brush holder;
- Among other things, it is recommended to check the general functionality of the brush assembly, for which a test lamp is connected to the brushes, and a voltage of 12V is applied between the terminal and the ground of the brush holder - the test lamp should light up, and when the voltage increases to 15-16V, it should go out. If the specified operating logic is violated, the regulator must be replaced.
Recommendations for selection
Let's consider several product manufacturers:
- Frameless Bosch Aerotwin. Belgian-made products are equipped with native fastenings; the main advantage is a long service life, as well as aerodynamics and the absence of extraneous sounds during operation.
- SWF VisioNext - also of the frameless type, equipped with a hook type mount. The products are manufactured by Valeo, which also produces many other types of components and parts for cars.
- Bosch Twin Spoiler frame brushes. Dimensions fit standard Granta windshield wipers. Despite the fact that the products are frame, they are quite reliable and have a long service life.
- Champion Aerovantage. This manufacturer has been on the market for quite a long time, during which time it has been able to win the trust of many of our compatriots. The products belong to the premium segment of the market and are equipped with a steel frame.
Price issue
The cost of products depends on their quality, performance and manufacturer. Average prices for some windshield wiper models are shown below.
Generator brushes.
Generator brushes are a part that is found in almost every generator.
The more modern the car, especially a foreign car, the more electrical consumers it has, which in one way or another make life easier for the car owner. Accordingly, an increasingly important role among automobile units is played by the autogenerator, which supplies electricity to all consumers in the car.
What are generator brushes used for?
Using the generator brushes, the voltage from the regulator relay is supplied to the excitation winding - the rotor. The rotor has commutator rings attached to it - the rotor commutator to which the brushes fit tightly. To transfer current from the voltage relay to the rotor winding, the brushes must be in a certain position and pressed against the commutator rings with a certain force. To do this, they are installed in the seats of the brush holder and are pressed by a spring on the reverse side.
The material from which the brushes of foreign manufacturers' generators are made - a mixture of copper and graphite - differs from domestic ones in better wear resistance and conductivity. For this reason, it is not recommended to install this element on foreign cars from domestic cars.
How do you know when you need to replace your generator brushes?
- Car mileage, 150-200 thousand km. is the period when the part is worn out.
- The battery charging indicator light comes on and goes off again. This may continue for several days until the icon lights up completely.
- Loss of power or voltage drop due to a loose fit of a worn part.
- Voltage surges in the vehicle's on-board network may indicate a faulty part.
- If a lot of motor oil or other technical fluid gets on the generator, then the part is subject to increased wear.
How to check whether replacing the generator brushes is really necessary?
To determine the causes of the malfunction, it is necessary to disassemble the generator and inspect the generator brushes - they must be long enough and in contact with the slip rings.
If the remaining length of at least one element is less than 3 mm, replacement is necessary in any case. Also, the generator brushes must be well movable in their seats, have approximately equal residual length, must not be dirty, and the springs must press with the same force.
How to replace brushes on a generator? Procedure.
On many modern autogenerators, the brushes are integral with the voltage regulator relay, for example, this is true for Valeo, Bosch, Mitsubishi, Magneti Marelli; for Denso, the relay regulator is made separately from the brush assembly.
To replace the generator brushes , if they are built into the regulator relay, the tools you will need are a 40-100 W soldering iron, solder, flux, a 1.5-3 mm drill, a drill or screwdriver, as well as a tool for removing the regulator.
- Remove the protective cover
- Remove the voltage regulator relay (or brush assembly)
- From the side where the brush harness is attached, we drill out the contact so that the remaining parts come out. We try not to damage the spring, which is located inside the brush assembly.
- We take new brushes and check whether they move freely in their seats
- We insert the spring and insert the harness into the hole so that the required working length remains.
- We solder the contact point and cut off the remaining strands.
- We assemble everything in reverse order.
On some relay regulators it is possible to replace the generator brushes , but on some it is not possible to replace the part; you can replace the relay regulator assembly.
For example, on Bosch generators since about 2000, the relay regulator comes complete with brushes; replacement is not possible.
If you need to replace the roller or brushes?
When, during operation of the engine, the owner of a Lada Kalina hears a distinct “rustle” coming from the rotating roller of the tension unit, then a detailed inspection of this element will be required and, if necessary, replaced.
To carry out this repair operation, it is recommended to stock up with ordinary keys and a screwdriver with a flat-tipped tip. All replacement procedures do not cause any difficulties, so we act with confidence.
- First, we resort to loosening the degree of belt tension. To do this, unscrew the stem.
- Using the designated screwdriver, carefully pry up the protective cap of the roller and unscrew the bolt holding the bearing.
- From the worn-out roller we remove the bushing together with the washer (they are necessary for installation in conjunction with a new product).
- The entire assembly is mounted in its proper place and secured with a bolt.
- We tighten the belt and start the engine. We make sure that the new product functions correctly.
One of the factors characterizing weak battery charging is wear on the brushes of the generator set. In order to eliminate this negative aspect, the generator brushes will need to be replaced. To monitor their condition, they will need to be dismantled. Replacing generator brushes is available both on a removed generator set and on one installed on a Lada Kalina car.
In order to achieve safety of work and eliminate the risk of a short circuit in the circuit, before repair work it will be necessary to disconnect the network from the battery (remove the terminals). Now you need to dismantle the protective cover and remove the plug. This can be done conveniently using the previously designated screwdriver.
At the final stage of the process, unscrew the bolts, after which we remove the regulator itself with the brushes present on it. Replacement of generator brushes is complete. Brush wear is assessed by measuring their height. This parameter should not be less than 5 mm.
How to remove a generator on an 8-valve Grant without air conditioning
To work you will need:
- socket wrenches for 8, 10 and 13;
- mounting blade.
- unscrew the 2 rear engine protection mounting bolts;
- unscrew the 4 front engine protection bolts;
- remove the engine protection (mudguard) from the car;
- disconnect the wiring block from the generator;
- remove the protective cap of the nut holding the power wire;
- unscrew the nut and disconnect the generator power cable;
- unscrew the top nut securing the “Grant” generator;
- press out the generator with a mounting spatula and remove the upper mounting bolt;
- unscrew the lower bolt securing the generator;
- move the generator away from the engine with a mounting blade and remove the lower mounting bolt;
- move the generator towards the right mudguard;
- remove the generator belt from the unit pulley;
- pull out the generator;
- Remove the alternator belt from the crankshaft pulley.
To put the LADA “Grant” generator in place, you need to perform the steps in reverse order.
Important: when installing the generator belt, make sure that the pulley grooves and the groove tracks on the belt match.
How to replace the voltage regulator and check its serviceability on a VAZ 1117-VAZ 1119?
Checking the voltage regulator for serviceability:
1) At the beginning of the operation, you will need to find where the generator itself is located and after you find it, move your hand to the side with the rubber cover indicated by the red arrow, this cover covers the “B+” terminal; in simpler words, this is the positive terminal and it comes from the generator to this terminal (By the way, it is also indicated by a blue arrow) you will need to connect the positive wire of the voltmeter and after connecting it, throw another wire (Minus wire) coming from the same voltmeter to ground (The places where you need to connect the wire , indicated by a green arrow), after the operation has been completed, a DC voltmeter will show you the voltage in the vehicle’s on-board network.
How to change the generator on a 16-valve Grant
- disconnect the block from terminal “D” on the generator;
- remove the rubber cap covering the “B+” terminal of the generator;
- Using a 10mm wrench, unscrew the nut holding the wire tip;
- loosen the tension bar nut using a 13mm wrench;
- by rotating the tensioner adjusting bolt counterclockwise, loosen the tension on the Grant generator belt (a 10mm socket wrench is required);
- move the generator towards the engine and remove the belt from the pulleys;
- Unscrew and remove the adjusting bolt of the belt tension mechanism from the generator mounting bracket;
- remove the tension bar;
- unscrew the lower nut securing the “Grant” generator;
- remove the spacer bushing and remove the lower mounting bolt;
- remove the tension bar;
- pull out the LADA Granta generator.
To install the generator, you need to do the above in reverse order.
Important: after installing the 16-valve LADA “Grant” generator, it is necessary to adjust the belt tension.
Lada Granta VAZ 2190 (engine 21126)
- We hang the front part of the car, unscrew the bolts, and remove the right front wheel.
- For safety reasons, remove the terminal from the battery.
- Release the top fastening and move the converter to the side until it stops.
- Unscrew the six bolts and remove the engine protection.
- Through the opening of the wheel arch, remove the belt from the generator pulley and crankshaft.
- Unscrew the generator power cable from the back.
- Release the lower fastening and remove the bolt.
- We remove the converter from its regular place.
Next, we carry out preventive maintenance, replace worn parts, and install in the reverse order.
Replacing the rotor with rings
Replacement on the VAZ 2110 generator
Sometimes it is not possible to replace the rings separately. The rotor also has to be replaced. This situation occurs when the rings reliably “stick” to the rotor. But you can try to restore the rings by placing them in a sulfuric acid solution. They cannot be kept in solution for a long time, as whole particles may disintegrate. To replace the rotor and rings, you must:
- Place markings on the covers of the generator (to make it easier to assemble them later, otherwise you can confuse their location).
- Remove the plastic casing. This is easier to do after the three latches securing it are bent away.
Note: you need to bend them very carefully, as they are quite delicate. Moving too quickly can cause them to break.
- Remove the two screws that secure the electronic voltage regulator.
- After this, you will have access to the generator relay. It must be removed, otherwise it will interfere with the work process.
- Remove all fastenings of the unit and condenser.
- Then unhook the three winding tips coming from the stator.
- Remove the block and capacitor. If you need to replace the capacitor, you need to unscrew the nut that secures it. Then remove the washer along with the bushing. Now it’s the turn of the wires that attach the capacitor to the contact bolt. After this, you can remove and replace the capacitor itself.
- Unscrew the generator coupling bolts. There are four of them in total. There are usually flat washers and spring washers underneath the screw heads. They are very small, but perform an important function. You can’t lose them, otherwise you’ll have to buy new ones, but finding them on sale is not easy.
- Remove the generator cover from the side where the slip rings are located. In this case, you can help slightly with a screwdriver, as if pulling the lid towards you.
VAZ 2110 in the generator slip rings
- Remove the nut securing the generator pulley. Remove the washer and pulley.
Note: the rotor must be stationary. To prevent it from spinning, it should be clamped as much as possible, and a small piece of plywood should be placed under it.
- Disconnect the thrust washer.
- Remove the generator rotor.
- It has a spacer ring that needs to be removed.
- At this stage, you need to carefully inspect the slip rings. It is possible that they will also have to be replaced. If they are worn out or there are scratches on their surface, then replacement cannot be avoided (by the way, it is not necessary to install new rings - they can be thoroughly sanded).
- A multimeter should measure the resistance of the rotor winding.
Note: if this tool shows that there is a break in the rotor winding, then it urgently needs to be changed. You can also try to rewind it, eliminating the break. But this process is quite complicated.
- You should also check if there is a short circuit between the winding and the rotor housing. To do this, you need to use a 220 V lamp. One of its wires must be connected to the body, and the other must be connected in turn to each of the slip rings. Moreover, if there are no short circuits, the lamp will not light.
- Insert the new rotor into place.
- Assemble everything in the opposite order.
see also
- What is a backstage
- Ceramic sealant for repair of exhaust systems
- Drawing up an accident diagram
- High-quality car body polishing
- Aux wire for car via phone
- Engine heating 220v
- Carburetor k126g where are the jets and diffusers?
- Fine for dangerous driving
- UAZ 414 engine
- DIY car interior plastic painting
- Reverse parking between two cars in a confined space
Third way.
Glass paper is placed on the commutator (abrasive side up) and pulled back and forth several times. At the same time, not too much pressure is applied to the brushes. The process stops once the brushes begin to evenly adhere to the commutator. The width of the strip of paper should be greater than the width of the brush.
The use of carborundum or emery cloth for lapping is unacceptable, since abrasive particles getting between the commutator plates can cause a short circuit.