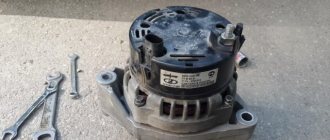
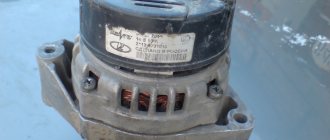
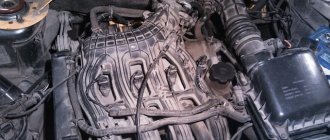
Often, many VAZ 2110-2112 car owners are in too much of a hurry at the first generator malfunction and prefer to replace it with a new one, instead of simply finding out the cause of the breakdown and eliminating it. In this case, we will not consider repairing this device, but will only look at the procedure that must be performed to remove and install the unit.
So, to dismantle it without problems, we will need a tool such as:
- Socket heads for 10 and 13.
- Ratchet handles or cranks.
Before starting repairs, be sure to disconnect the car’s battery by removing the negative terminal. Otherwise, you risk getting a short circuit when disconnecting the positive wires of the generator.
Replacing the generator: removal and installation
Often, many VAZ 2110-2112 car owners are in too much of a hurry at the first generator malfunction and prefer to replace it with a new one, instead of simply finding out the cause of the breakdown and eliminating it.
In this case, we will not consider repairing this device, but will only look at the procedure that must be performed to remove and install the unit. So, to dismantle it without problems, we will need a tool such as:
- Socket heads for 10 and 13
- Ratchet handles or cranks
Before starting repairs, be sure to disconnect the car’s battery by removing the negative terminal. Otherwise, you risk getting a short circuit when disconnecting the positive wires of the generator.
Especially for this post, I decided to make a video instruction to explain everything clearly and clearly.
If you have any questions about the video review, you can ask them on my YouTube channel. Below will be presented everything in the usual format.
Photo report on repairs
I would like to warn you right away that in this example of my VAZ 2110, the generator is slightly clamped by the mounting bracket, since it broke off during the accident, so I cannot show you the removal procedure in all its details. But still, the main points will be shown quite clearly in the photo.
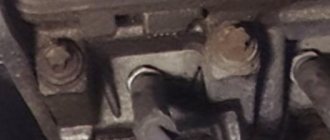
Unscrew the tensioner nut, which is shown by the arrow below:
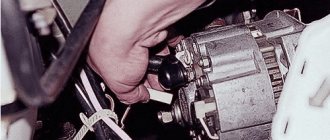
After this, move the generator back (towards the car interior) and remove the belt from the pulleys. Now you can disconnect all power wires. One “bundle” is secured with a stud and nut, and another plug is simply fixed with a connector:
Then you can unscrew the lower nut securing the generator, first crawl under the car and remove the engine protection (if installed):
Usually the bolt fits tightly, so it can be knocked out carefully and without excessive force with the handle of a hammer:
Then from the reverse side we try to remove this very bolt to the end:
Next, unscrew the tensioner nut from top to bottom and you can carefully move the VAZ 2110 generator to the side in order to remove it later:
If you are replacing the complete device, install it in the reverse order.
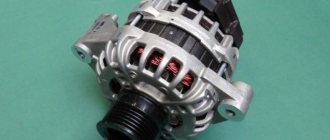
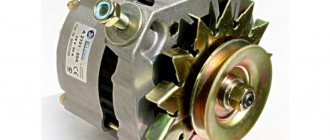
But please note that the generator model, if possible, should be the same as the one installed by the factory. That is, first of all, look at the applicability specifically to your car, and then at the current rating in Amperes. As for the price of generators for VAZ 2110-2112, it may vary depending on the type and manufacturer
But if you take the KZATE model, which in most cases is installed by the factory, then the cost can be about 3,500 rubles. Although, Chinese options can be obtained at almost half the price. True, you should not chase low cost, since the service life of these parts can be quite short
As for the price of generators for VAZ 2110-2112, it may vary depending on the type and manufacturer. But if you take the KZATE model, which in most cases is installed by the factory, then the cost can be about 3,500 rubles. Although, Chinese options can be obtained at almost half the price. True, you should not chase low cost, since the service life of these parts can be quite short.
Source: autoprivat.ru
Possible malfunctions and ways to eliminate them
The need to repair a generator unit may arise for various reasons. As practice shows, the most common of them are failed brushes or bearings. Read below about repairing these components.
Brush replacement procedure
VAZ is produced as follows:
- First of all, you need to release the three latches on the device’s body, on its sides. These latches secure the cover to the mechanism.
- The cover itself can be detached and put aside. This will allow you to access the regulator.
- There are two bolts on the regulator that secure the device - they need to be unscrewed. Then pull the regulator and remove it.
- Assess the condition of the brushes - if they are working, then the length of these elements should be at least 0.5 cm. If their size is smaller, then you have two options - either repair it by replacing the brushes, or change the device assembly. If repairs are being made, you will need a soldering iron since the brush assembly is soldered to the relay. First, you need to unsolder the wires connected to the brushes, and then dismantle the assembly, replacing it with a new one and securely soldering it to the relay contacts. Or you simply change the relay, and further assemble the device in the reverse order (the author of the video is the IZO channel)))LENTA).
How to change bearings yourself?
To replace the bearings, follow these steps:
- On the dismantled generator, you need to block the rotor; to do this, use a screwdriver, then unscrew the pulley.
- Next, by pulling the latches, you need to remove the device casing. You need to make marks on the two halves of the case, and then, using a screwdriver, you will need to remove the front cover.
- Then you will need to knock the bearing out of its seat; to do this, you will need to place it on a more suitable object. Alternatively, you can use a 27mm socket.
- After this, you can take a new bearing device and fill it with grease. This element should be hammered through the old one. To make the device more securely fixed at the installation site, you can use a chisel to flare the edges.
- Now let's move on to the rear bearing. To do this, you need to place either a thick screwdriver or a thin chisel under it, and hit the top several times with a hammer, while simultaneously moving the screwdriver in the opposite direction. The device can be dismantled using an open-end wrench.
Examination
Why doesn't the instrument panel work on the 16 valve VAZ-2112?
It happens that the generator begins to act up ahead of schedule and the battery does not charge properly. Actually, it serves to ensure the operation of the source of electricity to power all cars - the battery.
We advise you to rely not only on our instructions, but also on video lessons that will allow you to carry out repairs and replacements with your own hands, even without much experience.
Troubleshooting
The first step is to determine whether your generator is actually the source of the problem. To check, you need to carry out a series of sequential activities.
- Start the engine and let it warm up to operating temperature.
- Increase the crankshaft speed to approximately 3 thousand rpm.
- Turn on all the headlights, activate the high beams, start the heater, emergency lights, heated glass, and wiper blades. That is, all electricity consumers should be turned on as much as possible.
- Measure the voltage on the battery.
- If the device shows less than 13V, then a short circuit or break has most likely occurred in the generator windings.
- Another option is a breakdown of the voltage regulator, oxidation of the contacts of the excitation winding ring.
You can check for breaks and the condition of other elements of the generator only by dismantling it. But if you don’t have any experience in disassembling a generator, then you shouldn’t try to go there with your own hands. Replace the entire assembly or entrust the repair to professionals.
We identify the reason
In order to carry out the test, you need to start the engine and warm it up, bring the crankshaft speed to approximately 3000 per minute. Now turn on all the lighting devices (turn the headlights to high beam) as well as the heater, windshield wiper, emergency lights, and heated glass.
If the battery voltage measurement is below 13 V, it can be assumed with a high probability that there are breaks or short circuits in the generator windings. Another reason may be a malfunction of the voltage regulator or the contact rings of the field winding have simply oxidized.
Various breaks in the components of the generator can be checked if only it is removed. Do-it-yourself repairs can help in some ways, however, if the problem is serious and you do not have enough skill or driving and plumbing experience, then the best solution is to replace the failed unit assembly.
Checking the generator and choosing a new one
How to remove a generator on a Priora with a steering wheel
Generator failure causes some side effects that may signal it. The main signs of a node malfunction are:
constant “glow” of the battery charging indicator;
Battery charging indicator stays on
The easiest way to check the functionality of the generator is to measure the voltage supplied to the battery terminals with a multimeter. If it deviates from the norm, then there are clearly problems. More complex diagnostic measures involve dismantling the part and checking the operation of each component separately, with the possibility of partially repairing the part. This type of diagnosis and repair can only be successfully carried out by a professional electrician.
Check the voltage at the battery terminals with a multimeter while the engine is running.
In the event that the need for replacement is confirmed or there is a desire to perform it due to some other purpose, first of all, it is necessary to select a new generator set. According to drivers and auto specialists, the best generators for the VAZ-2114 are:
- any generating set from Lada: Priora and Kalina, equipped with air conditioning, its power is 115 A;
- identical factory generator set from the manufacturer Eldix;
- generators from PRAMO, the most successful option would be to choose a unit with a power of 120 A.
Service Features
The need to repair the generator unit on a VAZ 2112 16 valves does not arise often, but in order for the unit not to have to be repaired, it must be properly maintained. In general, this unit has a fairly high margin of reliability.
What maintenance features must be observed to prevent repairs:
- It must be remembered that the outer surfaces of the unit must always be clean.
- When carrying out maintenance, you also need to check the quality of fastening of the unit - it must be securely fixed at the installation site.
- It would be a good idea to check the functionality of the voltage regulator; a multimeter is used for this.
- The same applies to belt diagnostics. As stated above, first of all you need to check its tension - the belt should not be too tight, but it should also not be loosened. In addition, diagnostics of the condition of the strap should be carried out every 10 thousand km - there should be no signs of damage, cracks, and the belt should not peel off.
- Another point in maintenance is checking the condition of the bearings. For diagnostics, you need to remove the strap, and the rotor of the unit must be rotated by hand. If during rotation you feel a gap or even slight jamming, then the bearing devices need to be changed. The same applies to the appearance of sounds uncharacteristic of their normal operation.
Technical specifications
Setting timing marks on a 16-valve VAZ-2112 with your own hands
If the old generator fails, many motorists wonder which generator they should now replace the old one with.
There is no need to invent anything here. The most correct solution is to install the same generator as before, or a more powerful one.
Today, the VAZ 2110 provides for the use of three types of power supply devices:
- Katek 5102.3771. The generator produces 80 Ampere power and its voltage is approximately 14V.
- Katek 94.3701. This is a device with the same parameters. They are not seriously different.
- Catek 120 amp. A generator that is more adapted to modern realities, when in addition to standard electrical equipment, motorists install many additional devices.
If you have a powerful audio system in your car, you use an electric pump powered by the car, as well as a number of other additional consumers, it is recommended to install a 120-amp unit instead of a standard 80-amp generator.
If we take into account the size of the devices, then we can distinguish between ordinary and compact ones. They have a certain difference in design
To be specific, the differences are in the following components:
- Brackets;
- Anchor;
- Excitation wire;
- Drive pulley;
- Number of mounting bolts.
But in reality this does not play a special role. After all, the structure of all generators used for the VAZ 2110 is the same. Therefore, let's look at the circuit and structure of this unit.
| Element | Functions |
| He's an anchor. It is a rotating element of the generator, which creates a magnetic field due to the excitation winding located on the shaft. The field wire receives power from the slip rings. They are mounted on the same shaft. There was also room for a drive pulley, field winding wire, bearing assembly and fan impeller. There may be 1-2 last ones | |
| This is a stationary three-phase element that includes three windings. They provide the creation of alternating current. The windings are connected to each other using a triangle or star | |
| A lightweight non-magnetic aluminum alloy is most often used to make the generator housing. The body looks like a pair of covers connected by a bolt. The front cover is located near the drive pulley, and the rear cover is located on the side of the slip rings. Each connecting bolt must be tightened. To disassemble the housing, simply unscrew the mounting bolts. | |
| The upper mounting bracket for the generator uses two bolts, while the lower bracket is predominantly mounted on one bolt. In some cases there are two. It is not recommended to modify the brackets, since the factory one performs important functions. The purpose of the brackets is to hold the generator. It is recommended to monitor the condition of the brackets as they are subject to wear and breakage | |
| Brush unit | It consists of a pair of graphite brushes, springs that press the brushes, as well as a brush holder |
| Brush holder assembly and voltage wires | This design is typical for modern Katek generators. Therefore, if the regulator fails, you will have to replace the entire assembly |
| Rectifier block | Equipped with 6 diodes, it is responsible for converting alternating current into direct current. It is direct current that is required for the operation of all auto equipment. This element charges the battery, among other functions. |
| Belt drive transmission | The belt drive allows you to increase the speed at which the crankshaft rotates. If the pulley has a small diameter, then the V-belt will wear out faster. Therefore, for small driven pulleys it is recommended to use a poly-V-ribbed drive. It is most often found in modern generators |
The presented device is relevant for all generators used on the VAZ 2110, regardless of their power - 80-120 Amperes.
Margin of safety
If we take into account the standard Katek generator, which is installed on domestic dozens, then its resource is enough for about 10 years of operation or 140 thousand kilometers. The specified safety margin of the device can only be relied upon if it is handled properly
The specified safety margin of the device can only be relied upon if it is handled properly.
Many people fear that a powerful 120 A generator can negatively affect the condition of the battery. In practice, nothing like this happens. Moreover, installing a more powerful unit is recommended if you plan to install an impressive audio system or video equipment on the car.
Technical characteristics and principle of operation of the generator set on the Dvenashka
First, let's look at the operating principle of the 2112 generator. One of the main design elements is the rotor, which performs the function of generating a magnetic field. This component is a shaft on which the field winding is mounted. The halves of this winding are installed in special pole parts, and the winding is supplied with current thanks to slip rings. The rotor rotates thanks to a belt drive from the drive.
Removing the Unit Cover
Another equally important component is the stator, consisting of a core and a winding. This mechanism produces alternating current that passes through the electrical network through slip rings. To supply current to the rings, the design of the unit is supplemented with special brushes. After them, according to the scheme, a rectifier unit is installed, which is used to convert the voltage that the device produces. Depending on the device model and its technical features, different winding connection diagrams can be used.
The generator unit relay is used to maintain the voltage within specified limits. This element, if necessary, changes the frequency and duration of electrical pulses. By design, a relay consists of several controllers, as well as executive components. The purpose of these components is to determine the time during which the field winding must be connected to the network. If the relay fails, an unstable voltage will be supplied to the battery.
As for the technical characteristics of the generator on the VAZ 3701010-07, the voltage limits generated in the winding are 13.2-14.7 volts. The unit itself allows you to generate current up to 80 amperes
It is important that the VAZ generator belt is tensioned properly, otherwise the operation of the device as a whole may be incorrect. If you want to check the belt tension with your own hands, then keep in mind that when there is a pressure of about 10 kilograms on it, the deflection of the belt should be at least 8 mm (the author of the video is the channel In Sandro’s Garage)
Replacement process detailed instructions
We will look at options with 8- and 16-valve engines, which are present in the VAZ 2112 and 2110 models. Regardless of the number of valves, the same set of tools will be required for replacement. The list includes standard tools that can be found in almost every driver's garage.
Timing belt for VAZ 2110 16 valves
In addition to the timing belt itself and the roller for the VAZ 2110 or 2112, you will need:
- a special key that regulates the degree of tension of the roller;
- spanner set to “17”;
- key to “15”;
- key to “10”;
- installation, as an alternative - a powerful screwdriver.
Replacement on an 8-valve engine
Replacing the VAZ 2110 8 valve timing belt is as follows:
- First of all, we de-energize the battery - for this you need to get the negative wire;
- We unscrew the bolts that hold the timing belt protective casing, and then remove the casing;
- On the passenger side, it is necessary to remove the engine compartment mudguard along with the protective element and the right wheel;
- Our task is to ensure that the marks on the cover and, accordingly, on the pulley match, as indicated in all the diagrams. To do this, you need to twist the part clockwise;
- We go to the gearbox and remove the plug from it;
- We need to check the alignment of the marks in this hole;
- We block the flywheel - for this you can use a mounting tool or a powerful screwdriver;
- Now you can remove the timing generator pulley;
- We got to the nut that holds the timing belt pulley - it needs to be loosened, but not unscrewed;
- Now we have reached the required element of the VAZ 2110 or 2112 timing belt. Now it can be removed. All parts that it covered must be cleaned with detergent. After removing dirt, the area should be wiped with a clean rag;
- Next, a new timing belt and tensioner roller are installed - follow the direction indicated on the arrow. Sometimes it happens that the manufacturer does not indicate the arrows, in which case, you need to place the element so that the inscription is read from left to right;
- To tension, you need to turn the roller counterclockwise.
- The next step is to test the timing belt and its tension. You need to check the element with a cold engine, and the temperature in the garage or box should be within +15-+30C. We start the engine and inspect the timing belt.
If there are no unnecessary sounds or vibrations, then all the elements can be installed back - these are the wheel, casing and mudguard.
Replacement on a 16-valve engine
Despite the fact that there are more valves, replacing the timing belt is no more difficult than on the version with 8 valves. So, replacing the VAZ 2110 16 valve timing belt is performed as follows:
- As in the case of the VAZ 2110 or 2112, where there are 8 valves, we need to dismantle the belt protection. It is held in place by 6 bolts.
- Next, you need to remove the chip from the crankshaft sensor - unscrew the mount and take out the sensor itself. For clarity, you can study the photo.
- If you dismantle the gas distribution mechanism yourself, then you probably noticed the absence of one tooth. This is done so that the sensor can independently find the dead center. This feature can also be used to lock the crankshaft.
- Blocking can be done when a tube of a suitable size is placed in the hole under the sensor. Now the pulley is blocked, as a result, it can be safely dismantled.
- Next, the work scheme is practically no different from removing the 8-valve timing mechanism with your own hands - loosen the roller fastening and remove the faulty or worn belt.
- There are two ways to install a new element: remove the tension roller and then install the belt along with it, or do it by turning the camshaft.
- When the new element is installed, you can return everything to its original position. You should start by fastening the pulley - tighten the bolt and align the gear - the marks on the oil pump will help with this. If they are missing, then you can make a mark yourself.
- The parts must be combined carefully, since the timing gear should not get knocked out.
- Using a special wrench, we must tighten the belt. Not everyone has such a wrench, but as an alternative you can always take a powerful screwdriver and two nails. It is also worth remembering the nut, which must be tightened tightly.
- We check the tension; the rubber should move away from the gears, but there should be no folds.
- All that remains is to turn the crankshaft 2 times and make sure that the marks remain in the same place - the work is completed
Check the gas distribution mechanism every 10 thousand kilometers, and then you will not have to spend money on expensive repairs.
What types of breakdowns are common?
Most often, the generator for 8 and 16 valve VAZ-2110s fails as a result of moisture and dirt. Another reason is the wear of the components of this assembly, namely the brushes.
Most often, the malfunction manifests itself as follows:
- the generator does not produce electricity;
- output current is either too high or low voltage;
- During engine operation, extraneous sounds are heard, most often a squeak or squeal.
The operation of the generator is checked using special stands or a digital voltmeter. If extraneous sounds are heard in the engine compartment area, then first of all you need to check the timing belt tension. Most often this is the reason, but after checking, remove the belt from the pulley and start the engine. The absence of noise is a reason to check the performance of the generator more carefully.
How to install an additional diode?
This is another way to modify the generator set to increase the battery charging voltage. This method is somewhat more complicated, since it will require complete disassembly of the generator. The modification consists of changing the connection of terminal D of the relay regulator.
The diagram in red indicates an additional diode that needs to be installed. 2D219B device is well suited for such a semiconductor device.
, but you can choose a similar one with similar parameters.
You need to find about half a meter more of two-core wire, two terminals “male” and “female” number 4, as well as a heat-shrinkable casing. At one end of the wire, terminals are soldered and insulated with heat shrink. The free ends of the wire must be soldered to the diode, the “mother” is soldered to the cathode, and the “male” is intended for the anode. Now you need to connect the “mother” to the RN
, and the standard wire is connected to the “male”. At this point the modification is completed, all that remains is to assemble the device, install it on the car and carry out tests.
As you can see, the alteration is not so difficult. Modification of the VAZ 2110 generator (installation of a diode) will allow fans of loud music and additional lighting effects not to think that the battery is not charging enough.
Price list
- Special offers
- KAMAZ spare parts
- Spare parts KAMAZ-5490
- Spare parts MAZ, YaMZ
- ZIL spare parts
- Spare parts ZMZ, for GAZ vehicles
- Spare parts for Volzhanki cars
- Spare parts for Gazelists
- Spare parts for trucks Lawns
- Spare parts for GAZ-71 caterpillar
- Spare parts UAZ, UMZ
- Spare parts KrAZ, BelAZ
- Spare parts URAL
- Spare parts BUSES
- AMAZ spare parts
- IKARUS spare parts
- KAVZ spare parts
- LAZ spare parts
- LIAZ spare parts
- NEFAZ spare parts
- PAZ spare parts
- Other buses
- Tractors, computer equipment, attachments
- Tractors and walk-behind tractors
- Municipal vehicles
- Attachments and trailed equipment
- Spare parts for TRACTORS and SPECIAL EQUIPMENT
- JCB - spare parts for special equipment
- Truck crane (KS-3577, KS-4517, etc.)
- AMZ (A-01, A-41, D-440, D-442, D-447, D-461, D-467)
- Amkodor (TO-18, TO-28, TO-30, etc.)
- ATZ (T-4A, TT-4M)
- VgTZ (DT-75)
- VMTZ (D-120, D-144, D-130, D-145T)
- VTZ (T-25, T30A-80, VTZ-2048)
- LTZ (T-40, LTZ-55, LTZ-60)
- MKSM, UNC, DETVAN
- MTZ - spare parts for tractors
- OTZ (TDT-55)
- PTZ (K-700/701/702/703/704)
- KhTZ (T-150, MT-LB)
- ChTZ (T-130, T-170, B-10, B-12, B-170, T-10M, DET-250)
- YuMZ - spare parts for tractors
- Other special equipment and tractors
- RVD - high pressure hoses and sleeves
- MMZ spare parts and engines
- Spare parts for MMZ engines
- MMZ engines: D-242, D-243, D-245, D-246, D-260
- VAZ spare parts
- Spare parts OKA VAZ 1111
- Spare parts VAZ classic 2101 - 2107
- Spare parts VAZ front wheel drive
- Spare parts VAZ Granta and Largus
- NIVA spare parts and all-wheel drive
- Spare parts Moskvich, IZH
- Spare parts for Korean trucks
- Spare parts for Starex, H-1
- Spare parts for Porter, H-100
- Spare parts for HD65,72,78, County
- Spare parts for HD120, AeroTown
- Spare parts for HD160,170, . ,700,1000
- Spare parts for HYUNDAI, KIA buses
- Spare parts for Korean passenger cars
- Spare parts DAEWOO, CHEVROLET
- FOREIGN CAR spare parts more
- BMW spare parts
- DAF spare parts
- FIAT spare parts
- FORD spare parts
- Spare parts HONDA, ACURA
- IVECO spare parts
- MAN spare parts
- MAZDA parts
- MERCEDES spare parts
- MITSUBISHI spare parts
- Spare parts NISSAN, INFINITI
- OPEL spare parts
- Spare parts PEUGEOT, CITROEN
- RENAULT spare parts
- SCANIA spare parts
- SHAANXI spare parts
- SSANGYONG spare parts
- SUZUKI parts
- Spare parts TOYOTA, LEXUS
- VAG spare parts: VW, AUDI, SEAT, SKODA
- VOLVO spare parts
- Other foreign cars
- Trailers and semi-trailers
- SEMI TRAILERS foreign
- Domestic SEMI-TRAILERS
- TRACTOR TRAILERS
- Passenger TRAILERS
- Towbars and spare parts for passenger trailers
- Car audio and navigation
- Antennas
- DVRs
- Automotive video equipment
- Memory cards, flash drives
- Speakers, subwoofers, acoustics
- Accessories
- Radio tape recorders
- FM modulators, MP3 players
- Navigation, parking systems
- Radar detectors, antiradars
- Radio stations and accessories for them
- Sound amplifiers
- Auto chemical goods, filters
Methods for replacing brushes
Unit repair is carried out using 2 methods:
- with equipment removal;
- without dismantling.
The method for restoring the unit depends on the layout of the units in the engine compartment and the condition of the threaded connections. If there is a coating of rust and oxides on the steel elements, it is recommended to remove the electrical machine.
Before replacing the brushes on the generator, you need to prepare:
- wrenches or sockets (size and type depend on the car model);
- screwdrivers with flat and Phillips blades;
- a set of new parts (selected from the catalog depending on the modification of the electric machine);
- a bottle of WD-40 liquid, which allows you to unscrew dirty or rusted threaded connections.
On a removed generator
Algorithm for servicing a unit using the example of a VAZ-2113 car with an 8-valve power unit:
- Stop the engine, engage 1st gear and tighten the parking brake lever.
- Open the hood and disconnect the negative cable from the battery housing (it goes to the car body).
- Loosen the bolt in the lower support.
- Disconnect the patch cables.
- Unscrew the drive belt tension adjuster nut, and then use a mounting spudger to carefully move the generator towards the engine block.
- Remove the drive belt, unscrew the bolt securing the tension bracket to the cylinder block.
- Unscrew the bottom bolt holding the electrical machine to the motor.
- Place the equipment on the workbench and remove the plastic cover, which is held in place by latches.
- Remove the voltage regulator housing, which is secured with Phillips head screws. The unit is attached to the windings using a quick-release block.
- Remove the brushes; parts must be replaced if the remaining length of the graphite elements is less than 5 mm.
- Install new parts and reassemble in reverse order. Adjust the belt tension, and then start the power unit and check the operation of electrical devices. If an on-board computer is installed on the car, the device shows the voltage in the on-board network.
Removing the alternator on other vehicles may require removing the air filter housing or air ducts. On some foreign-made machines, automatic tensioning devices are used; the body of the electrical device is rigidly bolted to the cylinder block.
The owner needs to loosen the belt tension and then remove it from the pulley. On Toyota vehicles, the electrical components are covered by a metal casing secured with nuts.
Under the cover there is a brush block, a diode bridge and a charging control unit (equipped with an aluminum radiator). After removing the brushes, the collector rings are inspected; if there is wear on the parts, you will need to remove the rotor to correct the defect. After assembly and installation, the voltage in the on-board network is checked with the engine turned off and running.
Directly in the car
Replacing the brush assembly without dismantling the generator is possible provided there is free access to the back cover of the electric machine. A similar design is found on domestic or imported cars with naturally-aspirated engines of simple design (with 2 valves per cylinder). For example, to change the unit on “classic” VAZ cars, you will need to remove the wire from the negative terminal of the battery, and then remove the cables from the generator housing.
Using a short screwdriver, unscrew the fastening screw and remove the worn assembly. The problem is corrosion of threaded connections; applying WD-40 does not correct the situation, since due to the cramped space it is impossible to apply force to the tool. In addition, it is impossible to correctly check the condition of the collector rings with an installed generator. New brushes, when in contact with a damaged commutator, wear out within 500-1000 km, after which the generator fails again.
On some cars, access to the generator is possible from the bottom of the car (for example, on the Lada Kalina with a 16-valve engine). The owner needs to dismantle the protective shields; work is carried out from an inspection hole or on a lift. After dismantling the wires and the protective screen, you need to unscrew the fastenings of the voltage regulator, and then remove the brush assembly. Replacing the manifold rings requires removing the generator.
In what cases is replacement necessary?
Like any consumable material, the alternator belt has a certain resource and requires constant technical inspection. According to the advice of the manufacturer at VAZ 2112
Regardless of whether there are 16 valves on the engine or 8, it is necessary to change the consumables after 45 thousand kilometers. But these are only tips; you need to constantly worry about the condition of the product and change it when it’s time. The service life depends on the following reasons:
- driving habits;
- operation criterion;
- product properties.
A visual inspection of the drive components should be carried out when the car has traveled a maximum of 10,000 km and before a long trip. This makes it possible to avoid nasty surprises while driving – a broken belt. It is recommended to carry a spare one in the trunk on your own, because if it breaks, the car will no longer be able to move without the help of others.
It is necessary to change the strap if it is torn, stretched, as it is also called, and has become unusable. There is an option to find a bad tension by the specific whistle that occurs when starting the engine. Tension plays an important role in the performance of a belt drive. If the tension is weak, the unit does not produce the amount of electricity required for normal vehicle operation. If it is strong, the service life of the belt, drive bearings and crankshaft is reduced.
KEY-DOP
It is natural to find the need for replacement when examining the following signs:
- the appearance of cracks and tears;
- worn surface;
An old product with a worn surface
- material delamination;
- frayed edges;
- strong stretch.
It's easy to check the strap tension. It is considered normal if, with a force of 10 kg, it bends by 10-15 mm. To check, he needs to press with his huge finger approximately in the center of the belt between the crankshaft pulley and the generator.
When to change brushes: main signs
It is recommended to replace them as they wear out, but at least once every 4 years (or upon reaching a mileage of 50 thousand km). However, under difficult operating conditions, critical wear of brush rods made of graphite or its compounds with copper (bronze, aluminum) may occur earlier than the specified period. The brushes should protrude by at least 5 mm (the norm is 8-10 mm). This indicator is the most important - by measuring the length, you can understand whether there is a problem.
Several symptoms may indicate that your brushes need replacing, including:
- lack of starter response when turning the ignition key to the ON position - this can happen if the rods are skewed and there is no sufficient contact with the surface of the slip rings;
- slow rotation of the engine flywheel by the starter;
- reduced power of interior lighting, weak or flashing headlights, side lights;
- sudden shutdown of electrical appliances;
- rapid discharge of the battery, after which it becomes almost impossible to charge it.
To determine the cause of disturbances in the operation of the generator, it is necessary to accurately diagnose the malfunctions of the generator and, in particular, the brush assembly.
bracket
Most often, the reason for poor performance of cars lies not in the design itself, but in its bracket. The mounting bracket for the VAZ 2112 generator is fragile, as it is not made of metal. If the parts are installed incorrectly, the fastening of all nearby devices becomes beveled, which, in turn, causes a crack in the bracket.
Many car owners complain that car parts have to be replaced every three months. So, for example, of all cars, the VAZ 21124 generator mount breaks most often. In this case, it is better to consult with specialists and, if possible, make a metal bracket yourself or order it from a specialist.
It must be remembered that a broken bracket is a kind of indicator indicating the existence of a misalignment, improper installation of the generator, excessive tension or weakening of the belt. Only after the cause is identified and eliminated will the parts serve for a long time.
The instructions described above allow you to understand the structure and stages of installation of parts. But in order to better understand the sequence of actions, you need to familiarize yourself with the information provided in the attached video. Based on the fact that the work must be done independently, its price will be low.
With sequential steps, removal and installation will allow beginners to better understand the internal workings of the machine. The main motto in such work is care, since if the fastening is incorrect or there is a slight bevel or deviation, then many spare parts may break down, which will lead to costs.
The idea of replacing a generator on a classic is as old as the history of the car itself, because everyone who installs more bells and whistles on their own car than a weak Chinese radio, the native 42A G-221 is no longer enough for everyone.
True, even those who neglect the hassles of installing a more powerful generator are annoyed by the weak low beam at idle and the poor battery charge. Once, an acquaintance fitted me with a 55A generator on a ball and the idea arose about telling you how to install it in our classic. Having scoured the Internet to find at least something about installing and connecting it to a car, I didn’t find anything useful, a lot of comments like “Plug it in and forget it” or long discussions of professional electricians, but they spoke in a language that would suit a simple Russian to a person, it’s like a Chinese song, nothing is clear...))
In this regard, it was decided to write an understandable article for ordinary people in order to help them do this simple procedure of replacing the generator themselves, without any problems and special skills in working with electricity, but with their hands. Well, let's begin: There are many alternatives to a standard generator, since with the appropriate skills, means and desire you can install any generator. In the provided article, I examine only “economical” VAZ generators from other models, because: a) They are cheaper. b) They are more common, so you won’t have problems replacing them, finding components to repair them, and searching for them themselves. c) They are easier to change - you do not need to find or make any special fasteners and completely change the electrical system.
You can familiarize yourself with the features of VAZ generators from the following diagrams: 42A:
In theory, it is clear that even the more powerful 47A G222 generator from the VAZ-2105 is already significantly better than the standard one. Although, in practice, to be honest, there is not much difference between them. In terms of mounting and inclusion, it is quite suitable for the 42A-mu G-221. A 55A generator will be more than enough for a person who mainly uses the standard electrical equipment of a car. This is not an 80A generator, therefore, if you prefer to use a lot of additional equipment, I would not recommend you to install it and direct your interest to newer models. Although, if you use it, purely “Tape recorder plus fog lights”, it is completely sufficient. In terms of mounting 55A, the generator from the VAZ-2108 is no different from the standard G-221, so you shouldn’t have any problems here - remove the old 42 and install a new one, the main thing is not to forget to remove the terminal from the battery and tighten the belt before doing this after installation.
Difficulties begin with switching on - as you can see from the figure, there are 4 wires going to the standard generator - 2 on a pin and 2 are inserted separately, and at 55A only one wire is inserted. This is explained by the voltage switch already integrated into the generator, the so-called chocolate bar. Therefore, the dark wires from the relay (B) need to be isolated; we will no longer need them. Two wires from pin A need to be screwed to pin 1, and the remaining yellowish wire B must be connected to pin 2.
When removing the generator 37.3701 from a VAZ 2108, VAZ 2109, VAZ 21099 car, do the following: 1. Disconnect the wire from the “-” terminal of the battery. 2. Remove the engine protection (see section 4 “Engine” - “Removing and installing the engine”).
NOTE The generator from a VAZ 2108, VAZ 2109, VAZ 21099 must be removed together with the bracket, since the body side member prevents removing the bolt securing the generator to the bracket.
3. Disconnect the connector with the wire from the generator output.
4. Slide the rubber boot, unscrew the nut and disconnect the wires from terminal “30” of the generator.
5. Loosen the adjusting nut and the lower generator mounting nut.
6. Move the generator to the engine and remove the generator belt.
7. Unscrew the bolt securing the generator adjustment bar.
8. From the bottom of the engine compartment, unscrew the two bolts securing the bracket, holding the generator.
9. Remove the generator downwards from the VAZ 2108, VAZ 2109, VAZ 21099.
10. Install the generator on a VAZ 2108, VAZ 2109, VAZ 21099 car in the reverse order. WARNING When attaching the generator bracket, install the longer bolt closer to the generator drive!
11. After installation, adjust the belt tension (see “Replacing and adjusting the tension of the generator drive belt 37.3701”).
In a VAZ 2112 car, the generator is designed to power electrical equipment when the engine is running. If this unit fails, full operation of the car will be impossible, so the driver may encounter certain difficulties while driving. You can read more about the principle of operation, as well as the replacement of some elements of this unit, below.
[Hide]
Generator assembly and installation
Reassembly should be done in reverse order.
All parts must be thoroughly wiped with a clean cloth before installation. During assembly, it is important to orient the generator covers according to the previously made marks. The pulley spring washer should be installed with its convex surface facing the nut. The tightening torque of the nut is 39-62 Nm. The assembled generator is installed in its place, the belt is put on and tension is applied. When all the fasteners are tightened and the wires are connected, the engine is started. All work on removing and disassembling the VAZ 2110 generator is quite simple
All you need to do is perform each operation consistently and carefully. Then the repaired generator will thank the car owner with efficient operation
All work on removing and disassembling the VAZ 2110 generator is quite simple. All you need to do is perform each operation consistently and carefully. Then the repaired generator will thank the car owner with efficient operation.
Removal and repair of the VAZ 2110, 2112 generator
is done after you have checked the generator and found out that the generator does not produce enough voltage. The verification methods are described in and they are the same for all cars. Therefore, we will not dwell on this in detail, but will immediately proceed to removing and disassembling the VAZ 2110 generator.
1. First, turn off the power to the car. To do this, remove the negative terminal from the battery.
2. Disconnect the wire going to the charging relay.
3. Using a 10mm wrench, unscrew and remove the wires going to terminal B+.
4. Now remove the alternator belt. Use a 13mm wrench to loosen the bottom nut.
6. Using a 10mm wrench, loosen the generator tensioner bolt.
7. Remove the generator belt.
8. Now completely unscrew the upper and lower bolts securing the generator and remove them.
9. Completely unscrew the generator adjusting bolt and remove the generator tension bar.
10. The generator is completely unscrewed, all that remains is to remove it.
11. Now we begin to disassemble the generator. First, remove the rear plastic casing, release the latches and remove it.
12. Using a screwdriver, unscrew the screws securing the charging relay and remove it.
13. Using a 10mm wrench, unscrew the capacitor wire.
14. Using a screwdriver, unscrew the capacitor itself and remove it.
15. Through the hole in the 21 head (held with a gas wrench), insert a 8 hexagon and unscrew the pulley nut.
16. Remove the pulley...
17. ....puck
18. Before disconnecting the generator parts, it is advisable to mark their relative positions. Using a screwdriver, unscrew the screws holding the generator covers together.
19. Now you can remove the front cover of the generator.
20. From the rear side of the generator, unscrew the stator wires and the screw securing the diode bridge.
21. Remove the diode bridge.
22. We also remove the generator winding.
23. Use your fingers to squeeze out the generator rotor, along with the rear bearing bushing.
24. Remove the rear bearing bushing.
25. Use a puller to remove the rear bearing.
We assemble the generator in the reverse order.
Difficulties may arise when installing the front cover. When you place the front cover and begin to tighten the generator parts with screws, tighten the screws evenly, while turning the generator rotor. If the rotor starts to spin tightly, then you have a skewed front cover and you need to align it by tightening the other screws.
Stages
The replacement procedure is different for cars equipped with and without power steering. Below we will look at both options.
Replacing the alternator belt on a VAZ 2112 16 valve with installed power steering consists of the following steps:
- First, remove
the power steering fluid reservoir.
Then, using a key set to “13”, you need to unscrew the nut, thanks to which the generator is attached to the mounting plate.
Generator drive with hydraulic booster
the motor from the support. First you need to unscrew the cushion, and then jack up the engine in anticipation of the gap. We take out the belt through the gap formed.
KEY-DOP
This is where the difference between a car with a hydraulic booster appears - there is no adjusting bolt. The tension is adjusted using a tension roller.
The procedure on a car without power steering is simpler:
- Using a wrench set to “13”, unscrew the generator mounting nut.
We loosen the belt tension by turning the adjusting bolt with a wrench to “10” counterclockwise.
towards the cylinder block, we remove the belt.
furthest away from the cylinder block. By rotating the adjusting bolt clockwise, we increase the tension, and counterclockwise, we loosen it.
Generator drive without power steering
At this point, the procedure for replacing the alternator belt on a VAZ 2112 16 valves is completed. Having completed it in a homemade manner, you benefit from a trip to a car service center. Now, knowing how to change the alternator belt, you will feel confident when traveling, because you can always change this spare part without the help of others.
More details about replacement
Of course, this procedure can easily be performed by a technician at the nearest service station. However, many car enthusiasts prefer to repair or change parts on their car themselves. If you have knowledge and experience in this matter, then follow this algorithm:
- At the very beginning, you should turn off the power to the VAZ-2110.
- Next you need to disconnect the battery.
- Then pull out the pink wire that turns on the generator. To do this, unscrew the nut from the positive bolt.
- Then you need to loosen the upper and lower nuts and remove the tension bolt. After all this, you need to remove the belt.
- Next, the generator is turned 90 degrees, removing the lower mounting bolt.
- Then all connections need to be cleaned, including the rectifier housing.
- The upper part must be cleaned especially carefully.
- After this, the mechanism is replaced, and all connections are assembled in the reverse order.
- Finally, you need to check how the generator works.
When purchasing a new mechanism, you need to know that it must come with a warranty card. That is why you should buy only in specialized stores. If you find it difficult to replace the diode bridge yourself, then it is better to entrust this work to specialists from the technical service. They will easily perform the replacement, without removing the generator and with a guarantee.
Studying the spare parts catalog
It turns out that a “long” alternator belt, or “accessory belt,” can be used in conjunction with the 21120 engine (16v 1.5). The tension in this case is provided by roller 8.
Two different drive designs
The "short belt" can be used with any 16 valve. In configurations with a short belt there is no air conditioning and power steering.
Generator part numbers
- 2110-1041020, -01 – auxiliary drive belt (before 09.2001);
- 2110-8114096-10, -13 – air conditioning drive belt (after 09.2001);
- 2110-1041056 or 2110-8114060 – tension roller;
- 2112-8114054 (“Lux”, air conditioning) or 2111-8114054 (“Normal”) – roller bracket;
- 2110-3701720, -01, -03 – alternator belt (“short” belt);
- 2112-3701010, -02, -03, -06 – generator (for any configuration).
Do-it-yourself VAZ 2110 generator repair
So let's look at the common malfunctions of the VAZ 2110 generator and how to repair them:
How to check the generator capacitor of a VAZ 2110
The capacitor of the VAZ 2110 generator is one of the elements of the car’s electrical circuit and is a capacitance consisting of a pair of electrodes isolated from each other by a dielectric.
Since the main task of a capacitor is the accumulation of electrical energy, its capacitance can be considered the main indicator (the larger the capacitance, the greater the accumulated charge). So, in the capacitor body, a positive charge accumulates on one of the plates, while a negative charge of equal magnitude accumulates on the other (connected to ground)
Replacing a capacitor in a VAZ 2110 generator begins with its diagnosis. The main parameter by which one can judge its damage is increased radio interference while the engine is running.
Checking the bearings of the VAZ 2110 generator
Quite often the generator bearing fails, and the car owner will hear an obsessive hum when driving. But you don’t have to immediately go to a car service center; first, you can independently determine whether the problem is with the bearing.
How to understand a bearing failure?
- Visual inspection. If the design of the car allows, you can carry out an external inspection of the part for cracks in the area of the clips, metal damage, and wear of the seats.
- If there is a hum from the generator when driving, try tightening the fastening nut that secures the fan pulley. The cessation of extraneous noise after such manipulations means that replacement of the generator bearing is not required.
- Sometimes the hum stops after disassembling the generator and checking the starter with the rectifier unit. This also confirms that the generator bearing has nothing to do with it, but completely other parts are faulty.
- If the hum remains, the contact rings with brushes should be cleaned. This is best done with a regular rag soaked in gasoline. If the noise remains after this, then replacing the bearings is inevitable.
- As for the rear bearing of the generator, its failure is much easier to determine. To do this, shake the outer ring of the part and rotate it. If the ring rotates freely and there is no play or noise, then everything is in order. Otherwise, the spare part must be replaced.
- The front bearing of the generator is checked in the same way as the previous one. You need to rock and rotate the front cover while supporting the pulley. Seizing, play, noise - all this indicates bearing wear.
Signs of an unusable generator bearing:
- Noise, hum, whistling sounds when the rotor rotates;
- Rapid and excessive heating;
- Rotating the pulley;
- Unstable charging.
Generator operating principle
This unit consists of several parts:
- frame;
- rotor;
- stator;
- rectifier bridge;
- relay-regulator;
- pulley.
Thanks to the generator, the torque from the power plant is converted into electrical energy. During rotation, the rotor creates a magnetic flux, which is regulated by a relay, and the pulley carries out a belt drive. The rotor moves with the help of bearings, and when they work well, the shaft moves easily.
Another purpose of the relay regulator is to limit the output voltage in the range from 13.6 to 14.7 V. The voltage is transmitted through the commutator rings to the brushes, and the rectifier bridge is responsible for ensuring that energy is transferred in one direction.
How to remove the generator from a car:
- Be sure to disconnect the terminals from the battery;
- turn the car wheels to the right;
- remove the engine crankcase protection (if there is one);
- loosen the fastening nuts;
- loosen the screw on the tension bracket;
- by moving the generator towards the engine, loosen the belt tension;
- remove the drive belt from the generator;
- remove the wire coming from terminal “D”;
- unscrew the nut securing the second wire “B+”, having first removed the rubber cap from it;
- unscrew the tension screw;
- unscrew the nut of the upper mounting of the generator and remove the tension bar;
- unscrew the lower fastening nut and, holding the generator with your hand, remove the bolt and bushing;
- take out the generator;
