Every grant driver knows about the problems of the standard generator on the Lada Grant. However, they are in no hurry to eliminate the defect in mass production. Support (rolling) bearings often fail. While driving, extraneous noise appears, a metallic grinding sound.
To eliminate the defect, it is necessary to dismantle the generator, carry out an inspection, and replace worn elements. Most often, the causes of failure are associated with an electrical or mechanical component.
How to replace the Grant alternator belt
The replacement process is not simple and depends on the equipment of the car: whether there is a tensioner, air conditioning. In the latter case, you cannot do without a lift and dismantling the engine mount due to the air conditioning compressor clutch pulley.
For a Granta with air conditioning, for installation you will need to hang the wheel and remove one engine mount.
How to change a belt on a Grant 8 and 16 valve without air conditioning and tensioner
What you will need for work :
- a knife, if you just need to cut off an old part;
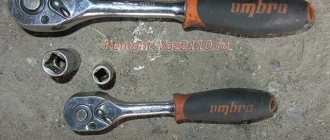
- crank or ratchet with head 13;
- long strong wire;
- flat screwdriver;
- partner – you can replace it yourself, but it’s easier with an assistant.
Step 1. Dismantling
The car is on a flat surface, neutral is engaged without the handbrake. The battery is disconnected .
If the old belt is not needed, we cut it in an accessible place and take it out.
If you need to save the old one, do everything up to step 3.
A replacement is needed with a length of 8223mm, six-wedge. Called 6RK 823. PHOTO: www.zr.ru
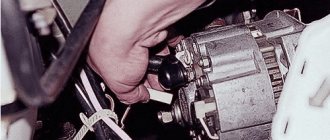
Step 2. Remove the generator mount
We approach the generator mount with head 13:
- we remove the lower bolt by 2-3 turns;
- Use it to completely unscrew the top bolt.
In this situation, we proceed to installation. PHOTO: www.zr.ru
Step 3. Raise the part
Scroll the generator up. The top mount becomes higher than the bracket to which it is screwed.
We press the part to the engine. We fix it with strong wire. For example, we hang it from the cylinder head bolt.
In this situation, we proceed to installation. PHOTO: www.zr.ru
Step 4. Install a new one
We pull the new one onto the pulleys.
The installation takes place in the position of the generator when it is pressed against the engine. PHOTO: www.zr.ru
Engage fifth gear , push the car back, pressing the belt against pulley 1 in the picture. This is where a helper will come in handy.
As soon as we put it on, we work in reverse order:
- unplug the generator;
- press it into working position;
- return the upper mounting bolt and tighten the lower one.
Replacing the alternator belt on a Grant with air conditioning
It's more difficult here. Step by step :
- we drive the car onto a lift or overpass;
- remove the tensioner;
- take off the front right wheel;
- we support the internal combustion engine and dismantle the pillow;
- change the required part.
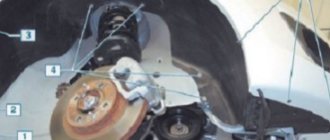
The whole problem is in points 5 (air conditioning compressor clutch) and 7 (right engine mount) - our belt passes through them (number 6). The rest: 1-drive of auxiliary devices, 2/3-tensioner, 4-generator. PHOTO: www.zr.ru
What you need
- new belt marked 6РК 995;
- spanners 8, 19;
- socket wrenches 8, 10;
- Torx keys T20, T27;
- ratchet with extension and heads E14, 17.
Step 1. Tensioner
The car is on a lift or overpass.
Open the hood. Remove the terminals from the battery.
We find the tensioner, take out the spanners 19 and 8:
- 19 we put on the lead screw;
- 8 hold the locknut;
- we touch;
- Turn the lead screw clockwise to loosen the tension.
We remove the lock nut and loosen the tension. PHOTO taken from: www.zr.ru
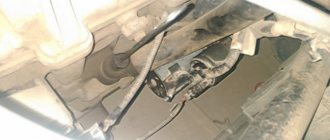
Step 2. Get under the car
You need keys 8, 10 . Filming:
- central shield (numbers 1, 5, 7);
- right shield (number 2).
Step 3. Wheel
Remove the front right wheel. Using keys 8, Torx t20, t27, we dismantle the fender liner according to the diagram.
To work with the fender liner you need three different keys. Having removed it, we gain access to the engine support. PHOTO: www.zr.ru
Step 4: Engine Mount
Getting ready to remove the engine mount.
Using a wrench or ratchet with an E14 head, unscrew the screws securing the support to the engine .
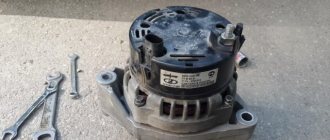
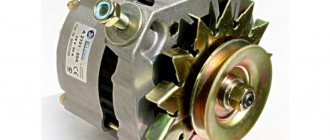
Technomania › Blog › Bosch 110A generator - replacing bearings.
I googled it - you can take the generator apart, everything is welded, everything is bad, etc.
It's sad, but we have to do it. I removed the cover with a flathead screwdriver - yes, all the cover latches were broken. Yes, okay with them. The cover is perfectly pressed by the positive wire when installing the generator in the car.
What to do next? The bolts are almost glued with superglue, the diodes and winding are welded...
The solution is the simplest one. We disassemble it on the other side, leaving the electrics entirely as a separate piece.
1) Remove the pulley (head 24)
2) Using a screwdriver, make a scratch—a mark for matching the body halves.
3) Remove excess sand/dirt from the generator
4) Soak with a lubricant similar to WD-40
5) Tap the hammer in a circle for a minute
7) Cut a strip from a PET bottle and slip it under the brushes (so as not to break them when pulling out the rotor)
 We unscrew the bolts holding the body (4 pieces per
9) Using a flat-head screwdriver, carefully, focusing on the generator housing, we pry up the stator iron one by one from all sides - and half of the housing begins to be pulled out without any effort. It is important not to damage the varnish on the winding with a screwdriver; caution is required. And half of the body came off easily because... The bearing is installed in a plastic liner and does not stick to it. Of course, you need to pry between the iron of the stator winding and the half of the housing without electronics.
As a result, we get a rotor with a bearing at one end of the shaft, and with a bearing and half of the housing without electronics at the other end of the shaft.
10) Having pulled out one of the halves with the winding, iron, relay regulator and diode bridge, we put this half aside.
11) Take half of the housing with the rotor, unscrew the screws (4 pieces) after tapping them through a screwdriver with a hammer (no other way)
12) Holding it by the body, we knock out the bearing with a head (I forgot how much), it came out easily, in just a minute I did it slowly.
13) Remove half of the body
14) Remove the bearings from the rotor. However, the puller does not fit under the bearings - there is not enough space. We take a flat screwdriver, insert it into the gap, turn it, and so on 15-20 times in different places. The bearing is lifted, the gap becomes sufficient for the bearing puller to grip. We tighten the bearings with a puller! I used regular small pullers with 2 jaws. On the brush side there is another part in front of the bearing; it can be easily removed with a flat screwdriver. There are paint marks on this part and the plastic base of the slip rings; in my opinion, they were aligned.
15) We send someone to get some bearings (it seems like they brought some from Largus) And at this time we go over the places where the bearings were sitting with “zero” sandpaper. We polish and lubricate all adjacent surfaces.
16) Reassemble in reverse order