Print this article Font size 16
Repairing a generator on a VAZ 2110 car with your own hands is quite possible. You can either partially repair the element or completely replace it. It all depends on the specific situation and the degree of wear of the device.
According to the operating manual, a routine check of the condition of the generator should be carried out every 50 thousand kilometers. But this is provided that the device is working properly.
Device diagram
The principle of operation of the VAZ 2110 generator
When starting the engine, starting current is supplied to the starter from the battery. But the battery itself does not produce energy, but only accumulates it and then releases it. If you use only the battery to power all consumers, it will quickly discharge.
A car generator produces electricity, charges the battery and powers the vehicle's on-board network while the engine is running (when it reaches a certain crankshaft speed). Car generator The generator begins to produce electric current starting from the idle speed, however, it reaches optimal operating mode when the engine reaches 1600-1800 rpm or more.
What functions does it perform and what is it responsible for?
So, what is a generator for? First of all, in order to provide all VAZ 2110 equipment that runs on electricity with energy. Perhaps someone thinks that this is the battery's task. Not really, because the battery is needed to maintain functionality when the engine is not running (it starts the engine, supports the alarm, music system while parked, etc.).
But when the engine has already started, with the help of the battery, the generator comes into play. During the trip, it is he who supports the operation of all electronics, air conditioning, audio (or even video systems), and everything else that you have added to your VAZ 2110.
Another equally important function of the generator is charging the battery. This also happens when the engine is running. And if it weren’t for this device, the battery would not be able to cope with its tasks, and it would have to be charged all the time.
Considering that today on the VAZ 2110, in addition to the standard layout, many additional energy consumers are installed, it happens that the generator voltage is not enough. In this case, it makes sense to install a 120 amp generator.
Common malfunctions (signs) of the VAZ 2110 generator
So, it is very easy to determine that it is the generator that is acting up; just know a few basic signs of this - here they are:
- The device does not perform its main function, that is, it does not produce current. In this case, the car is driven only by the battery. Moreover, in this case you will not be able to travel far.
- The drive belt is spinning.
- The generator brushes are faulty.
- The rotor clings and touches the stator.
- There is no wire contact with the battery.
- The device begins to make a lot of noise.
- The battery does not charge while driving.
All these signs are very specific and only an experienced driver can identify them. However, if you have even slight doubts about the performance of the generator of VAZ 21099, 2109, 2110 cars.
Rotor slip rings
If there are small scratches or nicks on their surface, then you need to sand the surface with fine-grained sandpaper. You can also remove a small layer of metal using a lathe and then sand it down. If the rings cannot be repaired using these methods, they must be replaced.
To remove it, you must first remove the rear bearing (how to do this was described earlier). Then remove the crosspiece - the protective casing of the rotor contacts. We bend these contacts and remove the slip rings with force.
After lubrication, new rings are installed on the anchor using a hammer. We bend the contacts and solder them to the rotor winding. We protect the soldering area with varnish. Then we put on the cross and bearing.
Which generator to choose for the “ten”
The choice of motorists is not limited to Katek generators. Therefore, if the old device fails, you should think about who will take its place.
There are several main options.
- Katek. A standard, fairly reliable and very efficient generator. AvtoVAZ’s choice in its favor is due precisely to this. Plus it is a domestic manufacturer.
- Chinese products. The attitude of motorists towards Chinese generators is quite skeptical. There are explanations for this. Compared to them, Katek is simply an ideal solution. Although in fairness, we note that you can find some pretty good Chinese-assembled options. But this is the exception rather than the rule.
- Imported analogues. Here, first of all, you should pay attention to Bosch companies. Denso and Delphi. High build quality, impressive service life, efficient operation. They cost more than their Russian counterparts in the form of Katek, but for such a thing it makes sense to spend a little more.
Among imported devices, the following are considered good options:
- Dynamo - manufacturer Bulgaria;
- Eldix - also produced in Bulgaria;
- BATE - produced in the city of Borisov, in Belarus.
When choosing a new generator for your car, pay attention to its technical characteristics and safety margin. Then think about the manufacturer. We do not recommend looking towards China if you are doing repairs for yourself and want to achieve high quality work.
Video: Generator VAZ 2110 – which one to choose?
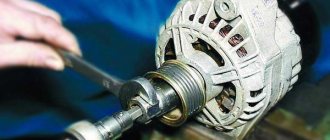
How to disassemble a VAZ 2110 generator: step-by-step instructions
In order to disassemble the VAZ 2110 generator, follow these steps:
- First of all, use a screwdriver or permanent marker to make a longitudinal mark on the body where the front and back covers separate. This will make it easier to assemble the generator in the future.
- We press the three spring-loaded latches on the plastic protective casing of the rectifier unit and remove it.
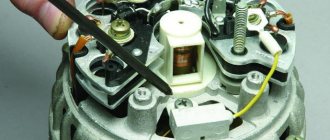
- Using a Phillips screwdriver, unscrew the two screws securing the voltage regulator and lift it up. Then remove the terminal of the appropriate wire from the regulator terminal and carefully remove the regulator completely. Electrically removable brushes are replaced along with the unit.
- Using a size 8 spanner, unscrew the three bolts connecting the rectifier unit to the annular terminals of the stator windings. We carefully move the conclusions to the sides. Remember the location of the thrust and insulating washers on the removed bolts. Now, using a Phillips screwdriver, unscrew the screw securing the noise suppression capacitor to the housing. Disconnect the appropriate wires. We remove the block itself and the capacitor. Using a 10 mm socket wrench, unscrew the two nuts of the contact bolts of the generator and take them out together with the spacer and insulating sleeve, and release the capacitor tip. It is worth noting that wear (or damage) of brushes is the most common cause of malfunction of the generator.
- Using a size 8 wrench, unscrew the 4 bolts holding the rear and front covers of the electric generator together. We push them apart with a face screwdriver and remove the back cover along with the stator winding.
- We remove the stator from the cover, having previously marked it with a mark of their relative position.
- If the front bearing needs to be replaced, remove the generator pulley. To do this, use a 22mm socket wrench to unscrew the nut securing the pulley to the rotor shaft, carefully holding it with pliers or wedging the rotor with a screwdriver. Do not damage the impeller blades, which are made of thin metal.
- Carefully remove the pulley, washers and spacer bushing.
- We return the nut to the rotor shaft, screwing it flush with the end of the armature shaft. Using a rubber hammer, knock the rotor (armature) out of the cover.
- It all depends on the degree of damage to its parts. So:
- First of all, use a screwdriver or permanent marker to make a longitudinal mark on the body where the front and back covers separate. This will make it easier to assemble the generator in the future.
- We press the three spring-loaded latches on the plastic protective casing of the rectifier unit and remove it.
- Using a Phillips screwdriver, unscrew the two screws securing the voltage regulator and lift it up. Then remove the terminal of the appropriate wire from the regulator terminal and carefully remove the regulator completely. Electrically removable brushes are replaced along with the unit.
- Using a size 8 spanner, unscrew the three bolts connecting the rectifier unit to the annular terminals of the stator windings. We carefully move the conclusions to the sides. Remember the location of the thrust and insulating washers on the removed bolts. Now, using a Phillips screwdriver, unscrew the screw securing the noise suppression capacitor to the housing. Disconnect the appropriate wires. We remove the block itself and the capacitor. Using a 10 mm socket wrench, unscrew the two nuts of the contact bolts of the generator and take them out together with the spacer and insulating sleeve, and release the capacitor tip. It is worth noting that wear (or damage) of brushes is the most common cause of malfunction of the generator.
- Using a size 8 wrench, unscrew the 4 bolts holding the rear and front covers of the electric generator together. We push them apart with a face screwdriver and remove the back cover along with the stator winding.
- We remove the stator from the cover, having previously marked it with a mark of their relative position.
- If the front bearing needs to be replaced, remove the generator pulley. To do this, use a 22mm socket wrench to unscrew the nut securing the pulley to the rotor shaft, carefully holding it with pliers or wedging the rotor with a screwdriver. Do not damage the impeller blades, which are made of thin metal.
- Carefully remove the pulley, washers and spacer bushing.
- We return the nut to the rotor shaft, screwing it flush with the end of the armature shaft. Using a rubber hammer, knock the rotor (armature) out of the cover.
Disassembly and repair manual
So, in what cases is it necessary to replace the VAZ 2110 generator, we figured it out, now let’s start the repair. If there is a problem with wear of the brushes, pulley, mounting brackets, rotor, or the mechanism is simply heating up, first you need to unscrew the protection.
- To unscrew the protection, unscrew the bolts of the mounting brackets. When you have been able to unscrew the protection, set it aside and dismantle the generator. Make a mark on the mechanism body; it will allow you to correctly connect the mounting brackets in the future. On the top cover, release the three latch brackets; the cover can be removed.
- Then you need to unscrew the two bolts that secure the regulator, the wire can be disconnected. After disconnecting the wire, the element can be removed along with the brush holder.
- Then you need to unscrew the bolt securing the capacitor. In addition, remove the bolts securing the block. To dismantle it, you need to disconnect three wires. Next, unscrew the contact bolt and change the capacitor; you also need to disconnect another wire from this bolt. Unscrew four more bolts, under them there are washers.
- Remove the rotor and place it in a vice, then unscrew the nut securing the pulley. Remove the thrust washer, remove the rotor directly, and then remove the ring from its shaft. All slip rings should be inspected; if there is visible damage, they must be sanded.
- Using a tester, connect the wires and measure the resistance. If, after connecting the wires and taking measurements, the ohmmeter shows “infinity”, this indicates a broken wire. There is no point in repairing the wires; it is better to change the rotor. The rotor can also be checked for short circuits using a test light.
- If there are no problems in the operation of this mechanism, then you can proceed to diagnosing the stator. Please note that when inspecting the device there should be no damage from the anchor. If the armature touches the stator, then first of all you need to try to change the bearing parts; if that doesn’t help, then remove the cover bracket bolts and replace it completely. You also need to diagnose whether there is a break in the stator itself. To check that it is not there, a test light must be connected to all winding terminals in turn. If, when checking, you notice that there is no light after connecting, then this indicates the need to replace the element.
- Try to rotate the cover bearing; if there is play or jamming, replace the element; if there are no problems in the operation of the bearing, then proceed to the next stage.
- You should also check how freely the bearings located next to the slip rings rotate. If there are any difficulties in its rotation, the element needs to be changed. Also take the time to inspect the lid itself. If there is mechanical damage on it, the component must be replaced.
- Upon completion of the repair work or if there are no breakdowns, the device will need to be properly assembled, securing all brackets. The cover must be installed in accordance with the mark; if there is no mark, then use the service manual. When assembling, be as careful as possible; the process is carried out strictly in the reverse order.
Do-it-yourself VAZ 2110 generator repair
So let's look at the common malfunctions of the VAZ 2110 generator and how to repair them:
How to check the generator capacitor of a VAZ 2110
The capacitor of the VAZ 2110 generator is one of the elements of the car’s electrical circuit and is a capacitance consisting of a pair of electrodes isolated from each other by a dielectric.
Since the main task of a capacitor is the accumulation of electrical energy, its capacitance can be considered the main indicator (the larger the capacitance, the greater the accumulated charge). So, in the capacitor body, a positive charge accumulates on one of the plates, while a negative charge of equal magnitude accumulates on the other (connected to ground)
Replacing a capacitor in a VAZ 2110 generator begins with its diagnosis. The main parameter by which one can judge its damage is increased radio interference while the engine is running.
Advice ! Make sure that the capacitor does not have loose contact with ground (which also contributes to noise).
Checking the bearings of the VAZ 2110 generator
Quite often the generator bearing fails, and the car owner will hear an obsessive hum when driving. But you don’t have to immediately go to a car service center; first, you can independently determine whether the problem is with the bearing.
How to understand a bearing failure?
- Visual inspection. If the design of the car allows, you can carry out an external inspection of the part for cracks in the area of the clips, metal damage, and wear of the seats.
- If there is a hum from the generator when driving, try tightening the fastening nut that secures the fan pulley. The cessation of extraneous noise after such manipulations means that replacement of the generator bearing is not required.
- Sometimes the hum stops after disassembling the generator and checking the starter with the rectifier unit. This also confirms that the generator bearing has nothing to do with it, but completely other parts are faulty.
- If the hum remains, the contact rings with brushes should be cleaned. This is best done with a regular rag soaked in gasoline. If the noise remains after this, then replacing the bearings is inevitable.
- As for the rear bearing of the generator, its failure is much easier to determine. To do this, shake the outer ring of the part and rotate it. If the ring rotates freely and there is no play or noise, then everything is in order. Otherwise, the spare part must be replaced.
- The front bearing of the generator is checked in the same way as the previous one. You need to rock and rotate the front cover while supporting the pulley. Seizing, play, noise - all this indicates bearing wear.
Signs of an unusable generator bearing:
- Noise, hum, whistling sounds when the rotor rotates;
- Rapid and excessive heating;
- Rotating the pulley;
- Unstable charging.
Diagnostic methods
As practice shows, diode bridges periodically fail on any vehicle, regardless of the make and model. It is also not fundamentally important whether you use diode bridges from Valeo, Bosch or any other manufacturer.
Most often, one or several diodes burn out in a DM. As for the reasons, here we can highlight:
Anti-gravel: DIY protective coating
Category: DIY repairs
- dust ingress;
- negative impact of dirt;
- contact of diodes with oil;
- accumulation of moisture in the generator;
- polarity error when lighting;
- incorrect battery connection;
- overload in the electrical network;
- errors in the installation of electrical equipment;
- factory defects, etc.
If you set a goal, the bridge can be checked in normal garage conditions. For such tasks, use a light bulb or a multimeter.
Before starting work, remove the protective casing from the DM, and also do not forget to disconnect the terminals on the regulator. Remember that all bridges are positive, that is, positive diodes are equipped with red wires, and negative ones are black. Don't get confused.
Now in more detail about each of the methods.
Multimeter
If you decide to use a multimeter to check the bridge, you will need to perform several sequential procedures.
The whole process looks like this:
- the bridge is dismantled from the generator (no other way);
- each diode will need to be checked separately;
- the beeper mode is selected on the measuring device;
- This setting will allow you to hear a signal when the probe is shorted;
- if this mode is not available, select the 1kOhm position;
- the probes are brought to the edges of the diode;
- a measurement is made;
- the probes are swapped.
Now regarding the measurement results. Everything is fine with the diode, if in one position you see an infinity sign on the screen, in the second it gives a value in the range from 500 to 700 Ohms.
If the device shows a lower resistance value, or there is an infinity sign in two positions, you have found a faulty diode.
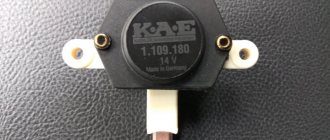
Malfunction of the VAZ 2110 generator relay
The regulator performs the function of a kind of stabilizer. Thanks to it, the voltage of the vehicle’s on-board network is the same, regardless of the number of revolutions of the running engine. Essentially, a regulator is a relay that closes and opens a circuit.
It happens like this. The voltage dropped below the required value, or rose above the norm - the relay disconnected the generator from the network. The voltage has reached the desired range - the regulator connected the device. There are no electromechanical elements in the VAZ-2110 generator relay. It is built on semiconductors. In addition, its design also includes a brush holder with brushes. It is almost impossible to repair the regulator on your own. It's easier to replace it with a new one.
Checking the functionality of the relay takes no more than five minutes. Yes, and there is no need to disassemble anything here. The diagnostic procedure is as follows. We start the engine and warm it up to operating temperature. Turn on the low beam headlights and the heater fan. Using a tester turned on in voltmeter mode, we measure the voltage at the battery terminals. The voltage should not go beyond 13.2 - 14.7 V.
If it is higher or lower, the relay is faulty. A regulator is considered faulty if its brushes are damaged or excessively worn. The minimum length of brushes is 5 mm.
Checking the tensioner belt of the VAZ 2110 generator
Checking the tension of the VAZ 2110 generator belt must be carried out periodically. If the tension is weak, the alternator belt may simply slip, especially during wet weather. As a result, poor belt tension can lead to insufficient battery charging. But you should not overtighten the alternator belt; this will lead to rapid wear of the belt itself or its unexpected break. In addition, when the belt is overtightened, the generator bearings are subject to additional stress and wear out quickly. Below is a schematic drawing that will help you understand how to properly tension the VAZ 2110 alternator belt.
Replacing bearings yourself
If the generator is repaired on its own, the main problems become:
- how to remove the front bearing of a generator - it is often rolled into the front cover housing, pressing in a new product becomes more difficult, since part of the housing is destroyed during dismantling;
- Removing the rear bearing - you need a puller with suitable dimensions.
However, if the generator starts to hum, you need to act quickly before the rotor completely jams.
Dismantling the generator
On some cars, the generator can be removed through the hood, on others, for example, VAZ 2112, you will need an overpass, pit or lift. The dismantling sequence is as follows:
- disconnecting the “–” terminal from the battery;
- loosening the tensioner nut;
- dismantling the alternator belt;
- disconnecting the terminals of the on-board system from the dismantled unit;
- removing engine protection;
- unscrewing the two mounting bolts from below;
- removing the generator from below.
After this, the repair continues on a table or in a vice. At this stage, the dimensions of the front and rear bearings of the auto generator are still unknown to the user if there is no manual.
Complete disassembly
Since the generator bearing can be checked for runout only after complete disassembly, it is necessary to follow the following sequence of actions:
- marking - using a marker, paint or colored nail polish to mark the relative positions of the casing, front cover and body;
- dismantling the pulley - the rotor is carefully blocked with a screwdriver from turning, the pulley is turned away with a key;
- removing the casing - it is usually fixed with latches that need to be unscrewed with a screwdriver to remove the specified part;
- dismantling the front cover - use a screwdriver to unscrew the screws.
Under the casing there is a voltage regulator, a diode bridge, brush clamps, and a capacitor. Before replacing the bearing, you should check the wear of the brushes, the performance of the diode bridge and the voltage relay in order to increase the next overhaul period.
Attention: The armature (rotor) is removed from the stator winding with the rear bearing mounted on the shaft, while the front one remains inside the corresponding cover. Before replacing standard consumables, it is necessary to check the bearings:
Before replacing standard consumables, it is necessary to check the bearings:
- rear - use your fingers to turn the outer race, which should not emit any extraneous sounds when rotating and have no play;
- front - here, on the contrary, the inner race is rotated and the play is controlled when the bearing is rocked inside the seat with your fingers.
Manufacturers unanimously recommend replacing the front cover along with the bearing, especially if it is rolled inside the seat. In practice, to reduce the repair budget, the cover is left for further use, since it costs 150–300 rubles.
Front bearing
If the results of the previous test require replacement of the alternator front bearing, the old standard product is removed from the front cover:
- the bearing can be knocked out inside by placing the cover on the bricks with the outer side up;
- or secure the lid in a vice;
- or use a special puller.
In the presence of rolling, this fixing element is broken irrevocably.
After the owner has removed the worn-out consumable, a new bearing is mounted inside the front cover:
- the lid is turned over with the inside facing up;
- the seating surface is treated with sealant;
- a sleeve of suitable diameter is installed on the outer race;
- With light blows, drive the bearing into the seat until it stops;
- lubricate the balls between the races or fill the grease into special holes.
The bearing has been checked for runout and is ready for use; assembly is carried out in the reverse order.
Rear bearing
The rear generator bearing is replaced as follows:
- dismantling with your own hands - the jaws of the puller grip the outer race, and by rotating the central screw the bearing is pulled out of its seat;
- installation - the standard product is mounted on the shaft, a sleeve of a suitable diameter is installed on the inner race, after which its surface is tapped with a hammer.
Then all that remains is to lubricate the bearing and check the runout and rotation of the outer race. The bearing is a closed type or with rubber seals and is already lubricated at the factory, which reduces repair time and its budget.
Step-by-step instructions for installing and assembling the tens generator
Guide to dismantling the VAZ 2110 generator:
- The tensioner nut is unscrewed.
- The generator unit moves slightly back towards the vehicle interior. The drive belt is removed from the pulleys. Then the electrical power circuits of the device are turned off. One block with wires is fixed with a nut and a stud; they must be unscrewed and disconnected. The second connector is attached using a regular block, which is detached.
- After this, the lower nut securing the assembly is unscrewed. This action is performed from under the bottom of the car. To complete the task, it is necessary to dismantle the power unit protection, if any.
- The screw that needs to be removed is usually fastened tightly. When unscrewing it, you need to treat the part with WD-40 if it is stuck and cannot be removed. You can use a hammer to remove the retainer.
- Then, from the reverse side, this element is removed completely.
- At the final stage, the nut that secures the tensioning device is completely unscrewed. The generator unit is moved to the side, this will allow it to be completely dismantled.
Replacement
The procedure cannot be called complicated, but it is very important to strictly follow the instructions. Based on our recommendations, as well as video tutorials, you can carry out the replacement yourself without any problems.
You have already found out what bearings are on VAZ 2110 generators, purchased a set of new spare parts, so you can start repairing.
Dismantling works
Front bearing
Slightly unscrew the mounting nut on the generator, and also loosen the adjusting bolt. Reset the alternator belt and start the engine. This will allow you to verify that the problem is with the generator. If the noise disappears, then we move on. There is still a lot of work ahead of you. Let's move on to the battery, from which the negative terminal should be removed
This is important from a safety point of view and protection against accidental short circuits during repairs. Once the terminal is removed, unscrew all the wires going to your generator. If you have a crankcase guard, unscrew the mounting bolts and remove it. This way you can get to the lower mount of the generator and remove the device
Remove the generator by pushing it through the engine compartment. Using a regular screwdriver or other handy tool, you need to block the generator rotor and then unscrew the pulley. The next step is to look for special latches. By pulling them to the side, you will be able to dismantle the device body. Next, the generator brushes are unscrewed, as well as the mounting bolts holding the halves of the generator assembly. There should be 4 of these bolts in total. We recommend marking both halves of the generator housing to avoid problems during reassembly. Use a flathead screwdriver to pry up the cover and remove it. Practice shows that it is more convenient to remove the rotor from the front cover bearing in the following way. Take a nut and screw it onto the rotor threads. Then hit it with a hammer, first placing a wooden block under it. Find a part whose diameter will coincide with the diameter of the bearing being removed. For example, a 27 millimeter head may be perfect. Gently start tapping the element so that the bearing comes out of its seat. Take the new bearing and prepare to reinstall it. The first step is to treat the new bearing with lubricant so that it lasts as long and reliably as possible. To install a new component, you will need the old bearing. Place it on top of the new device and lightly tap with a hammer to install.
That's it, the front bearing has been removed and replaced. Let's move on to the back.
Press-fitting
Rear bearing
- To remove the rear element, you will need a special puller;
- If you don't have a puller, you will have to knock out the component with a chisel. An alternative option is a metal rod and a powerful, strong screwdriver;
- The selected tool is used to strike the bearing with a hammer. Here you definitely need to move along the surface, moving in the opposite direction;
- Some people can easily cope with dismantling; they use a regular strong open-end wrench;
- Now take the socket that you used to remove the front bearing and the old generator element that was removed. With their help, a new bearing is driven into its seat;
- If you don't like this method, use a tubular wrench or a metal pipe whose diameter matches the diameter of the rear bearing.
Having finished the work, all you have to do is assemble the assembly, following the steps in reverse order. You should start with the front cover of the generator, followed by all other components of the assembly.
If you carefully study the instructions, watch training videos, understand the structure and operating principle of the generator, replacing its bearings will become a fairly simple repair job for you, which will take no more than an hour of your time.
After completing the replacement, be sure to check the machine for noise. If everything was done correctly, the next operation to change the bearings will not be required soon.
Replacing the generator bearing on a VAZ-2112 is quite simple with your own hands. However, to complete the process you will need some knowledge of car design and auto electrics.
Particular attention should be paid to the quality of the part, since low-quality components fail much faster than more expensive high-quality ones.
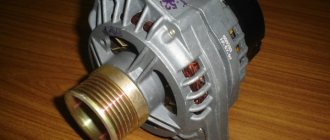
The device of the generator on the VAZ 2110 (Diagram)
The generator is the basis for the functioning of the entire car. It can be compared to the human heart, since the generator is responsible for transporting electricity through all systems and components that depend on electricity. Mechanical energy is converted into electricity.
Like any other element of the machine, the VAZ 2110 generator has its own characteristics, functions, and operating principle. Today we will get to know him in as much detail as possible.
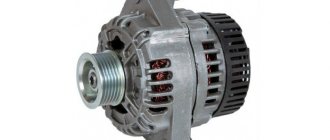
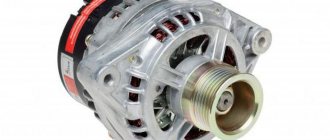
Appearance of the device
How does he work
First, let's figure out how this device functions. His work scheme is as follows:
- The key is inserted into the ignition switch;
- The current goes to the excitation wires;
- The magnetic field created by the armature passes through the stator windings, and voltage appears at its terminals;
- When the armature rotation frequency becomes high enough, the self-excitation mode begins;
- The rectifier unit provided by the car design converts alternating current into direct current;
- The voltage regulator starts working when the crankshaft rotation speed changes, and the time for which the excitation wire is activated is adjusted.
The presented video will allow you to clearly get acquainted with the principle of operation of the generator.
Functions
Beginners are very interested in the most important question, without which there is no point in trying to fix something on their own - what is the generator used for.
First of all, the generator’s task is to provide energy to all electrically dependent equipment.
The mistake many people make is that the equipment is powered by a battery. The battery is needed to maintain the functionality of the devices when the engine is turned off. It powers the audio system, alarm system, etc.
When the engine is started with the help of the battery, all the reins of power pass to the generator. He is now responsible for the operation of the audio system, air conditioning, power windows, etc.
The second, but no less important task of the battery is to recharge the battery. This happens when the engine is running. If it were not for the generator, the battery would not be able to provide power to all consumers for a long time; it would have to be charged regularly in the garage.
Scheme
Correct indicators
When checking with a multimeter (it has a special function for measuring volts). When the car engine is started, a volt is connected to the battery - the meter should show approximate readings of 13-14.5 W, but if they are less, it is possible that the battery is almost discharged or the whole issue is a faulty generator. In such a situation, you can try to gas the car and to do this you need to hold your foot on the gas pedal and then remove it from the pedal; if during this the current supply increases, it means the battery is discharged. But if after 1 check nothing has changed, then the procedure should be repeated. If the current readings are less than 12 W, then after a short time the battery will be completely discharged and a new attempt to start the car will fail.
Technical specifications
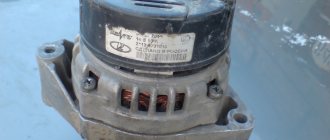
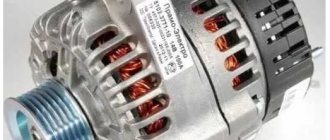
If the old generator fails, many motorists wonder which generator they should now replace the old one with.
There is no need to invent anything here. The most correct solution is to install the same generator as before, or a more powerful one.
Today, the VAZ 2110 provides for the use of three types of power supply devices:
- Katek 5102.3771. The generator produces 80 Ampere power and its voltage is approximately 14V.
- Katek 94.3701. This is a device with the same parameters. They are not seriously different.
- Catek 120 amp. A generator that is more adapted to modern realities, when in addition to standard electrical equipment, motorists install many additional devices.
If you have a powerful audio system in your car, you use an electric pump powered by the car, as well as a number of other additional consumers, it is recommended to install a 120-amp unit instead of a standard 80-amp generator.
If we take into account the size of the devices, then we can distinguish between ordinary and compact ones. They have a certain difference in design.
To be specific, the differences are in the following components:
- Brackets;
- Anchor;
- Excitation wire;
- Drive pulley;
- Number of mounting bolts.
But in reality this does not play a special role. After all, the structure of all generators used for the VAZ 2110 is the same. Therefore, let's look at the circuit and structure of this unit.
| Element | Functions |
| Rotor | He's an anchor. It is a rotating element of the generator, which creates a magnetic field due to the excitation winding located on the shaft. The field wire receives power from the slip rings. They are mounted on the same shaft. There was also room for a drive pulley, field winding wire, bearing assembly and fan impeller. There may be 1-2 last ones |
| Stator | This is a stationary three-phase element that includes three windings. They provide the creation of alternating current. The windings are connected to each other using a triangle or star |
| Frame | A lightweight non-magnetic aluminum alloy is most often used to make the generator housing. The body looks like a pair of covers connected by a bolt. The front cover is located near the drive pulley, and the rear cover is located on the side of the slip rings. Each connecting bolt must be tightened. To disassemble the housing, simply unscrew the mounting bolts. |
| Fasteners | The upper mounting bracket for the generator uses two bolts, while the lower bracket is predominantly mounted on one bolt. In some cases there are two. It is not recommended to modify the brackets, since the factory one performs important functions. The purpose of the brackets is to hold the generator. It is recommended to monitor the condition of the brackets as they are subject to wear and breakage |
| Brush unit | It consists of a pair of graphite brushes, springs that press the brushes, as well as a brush holder |
| Brush holder assembly and voltage wires | This design is typical for modern Katek generators. Therefore, if the regulator fails, you will have to replace the entire assembly |
| Rectifier block | Equipped with 6 diodes, it is responsible for converting alternating current into direct current. It is direct current that is required for the operation of all auto equipment. This element charges the battery, among other functions. |
| Belt drive transmission | The belt drive allows you to increase the speed at which the crankshaft rotates. If the pulley has a small diameter, then the V-belt will wear out faster. Therefore, for small driven pulleys it is recommended to use a poly-V-ribbed drive. It is most often found in modern generators |
Internal organization
The presented device is relevant for all generators used on the VAZ 2110, regardless of their power - 80-120 Amperes.
Margin of safety
If we take into account the standard Katek generator, which is installed on domestic dozens, then its resource is enough for about 10 years of operation or 140 thousand kilometers.
The specified safety margin of the device can only be relied upon if it is handled properly.
Many people fear that a powerful 120 A generator can negatively affect the condition of the battery. In practice, nothing like this happens. Moreover, installing a more powerful unit is recommended if you plan to install an impressive audio system or video equipment on the car.
Bearing 330802 (1НР16092)
Radial double-row bearing, combined, ball-roller (one row of balls and one row of rollers), the coding of which is subject to separate rules. The product has a double-sided seal and a roller instead of an inner ring. Bearings of this design are also called “pump”, since they are used in water pumps of cars (VAZ), which have a second name - pump. Another name for them is “popsicle”. Full marking is 6-1НР16092EKС17, but may differ between different manufacturers and depending on the design features. Thus, the Vologda plant completely switched to a foreign-brand system of symbols. A product with the outdated marking 330802 indicates exactly the same bearing, and is often sold in illiquid quality.
6 - degree of accuracy, HP indicates that the rolling elements are balls and rollers, the first number 1 is a smooth roller with an annular groove on a long ring, 16 and 115 are sizes. E - polyamide separator, K - design, 17 - type of lubricant used in production (Litol-24).
The bearing is produced at two factories in the country, both of which are famous for their high quality products - VBF (23 GPP, Vologda) and SPZ (Saratov Bearing Plant, 3 GPP), however, at the latter they have been discontinued, although many still have them in stock companies. To purchase them in bulk, you can contact EPK or VBF dealers in your region (some also carry out retail sales). The approximate price is about 130 rubles.
The bearing is used in the pump (water pump) of front-wheel drive VAZ cars - 2108, 2109, 2110, 2111, 2112, their modifications, as well as in such outdated models as VAZ 1111 "Oka", "Tavria", LuAZ and some others.
Dimensions and technical parameters of bearing 330802 (1НР16092)
Inner diameter (d) - 16 mm;
Outer diameter (D) – 30 mm;
Width (B) – 39/92 mm;
Dynamic load capacity - 6.5/12.7 kN;
Static load capacity - 2.7/11.8 kN;
Rated rotation speed: 10,000 rpm.
There are currently a variety of brands and manufacturers of water pumps on the market; each manufacturer claims that its products are the best. We will try to impartially figure out what’s what, and consider one of the most popular items - a pump for front-wheel drive eight-valve VAZ cars.
To avoid any confusion, let's clear things up right away. Eight-valve engines on front-wheel drive VAZs were constantly modernized and changed, so the pumps listed below are suitable for all engines equipped with the so-called “eighth” timing belt. If we take it by model, then these are VAZ 2108, 2109, 21099, 2110, 21013, 21014, 21015, as well as Kalinas and Prioras of the first years of production.
We purchased seven samples of pumps from different manufacturers - both domestic and foreign. But before we start introducing the products, I would like to explain some of the terms that are used below.
The impeller is a low impeller, which is located on the reverse side of the main impeller, its purpose is to relieve the shaft-housing seal
Equally important is the presence of holes in the base of the impeller - they also help reduce the load on the mechanical shaft seal with the housing
What to choose?
The choice of motorists is not limited to Katek generators. Therefore, if the old device fails, you should think about who will take its place.
There are several main options.
- Katek. A standard, fairly reliable and very efficient generator. AvtoVAZ’s choice in its favor is due precisely to this. Plus it is a domestic manufacturer.
- Chinese products. The attitude of motorists towards Chinese generators is quite skeptical. There are explanations for this. Compared to them, Katek is simply an ideal solution. Although in fairness, we note that you can find some pretty good Chinese-assembled options. But this is the exception rather than the rule.
- Imported analogues. Here, first of all, you should pay attention to Bosch companies. Denso and Delphi. High build quality, impressive service life, efficient operation. They cost more than their Russian counterparts in the form of Katek, but for such a thing it makes sense to spend a little more.
Among imported devices, the following are considered good options:
- Dynamo - manufacturer Bulgaria;
- Eldix - also produced in Bulgaria;
- BATE - produced in the city of Borisov, in Belarus.
When choosing a new generator for your car, pay attention to its technical characteristics and safety margin. Then think about the manufacturer. We do not recommend looking towards China if you are doing repairs for yourself and want to achieve high quality work.