Alternative
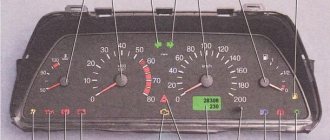
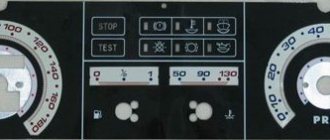
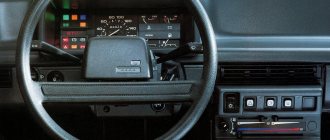
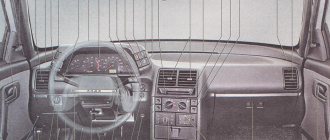
They mainly use the so-called Euro panel overlay.
This trim for the VAZ 2110 is sold as a kit, which includes:
- Actually, the overlay;
- Inserts for finishing on the instrument panel, air ducts, as well as for the button;
- Buttons: heated rear window and rear foglights (these buttons have locks); turning on the dimensions and low beam (dual);
- Two pads for buttons;
- Six plugs that can be placed instead of buttons where they are not needed;
- A set of wires with the help of which the specified double switch is turned on and a block for them;
- Brackets for the instrument panel.
The pad itself is usually softer than that of the VAZ 2110, and does not produce an annoying squeak like the standard one.
Practice shows that proper replacement of such a lining will significantly improve the appearance, sound insulation, and glass blowing.
Where can I get Europanel?
The fact is that europlates, as well as assembled europanels, have become in short supply, since their production was discontinued more than five years ago. Therefore, they mostly sell used ones in good condition; it is quite difficult to find a new one. If suddenly the offered product does not suit you, you can install the Priorovskaya by completely disassembling the old one.
Didn't find the information you are looking for? on our forum.
We recommend reading:
VAZ 2110, when you press the gas, the car choke on the injector
The stove does not heat up at idle speed of the VAZ 2110
What is the best gear oil for vases
Gasoline consumption of Lada Vesta, what the manufacturer promises
VAZ 2110 gear shifts poorly: causes, troubleshooting, gearbox diseases
How to change the generator on a VAZ 2107
Gasoline consumption of Lada Largus per 100 km, city, highway, combined cycle
Low beam on VAZ 2114 went out
Disassembly
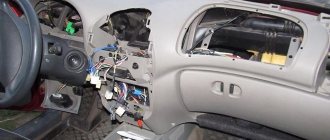
Replacing the panel, installing the trim, and do-it-yourself sound insulation require quite a lot of disassembly. Therefore, it is very advisable to mark all removed parts. For example, using self-adhesive labels on goods.
- Remove the front seats;
- The floor tunnel is also subject to dismantling;
- We also remove the steering column cover and the steering wheel itself;
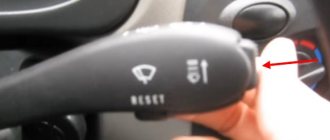
- The steering column switches also need to be removed;
- Next we remove the glove compartment;
- We disconnect the connectors and relays from the mounting block;
- After removing the front pillar covers, remove the instrument panel of the VAZ 2110, disconnecting everything that is possible from it. If you do not have many devices installed other than those standardly provided, then it is better to remove the panel along with the wires.
Also, in order for the sound insulation to be such not only in name, you need to remove the ECU bracket and sills, and then carefully remove the factory sound insulation.
How to easily and correctly remove the old “tidy”
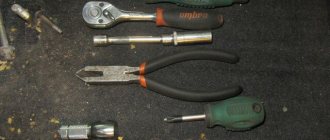
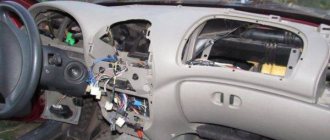
A car torn apart during the dashboard repair process looks really scary. The front seats were pulled out of the cabin, the steering wheel was removed, and a pile of electrical wiring was sticking out from the bottom of the car. In all appearances, the VAZ-2110 we adore seems as if it has been plundered with its insides turned inside out. In order to perform such a seemingly complex operation, you only need pliers and a cross-head screwdriver.
There are really a lot of connecting connectors and this is perhaps the most terrible moment of replacing a VAZ “tidy” for most motorists. The truth is that you don’t need to understand all these intricacies of electrical wiring. Just make it a rule to mark and label all disconnected connectors, and then the reverse installation process will be no more difficult than assembling a children's Lego set.
Thanks for subscribing!
Be prepared for the preliminary disassembly phase to steal most of your day. It's better to start in the morning. It is unlikely that you will be able to complete it in less than five to six hours of painstaking work. During the dismantling process you will:
- remove the seats in the cabin;
- completely dismantle the heat-conducting tunnels on the floor;
- remove the steering wheel together with the switches located under it;
- dismantle the instrument panel along with the trim;
- the same applies to relays and other connectors accessible after removing the glove compartment. The VAZ-2110 headlight hydraulic corrector and other regulators on the panel are removed.
The VAZ-2110 stock panel is attached to the car body with a set of self-tapping screws and two studs in the area of the heat tunnel of the furnace, which directs air flows to the side windows. After unscrewing the screws, the only thing that can prevent you from removing the panel is the unplugged wiring harnesses, which you already know what to do with. And, since you have decided to start replacing the “tidy”, upgrading the display panel would also be a good idea.
Noise insulation
If you think that installing a panel overlay will immediately solve many problems, then this is not entirely true. We still need to work on eliminating the creaking, for which we need to glue and stretch everything with our own hands; we also need to soundproof the panel itself, and at the same time the floor. It is also possible that the air ducts will need to be replaced or modified.
An article dedicated to tuning and soundproofing a torpedo on a VAZ 2110 is located here: https://vazweb.ru/desyatka/salon/torpeda.html
To work you need, based on a VAZ 2110:
- Six sheets of bimast are a self-adhesive material used for sound insulation. It consists of three layers: 1 – thick aluminum foil; 2 – bitumen; 3 – raw rubber. The standard sheet has a size of 60x90 cm;
- Three sheets of splen measuring 100x125 cm and 0.8 cm thick. This is also a self-adhesive material resembling foam;
- One standard sheet of Bitoplast-5 (black self-adhesive foam rubber).
All these materials will be needed in order to glue all the places that make creaking and other noises, and so that the sound insulation in the VAZ 2110 interior is at the level, and not what it actually is.
In order to know for sure that in the future nothing will creak or rattle on the VAZ 2110, irritating those in the car, normal sound insulation is needed. On the floor of the entire front part (up to the rear seats) and on the front panel with your own hands you need to glue the butt joint in the following sequence:
Why should you consider replacing the lining?
Perhaps you really think that replacing the front trim of the dashboard will be an overwhelming task for you. However, it is difficult to argue that the original factory plastic is hardly distinguished by high quality and presentability, and something needs to be done about it. A good overlay for the instrument panel of a VAZ 2110 Euro-model will cost about 6,000 rubles and has a lot of advantages:
- updating the aesthetic appearance of the VAZ-2110 car interior;
- There are also exclusive offers that inherit the design of prestigious imported cars;
- you get rid of the problems of low-quality plastic: fading of the material in the sun, creaks, cracks and widening gaps at the junction of panel elements;
- improved sound insulation properties: all kinds of noise emanating from under the hood of a car (including when driving on poor-quality roads) will be transmitted to a lesser extent into the interior of the VAZ-2110;
- The furnace air ducts of the stock lining for the panel leave much to be desired, so you will certainly improve the heat exchange performance inside the cabin in the winter season.
Europanel for VAZ 2110
By the way, there are several types of “Europanels” for the “ten” from VAZ. For example, Euro-1 is quite ascetic in its design and does not have a glove compartment opposite the passenger seat. But it is available for the rubber from the series number two. There are also decorative trims that only complement the interior design and are mounted as upholstery on top of the main ones.
The original stove ventilation system in VAZ-2110 cars really does not suit most drivers. Because of this, many motorists do not have the opportunity to drive comfortably in the winter. You can, of course, modernize an old panel cover: seal all the cracks with model material, compensating for heat loss, but buying a completely new one can really kill “two birds with one stone.”
You can come up with a lot of logical arguments in favor of why the new overlay for the VAZ 2110 panel is good. This means that if you have the means and capabilities, all you have to do is pick up the tool and get to work. Below we will briefly describe how to replace the front pad.
Installation
The removed panel needs to be disassembled and modified taking into account the purchased cover. The standard trim of the VAZ 2110 is removed, and the instrument panel is installed using the brackets included in the kit on the panel.
The euro trim itself must be cut according to the instructions, and all the accessories supplied with it must be installed, as well as the air duct panels. The wires need to be laid and secured at the base of the panel. The base itself should be glued with bitoplast so that the squeaking does not bother you. It is also necessary to seal the joints of the air ducts with splen and bitoplast.
We carry out actions with the overlay according to the instructions
The existing wiring harness is connected to the additional Euro pad harness. Fastening - using mounting ties. To avoid annoying squeaking in the future, all connectors should be wrapped in bitoplast. After this, the panel overlay is secured with self-tapping screws in the indicated places.
Now you can install the panel on which the overlay is already attached in its place. The most painstaking work is to connect all the devices correctly. Markers should help with this. Be sure to check if you can hear the panel creaking; perhaps additional sizing is needed somewhere.
In general, there is nothing particularly difficult about installing a new trim successfully. The only thing is that this work requires great care, especially in terms of connecting all devices.
Source
Let's prepare a new dashboard trim for installation
To do this, we cut off the remaining material of the Euro lining. There is no need to cut out any space under the dashboard, otherwise there will be a gap between the control column and the trim. In this place you simply need to make 2 cuts on the sides so that this part of the lining can be slightly bent as needed. Also, there is no need to cut off 10 mm from the sides of the lining in the area of the side air ducts; these places must be adjusted to the location.
We measure the panel overlay and adjust it as necessary. At this step, it is recommended to use anti-creak (soundproofing the panel). This way, you will insure yourself against squeaks in the future.
To install the dashboard in the Euro trim, you can use one of the methods:
- Use fasteners from the Euro lining kit.
- Use fasteners from an old lining (from drilling).
- We connect connectors and Europanel keys according to the instructions:
When the overlay is ready, let's try to install it. Fastening the Europlate in positions 1-7 of the diagram. We fix 35mm screws on top, which are then hidden under a plastic cover.
The advantage of this method is time. If you dismantled the panel, then you will spend no more than 3 hours changing the lining. If this is the first time you are faced with a similar type of work, then about five hours.
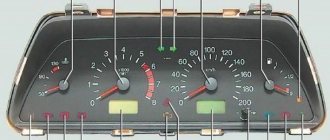
Instrument cluster trim VAZ 2110 euro
This product was chosen by 68 customers
Euro-overlay for the instrument panel of VAZ cars of the tenth family made of durable ABS plastic.
Set: 1 pad
Product delivery options
Note! Below are the shipping methods available specifically for this product. Payment options may vary depending on the shipping method. Detailed information can be found on the “Delivery and Payment” page.
Parcel by Russian Post
Available payment methods:
- Cash on delivery (payment upon receipt)
- Using cards Sberbank, VTB, Post Bank, Tinkoff
- Yandex money
- QIWI
- ROBOKASSA
Shipping throughout Russia. Delivery time is from 5 to 12 days.
Parcel by Russian Post 1st class
Available payment methods:
- Cash on delivery (payment upon receipt)
- Using cards Sberbank, VTB, Post Bank, Tinkoff
- Yandex money
- QIWI
- ROBOKASSA
Shipping throughout Russia. Delivery time is from 2 to 5 days. More expensive than regular delivery by Russian Post, approximately 50%. Parcel weight up to 2.5 kg
Express Parcel EMS
Available payment methods:
- Cash on delivery (payment upon receipt)
- Using cards Sberbank, VTB, Post Bank, Tinkoff
- Yandex money
- QIWI
- ROBOKASSA
Shipping throughout Russia. Delivery time is from 3 to 7 days. More expensive than regular delivery by Russian Post, approximately 100%.
Transport companies
Available payment methods:
- Using cards Sberbank, VTB, Post Bank, Tinkoff
- Yandex money
- QIWI
- ROBOKASSA
Delivery is possible to any locality where there is a representative office of the transport company. Delivery time is from 2 to 10 days. Sending large parcels is approximately 50% more profitable than by Russian Post.
Pickup from our warehouse
Available payment methods:
- Cash upon receipt
- Credit, installments
- Using cards Sberbank, VTB, Post Bank, Tinkoff
- Yandex money
- QIWI
- ROBOKASSA
Pickup times must coincide with store opening hours.
Source
Instrument cluster trim VAZ 2110 euro
41 customers chose this product
Original (standard) cladding of the instrument cluster of a new type. Designed to replace a standard one that has become unusable.
Set: 1 facing
Product delivery options
Note! Below are the shipping methods available specifically for this product. Payment options may vary depending on the shipping method. Detailed information can be found on the “Delivery and Payment” page.
Parcel by Russian Post
Available payment methods:
- Cash on delivery (payment upon receipt)
- Using cards Sberbank, VTB, Post Bank, Tinkoff
- Yandex money
- QIWI
- ROBOKASSA
Shipping throughout Russia. Delivery time is from 5 to 12 days.
Parcel by Russian Post 1st class
Available payment methods:
- Cash on delivery (payment upon receipt)
- Using cards Sberbank, VTB, Post Bank, Tinkoff
- Yandex money
- QIWI
- ROBOKASSA
Shipping throughout Russia. Delivery time is from 2 to 5 days. More expensive than regular delivery by Russian Post, approximately 50%. Parcel weight up to 2.5 kg
Express Parcel EMS
Available payment methods:
- Cash on delivery (payment upon receipt)
- Using cards Sberbank, VTB, Post Bank, Tinkoff
- Yandex money
- QIWI
- ROBOKASSA
Shipping throughout Russia. Delivery time is from 3 to 7 days. More expensive than regular delivery by Russian Post, approximately 100%.
Transport companies
Available payment methods:
- Using cards Sberbank, VTB, Post Bank, Tinkoff
- Yandex money
- QIWI
- ROBOKASSA
Delivery is possible to any locality where there is a representative office of the transport company. Delivery time is from 2 to 10 days. Sending large parcels is approximately 50% more profitable than by Russian Post.
