I have long wanted to replace the license plate light bulbs on my Kalina with LED ones, but I haven’t had the time. And then, finally, it happened - one of the lamps burned out. I bought a couple of LED ones at the market, came home and got to work.
As it turned out, the work is very simple and straightforward; you don’t even need to unscrew any bolts. This example is suitable for owners of Kalina sedan, station wagon and hatchback.
Fuses and relays in Lada Kalina, electrical diagrams
If one or another electrical device in your Kalina has stopped working - headlights, low or high beams, cigarette lighter, stove, turn signals, as well as other devices, then the first thing you need to do is find the cause of the malfunction, in particular, check the fuses and relays in the Lada Kalina.
The first thing to check in electrical circuits is the fuses, because they are the weakest point of the circuit and are usually the first to fail. Read on to learn about which fuses do what in the Lada Kalina, as well as where the relays are located and how to find the right one.
If you do not want to get into an unpleasant situation when, due to a blown fuse, one or another device refuses to work, but you don’t have a whole one at hand, it is useful to make it a rule to always carry with you a set consisting of different fuses.
For the Lada Kalina, you can buy a similar set at any auto store that sells auto parts for domestic cars. It takes up very little space, but its benefits in case of failure will significantly reduce your time to fix the problem.
Results
You learned how to change the license plate light bulb on popular cars. Rest assured that on other car models there is nothing difficult and everything is done in the image and likeness of our examples. By the way, by eliminating such minor malfunctions with your own hands, you save money, because auto repair shops charge quite a lot of money for such procedures, several hundred rubles, depending on the region. So why spend money on such trifles if it is absolutely not difficult for even the most inexperienced driver?
How to change the license plate light bulb on Kalina
What tools will you need:
- flat screwdriver,
- a piece of rag
- new lamps.
The left side of the lampshade is made in such a way that you can place a thin object (in our case, a screwdriver) under it and pry it, releasing the first latch. This requires a little effort. If you are afraid of scratching the plastic, place a prepared rag under the tip of the screwdriver.
Once the left side of the latch has come out, move the lamp itself a little to the left and remove the right side. Pull the lantern out. Now you can either disconnect the wire, or simply turn the lamp a little and remove it from the housing.
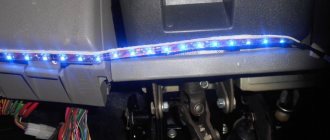
The light bulbs in the license plate illumination are the most common ones - W5W. The same ones are in the front side lights. We take out the old incandescent lamps and insert new ones - LED ones. It’s better to immediately check whether you placed them on the wrong side; LED lamps have polarity! Well, now, with a clear conscience, everything can be put back together. The license plate light bulbs on Kalina have been replaced.
What advantages will we get after replacing the standard license plate light bulbs with LED ones?
- Firstly, they shine much brighter. This is noticeable even to the naked eye. And at the same time they consume much less energy, which leads to at least insignificant savings.
- Second, they don't get so hot. Having removed the old lamps, you may have noticed some melted plastic near their seats. It is not good. This definitely shouldn’t happen with diode lamps.
- And last but not least, it looks beautiful. Agree, the bright, white backlight of the license plate looks much better than the standard one.
Installation Tips
- When buying new elements, it is worth paying attention to the fact that in addition to sizes 36 mm, which are suitable, there are also sizes 41 and 38 mm, which are not suitable.
- They have polarity, so before replacing elements on the Chevrolet Niva, you should turn on the backlight and only then carry out the installation.
- If, when examining the light bulb, the bulb turns black, but continues to shine, it should also be replaced as it will soon fail.
- Try to avoid moisture, as the device will quickly fail if water gets in.
Additional mounting block Lada Kalina
The control system relay box is located under the instrument panel console, next to the controller. To get it, remove the right trim of the instrument panel console (near the passenger’s left foot), and then:
- Unscrew the relay block mounting nut using a socket wrench.
- Pull the bar.
- Remove the system relay block from under the console.
Control system relay block:
- cooling system electric fan relay;
- electric fuel pump relay;
- fuse (50 A) for the electric cooling fan;
- main relay
Attention:
A new relay or fuse should be installed in place of a failed one only after the cause of the malfunction has been determined and eliminated. Only standard fuses designed for a certain rated current may be used. The use of homemade fuses or fuses of increased rating can lead to failure of electrical equipment elements, and possibly to a fire.
Keywords:
Fuses and relays in Lada Kalina, electrical diagrams
Fuses and relays in Lada Kalina, electrical diagrams
If one or another electrical device in your Kalina has stopped working - headlights, low or high beams, cigarette lighter, stove, turn signals, as well as other devices, then the first thing you need to do is find the cause of the malfunction, in particular, check the fuses and relays in the Lada Kalina.
The first thing to check in electrical circuits is the fuses, because they are the weakest point of the circuit and are usually the first to fail. Read on to learn about which fuses do what in the Lada Kalina, as well as where the relays are located and how to find the right one.
If you do not want to get into an unpleasant situation when, due to a blown fuse, one or another device refuses to work, but you don’t have a whole one at hand, it is useful to make it a rule to always carry with you a set consisting of different fuses.
For the Lada Kalina, you can buy a similar set at any auto store that sells auto parts for domestic cars. It takes up very little space, but its benefits in case of failure will significantly reduce your time to fix the problem.
Relay and fuse box
The fuses in the Lada Kalina are located under the dashboard, in a block located to the left of the steering wheel. To get to it, you need to open the cover in which the headlight switch is built in. The lid has latches; if you pull it towards you by the upper part, it will open and fold down (its lower part is fixed on an axis).
F1 (10 A) - immobilizer, dashboard lamps and sensors, reversing light, turn signals. If any of the gauges on your dashboard stop working, or one or all of the warning lights stop lighting up, check that fuse, as well as the gauges or bulbs themselves. If the rear white light does not come on when you engage reverse gear, it could also be this fuse or the reverse switch.
The reverse switch is located on the transmission, to change it you will most likely need to remove the engine cover to get to it. Located on the left side in the direction of travel on the rear of the gearbox. If the turn signals do not work and this fuse is intact, also check relay K5, the turn signal control knob, its connector, as well as the turn signal lamps themselves.
F2 (30 A) - electric windows. If the power windows stop working, check this fuse, as well as relay K2. If the fuse and relay are good, there could be a number of reasons. First, try pressing the power window button and slamming the door. If the mechanism “bites” when the glass is raised, this may help.
Otherwise, you need to disassemble the casing and look at the mechanism. When disassembling, you need to check the serviceability of the gears and all components of the window lifter, including the motor brushes. It could also be a problem with the power window module. It is located in the left rear door; if there is something wrong with it, then most likely you will have to change this module to a working one.
F3 (10 A) - alarm.
If the emergency lights do not work and this fuse is good, check relay K5. If your left or right turn signals come on and are constantly on, even when you turn off the ignition, this is a factory defect. In this case, it is necessary to replace the body electronics control unit. This can be done in official salons.
F4 (20 A) - windshield wiper, heated rear window. If the windshield wipers do not work and this fuse is intact, also check relays K4 and K6. The issue may be in the windshield wiper motor or its mechanism. Check the wiper switch and its connector.
If the rear window heating does not work, check fuse F8, the heater terminals, their contacts, as well as the contacts of this fuse and relay K6. Another issue could be poor contact on the body. The wiring ground is connected to the body under the dashboard. If there is poor or oxidized contact in this area, it can also cause problems with the correct readings on the panel instruments.
F5 (25 A) - heater, electric power steering, windshield washer. If this fuse and relay K4 are intact and the stove does not work, the problem may be in its electric motor (brushes) or the power button, as well as its contacts. If the electric power steering does not work, this fuse and fuse F31 are intact, then it is better to contact a workshop, because it will be difficult to find and fix this malfunction yourself.
Main reasons
Consider in detail the most basic reasons for such a breakdown.
Fuses blown
The fuses in the mounting block have burned out (F12 - right side, F13 - left side). Their rating is 7.5A.
F12 - left headlight, F13 - right headlight
The fuses in the photo are marked with an arrow. (top - left headlight, bottom - right headlight)
In this case, the voltage regulator may be faulty. As a result, a power surge occurred and both fuses were blown. It is necessary to check the voltage of the electrical circuit under load.
If you are on the road at the time of a breakdown, you can install a “bug” instead of fuses.
Carefully insert a piece of wire into the fuse connectors, preferably one, the left fuse. In this case, do not put the cover of the mounting block back on, as you will have to conduct a visual inspection; the wire may begin to heat up.
Low beam bulbs burnt out
“Right low beam” burned out
The low beam bulbs burned out, both of them at once, either a coincidence, or a short one, or the low beams were not turned on at idle. At high speeds, the current is greater, so both can burn out at once. The voltage regulator may also be faulty.
The low beam contact relay is broken
Location of the contact relay in the mounting block
The low beam may not turn on due to a broken contact relay. This breakdown is a very common reason. Due to the design of the relay and its low cost, the contact group may become stuck.
- Open the fuse box (mounting block).
- We take out the relay number K9.
- It is advisable to take a known good relay for a test drive. Or you can lightly tap the old relay with a key or coin.
- Reinsert the contact relay.
- Checking the low beam operation.
Light control module failure
Light control module on Grant
This fault should be checked last. The cost of a new part is about 900 rubles, so the easiest way is to replace the module with a known good one, for example, take it from another car.
If your high beams also do not work, then check whether voltage is coming to the MUS.
Light control
All cars that come off the assembly line have light bulbs installed to help you see the license plate from the rear. Typically, a pair of instruments is located in the lower trunk saber. Traditionally, problems do not arise for the first few years, but over time the lamp may burn out, so it is necessary to periodically monitor the condition of the backlight on cars with high mileage.
Almost every motorist can cope with the replacement. You don't even need special equipment for this.
The license plate light bulb can be replaced in the following sequence:
disconnect the battery from the on-board power supply to prevent possible contact shorting; Using a screwdriver with a thin tip, we disassemble the lamp shade; We show maximum care when unscrewing the lamp, since many people damage the socket due to carelessness; in place of the burnt out lamp we install a similar lighting device with LEDs or a classic incandescent lamp; The next step is to install the lampshade, but we recommend degreasing it first.
After all the manipulations, we check the functionality of the node. To do this, we connect the battery to the network. Each car model has its own procedure.
Hyundai Solaris
Minor repairs on one of the most popular car models in Russia are not difficult. Before you replace the license plate light bulb in this car, you need to know that there are two lights there. They are located on the trunk lid under the trim.
The rear lighting fixtures on Solaris are interconnected. Dismantling begins with removing the trim on the trunk lid. There is a cover in the handle that needs to be lifted with a flat-head screwdriver.
Now use a Phillips screwdriver to unscrew the screws holding the handle, after which you can remove it. Using the same tool, we unscrew the pins that the manufacturer uses to secure the casing in the lid. The upholstery is removed after removing the pistons.
The cartridge is unscrewed clockwise until it stops. Next, we lightly squeeze it and unscrew it from the housing along with the lamp, which is easily removed by the glass bulb.
Assembly is carried out in the reverse order of disassembly. You should not use excessive force to avoid damaging the housing.
Lada Kalina"
Three to four years later, Kalina car owners are faced with the problem of illuminating the license plate from the rear. The license plate light bulb may oxidize in the area of contact with the socket or burn out.
Disconnect the wiring from the battery. To replace, use the algorithm:
- press lightly on the lantern on the right, while moving it slightly in the same direction (it can be easily dismantled);
- Together with the wiring, the lampshade is removed outwards, which greatly simplifies further work with the unit;
- slightly lift the plastic clamp up and install the plug that provides power;
- carefully unscrew the lamp housing;
- to remove the light bulb, move it slightly to the side;
- install a new classic or LED light;
- We carry out the assembly in the reverse order.
We return the wiring to the battery. We check the functionality of the lighting. Owners of the Lada Priora carry out similar operations to restore the unit’s functionality.
Nissan Qashqai
On popular foreign cars, license plate lighting also often fails. Car owners can replace the lamps themselves. As in other cars, first of all we unplug the cable from the power source.
Next, the lampshade is dismantled; in this case, you can get by with one screwdriver. You can simplify the operation by applying slight pressure on the lampshade, while swinging it slightly left/right, and then remove it outward.
As soon as the lamp cover is removed, we unfasten the connector and remove the light bulb, replacing it with a working one. Assembly is carried out in reverse order. Next, we return the connection of the on-board electrical system to the ABK and check the functionality of the unit.
TOYOTA Corolla
When working with the rear lamp of the Corolla, you must lower the lamp diffuser. This will allow easy access to the lamp. To do this, press lightly on the tongue, which will allow the diffuser to move down.
It is necessary to unscrew the lamp socket counterclockwise to make everything easier to remove. Next, unscrew the screws holding the backlight mount so that you can lower the backlight. When removing the lamp holder, unscrew the thread also counterclockwise, and then remove the lamp. All that remains is to put everything back together in reverse order.
Stern maintenance
On a Lada Kalina, replacing the brake light bulbs may be necessary if the headlight is damaged or the element itself burns out. Due to the design features of the car, repairs can only be performed by completely disassembling the rear panel and removing the entire headlight.
- On a Lada Kalina, replacing brake light bulbs begins with dismantling the headlight. To do this, you need to remove the plastic cover from where the seat belt comes out. The second part is attached a little lower - near the belt reel. The nuts are unscrewed with a No. 10 wrench. You should be extremely careful when doing this. If a part flies into the body panel, you will not be able to get it out.
- As soon as the device is freed from its mounts, all lamps will be accessible. You can remove them from the mount by turning the base 45 degrees clockwise.
- Next, the light bulb itself is removed and replaced with a new one.
- Reassembling the headlight is performed in reverse order.
Standard replacement of light bulbs of Lada Kalina dimensions and other elements is carried out at home without significant difficulties. Changing the lamps alone is quite easy. This does not require any specialized tools or deep, professional knowledge of mechanics. It is enough to follow the instructions for car repair and maintenance.
Power fuses
The main power fuses and the diagnostic connector are located under the cover next to the cigarette lighter.
I hope this article will help solve your electrical problem. Just in case, take with you spare fuses and, if possible, relays, then you won’t have to look for them at the most inopportune moment or during auto shop hours.
You can also read about Lada Granta fuses, if you have such a model in your fleet.
Interpretation of fuses in the center console
| Designation on the image | Current strength, A | Protected Circuits |
| F1 | Main relay circuits (winding of the cooling system electric fan relay, canister purge valve, air flow sensor, speed sensor, oxygen concentration sensor, ignition coil) | |
| F2 | Fuel pump, viburnum fuel pump fuse. | |
| F3 | Electronic control unit (constant power circuits) |
The system relays are assembled into a block and installed under the center console. The block contains a fuse for the electric fan of the engine cooling system.
Additional relays and a fuse are located on the right side at the bottom of the instrument panel.
To get there, you need to remove the right panel of the instrument panel console
And use a socket wrench to unscrew the nut securing the relay block
Then remove the block.
Designation of the engine control system relay block
1 — fuel pump activation relay; 2 — fuse for the electric fan of the cooling system (50A); 3 — relay for turning on the electric fan of the cooling system (low speed); 4 - main relay; 5 - relay for turning on the electric fan of the cooling system, high speed)
Penalty for faulty lighting
The first regulatory act to which you should refer is paragraph 2.3.1 of the Road Traffic Regulations. According to it, traveling to a repair site with a faulty license plate backlight is possible if the driver cannot fix the fault on the spot. This is not an offense, since such a malfunction is not directly indicated as a prerequisite for prohibiting operation.
However, when driving in the dark or in conditions of insufficient visibility, regardless of the reason why the license plate illumination does not light up, the absence of illumination of the state registration plate (state registration plate) clearly turns the rear license plate into “unreadable” according to the interpretation of the law. In this case, the Code of Administrative Offenses, as amended on December 29, 2015, comes into force, stating:
". Article 12.2. Driving a vehicle in violation of the rules for installing state registration plates on it:
1. Driving a vehicle with unreadable, non-standard or installed state registration plates in violation of the requirements of the state standard, except for the cases provided for in Part 2 of this article, shall entail a warning or the imposition of an administrative fine in the amount of five hundred rubles. »
Thus, driving with the rear license plate illumination completely inoperative during daylight hours for a traffic police officer can only be grounds for warning the driver about this malfunction, while in the dark this is already a reason for drawing up a protocol on an administrative offense.
Addition block
It is located on the bottom right of the instrument panel, near the heater air duct, and is also covered with a lid. The cover is attached to a screw; to remove it, you need to unscrew this screw. To dismantle the relay block itself, wrench No. 10 is useful.
The relay block is responsible for the following functions and components.
- Turn on the engine cooling fan (low and high speed).
- Main relay.
- Fan fuse.
- Fuel pump switch relay.
You need to know which guards protect which elements. This is especially true if one of them is responsible for two or three nodes. For example, if you discover that the cigarette lighter does not work (usually some device is connected through it, for example, a DVR), you should check the radio. If it does not turn on, then it is necessary to replace fuse F20. You can replace the damaged element yourself. There is no need to contact a car service, since after replacing the fuse everything should work.
If any fuse or relay malfunctions, you must remove the blown element and put a new one in its place. The blocks must be restored or assembled in the same sequence as they were disassembled.
The Lada Kalina fuse box is located in the cabin, on the left side, under the cover where the light control switches are located. If something doesn’t work for you electrically, I recommend that you first check all the fuses responsible for a particular power circuit; in most cases, the culprit is a blown fuse, and only then look for the problem in the components themselves.
We attach photographs of the Lada Kalina fuse box, which were recently installed on Kalina:
So, let's look at which fuses and relays are responsible for what in our Kalina.
Circuits protected by fuses F1 - immobilizer control unit, hazard warning switch, instrument cluster F2 - power windows F3 - hazard warning switch F4 - Windshield wiper F5 - Heater, electric power steering control unit F6 - Horn F7 - Instrument cluster, interior lighting F8 - rear heating glass F9 - Side lights (right) F10 - Side lights (left) F11 - Immobilizer control unit F12 - Low beam (right) F13 - Low beam (left) F27 - electric power steering control unit (large red 50 A) F28 - control unit ABS system (in this case, an empty space, since ABS is not installed) F14 - High beam (right) F15 - High beam (left) F16, F17 - Fog lights F18 - heated seats F19 - ABS F20 - cigarette lighter F21 - Reverse lock F22 - Electrical package control unit F23, F24, F25 - reserve F26 - ABS
Purpose of the relays installed in the block: K1 - headlight washer K2 - activation of the power window circuit K3 - activation of the starter K4 - additional (ignition relay) K5 - direction indicators and hazard warning lights K6 - windshield washer and wiper K7 - high beam K8 - horn K9 - front fog lights K10 - heated rear window K11 - heated front seats K12 - reserve
Please note that all fuses are colored differently depending on the amperage (Amps) they are rated for - it is important to respect these values to avoid short circuits. To replace, use tweezers that are inserted into the mounting block
Two types of mounting blocks were installed on Kalina, let’s look at each of them:
"Lada Priora" - the people's car
"Priora" is a very popular and prestigious domestic model. This car is very common due to its low cost and prices for auto parts. Any car owner should know how to change the license plate light bulb on a Priora. There are two lamps in the niche of the rear license plate and you can replace the light bulb in them without removing the lamp. By the way, a W5W type bulb is installed here. To quickly and correctly replace, you need to do a couple of steps. Firstly, open the trunk, and secondly, carefully inspect the area where the license plate is located. After which we find the wires going to each of the lamps.
Now we will turn the light bulb counterclockwise, remove the socket and insert it into the light bulb. Reattach the cartridge by turning it clockwise.
The second replacement option is to pull the lamp out towards you, prying it off with a flat screwdriver
Do this carefully - the lampshade may be damaged
We figured out how to change the rear license plate light bulb on this car, but on others?
Changing a lamp on a Toyota Corolla
The next car in our review is the Toyota Corolla. How to change license plate light bulbs on a Japanese car?
As you can already judge from the photo, there is nothing complicated here. Remove the casing using gentle movements. Having pulled out the faulty light bulb, replace it with a new one, be careful that when dismantling the lamp it does not crack in your hands and you do not get hurt, and then we assemble everything in the reverse order.
Replacing fuses and relays
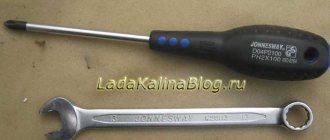
To properly replace outdated or failed fuses with your own hands, you will need a set of tools and consumables:
- Flashlight.
- Tweezers.
- Plastic spatula.
- Rags.
- Layout of mounting block elements.
First of all, Kalina is fixed in a secure position. In the passenger compartment, on the panel next to the driver’s seat, they find the cover of the main unit and use a plastic spatula to open it. Remove the required module using tweezers and install a new one. If you do not have a diagram of the location of the relays and fuses on hand, it can be found on the back side of the unit cover.
The procedure for replacing parts located in the engine compartment is not much different. As in the previous case, find the block (behind the gearbox) and open the plastic cover. The faulty module is removed using pliers and replaced with a new one. By closing the lid back, check the functionality of the car.
On average, each car owner will have to carry out a similar procedure every 45-60 thousand kilometers. If for some reason you can’t do it yourself, it’s better to contact a service station.
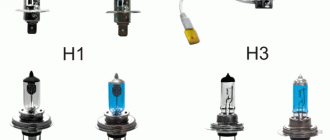
What lamps are used
The factory equips the car with standard lamps with a 12V/5W C5W base. And if the lamp burns out, you can replace it with the following:
If the installed lamp causes an error on the dashboard, then it must be replaced with an LED with a blende, an example would be the MTF company and its price for the entire set is around one thousand rubles.
License plate light bulb viburnum
After using the car for a long time, the license plate lamps burn out and Lada Kalina owners quite often encounter a similar problem. The room is illuminated by two lampshades, which are located on the lower side of the trunk saber. To dismantle them we need a flat blade screwdriver.
We open the trunk to make everything more convenient and pry the lamp cover on the left side with a screwdriver so that it is released from one latch:
After replacing the license plate lamp with a new one, we install everything in the reverse order on our Kalina. As you can see, everything is done quite simply.
Welcome, dear reader, to the Lada Kalina blog. Today we will look at replacing rear license plate light bulbs
located in the trunk lid trim (number saber). We will replace the regular license plate lamps with diode ones. I used 4 LED backlight lamps.
To replace the backlight bulbs, you must remove the license plate. How to do this, see the article Removing the license plate on a Lada Kalina car. So, after removing the license plate on the Lada Kalina, we disconnect the wiring harness block and pull out the license plate lamps.
Then we take out the license plate light bulb socket by turning it counterclockwise, as you can see in the photo.
Next, pull the license plate lamp toward you and remove the bulb from the socket.
We take a new light bulb, which we will use as a license plate light.
Please note that the light bulb contacts should not be located on one side, which is what I encountered. This may cause the fuse to burn out. If the contacts are located in the same way as in my case, we do the following: bend the contacts and bend them in different directions, as in the photo
If the contacts are located in the same way as in my case, we do the following: bend the contacts and bend them in different directions, as in the photo.
We insert the license plate illumination bulb into the socket, and insert the socket into the illumination lamp, which is located in the license plate. We connect the harness block and put the saber back together, as described in the article Removing the license plate saber on a Lada Kalina car. So, having spent 20-25 minutes of time, we independently replaced the license plate light bulbs with diode ones using the example of a Lada Kalina car.
For reasons of safety of drivers, passengers and pedestrians, the Traffic Rules and the Technical Regulations on the Safety of Wheeled Vehicles prohibit the operation of vehicles whose external lighting devices do not meet the design requirements of the vehicle. After all, on the one hand, it is necessary that the car is clearly visible on the road, and on the other hand, it is dangerous to blind other drivers or pedestrians with too bright or incorrectly adjusted headlights. Working brake lights will allow drivers moving behind you to keep a safe distance. There are many such nuances, and everyone can save not only money and nerves, but often also health.
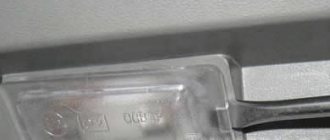
The license plate lamp has burnt out. Without waiting for maintenance, I decided to replace it myself.
Changing the lamp is not very convenient, since you have to manage to hold the back door, which is constantly being pulled up, and at the same time try to pick up the lamp with something flat.
The lamp will be replaced in the right lamp.
Right license plate light Kalina 2
They write on the Internet that the flashlight needs to be hooked on the right side, as I tried to do at the beginning, and you need to place something under the screwdriver, which you can use to try to pry the flashlight off so as not to damage the decorative plastic trim. I didn’t manage to damage it; there were traces on the right side of the cover, fortunately it’s plastic.
After removing the flashlight, I realized that I still had to pry the flashlight on the left (marked with an arrow). Namely, move it to the right and pry it off.
Removing the license plate light Kalina 2
As a result of manipulations with a screwdriver, we remove the flashlight, disconnect the wires (lift the latch up) and see that the latch holding the flashlight in place has broken. I should have been more careful
Removed license plate light
We turn the white plastic and remove the light bulb. I bought the light bulb in advance, the price was 9 rubles.
License plate light bulb viburnum 2
We assemble everything in the reverse order and insert it back. Before installation, check the operation of the light bulb. We rejoice.
If you still have the same trouble as I did, don’t be upset. Kalina 2 fits the lights from the previous version. True, the shape of the latch is made a little differently, but the lantern fits perfectly into place. The price of a lantern complete with a light bulb is 130 rubles.
License plate light Kalina (left) and Kalina 2 (right)
Debugg
Of the possible malfunctions listed above, the average motorist cannot eliminate all of them. It is unlikely that in the middle of the road you can replace a rotten lampshade with something. Not everyone can repair a damaged wiring harness. Therefore, we will not consider such cases in this article.
Having discovered a malfunction of the backlight, let's start by removing the lampshade. It is fastened either with self-tapping screws, or with plastic latches, or with a “screw + latch” combination. All these methods have both pros and cons - plastic latches are easy to break, but a soured self-tapping screw with rolled-up slots is by no means a gift.
On a number of cars, you can unscrew the lamp socket from the lampshade from the inside of the trunk lid, for example, on a Priora. This is often preferable to trying to press the plastic clips of the backlight from the outside, although it is less convenient.
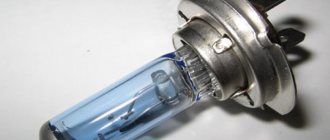
After removing the courtesy light or the backlight bulb socket, first inspect it. A dark bulb or visible damage to the lamp filament is a clear indication for replacement. As a rule, W5W (pictured below) or C5W lamps are used to illuminate the license plate. They do not take up much space in the car, and it is advisable to have them with you just in case.
You can often observe the following situation: a C5W type lamp (cylindrical with end contacts) is installed in the backlight. It may be absolutely fine, but the contacts themselves are oxidized. In this case, it is enough to clean the contacts and bend them slightly to fix the light bulb more securely - sometimes the license plate light does not light up simply because the lamp has jumped out of the spring contacts.
Fuses and relays in Lada Kalina, electrical diagrams
If one or another electrical device in your Kalina has stopped working - headlights, low or high beams, cigarette lighter, stove, turn signals, as well as other devices, then the first thing you need to do is find the cause of the malfunction, in particular, check the fuses and relays in the Lada Kalina.
The first thing to check in electrical circuits is the fuses, because they are the weakest point of the circuit and are usually the first to fail. Read on to learn about which fuses do what in the Lada Kalina, as well as where the relays are located and how to find the right one.
If you do not want to get into an unpleasant situation when, due to a blown fuse, one or another device refuses to work, but you don’t have a whole one at hand, it is useful to make it a rule to always carry with you a set consisting of different fuses.
For the Lada Kalina, you can buy a similar set at any auto store that sells auto parts for domestic cars. It takes up very little space, but its benefits in case of failure will significantly reduce your time to fix the problem.