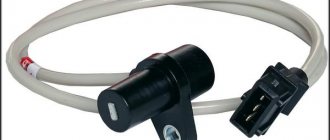
How it all works
A modern car is equipped with a significant number of various sensors, the main task of which is to monitor the operation of mechanisms or systems.
Data from these sensors is transmitted to an electronic control unit, which, based on the information received, configures the operation of certain systems.
One of the most important of these control elements is the crankshaft position sensor (CPS, TDC sensor).
This sensor monitors the rotation speed of the engine crankshaft.
Based on its readings, the control unit adjusts the operation of the fuel system and ignition system.
To put it simply, based on the DPKV readings, the control unit determines how much fuel to supply to the cylinders and when to do it, as well as at what moment to apply a spark.
Therefore, perhaps, this is the only sensor whose malfunction may prevent the power plant from starting, because a failure in its operation will lead to disruption of the fuel system.
Even if the power plant starts, its operation will be unstable, intermittent, etc. Therefore, this crankshaft sensor is very important and you need to monitor its performance.
Crankshaft Position Controller Basics
Now we suggest that you familiarize yourself with the basic information regarding the crankshaft sensor. Where is this device located, how to check the device, what types are there? Find the answers below.
Installation location, purpose and device
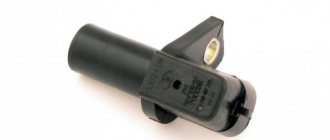
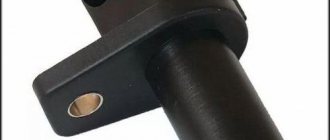
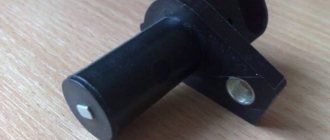
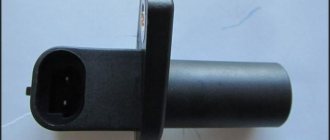
The crankshaft sensor or crankshaft sensor is a small device designed to transmit information about the position of the crankshaft. The information is sent to the control module, that is, the block. The regulator is responsible for injection. The correct operation of the engine injectors, which are responsible for supplying fuel, depends on the performance of the DPKV. DPKV also affects the performance of the ignition system as a whole. As for the location, the controller is not difficult to find - it is located in the engine compartment, next to the crankshaft pulley, the sensor is fixed to the oil pump with a bolt.
Principle of operation
It is necessary to take into account that the Fours can use different DPKVs and they differ from each other not only in design features, but also in their operating principle. For example, if we are talking about an inductive type controller, then it is equipped with a steel rod with a magnet that is used to magnetize the sensor. On top of the rod there is a winding of copper wire. In this case, the operating principle is based on delivering an impulse if a metal object is located nearby.
There are also sensors whose operating principle is based on the Hall effect; the Hall controller itself is located inside the structure. If you bring a metal device to the DPKV, the state of the sensor will change. In addition, the “Fours” also use pulse devices, which are designed to generate signals of a certain frequency.
Possible problems and methods for eliminating them
How to check and determine if the regulator is not working? There are many reasons why a DPKV can break, ranging from contamination of the device to failure of the device itself or damage to the wiring.
First, let's look at the main symptoms of a breakdown:
- the car's power unit has become unstable at idle speed - the speed can increase and decrease arbitrarily;
- the power of the car engine may also decrease;
- when the driver presses on the gas, dips may occur in which the car’s power does not increase;
- there are difficulties starting the engine;
- computer diagnostics may show errors 0335 or 0336; with such problems, most likely the cause should be sought in a damaged electrical circuit near the connector.
As for the main breakdowns:
- the device case is damaged, then the only solution is to replace the sensor;
- there is a short circuit of the turns on the winding itself, due to which the control module receives incorrect signals - the device will also need to be replaced;
- natural wear and tear of the sensor - there is no escape from this, the sensor will have to be replaced;
- The teeth on the crankshaft pulley are damaged; in the event of such a malfunction, the pulley itself must be replaced (author - AUTO REPAIR channel).
How to change the DPKV yourself?
The easiest way to check the functionality of the controller is by replacing it with a known working device. If, as a result of replacement, the symptoms of malfunctions become more pronounced, then we can say for sure that the previously installed crankshaft sensor is inoperative.
How to change the device yourself:
- First, turn off the ignition and open the hood of the car.
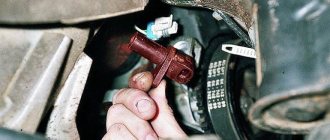
- Find the location where the controller is mounted, look for it on the oil pump, next to the crankshaft pulley.
- If the sensor seat is dirty, it should be cleaned before dismantling the device. Make sure that the surface around the device is as clean as possible.
- Then disconnect the connector with wires connected to the sensor, unscrew the screw that secures it and remove the controller from the mounting location. Visually check for possible damage to the device body, as well as the toothed pulley.
- Before installing a new DPKV, clean the seat again. Install the new controller, tighten the screw that secures it. When tightening, be careful not to over tighten.
- Using a feeler gauge, you should also check the gap between the pulley and the controller core. Ideally, this gap should be no more than 1 mm; a slight deviation of 0.4 mm upward is allowed.
- When the DPKV is installed, it is necessary to start the power unit and check its operation. If you notice that the engine started quickly and confidently, then the replacement was performed correctly (the author of the video is the IZO channel)))LENTA).
DPKV location - design features
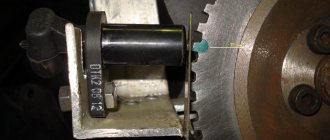
Typically this sensor is located near the alternator belt drive pulley. On this pulley there is usually a gear ring made around the circumference, the so-called synchronization disk. It is to the rotation of this disk that the sensor responds.
It is worth noting that in order to accurately obtain data on the rotation of the crankshaft, the DCPV is located at a certain distance from the disk.
For a correctly installed device, the distance between its core and the top of any tooth should be 0.6-1.5 mm.
The location of the DKPV is not the most convenient, but it is quite possible to get to it.
Cars use several different DPKVs in design and operating principles:
- induction (one of the most common);
- sensor using the Hall effect;
- Optic.
We won’t talk about the design and operation features of each of them for now; let’s move straight to the malfunctions.
Purpose and principle of operation
The functional purpose of the DCPV is to supply the ECU with fourteenth information about the current position of the crankshaft, on the basis of which the controller synchronizes the operation of the ignition system and injectors. Simply put, the moment at which the fuel mixture is supplied to the combustion chambers and the frequency of spark occurrence on the spark plugs depend on the DCPV.
If the DCVP fails, the operating mode of the engine will be completely disrupted - due to the fact that fuel will be supplied excessively or, conversely, ignition will not occur at the right time, the engine will begin to stall, the car will twitch when driving and lose speed.
For fourteen different years of production, different DCPVs were installed - frequency and inductive, the differences between them lie in the principle of operation.
Inductive sensors, also known as electromagnetic sensors, have an electromagnetic core covered with a winding of copper wire. When a metal part (crankshaft) appears near the core, the core reacts to its electromagnetic field, as a result of which its electrical potential changes.
The potential difference is transferred to the copper winding and alternating current is generated on it. The winding itself is routed to contacts located on the DCPV housing. The wires connecting the device to the engine control unit are connected to the contacts. The resulting alternating current is transmitted to the controller, on the basis of which the brains of the fourteenth determine the current position of the crankshaft.
The design and operating principle of a frequency-type crankshaft sensor is somewhat more complicated. Such devices also have an electromagnetic core, but they are also equipped with a converter operating on the Hall principle, which generates a frequency pulse from the resulting alternating voltage.
Information is supplied to the ECU in the form of pulse signals, the frequency of which changes when a metal object is located next to the sensor (in this case, the crankshaft ring teeth).
Symptoms of a problem
A malfunction of this device will immediately appear. Symptoms of a faulty DCPV are:
- Inability to start the power plant;
- Decrease in car dynamics while driving;
- Floating speed in different driving modes;
- Interruptions in operation, instability of idle speed;
- Under load, detonation may occur.
It is worth noting that since this sensor is very important for the functioning of the power plant, if it malfunctions, the electronic unit will signal this by lighting up the “ Check Engine”
».
Of course, the reason for the appearance of this inscription or icon on the dashboard may also be a malfunction in some other system, however, in combination with the indicated symptoms, we can immediately assume that the DCPV is to blame for all the troubles with the car.
Verification methods
Before going to a car store for a new sensor, it is still recommended to first check the one installed on the car.
This will make it much faster to determine why the car is not working well, because it is possible that the sensor is not to blame for everything, especially since some testing methods are not so complicated.
The most common are:
- checking the resistance of the sensor coil;
- comprehensive check (coil and insulation resistance, winding inductance);
- checking with an oscilloscope.
The first two checks are quite simple; you can perform them yourself if you have the necessary equipment.
The third method is the most accurate, but it can only be checked at specialized stations.
Check for VAZ 2110
Ohmmeter (multimeter).
To make it more clear, let’s look at each method of checking the crankshaft sensor using the example of several cars.
The first will be the VAZ-2110, which uses an induction type of device.
So, the engine on the “Ten” malfunctioned and there is every assumption that this happened due to the crankshaft sensor. There is a multimeter at hand that can work in ohmmeter mode.
This is quite enough to check the winding resistance.
The first thing to do is to inspect the device while it is installed on the car, or rather, check for a gap between it and the synchronization disk.
It is quite possible that there is no gap there due to the fact that dirt has adhered to the sensor or disk, which led to malfunction.
If everything is in order with the gap, we will remove the device from the car.
On the VAZ 2110 it is located on the oil pump cover.
Before doing this, it is better to mark the position of the DPKV.
The next stage is assessing the external state. The sensor body must be intact, without signs of damage, the core must be clean, the contact terminals must be free of traces of oxidation, and the wires must not be damaged.
If external contamination is visible on the DPKV, you can wash it before checking (to do this, use only pure gasoline or alcohol), and also clean the contacts with a file.
After cleaning, rinsing and drying, you can start taking measurements. To do this, switch the multimeter to ohmmeter mode and connect the probes to the sensor contacts.
When measuring, a working DPKV should show a resistance in the range of 550-570 Ohms.
For other cars, this indicator may be different, so it is better to inquire about the rated voltage of the sensor in the technical documentation of the car before taking measurements.
If the resistance value is lower or higher than the specified range, the sensor is faulty and must be replaced.
This is the easiest way to check DPKV, but it is also the most inaccurate. It can only give a partial idea of the state of the device, although this is sometimes quite sufficient.
An oscilloscope.
The most accurate method for checking is using an oscilloscope. Therefore, let’s look at how to check the sensor on a VAZ-2110 using this device.
During such a check, there is no need to remove the DCP, and all measurements are taken directly on the car.
Before carrying out the test, you need to correctly connect the oscilloscope to the machine. Typically this device has one clamp and two probes.
The clamp must be connected to the engine ground, that is, to any metal component of the motor.
One probe is installed parallel to the sensor signal output terminal. The second probe is connected to pin 5 on the scanner connector.
After connection, you should switch the device to the “Inductive Crankshaft” mode.
After this, start the engine. If it does not start, then you will need to rotate the crankshaft with the starter so that the oscilloscope takes readings.
After this, the performance of the sensor can be assessed from the resulting oscillogram. Any disturbances in its operation will affect the oscillogram image, and this will be clearly visible.
Replacing the crankshaft sensor
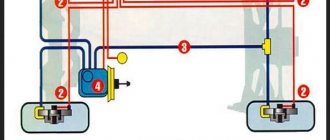
Where is the crankshaft sensor located? On all LADA cars, the DPKV is attached to the engine crankcase (to its lower part) using one bolt. On the diagram it is number 2.
To change the crankshaft sensor, disconnect the block with wires from it and unscrew the mounting bolt (10mm wrench). On Renault-Nissan engines (for example, H4M), you will first have to remove (move aside) the protective casing.
Installation of the DPKV is carried out in the reverse order. Using a set of feeler gauges, we check the gap between the end of the sensor and the teeth of the crankshaft pulley. The gap should be 1±0.41 mm; it is specified by the design of the sensor and is not adjustable.
Comprehensive check for Opel Vectra B
Now let's take another car and use it to consider the last of the verification methods - comprehensive.
This test is much better than with a conventional multimeter, but in terms of accuracy it is not as accurate as an oscilloscope.
The problem car will now be the Opel Vectra B. We leave the symptoms the same.
The initial work is also no different from the VAZ-2110: the sensor is removed, inspected, thoroughly washed, and only after that you can start checking the condition.
But for a comprehensive check you will need more equipment:
- Multimeter;
- Megaohmmeter;
- Device for measuring inductance.
It is better to take all measurements in a heated room so that the readings are correct.
First, the coil resistance is measured, as described above. Resistance readings must be within the range specified in the technical documentation.
The next check is to measure the winding inductance, for which a device is used to measure it. A working DPKV inductance should be in the range of 200-400 mH.
The devices are pictured below.
The insulation resistance is also checked with a megohmmeter. When a voltage of 500 V is applied, the resistance value of the sensor should be no more than 20 MΩ.
Based on these measurements, it is determined whether the DPKV is working or requires replacement.
Photos of the devices are below.
Tips and tricks
In the process of performing diagnostic and repair work, an inexperienced technician may make serious mistakes that will negatively affect both the performance of the part itself and other devices and assemblies of the machine. To protect yourself from such troubles, it is recommended to adhere to the following recommendations:
- When performing repair work, you should stop smoking. When removing the sensor, a certain amount of lubricating fluid may appear, which is a highly flammable substance.
- When measuring resistance, the multimeter must be switched to the appropriate operating mode. Some modes that can be used to determine this parameter of an electrical circuit are also not suitable. For example, when the toggle switch is set to a resistance measurement range of up to 200 Ohms, the nominal value of DPKV (500–700 Ohms) will be outside its limits, which will lead to false positive results in determining the malfunction of this part.
- If the DPKV fails due to severe contamination, then the new part may also not last very long. To significantly increase the service life of the DPKV, it is recommended to eliminate oil leaks, which can cover all parts within a short period of time. This film, like a magnet, attracts dust and dirt.
- You should only purchase a new part from a reputable dealer. Failure of the DPKV due to manufacturing defects is a fairly common reason if the sensor is purchased on specialized markets. An indirect sign of a low-quality spare part is its cost. Typically, counterfeit spare parts are sold 2-3 times cheaper compared to original products.
- When replacing a sensor, the wires must be properly connected to it. If this is not done, the connector may become separated from the contacts when driving on a bumpy road, which will lead to the cessation of impulses from the DPKV to the vehicle's ECU.
How to check the crankshaft sensor of a VAZ 2112 is described in detail in this article. If you fix the breakdown strictly according to the instructions, then even an inexperienced person can handle this work. If you have doubts about your own abilities, you should not risk the “health” of the car. The work of replacing the DPKV is carried out by many specialized service stations, is relatively inexpensive and does not require significant time expenditure.
Features of testing on other cars
As for other cars, for example, VAZ-2109 with an injection engine, VAZ-2112 and VAZ-2114, their check is carried out identically to the VAZ-2110 car.
It is noteworthy that for VAZs, when checking the resistance of the crankshaft sensor coil, an additional check can be carried out.
But to do this, the multimeter must be switched to voltmeter mode with a measurement limit of 200 mV.
Then connect the probes to the DPKV terminals and pass them with any metal object, for example, a screwdriver, at a short distance from the core.
If the sensor is working properly, it will react to metal, the multimeter will show voltage surges on the display. The absence of these bursts will indicate a faulty element.
As for a car like the Reno Logan, the difference from the VAZ in this car comes down to slightly different readings of the resistance of the sensor coil when measured with an ohmmeter.
A working Logan DPKV has a normal resistance of 200-270 Ohms.
For Daewoo Lanos, the coil resistance should be in the range of 500-600 Ohms.
But on the ZMZ-406 engine, installed on Volga and Gazelle cars, the normal coil resistance is in the range of 850-900 Ohms.
Methods for diagnosing DPKV
When determining the serviceability of the crankshaft position sensor, we are guided by the principle - from simple to complex. In other words, first an inspection, then checking the characteristics with instruments (ohmmeter, oscilloscope or computer). The absence of moving parts and the simplicity of the design of the element make it a fairly reliable part. Therefore, the crankshaft sensor in rare cases becomes unusable on its own. Most often, it receives mechanical damage during repair work under the hood of a car or as a result of foreign objects getting between the sensor and the gear wheel.
Before you begin diagnosing an electronic component, you need to note its original position on the motor. After dismantling, the device is checked for defects in external surfaces. If the DPKV is dirty or has corrosion on the contact group, then it must be cleaned with alcohol. If the inspection shows no defects, it can be diagnosed using special instruments. It is advisable to carry out the test using a multimeter, which can be switched to different modes.
Ohmmeter test method
This method is simple and accessible, but does not guarantee detection of a breakdown. It is used to measure the resistance of the coil. To do this, it is enough to simultaneously touch the coil terminals with the probes. The polarity of the touch is not important in this case.
The resistance value depends on the characteristics of the coil and is usually in the range of 500-700 Ohms. To determine the resistance value of your sensor model, you need to look in the description of the DPKV or search on the Internet.
The multimeter is used as follows:
- We set the measured parameter (resistance) in a range close to the measured value, but not lower.
- We touch the ends of the sensor with the probes and look at the readings.
If the indicators are close to the standard values, then the coil is working properly. The disadvantage of this method is that it does not always indicate a faulty crankshaft sensor. Therefore, it is advisable to check using other methods.
