What is a silent block?
The word “ silent block ” is of foreign origin; translated from English “silent” means silence and “block” means detail. A silent block or “silent” is a rubber-metal part; in other words, it is two bushings connected to each other by a thick layer of durable rubber. This invention, in addition to providing comfortable and silent movement in a car, has a number of advantages that I cannot list.
What are silent blocks needed for?
- Silent blocks prevent beatings and vibrations that occur during vehicle movement between various parts of the chassis and engine compartment.
- They protect parts from wear and tear by damping vibrations.
- They dampen vibrations coming from the wheels and chassis, thereby ensuring a soft and comfortable ride.
And these are just the main advantages of silent blocks; in fact, there are many more of them. However, today we will talk a little about something else, namely how to repair a car with your own hands, press out and press in silent blocks without damaging the part and your car.
When and why to change silent blocks?
Replacing silent blocks is most often done after the driver begins to notice a deterioration in the driving characteristics of his car or after the appearance of extraneous sounds (knocking, creaking, grinding), indicating the need to replace the silent blocks. Also, damaged silent blocks are often discovered during chassis diagnostics on a vibration stand.
If the silent blocks are not replaced on time, the owner risks even more breakdowns, which one way or another will arise due to faulty “silents”. For example, due to one damaged silent block, the load begins to be distributed unevenly, resulting in generation in other connections and nodes. As a result, instead of just one bushing, you will have to fork out money to replace all the silent blocks of the rear or front suspension.
Moreover, one should take into account the fact that a faulty suspension affects: a deterioration in the level of comfort, increased fuel consumption, increased tire wear, and also increases the braking distance, as a result of which the risk of an accident seriously increases.
How to press out a silent block at home?
Replacing silent blocks is not difficult; for example, I personally became convinced of this when I replaced the silent blocks and shock absorbers on the rear suspension with my own hands. It is for this reason that you can often meet those who decide to independently replace silent blocks at home.
Method 1
First, let's talk about how this should ideally happen. The lever in which it is necessary to replace the silent block is taken, installed under the press on a special stand into which the old silent will be squeezed out, after which a special spacer is installed on top, which will squeeze out the old bushing. This method is used by service stations that have the necessary set of spacers and a powerful press of 10-20 tons.
Method 2
Most motorists, of course, do not have a powerful press, but many have a good vice or jack in the garage. Using a powerful vice, you can successfully squeeze out old bushings using a similar principle - a spacer into which the bushing will go and a spacer that will press on the bushing.
Jack. It would seem, how can a silent block be squeezed out with a jack? Everything is very simple, you need to weld a rectangular frame from some channel or corner at a height slightly higher than your jack and lever. The principle is as follows: we install the jack in the frame, after which we install the lever eye and the two spacers mentioned above on top of the rod. We create the necessary pressure, and the bushing is squeezed out of the seat. It should be noted that in most cases, a 3-5 ton jack is simply not able to cope with such work, so it is better to use 10-15 ton jacks.
Method 3
If you don’t have a jack or a press, and you have an insatiable desire to replace the silent blocks yourself, you can use the third method - using a simple press puller (a pin or a bolt with a nut). The principle is to create pressure by gradually tightening the nut on the stud; this method can be considered analogous to a vice. A pin with a washer of the required diameter is inserted into the eye through the silent block, then a spacer with a washer is put on the other side and the nut is tightened. Rotating along the thread, the nut creates the necessary pressure and forces the silent block to be squeezed into the “receiving” spacer. This “method” requires a strong, hardened stud with the same nut. If the nut or stud is soft, you won't succeed. For example, my pin began to bend due to pressure, after which the thread on the nut was torn off. However, there are thousands of those who managed to replace silent blocks using this particular method. The advantage of this method is its cost-effectiveness and convenience from the point of view of “mobility”, that is, you do not need, for example, to completely remove the entire hub or lever, you just need to have such a primitive press puller.
How to press out/press in a silent block using a press puller video
Method 4
This method can be classified as drastic or extreme measures. It consists in using all known methods and devices to extract the silent block from the mounting socket. The principle is to knock out the old silent block using a powerful screwdriver or a thick wedge-shaped piece of reinforcement. The task is to drive a screwdriver or something similar between the bushing and the silent block, thereby deforming the wall of the bushing inward. After the sleeve is crushed and fed inward, knocking it out is not difficult. Before you start knocking out the silent block, you need to burn out or squeeze out the inner bushing of the silent block and, if possible, any remaining rubber.
How to knock out a silent block using a screwdriver and drill
Method 5
The next method of removing a silent block cannot be called pressing out, since it, like the previous one, does not require the presence of a press; all that is needed is a metal blade, a screwdriver and a hammer. The principle is simple, but not safe. We remove the inner sleeve, then take the blade and start cutting the outer sleeve. We are trying to cut through the old silent block as much as possible without damaging the lever itself or the eye. It is advisable to make two cuts, after which using a flat screwdriver, the silent block is easily deformed and knocked out.
Causes of knocking in the front suspension
In total, there are four main reasons why noises and squeaks can annoy the Lada Kalina car owner, and three of them can be eliminated independently and everything can be returned to a safe state.
- The first reason why knocking occurs in the suspension is the poor quality of the road surface . A suspension that is in good working order can also produce some extraneous noise. If the noise disappears when you drive onto a good road, then everything is fine with your suspension, you can move on to the point below.
- If knocking and simultaneous vibration occur in the steering wheel, the reason may lie in a faulty steering rack . If you can tighten the steering rack yourself, then it is better to entrust its repair or replacement to professionals.
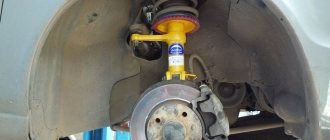
- The third reason is the front suspension strut spring that has lost its elasticity . Since the spring tone is significantly reduced, the suspension hits directly against the body. How to change the front struts, and along with it the spring, is described in detail in this article.
- And the last reason is cracked silent blocks, which are simply necessary to thoroughly dampen knocks and vibrations that occur while driving. Read below for information on how to properly replace these front suspension elements.
How to press in silent blocks with your own hands?
We have already talked about how to remove the silent blocks, now another problem arises, how to press in the silent blocks? This procedure is complex in that it requires certain skills and abilities. A silent block installed incorrectly or “at awry” will either not work or fail ahead of time.
Method 1
As with pressing out, pressing should ideally be done using a vice. The principle is similar, but exactly the opposite. Before pressing in the silent block, you need to use sandpaper to clean the seat from rust and remnants of the previous silent block. Then the eye is generously lubricated with soap solution or Litol-type lubricant. A lever is installed, a silent block is placed on top, after which, through a special mandrel, press pressure is applied to the spacer, which will press the silent block into the seat.
Method 2
When there is no press, you can press in the silent blocks using the above-mentioned vice or jack. The principle is the same as that of the press. A lever, bushing, spacer are placed and, under the influence of a vice or jack, the silent is pressed into the seat.
How to press in a silent block using a vice - video
Method 3
Press puller. If the silent block is small, then you can “put it in place” using the same press puller that was used to press the silent block out of the socket. Again, the principle is the same, only a pin and a thick washer are used as a press.
Method 4
Sledgehammer and brute force. I strongly do not recommend this method for the reason that it is generally considered as purely theoretical, that is, it allows you to press in silent blocks, but it is quite difficult to say what the consequences and quality will be. The principle is quite simple, we take a lever, put a silent block on it, and then sharply and strongly hit the silent block, causing it to go into the ear of the lever. The disadvantage is that it is quite difficult to predict the correct movement of the silent block; it can go into the seat awry. It is also possible for the rubber parts to “bite” and damage the silent block or lever itself. In short, the blow is very difficult to control, and often after such “experiments” you have to go to specialists and redo everything. Therefore, think carefully before using this method.
Method 5
method I know of is to use the weight of the car. The principle is to use the weight of the car, so to speak, for personal gain. It all looks like this: a hydraulic or screw jack is installed under the car, the wheel is removed, although I think it is already removed if you are changing silent blocks, then a lever with a silent block is installed under the hub, which must be pressed in. Next, we align everything properly and begin to slowly lower the jack, it is better to have a friend or assistant help you. I think the weight of the car will be enough to press the silent block into the seat. The disadvantage of this method is that it is inconvenient and somewhat dangerous; in addition, it is quite difficult to control whether the silent block is correctly seated in the seat. However, if you have no other option, then the method is well worthy of your attention.
In principle, that’s it, I don’t know to press out or press in silent blocks If you know any other options worthy of attention, I will be happy to listen to them and publish them. Share your opinions from what you read and comment, I will be glad to see any constructive criticism. I also remind you that the best way to say thank you to the author of the article is to share this article with your friends on social networks using special social buttons. networks located just below. Peace and goodness to everyone, see you again at VAZ Repair.
Everyone who has a car is familiar with the problem when there is a need to press out or press in silent blocks. You don’t always want to turn to specialists, and doing it yourself is much more pleasant.
Thanks to this article, you will learn what silent blocks are, why they are needed, and most importantly, how to press them in and press them out at home using different methods.
Repair and Improvement" on DRIVE2
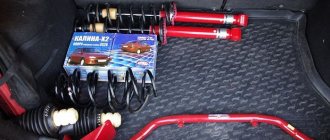
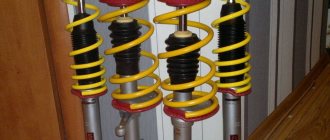
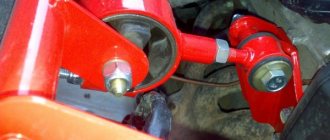
Well, the time has come when the mileage of the car makes you think about replacing suspension elements. I spent a very long time selecting spare parts. I smoked the entire Internet and all kinds of sites. But I decided to make the choice myself, because everyone has different opinions and impressions of different suspension elements. It was decided to start purchasing parts. Phobos Lux springs with variable pitch, conical. I chose these springs because I didn’t want VAZ springs, I wanted to see the difference and compare the original factory ones and something from other manufacturers. I didn’t even think about lowering the car, and there’s no point in doing it on this car. I learned that these springs are underrated from the inscription on the box, but there is not a word about this on the manufacturer’s website. Inscription on the box:
Springs “Lux” (Comfort) Progressive springs of the comfort type have initially lower stiffness rates compared to the original standard springs.
This ensures more elastic operation of the suspension in normal mode. At the same time, a more pronounced progressive design allows for vehicle stability at increased speeds, loads and maneuvers. This series of springs has an initial lowering of 5-10 mm relative to standard ones (depending on the car model). I thought this underestimation would be compensated, because there are plans to install reinforcement supports.
The weekend was fruitful, I lost more than 2 kg. I suffered with replacing silent blocks. I bought a special puller, but it’s terribly difficult to perform such manipulations with a loose vice. On one lever the daisy was completely destroyed. I decided to replace the ball joints as well. I bought ball ones. I tightened the stabilizer nuts and broke off the stud from the body. I'll cook it on Saturday. For now it stays at 3x. Replaced\installed: — struts for SAAZ conical spring; — Phobos Lux conical springs; — BRT supports; — AutoPRODUCT support amplifiers; — vibration and noise insulators for lower conical springs SS-20; — vibration and noise insulators for a conical spring, upper SS-20; — bumpers with anthers assembled Syzran; — ball pins Cedar; — silent blocks of SEVI Expert levers; — tension joints (chamomile) SEVI Expert; — stabilizer struts (eggs) SEVI Expert; — BRT stabilizer cushions. I could not replace the hinges of the brace bracket (crab). Need a good vice. I did a wheel alignment.
The result: the face was lifted, the car became stiffer, a nasty creaking appeared, one fender liner had to be cut because it was clinging to the spring. But the thing that scares me is that the car seems to be standing on bump stops, although the face is raised.
How can this be? It was difficult to assemble the racks, since I did not have time to screw the nut onto the rod; it constantly fell down, hiding in the support.
Phobos has a thicker rod than stock
What is a silent block
This word is of foreign origin. Translated from English, silent means silence, and block means detail. A silent block, or simply “silent,” is a rubber-metal component; in ordinary words, these are two bushings that are connected to each other by a layer of durable rubber. This invention, in addition to guaranteeing comfortable and silent movement in a car, has a number of advantages that will be listed below.
Purpose and functions
Silent blocks perform the following functions:
- Protect components from wear and tear by damping vibrations .
- They dampen vibrations that come from the chassis of the wheels, thus providing a comfortable and soft ride.
- Prevent vibrations and beatings that appear during the movement of the car between different elements of the chassis and engine compartment.
And these are just the main advantages; in fact, there are many more.
Right choice
The choice is made after diagnosing the malfunction or during a planned replacement. It is necessary to understand what role the part plays in the suspension. Its task is to dampen vibrations that inevitably arise due to unevenness on the road.
Vibrations during movement are transmitted to the suspension springs, where they are partially damped by shock absorbers. The vibration then spreads to the frame through the connecting nodes. It is partially damped by silent blocks due to the presence of a soft base between the bushings. Therefore, the quality of the base must be of a high level. The factory version of the suspension is equipped with rubber-based silent blocks. This is a proven material, but there are better ones - for example, polyurethane.
- The service life is increased by 5 times. This allows replacements to be made after long mileage intervals and the suspension to be loaded more aggressively.
- Increased thermal stability. Polyurethane tolerates temperature changes well. The material works just as well in cold weather as at high temperatures.
- Thanks to the dense structure of the material, vehicle handling is improved.
Rubber and polyurethane are equally popular. Drivers themselves choose what to focus on. With rubber spacers you can get increased riding comfort, but improved handling can only be achieved with polyurethane. But in the latter case, comfort decreases, which is especially felt by passengers.
How to understand when it's time to replace
Before you set out to press in these parts, you should first of all inspect them thoroughly to make sure that they really require replacement. Check for holes and any deformations, for swollen rubber on the hinges and for cracks. Manipulate the components, determining the presence of backlashes. If the permissible norm is exceeded, then replacement of parts is inevitable. It is not recommended to delay the pressing procedure. Over time, this problem will only get worse and can lead to suspension arm failure.
The main indicators that indicate the failure of one part or several:
- Driving the car has become much more difficult.
- When overcoming bumps, the suspension begins to knock loudly. Tires wear unevenly, which has not been observed before.
- It has become much more difficult to adjust wheel alignment.
Dismantling and installation process
Installation begins after purchasing the parts. You will need a tool - wrenches for removing the beam and suspension arms, a hammer or sledgehammer.
- The car is driven into a pit or overpass. You can lift the wheel with a jack, but it is so inconvenient to work with the suspension - you have to work lying down. The jack foot should not be in the same plane as the beam bracket.
- Dismantle the suspension beam. Be sure to remove the handbrake cable when doing this.
- The brackets have special brackets that hold the brake system hoses. The staples are removed.
- The old silent block of the beam is dismantled. Garage conditions require the use of a hammer or sledgehammer. You should work carefully so as not to damage the seat, otherwise there will be problems with installing the new part.
- The seat is cleaned of dirt and graphite lubricant is placed there.
- Install a new part. Replacement of the silent block of the rear beam is done so that there are no gaps or holes. Pressing is done with careful blows of a hammer.
- Reassemble the beam in the reverse order.
Necessary materials
To press this part into place at home, you will need the following tools:
- Mount;
- Jack;
- Set of wrenches;
- New hinges.
It is recommended to use machine oil or other types of lubricant as a lubricant.
Among other things, you will need special mandrels designed for pressing silent blocks; as an alternative, you can use a piece of pipe with the required diameter. You also need to get a press to press in a new rubber-metal hinge . When it comes to home use, an ordinary vice can serve as a press. In addition, you can stock up on a set of sledgehammers, but with this approach it is necessary to maintain high precision in the work.
Practical recommendations
It should be taken into account that the original suspension of the Kalina Sport car, compared to the base model, is lowered by 20 mm, which is important to take into account for those who like to travel, for example, to the country, taking into account the condition of the roads. Passability may also suffer in winter, especially when you have to overcome snowdrifts. But otherwise the clear advantage of the sports suspension is clear
In most cases, replacing the standard Lada Kalina suspension with a sports version is a way to increase or improve the car’s handling, and not to achieve any sporting goals, including high-speed ones
But otherwise, the clear advantage of the sports suspension is clear. In most cases, replacing the standard Lada Kalina suspension with a sports version is a way to increase or improve the car’s handling, and not to achieve any sporting goals, including speed ones.
The most attractive aspect when replacing a conventional suspension with a sports one from Kalina Sport is that this is a serial factory model and, accordingly, no additional equipment with springs, supports or shock absorbers is required. That is, the Kalina sports front suspension can be purchased assembled, but if we are talking about the rear, then you will have to purchase it in parts. In this case, you can use the data on the catalog numbers of parts, select the necessary ones, and then either search at car dealerships and specialized stores, or place an order from a catalog.
A sports suspension will make the car more controllable and passable on different roads.
If we consider the differences, then in addition to some lowering of the height, which leads to a corresponding decrease in the length of the spring, and therefore the stroke of the rod, the sports suspension provides noticeably stiffer rebound damping. The supports themselves have a characteristic offset, due to which the castor can be increased to 3°, but for this, the brackets on the front braces will need to be replaced. The springs themselves of the sports suspension are stiffer, and the shock absorbers are nitrogen-filled.
But when buying racks, you should pay attention to one frequently encountered nuance: it may turn out that the springs will be of different stiffness, for example, the first with one point, and the second with two. And even if they convince you that this is normal and that many cars drive with strut springs of different stiffnesses, it is still worth choosing the option of installing parts with the same characteristics on the Lada
And for the rear suspension it is quite acceptable to use some parts from the original ones, except for the bolts, because they all must be new.
In order to achieve the desired result, you should replace not only the front struts, but also the rear ones.
And the stiffness of the suspension can be felt immediately, but this is compensated by the absence of knocks, a more comfortable ride and better behavior on roads with different surfaces, as well as cornering: rolls practically disappear, and, what is important, they can be driven completely safely at higher speeds than on the original suspension. If the Kalina suspension is being modernized, then it is recommended to think about replacing the rack from a sports car model
You can install a 3.1-turn rack complete with a reinforced front end shield. The brackets should also be replaced along with the extension, which has additional support.
If the Kalina suspension is being modernized, then it is recommended to think about replacing the rack from a sports model of the car. You can install a 3.1-turn rack complete with a reinforced front end shield. The brackets should also be replaced along with the extension, which has additional support.
Not only the driving performance of the car, but also the safety of the driver and his passengers depends on the condition of the front suspension, especially in the case of the Lada Kalina. Therefore, checking its condition should be carried out regularly at service centers or service stations. Although the driver himself can feel or detect the presence of a problem while driving: there should be no extraneous sounds, various creaks or knocks. Such diagnostics should be carried out by the driver at low speed. A test for overcoming a low obstacle can also be a characteristic sign: after passing it, the car must remain stable and not sway from side to side.Pressing out at home
Replacing these parts is not as difficult as it might seem at first glance. For example, many car owners made sure of this when they replaced parts, using special equipment for self-replacement. It is for this reason that there are many people who have decided to replace silent blocks with their own hands and at home.
First method
First of all, let's learn about how it should be ideally.
The lever in which the rubber-metal hinge needs to be replaced is installed on a special spacer for the press. The old silent will be squeezed onto this spacer. Then another spacer is installed on top - it squeezes out the old bushing. This method is used by service station workers, since they have the necessary set of spacers and a powerful press of 10-20 tons.
Second method
Almost all car owners, naturally, do not have a powerful press, but many have a jack or a good vice in their garage. If you use a powerful vice, you can successfully squeeze out the old bushings according to the principle that is already familiar to us: a spacer for the original bushing and a spacer for pressing on the bushing.
At first glance, it becomes unclear how you can squeeze out the silent tape with a jack? Everything is very simple: you need to weld a frame in the shape of a rectangle from a channel or corner so that its height is slightly higher than the lever and the jack. The operating principle is as follows: place the jack in the frame, then install the lever eye on top of the rod, as well as the two spacers mentioned above. We create the required pressure, after which the bushing is squeezed out of its seat. It must be emphasized that most often a jack with a capacity of 3-5 tons is not able to cope with such work, therefore it is recommended to use 10-ton jacks.
Third method
If you have neither a press nor a jack, but still have a strong desire to replace the silent blocks on your own, you can use the third method - using a simple press puller (bolt with nut or stud).
The principle of operation is to create pressure by gradually tightening the nut on the stud; this method can be called an analogue of a vice. This pin with a washer of suitable diameter is inserted into the eye through the silent block, then on the other side you should put on a spacer with a washer and tighten the nut. Rotating along the thread, the nut creates the necessary pressure and forces the silent to be squeezed into a special spacer.
This “method” requires the use of a strong, hardened stud and an equally strong nut. If you take a soft pin or nut, you will most likely fail. For example, there are cases when, due to strong pressure, the stud becomes bent, as a result of which the thread on the nut breaks. However, there are thousands of those who managed to change silent blocks using this particular method. After all, everything depends on the quality and strength of the material used.
The advantage of this method is its low cost, as well as its convenience, if you look at it from the “mobility” point of view. In other words, you don’t need, for example, to completely remove the lever or the entire hub; it will be enough to just have a simple press puller like this.
Fourth method
This method can be classified as drastic decisions or extreme measures. Its principle is to use all popular methods and devices to extract silent from the seat. To do this, you need to knock out the old part using a powerful screwdriver or a thick wedge-shaped piece of reinforcement. You need to try to hammer a screwdriver or something between the silent block and the bushing, thus deforming the wall of the bushing inside. Now that the bushing is crushed and pushed inward, it is not at all difficult to knock it out. Before you start knocking out the silent block, you need to squeeze out or burn out the inner sleeve of the part and, if possible, all remaining rubber.
Fifth method
The next method of removing a silent block cannot be called pressing out, since it, like the previous one, does not require the presence of a press: all you need is a metal blade, a hammer and a screwdriver. The principle is simple, but unsafe. We remove the inner sleeve, then take the blade and start cutting the outer sleeve. Try to cut through the old silent as much as possible without damaging the lever itself or the eye. It is best to make two cuts, and then using a flat screwdriver, the silent block will be easily deformed and knocked out.
If none of the methods listed above helped, and you still need to do it, there is only one option left - to entrust this work to specialists. To achieve the desired result, take the part and go to the service station, where specialists, using a silent block extractor and other special tools, will qualitatively do all the necessary work “in the blink of an eye.”
Replacing daisies, silent blocks and crabs — Lada Kalina Sedan, 1.6 l., 2007 on DRIVE2
As I wrote earlier: www.drive2.ru/l/6996098/ I was tormented by the grinding noise. Inspired by the video:
I decided to replace the rubber bands on the wishbone and replace the crab assembly. In terms of money, the discounted parts cost 900 rubles. somewhere. The service asked for 2400 rubles for the work. along with the wheel alignment (600 rubles we ate to do it from them). I decided to go to a friend's service center. I practically didn’t do anything myself, well, I knocked 1.5 daisies with a chisel from a lever clamped in a vice. The old sealing blocks were pressed out on a press, a bolt from the wheel was inserted through a hollow bushing on one side - the principle is the same as in the video instructions. Before driving in the new sealing blocks, we made a small chamfer on sandpaper, smeared it with soap and pressed it. The ball joint was not filmed from the lever just like in the video. We started checking - the right ball joint somehow turns slightly and sticks, apparently in vain when I changed the ball joints 2000 years ago: www.drive2.ru/l/5274525/ I added a CV joint under the boot. I went and bought reinforced BZAKs from the supplier AvtoVAZ for 800 rubles for 2 pieces + 2 gingerbread for Glushak 100 rubles. somewhere the previous time: www.drive2.ru/l/6374823/ not new gingerbreads. We did not tighten the nuts on the lever too much because on the lift, you will have to ask for the nuts to be tightened for wheel alignment. In short, my friends took only 1300 rubles for the work. There is no grinding noise, but there are still puddles on the street.
In the near future it will be necessary to do a wheel alignment, although the car drives smoothly as before (up to 1000 rubles or + 400 rubles more if they say that the steering ends need to be loosened)).
If a grinding noise appears, then I will change the steering tips with the support bearings - the rest has already been changed. But of course the ball joint amazed me; well, I caught a few holes, but not particularly serious ones. In the store, the guy says that most likely China is where I bought the damn thing - there were no other stores near the service. There was a BZAK with a sticker - there was no time to check the code - let's see in practice, it feels easier to turn the steering wheel (or Placebo))))
Continuation:
I stopped by for wheel alignment and tightening of seal blocks, price 840 rubles. broach 240r. Fee 600 rub. They did it great, better than anywhere else I did it before. The car drives straight and goes nowhere. I unscrewed the steering wheel to look at the ends - it was clear that the lug nuts had been touched (the previous time they weren’t even touched in a different place((().
Price: 3,840 ₽ Mileage: 60,400 km
Pressing in silent blocks
We have already talked in detail about how to get the “silents”, now another problem arises - how to press this part? This procedure is difficult because it requires certain skills and abilities. An incorrectly or crookedly installed silent will either not work or break prematurely.
First method
As with pressing, pressing should ideally be done using a vice. The principle is somewhat similar, but just the opposite. Before pressing the part, you need to thoroughly clean the seat from any residues and rust from the previous silent using sandpaper. Then the eye is generously lubricated with a lubricant like “Litol” or with a soap solution. A lever is installed, the part is placed on top, after which press pressure is applied to the spacer through a special mandrel. It will press the part into the seat.
Second method
When you do not have a press, you can press the part using the above-mentioned jack or a vice. The principle of operation is no different from a press. The lever, bushing, and spacer are installed. Then, under the force of a vice or jack, the part is pressed into the seat.
Third method
Press puller. If the silent block is small, you can “put it in its place” using the same press puller that was used to press the part out of the socket. Again, the principle is the same, only a thick washer and a pin are used as a press.
Fourth method
Using a sledgehammer and brute force. This method is not the best of all existing ones, since it is considered more from a purely theoretical point of view. In other words, it really allows you to press a part, but it’s very difficult to say what the results and quality of work will be. The principle is quite simple: we take a lever, put a silent on it, and then hit it quickly and hard.
Lada Kalina Cross “Apisinchik” › Logbook › Fuel pipes, ball pipes, daisies, OD sabotage?
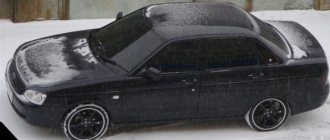
The backstory is typical for the Russian outback. It was about 6 pm, it was snowing, the road workers were in no hurry to clean up the mess, despite the parapets being 15-20 cm in places, I was traveling for work from Ivanovo towards the M8 federal road, after the weight control post in the Yaroslavl region there is a broken section, knowing this, I kept the speed a little lower than usual, but it didn’t help. The hole didn’t look big to the eyes, and it was fairly sprinkled with porridge, the left side starred noticeably, I already heard a loud “slurp” from the front suspension, the strut was probably completely compressed. I was already getting ready to get up, I thought the tank had broken, but the car was going nowhere. I drove a little so that it was visible from a distance, and not blocked by a turn or hills. I got up, turned the wheel, and didn’t see anything suspicious. The first bell came out already on the M8 itself, when, when overtaking, the car somehow clearly wanted to go further to the left, although the steering wheel was already at zero. But the porridge, the ice, I chalked it up to that, I remembered it. The second call came at a gas station; the smell of gasoline was somehow too strong. But refueling is normal here, and the brake guns, if you don’t turn them, snap off when a couple of splashes have poured onto the wing. I got to work, started to look at it with passion, and the smell of gasoline did not leave the cabin if you were barely driving or just standing next to it. First, I simply hung up the left side, took off the wheel, found “daisies” torn from the metal, traces of gasoline on the drive and boot of the internal combustion engine, all the anticorrosive material nearby had softened, the clutch cable jumped out of the rear mount on the gearbox. When the car was rocking, a creak of metal on rubber could be heard from the left front side. Along the wheel, on the cylinder, closer to the seat, there is a barely noticeable bump, 1.5-2mm in height. There seems to be a dent on the disk, but it doesn’t seem to be, if you look at the annular notch on the rubber, then 0.5-0.8 mm, it’s as if the very edge is bent. When I showed it to my father later, he didn’t find it right away, and even then only on tires; he said about the disc that I was being picky.
Initially, my version was this: the strut compressed completely, the drive touched the clutch cable bracket, it jumped out and somehow broke the fuel pipe, how wrong I was.
An inspection from under the hood showed that only fuel pipes can leak in that area, which many people need to replace under warranty (my car is not on the list). It was boring to travel further myself, so I asked a colleague to buy them and bring them. Number 21900-1104040-00, “front fuel and steam pipe assemblies.”
The only thing is that in spare parts they come under the number 2190-110404. I didn’t find them in the two closest cities, or rather, in the first there was only one, but they didn’t know the number (they are different on K1), in the second there were both, but without these connecting rubber bands and clamps, and they were more expensive. As a result, they arrived from Ivanovo at a quite humane price of 490 rubles per pair assembled. While they were transporting it, I began to disassemble and remove the old ones. It was necessary to remove only the engine boot from below, and bend the air filter box from above and the intake pipe to the side. The view from under the battery platform was sad.
and most of it is not water, alas.
Then my gaze fell on the tubes themselves and what did I see?
Do you all see this?! The clutch cable is passed between the fuel pipes, between the pipes, Karl! Those. When they replaced my clutch cable under warranty, they stupidly routed it incorrectly. It turned out that the cable rubbed both tubes, and the fuel one more, because it should generally be further from the spar, and a greater tension was obtained on it. They just did it to “love it.” Do you think that's it?! But no! Further inspection showed that the clutch cable did not jump out of the bracket from the impact, but was simply not secured in it!
In the photo I have already inserted it, the rub on the spar is circled in yellow, and not only the paint has been rubbed off, but also a small hole can be felt in the metal. The softened anticorrosive is right there.
From a different angle.
In addition, one of the brake pipes is rubbed, but barely noticeable, replacement is not required. In the photo above you can see the point of contact.
There is already a decent fistula on the fuel pipe itself.
With the new tubes, the question arose, which is correct, above the cable or under it. First, I somehow ran it under the cable, got tension and contact, laid it over it, it fit perfectly, there was a gap of 15-20mm to the cable, but I still put the corrugation on both tubes just in case. I removed the latches on the tubes without any problems and did not break anything. Just keep in mind that when you remove the fuel pipe, gasoline will run out. Therefore, I first pulled out the old ones, plugging the tube from the bottom with my finger, put the removed ones under the catalyst and clicked the fuel one into place. After that, I installed new ones, removed the connector of the old one again, and connected both new ones.
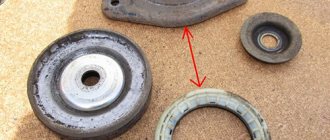
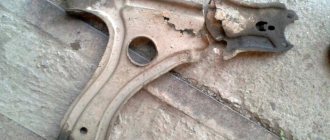
I generally don’t like to swear, but I decided to visit the OD and show him how they work. Well, try to get the daisies under warranty, because I’ve pointed out cracks on them before. I only talked to IPG, he was of course shocked by what he heard. About the creaking, I ordered that we come in for diagnostics. They had a place, immediately registered it, ordered the left ball joint to be replaced, by the way, it was changed to TO30tkm, it only took 18tkm, funny. They changed it under warranty, this is about the question of how the spacers affect it) Regarding the daisies, they said that they are replaced (complete with levers) only if a piece of rubber is missing, the factory does not recognize cracks and peeling as a defect. Left.
The cats are scratching at the soul, the brain understands that now this silent agent is not working quite correctly. At first I wanted to replace only two on this side. But then I remembered that I had two levers lying around (still from the 8, replacement ones, until I pressed them into the original PUs), new BRT rubber bands in them, I decided to install them assembled, and put in the ball ones again, spare ones from the 8, Track Sport, even Despite the mileage of 80 thousand kilometers, the finger turns very hard in them. More precisely, I decided to install these ball joints after I removed both levers and an inspection showed that the right, still original, ball joint, although it did not knock, the finger could already move easily. Expectations were met; in all 4 daisies the rubber fell off the outer ring.
Full size
Such balls are installed by OD, Belmag, as I understand it.
Disassembly and reassembly was no problem, only the rear nut on the left extension was tight, I cleaned the threads several times and ran it back and forth. The bolts on the stabilizer struts were already rusty. I assembled everything traditionally using graphite.
I have two questions for readers: 1) Are Rosteco RTIs better than BRT? I’ll still be preparing my original levers for the warm season, I’m thinking about what to put in them. 2) what is the difference between daisies 21900-2904020-00 and 21080-2904020-00? I know that the sizes are the same, I’m more interested in the tire parameters, only official data, no rumors.
Many media and public groups are now indignant that snow fell in winter (comedians), roads are littered, yards are not cleared. I’m not many years old, of course, but I remember well the winters of the 90s and early 2000s, cars drove quietly in the mess at 2/3 of the wheel height, and on the simplest winter tires or even all-season tires, no one complained, or maybe because they knew how to drive and the cars were designed for the Russian winter?! They often helped the janitors clean the yards (for themselves) and didn’t cry. Nowadays I’m too lazy to tear my 5th point away from the chair, go out for an hour with a shovel, it’s easier to make shit on the Internet. On my own behalf, I will say that the snow did not affect me much during these 3 days. During the first of them, I calmly parked in the courtyards, purposefully driving into the snowdrifts in order to leave clean spaces for my shorter comrades. At the garages I drove my father’s Kalina and 8k into snowdrifts that no one had cleared. I calmly drove around the city, for example, from the same Outlander. On the highway for 280 km, only the Land Cruiser passed me, it was really boring for me to jump over a 20-25 cm parapet at speed, and I successfully took everything that was lower. The M8 was parked in places, the trucks could not climb into the mountains, thanks to Ya. Kartam, they wrote back that they needed to go into oncoming traffic and go around the crowd, the traffic police station standing on the mountain turned a blind eye to this, they understood that there was no way without it in this case. Yesterday at work I climbed through knee-deep snowdrifts, but for a colleague I cleared 20-25m to the gate where the tractor did not pass and there was an area for 1 car immediately after, everything will be guarded at least. And precisely because I’m human and I understand that it’s impossible to clean everything up right now, there’s simply not enough technology, but people need to be helped. Well, today I did my raking, yesterday’s tractor was almost up to its handles!)
Full size
Necessary tool
To press in silent blocks at home, you will need the following tools: a set of wrenches, a jack, new hinges, a pry bar. For lubrication you will need to use machine oil or other types of lubricant.
You will also need special mandrels for pressing in silent blocks, as an alternative - pieces of pipe with the required diameter, as well as a press for pressing in a new rubber-metal hinge. At home, this press can serve as a regular vice. You can also prepare a set of sledgehammers, but you must maintain high precision in the work.
Replacing the silent block of the rear suspension beam arm
We carry out the work on an overpass or inspection ditch. We hang out the back of the car. To make the job easier, remove the wheel. We disconnect the parking brake cable from the beam and bracket (see “Removing elements of the parking brake system”).
Use a 19mm spanner to unscrew the nut, holding the bolt securing the lever to the bracket with another wrench of the same size. . and remove the bolt. We insert a wooden block between the body and the beam. At the same time, make sure that the brake hose of the rear wheel is not stretched.
Using a cup puller for wheel hub bearings or suitable pipe sections, press the silent block towards the threshold of the car. The wheel bearing puller bolt does not fit into the hole in the silent block, so we replace it with a bolt or screw d 12 mm. (The cylinder head screw is suitable.)
Squeeze the silent block into the puller cup. We clean the hole for the silent block in the lever from dirt.
We wet the new silent block and the hole in the beam with soapy water.
We insert the silent block into the hole in the lever and press it in with the same puller. Having lowered the car onto the wheels, tighten the nut of the bolt securing the lever to the bracket to the prescribed torque.
Almost a year ago, during a suspension diagnostic, I was told that the rear beam silent blocks needed to be changed. I bought polyurethane ones from Point of Support, but I was in no hurry to change them, the service center quoted me 1000 rubles for the work, a toad strangled me, especially since this is not the place where such a massive rubber band will die in such a short time, and I postponed this matter until the summer. At that moment, the lack of a hole or overpass still stopped me from replacing it myself. I thought I’d change it somehow in the summer, especially since I found more than one video where they do it right on the ground. But it so happened that in the summer I finally made a hole in my garage, and in more comfortable conditions I made a replacement. Most of all I was afraid of soured bolts in the bushing of the silent block; I have a sad experience of replacing my wife’s 11-year-old Matiz. But my Kalina is fresher, so everything turned out well. I unscrewed the nut on the left side, knocked out the bolt, jacked up the car, the beam came out of the mount, releasing the silent block, and knocked out the silent block itself with a hammer. I cleaned the seat, lubricated the silent and pressed it in using a wheel bearing puller. I lowered the car, lubricated the bolt, and put everything back together.
How to check silent blocks
To press in the hinges, you need to inspect them thoroughly, making sure that their replacement is definitely necessary. To do this, you need to visually inspect the silent block and check its integrity. You need to make sure that the rubber on the hinge does not swell or crack. Check the play in the parts; if they exceed the size, then replacement is necessary. There is no need to delay this work; if it is not done in a timely manner, problems may arise that will lead to a complete replacement of the suspension arm.
Standard reasons that indicate their malfunction:
- poor handling;
- when driving over uneven surfaces, knocking sounds appear in the suspension;
- tire wear occurs unevenly;
- problems with wheel alignment adjustment.
Useful tips
The brake hose is located on the beam. If the eye is moved, it can be damaged.
Pay attention to this point and be careful when working. Most often, damage occurs from contact with the mount.
Always look at what it is leaning on.
In most cases, it will not be possible to simply unscrew the fastening nut. In this case, you need to tap it out. Just don’t hit the nut, hit the screw, the vibration will make it much easier to unscrew it. Using a pipe will also make the task easier. It is put on the knob, this way you can increase the lever and, accordingly, the force transmitted to the nut. As a rule, after such exposure, the most rusted connection gives in.
Press-fitting instructions
At the initial stage, it is necessary to visually assess whether the new silent block is suitable for a particular case. This condition must not be neglected, so that later it will not be too late. There are often cases when the outer part fits perfectly, but the inner part does not, and vice versa. Once you determine that the parts will fit exactly, you can proceed to the next step. To do this, you should use a vice to help press it correctly. This method is safer and more accurate.
You can also use hammers and sledgehammers, but you need to be more careful and carefully monitor the accuracy of the process.
Thus, you will need to land several hits. If after this the broken silent block is firmly held in the hole, you need to knock it out. For this work, special mandrels are used for pressing silent blocks or two pieces of pipe. The diameter of one of these parts must correspond to the parameters of the outer joint bushing. When knocking out a part, you do not need to worry about damaging it, since it is faulty. This process is carried out with a regular hammer.
You can make it easier and faster to knock out the old hinge by heating it with a special burner. It is worth remembering that as a result of this procedure, the part breaks completely.
After knocking out is completed, the eyelet in which the hinge was located must be cleaned of dust, dirt, and so on. The seat for the new part must be perfectly smooth and even. There should be no mechanical damage or various scratches on it. In addition, there should also be no sharp edges.
After cleaning the seat, its surface must be treated with lubricant. If this is not available, you can use a regular soap solution. A device such as a metal polyurethane bushing must also be lubricated. Having completed the lubrication of the seat, you can begin to clamp the lever in a vice. In this case, it will be necessary to install a silent block perpendicular to it. This work is done as smoothly as possible. The further normal functioning of your machine depends on this.
Next, you will need to choose how to press in the silent block - press it in or drive it in with a sledgehammer. To reproduce this process, you will need metal tubes or mandrels for pressing silent blocks, one of which will need to hold the lever. And the other tube must be leaned against the side to avoid damage to the hinge when working with a vice or hammer.
The main difficulty with this work may be the difficulty of pressing the hinges into their original place. To perform this procedure, I recommend using a special press to press them in and out with the levers, as well as a mandrel for pressing in the silent blocks. You can also use improvised means, such as pieces of pipe and a sledgehammer, but you should be very vigilant and attentive, since this process requires high precision and dexterity so that the result is a whole polyurethane insert.
You can press in silent blocks with your own hands only on the front and rear parts of the suspension. If you need to replace rubber-metal joints in engine or gearbox components, you should contact a specialist. This is necessary precisely because replacing parts in such units is a labor-intensive process. To implement it correctly, you must have repair experience and a good knowledge of the main components of the car's structure. If you lack experience and knowledge, it is better not to test your luck and entrust your car to specialists. Because, in addition to the time spent, you will spend a lot on replacing silent blocks.
Important!
If during the work you find that the bolts and nuts are in poor condition (there are cracks, traces of severe rust, bad threads - approx.), then it is best to replace such elements with new ones, using high-quality steel bolts and nuts with a self-locking element .
Other front suspension elements
The remaining elements of the front suspension, which contain rubber-metal and metal hinges, are replaced immediately as an assembly. These include:
- Spherical bearing.
- Stretch bracket.
- Steering end.
These elements cost about 500 rubles per set, and also do not require specific installation skills.