Considering the driving culture and the state of domestic roads, there is no need to talk about the benefits of a DVR. And if until recently an ordinary video camera on a suction cup was a source of pride for a car owner, then the functionality of a modern recorder is comparable to the capabilities of a computer. Below we will look at the selection criteria and consider how to install a DVR with a rear view camera, depending on its design and your wishes.
Let's talk about the main thing right away: decide on the type of device. There are only two of them:
— classic is a separate two-channel display that is installed on the dashboard or windshield;
- a mirror with a built-in front camera and a connector for connecting a rear view camera - combines the functions of a mirror and a display, mounted on a standard mirror in the cabin or replaces it.
The obvious advantage of the second option is the possibility of permanent installation. At the same time, the windshield and dashboard are not cluttered with additional gadgets, and the DVR itself, outwardly indistinguishable from an ordinary mirror, does not arouse interest among unscrupulous citizens.
Both types of two-channel DVRs of the latest generation with a remote rear view camera are equipped approximately the same, and their installation differs only in the way the display is mounted. More about this.
Installation of a DVR mirror with a rear view camera and connection
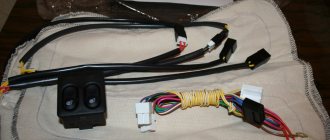
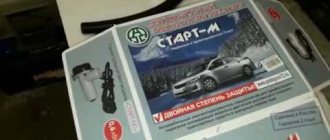
The complete set of the mirror-video recorder includes: the mirror-monitor itself with a built-in front camera, a charger from the cigarette lighter, a rear view camera, a 5-meter connecting cable, a set of fasteners (Fig. 1).
Rice. 1 – Complete set of mirror-video recorder
If you have chosen the right mirror, you can quickly and easily fix it to the standard one using two elastic straps. Otherwise, you will have to dismantle the old mirror and purchase a separate mount for the new one.
How to connect power
Like a regular electrical device, the DVR can be connected to the on-board network anywhere, observing the polarity and the voltage consumed by the device, which is usually 5 V.
Depending on the make and model of the car, some of its electrical appliances are under constant voltage, and some are turned off along with the ignition. This moment determines the choice of wire to which you connect.
The supplied charger provides power from the vehicle's 12-volt network. At the same time, in many models of DVRs, the cigarette lighter plug is equipped with a voltage converter from 12 volts of the on-board network to 5 volts consumed by the camera itself. Therefore, if you are not strong in electrics and do not want to buy a separate converter, you should not cut off the charging plug - it is better to purchase an additional cigarette lighter socket, which will connect to the desired contact. In addition, such an installation will allow you to keep the DVR with a rear view camera intact for the period of warranty service.
Before starting work on connecting the gadget, remove the negative terminal from the battery.
To the cigarette lighter
The length of the charging cord allows it to be routed under the roof trim and front right side pillar trims, and then led directly to the cigarette lighter or into the glove compartment with an outlet. If you regularly use a cigarette lighter to charge other devices, consider this type of splitter as a tee with switches - a very useful device for long trips.
With this connection, recording is activated automatically when the engine starts. After turning off the ignition, the device turns off. But if the DVR has a built-in battery and motion sensors, it can activate recording even when the engine is turned off.
To the interior lamp
This is the shortest way and the easiest way. You just need to remove the ceiling cover and find the positive wire. At the same time, it is important not to confuse it with the one that comes from the relay that reacts to the doors, otherwise the recording will turn on every time they are opened.
Since in the vast majority of cases the interior lamp is under constant voltage, the DVR will also be constantly active.
To the fuse box
It is usually located at the bottom of the front or side of the panel. On the cover of the block there is a diagram of the location of fuses for electrical appliances (Fig. 2). Having chosen the appropriate one, you need to pull out its fuse, secure the red wire from the cigarette lighter socket to the positive terminal and insert it back (Figure 3). The negative contact - ground - goes to the mounting bolt. (Figure 4)
Rice. 2 – Layout of fuses for electrical appliances
Rice. 3 – Terminal
Rice. 4 – Negative contact
With this connection option, the DVR will turn on when voltage is applied to the electrical appliance you have chosen. If the latter is under constant voltage, you will need to turn off the recorder manually.
To battery
A good way to power the DVR is a separate dedicated line. The connection is similar to the previous one: the wire is led out under the hood to the fuse box - plus to plus, and the minus can be fixed directly to the car body.
If, in addition to the cigarette lighter connector, you also purchase a power controller, you can independently control the voltage supply to the camera.
How to connect a rear view camera to a DVR
This question consists of two parts: direct installation of the rear view camera and its connection to the DVR.
Parking cameras come in mortise and overhead types. To install the mortise ones, you will need to drill the bumper. The invoices are fixed to the glass with Velcro, and on the bumper or trim - with Velcro and self-tapping screws.
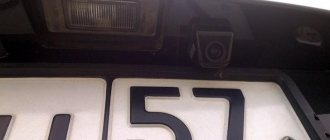
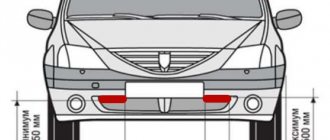
An overhead rear view camera can be installed on the glass inside the passenger compartment or outside - above the license plate (Fig. 5). It is clear that the first option is not considered if the rear window does not have electric heating and a wiper. But another important drawback of this installation is that you will not see the road directly under the wheels. And this function is very useful when driving off-road in reverse.
Rice. 5 – Rear view camera installation options
As can be seen from the figure, laying the connection cable to the DVR when installed inside the cabin does not cause any particular difficulties. The situation is different with external fastening.
In this case you will need:
— remove the cover with the number plate illumination and mark the location where the camera is mounted;
- secure it with Velcro, and then make holes for the screws - with a drill or an awl;
— screw in the screws, then use a knife to cut a small recess for the wire along the lower edge of the trim and bring it out into the trunk.
The power is connected to the reversing lamp (the red wire is to the positive of the lamp), the video signal is to the corresponding connector (Fig. 6). Thus, when reverse gear is engaged, recording is automatically activated and the image from the rear camera is displayed on the screen.
Rice. 6 – Rear view camera connection diagram
Throughout the cabin, the wire is stretched from the mirror to the trunk under the trim lining or passed through a standard corrugation with wiring.
Conclusion
By and large, self-installation of a DVR with a rear view camera purchased in one kit should not cause much difficulty. But if you purchased a parking camera separately from a two-channel DVR and want to connect it specifically, it is better to contact a specialist.
The rear view camera is not included in the standard equipment of the Lada Granta Liftback; owners connect the equipment themselves. You can purchase the accessory in a car store, car market, or on the Internet. Wide range, gradation by price categories, technical characteristics.
Connection instructions
To connect the camera to the standard radio, use the connector located on the rear wall of the equipment. Before purchasing an additional device, you should make sure that the installed player supports rear view camera switching. To power the camera, a cable marked Reverse is used, which is connected to the reverse lamp circuit. The RCA plug is installed into the standard video input jack located on the rear of the radio.
Connection to the Pioneer radio has several differences:
- The yellow plug of the camera is installed in the socket marked RC IN;
- The cable harness of the head unit contains a cord with purple-white insulation, which is responsible for providing a signal for activated reverse gear.
It is recommended to lay the commutation lines after installing the camera, since during the installation process unforeseen difficulties may arise that require the use of a different layout solution.
Installation process
Rear view cameras for the radio made by third-party manufacturers have a shape that does not match the license plate light used. To simplify installation, it is possible to trim the housing and then install the product between the backlight lamps. This design improves the viewing area of the lens and simplifies the calculation of the trajectory when maneuvering in reverse. Installation of the device is carried out after installing a 2 DIN standard radio with a liquid crystal screen.
An approximate algorithm for installing a camera on the rear of a car:
- Cut a rectangular hole in the plastic trim or metal casing located above the license plate mounting location on the trunk lid. Metal edges are treated with an anti-corrosion compound. It is recommended to select the installation point in such a way as to avoid trimming the body panel, since it is impossible to provide reliable protection against corrosion in artisanal conditions.
- To trim, you need to dismantle the plastic cover with the backlight lamps, which is secured with clips or screws. The installation method depends on the car model.
- The window is marked by drilling 4 holes with a diameter of 2-3 mm, then cutting out the opening using a file or jigsaw. The edges are smoothed with a file. A test installation of the camera is carried out to check the viewing angle of the selected layout solution.
- Mount the camera body into the mounting socket and secure the parts with 2-component epoxy resin adhesive. It is recommended to first verify that the lens is positioned correctly by connecting the equipment to the radio. Since the epoxy glue hardens within 3-5 minutes, the user has time to adjust the position of the device.
After installing the rear view camera, they begin laying patch cables that are routed through the car interior to the head acoustic unit. The type of connection between the cord and the player depends on the model and manufacturer. Pioneer radios are equipped with a special plug designed to connect a camera. Users confuse it with the yellow “tulip”, which is designed for switching equipment operating in manual control mode.
Connection
The correct connection diagram for the rear view camera ensures that the signal starts broadcasting only after reverse gear is engaged. For switching, a switch located in the speed selection mechanism is used. On some cars there is no such element, so a connection is used to the sensor for turning on the reversing lights or to the lamp sockets located in the rear lamps. The commutation cable is carefully inserted into the plug and held in place by the factory spring contact.
The instructions included with the radios contain recommendations on how to properly connect and adjust the camera. If the user experiences difficulties when switching or installing additional equipment, it is recommended to contact a service center.
Settings
Adjustment of operating parameters is carried out through menu sections. The user activates signal transmission and then adjusts the resolution of the picture on the display. After this, a balance of brightness and contrast is sought under different ambient lighting conditions. On Pioneer head units, a warning message appears on the screen informing the driver of the possibility of mirroring. The text is displayed when the camera is turned off; To disable it, you will need to adjust the polarity of the connected reverse signal cable.
Used when installing several parking cameras, a 2-position toggle switch allows you to display images from the front and rear devices. When the switch is set to receive a signal from the rear camera, the broadcast begins after moving the gearbox lever to the reverse position. To view the situation from the front of the car, you will need to move the lever to a different position. If you try to engage reverse gear, the image will not change.
How to choose a good camera. Review of prices from different manufacturers
| № | Article/name | Price, rub.) |
| 1. | Kalina, Kalina-2, Granta (liftback), Vesta, Priora |
*prices are current as of September 24, 2018.
Technical characteristics of the rear camera of the Grant Liftback:
The most popular gadgets are in the price category up to 1,500 rubles. Picture display quality, focusing, zoom level are at an average level. Of course, the image is grainy, pixels are visible, and the viewing angle is only 170 degrees.
The rear view camera on the Granta Liftback in the range of up to 3,000 rubles has improved characteristics, image output quality, and a viewing angle of 180°. Despite decent parameters, gadgets in this price category are beyond the means of most car owners.
How to choose a camera
The modern electronics market, and especially China, is overcrowded with a variety of cameras, and this makes choosing the right thing more complicated. In order to make your work easier, decide on your priorities, what worries you more – price or quality. Not everyone needs high-definition cameras, or cameras that can show even in low light. For some drivers, an inexpensive rear view camera for the radio is enough.
What parameters should you pay attention to if you decide to purchase a higher quality product, then in this case there are at least five points that need to be taken into account when purchasing:
- What resolution does the camera record in? The higher the video resolution, the better the recording quality. And high image clarity is not always needed.
- The next point is the camera’s sensitivity to lighting. With cheaper models, low-light recording quality can be very poor. Therefore, if, due to circumstances, you often use a car in the dark, then this point is worth paying attention to.
- If, before purchasing, you have already decided where to install the rear view camera, then you need to pay attention to the installation method of this particular model.
- The next point is this viewing angle that the camera lens captures. Usually it is in the range from 120 to 180 degrees. It is better to take something in between these two indicators, so that you have a good view of the rear view, but do not have a panorama, because it distorts reality.
- Selecting the monitor on which the camera will display the image. But if you already have a radio with a screen in your car, then you just need to think about how to connect the rear view camera to the radio.
Procedure for installing the rear camera on the Granta liftback
- We place the car on a flat area.
- Remove the rear door trim.
- Remove the driver's and passenger's door sills on the left side.
- We lay a block with wires from the center console to the rear door lid.
- We dismantle the saber - spoiler.
- We install the mount.
- We connect the wiring to the 2-DIMM radio.
The order may differ from the above. In the event that the owner does not want to display the image on the standard radio. In this case, use a folding monitor. The location of fixation is arbitrary.
Preparatory stage
- isolation;
- screwdrivers with different tips;
- plastic spatula for plastic;
- blocks with wires;
- adapter - ISO type connector.
Dismantling works
- remove the thresholds from the left driver and passenger doors;
- fold the back row of seats;
- remove the upper trim of the interior and luggage compartment;
- Unscrew the fasteners, remove the spoiler from the trunk lid.
Laying wires, power supply from the circuit
We lay the wiring from the central channel of the console to the trunk lid along the following route:
- location for fixing the standard radio,
- the lower part of the dashboard on the left side under the steering wheel,
- thresholds,
- rear door pillar,
- luggage compartment lid.
Connection to the power circuit from the positive cable of the reverse gear lamp. In the Lada Granta Liftback it is green and located in the luggage compartment on the right side. Powering is done by soldering; twisting is also permissible, provided that the connection point is well insulated.
Connecting wiring, installing standard casing
After installing the camera, connect the positive cable to the flashlight wiring. We place the block with wires in a corrugated material made of fire-resistant material, and fasten the casing.
From the back of the 2-DIMM radio, we connect to the miniISO connector:
- black wire: ground;
- red: 12V power supply from the reversing light.
The designations on the plug are: pin 16 and pin 19, respectively. For the standard MMC radio, no additional firmware is required. The screen automatically switches to camera mode when reverse gear is activated. We start the engine, activate “R” gear, an image appears on the screen of the standard rear view camera.
Settings
The standard multimedia system does not require firmware. It is enough to launch the rear video review function using a special program. If the car owner installed the view camera with his own hands, you will have to perform the following steps:
- The CAM on/off program is downloaded to a USB flash drive by connecting to a computer. The drive is inserted into the USB connector of the radio.
- On the car radio screen, press the “Settings” button, and then go to the desktop. This provides the user with access to the WinCE operating system.
- Going to the “My devices” folder, find the “USB drive” item. By pressing the select button you go to the folder with the program.
- Run the installation file, allowing the use of the camera. The settings menu is closed.
- Engage reverse gear and check that the video system is installed correctly. Using the appropriate controls, adjust the required parameters.
If the machine is under warranty, the installation of the video system should be entrusted to specialists.
https://xn--80aal0a.xn--80asehdb/do-my-self/tuning/tuning-lada-granta/749-ustanovka-kamery-zadnego-vida-na-lada-granta-kalina-priora.html https ://lada-kalina2.ru/tuning/podkluchaem-kameru-zadnego-vida-k-shtatnomu-displeu-mms https://new-granta.ru/kamera-zadnego-vida/ https://www.lkforum. ru/blog.php?b=7922 https://autotuning.expert/parktronik/ustanovka-kamery-zadnego-vida-na-lada-granta.html
Reviews
| № | Positive |
| 1. | Vitaly, 41 years old: connected the camera to the standard radio, did not flash anything additional. In total, I spent half an hour. I bought a Chinese Viori – 264897PR. |
| 2. | Gennady, 33 years old: the picture when reversing is good, the distance is marked. In case of insufficient lighting, I used side mirrors for objectivity of data. |
| 3. | Sergey, 31 years old: I work as a taxi driver and spend a lot of time on the road. In order to deliver/pick up a client as quickly as possible, it is necessary to maneuver in the limited space of courtyard areas. The camera is an indispensable assistant. |
| 4. | Kirill, 39 years old: a friend recommended a Viori rear view camera - 264897PR. I installed it and have been using it for over a month, no complaints. |
| 5. | Maxim, 42 years old: received a gift from his son for his birthday, installed it on his own. The lighting is good and the viewing angle is sufficient. |
| Negative | |
| 1. | Victor, 38 years old: I didn’t like the image on the standard radio, so I bought an additional folding monitor and installed it on the dashboard. The quality is good, no graininess. |
| 2. | Dmitry, 29 years old: I bought a folding monitor along with a rear view camera, since the image on my original radio was poor. I've been using it for two months, no complaints. |
| 3. | Vasily, 27 years old: I bought a car with a built-in rear view camera. I didn’t like the image quality on the “native” screen. I bought a folding monitor at the store. |
Conclusion The standard screen displays the image from the rear view camera with a resolution of 800 x 600 pixels. Obviously, this is not a 1920 x 1080 HD format, but the picture is quite legible. Those wishing to improve output quality can additionally purchase a portable monitor for an additional fee.
1. Removed the trunk door trim. It is attached with new caps: first you need to pull out the cap, then take out the cap. Removed the plastic trim on the trunk door. 2. The cover has space for installing a camera. I cut a hole for the camera in this shape:
3. Mating connector for YAZAKI 7283–8853–30 (AX951) camera. My connector was already crimped with wires. Pass the 4 connector wires through the seal of the stock wiring harness. The wires are thick and difficult to thread through, but possible. I crimped the EL 2×02 M connector onto the camera wires that go inside. Pinout of the camera wires: red - camera power + black - camera power - yellow - video signal white - video signal - 4. The camera wire was wrapped with shaggy electrical tape, placed in holders, connected connector The connector was secured to the cover plate with hot glue.
5. Installed the cover in place 6. Crimped the mating connector EL 2×02 F. As a cable for the camera, I used a simple three-core cable with a cross-section of about 0.5 mm2, which I got from some equipment. The camera's negative power wire was connected to the thickest black wire in the trunk door harness. There will be 3 wires going to the MMC: power +, video signal, video signal -.
7. I wrapped the camera cable with shaggy electrical tape and pulled it along the standard harness in the trunk door on the left side, in a rubber corrugation and along the rear pillar in the trunk, tying it to the standard harness. Before doing this, I disassembled the trunk trim.
8. In parallel with the standard connector, I also installed the EL 1×03 M / EL 1×03 F connector. 9. Next, pull the cable to the MMC along the standard harness. At the rear left arch, the same video cable from the trailer connector is connected to it (I have a camera installed on the trailer), as well as a trailer connection signal wire. 10. By tying the cable to the standard harness, I pulled it along the left side to the rear passenger’s feet. Then under the feet of the rear passengers to the starboard side. Then along the right threshold to the A-pillar. It went up the rack behind the glove compartment along with the antenna cable. In a place where there was no standard harness, I secured the cables with black tape, in the factory style:
11. Behind the glove compartment, where the cables come out of the rack, I installed the EL 3×03 M / EL 3×03 F connector. 12. Then, together with the antenna cables, placing them in their own holders, I brought the cables into the space under the MMC behind the climate control unit.
Connection: 1. According to information from the Internet, the power supply for the standard camera is +6V. I took a car phone charger, which is a +12V to +5V converter. I disassembled the case, took out the board, soldered three wires to it and crimped it with heat shrink.
2. Because I have two cameras, so I need a device that switches cameras. I assembled a relay circuit.
The device automatically switches video input and supplies power to the trailer camera when the trailer plug is connected. And also, by pressing a button, it forcibly turns on the rear view camera on the car. There are 4 connectors on the board: Connector X3 - video cables from the cameras that I connected earlier. Connector X4 is a voltage converter +12V to +5V. Connector X1—connection to the MMC harness. Connector X2—connection of the rear view camera power button. 3. Connect to MMS. In the MMC harness, cut the green wire for the reverse signal. Both ends will go to the switch. We connect to the orange ACC wire and the black minus wire. Insert the crimped contacts into the blue MiniISO MMC block: 16 - video input -, 19 - video input signal. I bought contacts in China a long time ago. We form a harness of six wires.
4. Connecting the button. I had the button with the camera symbol in stock, but with a green backlight. I bought a heated rear window button with white backlight 8450100638 and changed the button. You can order a button with the desired symbol here. We form a harness of three wires from connector X2 of the switch to the button. Block on the button: 1 and 2 - contacts; A, C - minus; B - backlight; D - indicator. I took the minus and the backlight from the adjacent heated rear window button. 5. In MMC you need to activate the video input. This is done in the NewMenu settings.
I secured the switch and converter boards under the MMC.
Result - I installed a standard camera: advantages (compared to Chinese ones) - standard appearance and quality, wide viewing angle; minus - price (3800 rubles). But I didn’t regret it, I’ve suffered through it with shitty Chinese cameras before. — Made the connection for the trailer camera. It helps a lot, especially when with an awning. — I forced the camera to turn on. You can control the load and trailer. — Now I see the tow bar ball, I won’t poke the bumper into the trailer anymore.
Immediately after purchasing the car, it was very unusual to have such a view of the rear hemisphere as a liftback. You can't see anything! Then I immediately got the idea to put the camera back, but the standard radio does not have a screen, and besides, I also needed a DVR, so the choice fell on a mirror DVR - it’s 3 in 1 or 4 in 1, or just N in 1. I ordered it here : ru.aliexpress />I decided to take it straight away from GPS on Android. It arrived in a week.
And so, one fine evening, my friend and I got ready to install this whole miracle. The photographs will not reflect all the steps, but only what was captured in the process.
This mirror came with fasteners not only in the form of rubber bands, but also for replacement instead of the standard one. I decided to remove the standard mirror and install a new one. The kit included a bunch of different adapters for different types of mounting, so I think it will suit almost everyone.
Next, it was decided to place the rear view camera outside, since after driving around a bit with the camera mounted on the rear window, parking was still inconvenient.
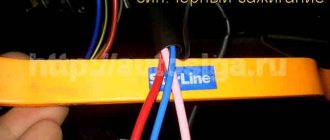
So, I ran the wires according to the following diagram:
There are three wires in total from the recorder: power, rear view camera and GPS receiver.
The rear view camera wire was pulled from the passenger side. First, I hid the wire under the trim near the windshield, then through the front pillar and, bending the rubber seal, also hid it under the trim.
Then, at the middle pillar, the decorative plastic part can be easily removed and passed through it further.
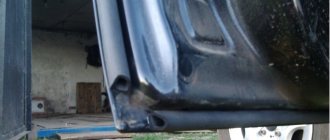
But after I brought it to the rear row of passengers, I used wire to extend it further and threaded the wire through the trim and the rear pillar. Then you need to remove the decorative elements from the tailgate:
1. The element is simply removed from the clips by picking it up from the middle. 2. Unscrew 4 screws (2 of them are the shelf fastenings on the side). 3. Unscrew two more screws in the grooves under the “handles” for closing the trunk. I also had to unscrew the decorative trim at the seat belt attachment point for the middle passenger (circled in yellow) in order to get under the trim and thread the wire through the corrugation to the trunk door.
Well, the fun began when I started running the wire to the trunk door. The holes are small, it’s difficult for your fingers to get into them, but again, everything was done with the help of wire, although it took a lot of sweat.
At this point, the red wire that should be connected to the reverse lamp is almost gone, so I soldered another 2 meters of wire and put it on heat shrink.
Next, I tied the wire to the harness, which goes on the left and goes to the rear door lock and license plate light, and ran the wire to the reverse lamp under the trim and plastic to the left lamp. There I found a wire going to the reverse lamp (mine was green) and soldered it to it.
Then I removed the saber from the trunk door by unscrewing 5 or 6 bolts. I also connected the wire along with the wire going to the license plate light. Then I drilled a hole for the wire in the place that, as I understood, was intended for the camera - just to the left of the trunk door release button and secured the camera with two bolts. I didn’t “drown” it deep, but simply screwed it on:
After pulling, there was still a supply of wire left, which I twisted into a bundle and hid under the decorative trim. Thus, there is enough wire to spare, with the exception of the wire to turn on the camera when reversing, which had to be increased.
I pulled the power wire through the left pillar, removed the heater control panel and there it was soldered to the wires going to the cigarette lighter. The GPS antenna was pushed under the roof lining.
This is what the image from the rear view camera looks like:
But, if there is little lighting, then, of course, the image will be noisy. It will show well during the day or under street lighting at night. Even at night, headlights from behind moving cars still illuminate the camera.
The mirror itself is larger than the standard one; when the visors are lowered, they rest against it, but this is not critical, since the visors are lowered completely and there is no point in moving them further. By the way, during the day the reflection in the mirror is clearly visible through the image on the screen.
You can launch applications and display images from cameras in a floating window:
You can display two images:
You can install YouTube and watch videos on the go:
There is a navigator. True, when launching such applications, the recorder becomes “stupid”, takes a long time to load everything, searches for an address on the map or loads the video, but then it works fine. It feels like he doesn't have enough memory. You can install the application and track the movement of the car, display images from cameras directly on your smartphone, if the Internet allows, of course. You can see the route during the day, for example. But the main thing it was used for was monitoring the situation behind the car and assisting in parking, which the recorder does an excellent job of and now you feel more confident when backing up.
How to choose a good camera. Review of prices from different manufacturers
| № | Article/name | Price, rub.) |
| 1. | Kalina, Kalina-2, Granta (liftback), Vesta, Priora (99009916) | from 3000 |
| 2. | Viori – 264897PR | from 2700 |
| 3. | Lada Granta Liftback LGR-01 | from 1400 |
| 4. | CAM-98645236 | —/— |
| 5. | LGR-112 | —/— |
| 6. | Folding monitor 4.3 MR-01 | from 2000 |
*prices are current as of September 24, 2018.
Technical characteristics of the rear camera of the Grant Liftback:
- Matrix type: CCD (photosensitive);
- Viewing angle: 170°;
- Resolution 800 x 600 pixels;
- Zoom level: 0.01 Lux;
- Aspect ratio: 4:3;
- Gradation: parking lines on the screen (0.5 / 1.0 / 1.5 meters);
- Moisture and dust protection: present, level IP 67;
- Brightness: 300;
- Recommended voltage for correct operation: 12V;
- Operating temperature range: - 25° - + 35°;
- Connection type: ISO connector, from the back of a 2-DIMM radio or a separate folding monitor.
The most popular gadgets are in the price category up to 1,500 rubles. Picture display quality, focusing, zoom level are at an average level. Of course, the image is grainy, pixels are visible, and the viewing angle is only 170 degrees.
The rear view camera on the Granta Liftback in the range of up to 3,000 rubles has improved characteristics, image output quality, and a viewing angle of 180°. Despite decent parameters, gadgets in this price category are beyond the means of most car owners.
Device selection
When choosing a view camera for the Lada Liftback, you need to consider the following characteristics:
Setting up standard MMS
No firmware required for the radio, you just need to activate the rear view camera
. To do this, download the program (To download files you need to log in to the site) and copy it to removable media (USB Flash).
- Go to the desktop (WinCE). On the radio screen, hold down the “Settings” button, then “Exit” and “Desktop”.
- Let's launch the program. how to connect a rear view camera to a TV Connecting a rear view camera Installation of the camera should provide a good overview, parking lot markings should be visible for convenience. Rear view camera Lada Warranty on the camera is an indispensable assistant for both. How to install a turbine on a Zhiguli? My device - USB disk - Folder with the program - Run the CamOnOff file.
- We allow you to use the camera. Click on the corresponding button. We close the program, it and the flash drive will no longer be needed.
By the way, the whole process is also shown in the video:
Checking the operation of the rear view camera
including reverse gear.
Let us remind you that some motorists prefer to use parking sensors instead of a camera.
The Volzhsky Automobile Plant does not practice installing a rear view camera on its cars, so this process is carried out by car owners. Today we will tell you how to install a rear view camera on a Lada Granta with your own hands. You will need: a rear view camera, a knitting needle (wire) for pulling wires, a Phillips screwdriver. The easiest way to install a rear view camera on a Grant is to attach it to the bumper with self-tapping screws above the license plate. It is not necessary to remove the bumper for this. To route the camera wiring into the trunk, you will need to remove the left license plate light, and then pull the wires through the rubber plug using a long knitting needle. You will only have to remove the bumper on the Lada Granta if you decide to install a rear view camera inside the bumper. This placement of the camera will be more reliable, but installation time will also increase.
How to determine the location of the camera?
Before connecting the camera, you need to select a location to mount the device. The KZV can be installed in the trunk lid, license plate frame or rear bumper. Such a mounting location will not spoil the external design of the vehicle; this is the best option in terms of height - the necessary image will be displayed on the monitor.
Depending on the type, the KZV can be mounted instead of a license plate backlight, and the device is equipped with a backlight option. But its quality is much worse. The main criterion that you should rely on when choosing where to install the system is how dirty the camera will be. On many vehicles, due to the aerodynamics, the rear of the bumper can become covered with dirt in bad weather.
Procedure for installing the rear camera on the Granta liftback
- We place the car on a flat area.
- Remove the rear door trim.
- Remove the driver's and passenger's door sills on the left side.
- We lay a block with wires from the center console to the rear door lid.
- We dismantle the saber - spoiler.
- We install the mount.
- We connect the wiring to the 2-DIMM radio.
The order may differ from the above. In the event that the owner does not want to display the image on the standard radio. In this case, use a folding monitor. The location of fixation is arbitrary.
Preparatory stage
- isolation;
- screwdrivers with different tips;
- plastic spatula for plastic;
- blocks with wires;
- adapter - ISO type connector.
Dismantling works
- remove the thresholds from the left driver and passenger doors;
- fold the back row of seats;
- remove the upper trim of the interior and luggage compartment;
- Unscrew the fasteners, remove the spoiler from the trunk lid.
Laying wires, power supply from the circuit
We lay the wiring from the central channel of the console to the trunk lid along the following route:
- location for fixing the standard radio,
- the lower part of the dashboard on the left side under the steering wheel,
- thresholds,
- rear door pillar,
- luggage compartment lid.
Connection to the power circuit from the positive cable of the reverse gear lamp. In the Lada Granta Liftback it is green and located in the luggage compartment on the right side. Powering is done by soldering; twisting is also permissible, provided that the connection point is well insulated.
Where and how to install
The video system installation procedure includes the following steps:
- Choosing a place to fix the monitor. If the owner does not want to display information on the radio, use a folded monitor installed in a random area. The head unit is mounted in the trunk.
- Preparing tools. To install the camera you will need screwdrivers with different heads, sockets with cables and standard adapters.
- Dismantling works. Before installing the camera on the Lada sedan, remove the door sills on the left side, fold the rear seats and remove the trunk trim.
- Wiring. Cables from the central part of the console to the trunk are pulled through the standard place of the radio, the lower part of the dashboard, sills and rear door pillars.
- Parking sensor fixation. You can install the camera on the spoiler; this is done by drilling a hole. The video sensor can also be installed on the license plate.
How to install a rear view camera on a grant
Do-it-yourself wiring and connection of wires You can run wires into the cabin to the standard multimedia system either through the headliner or along the side door trims. To work with ceiling cladding, we recommend using special “spatulas” and filling the voids under the cladding with additional pieces of foam rubber for the cable. On the A-pillar, the wire can be connected to the antenna wire, then stretch it to the glove compartment area to the radio or standard multimedia. The central panel is attached to metal clips and can be removed quite simply. To do this, you need to insert a flat-head screwdriver into the hole on top of the radio and pry it off, then disconnect several clamps. After this, remove the temperature and air direction regulators and use a screwdriver to unclip the fasteners along the perimeter of the panel from top to bottom. It is most convenient to connect the camera power wires to the reversing light.
How to connect
After the camera is installed on the Lada Liftback, you need to make a connection. This is done like this:
- the black cable in the trunk is connected to ground;
- the red wire is connected to the reversing light;
- a standard ISO connector is connected to the radio (a “tulip” is pre-installed on the connector);
- The outer contact of the connector is connected to pin 16, the inner one to terminal 19.
If the car has a built-in multimedia system, no auxiliary work needs to be performed at the connection stage. If the MMC is not included in the package, you need to additionally connect the wire from reverse to the first contact of the car radio connector.
Connecting wiring, installing standard casing
After installing the camera, connect the positive cable to the flashlight wiring. We place the block with wires in a corrugated material made of fire-resistant material, and fasten the casing.
From the back of the 2-DIMM radio, we connect to the miniISO connector:
- black wire: ground;
- red: 12V power supply from the reversing light.
The designations on the plug are: pin 16 and pin 19, respectively. For the standard MMC radio, no additional firmware is required. The screen automatically switches to camera mode when reverse gear is activated. We start the engine, activate “R” gear, an image appears on the screen of the standard rear view camera.
Lada Granta - installing a rear view camera
Due to the fact that a 2-DIN Chinese radio was purchased, I was honored to install a rear view camera. The radio came with a rear view camera, which had to be mounted on the outside of the trunk door. I was too lazy to run “kilometers” of wires along the trunk lid, rear pillar, disassemble the ceiling, and the sides of the trunk, so, after surfing the Internet, I found a camera that fits into the bumper, like parking sensors (much closer to the reversing lights). Installation in the bumper is the same as when installing parking sensors, instructions are here. A cutter of suitable size is included in the kit. The liftback has two reverse lights, so I connected the camera to the second one (the parking sensors are connected to the first one). The cameras came with wires. Connection diagram:
connection diagram
Connector P2 – red wire to + reverse lamps, black – ground.
The signal wire from the camera to the radio (which has tulip connectors) has another additional red wire P3. This is the power supply for the radio to output images from the camera. We connect one end to the + of the reverse light, the other to pin 9 of the radio connector (red dot on the ISO connector of the radio). Since birth, I had audio equipment in my car, but this wire was not in the block. I pulled the wiring out of the block that came with the radio and inserted it into the ISO block of the car. The wire was thrown under the carpet, the tulip is connected to the CAMIN connector on the radio.
connection
This is what happened on the screen
inside
This is what it looks like from the outside
outside
outside2
The rear view camera automatically turns on when you engage reverse gear, and also turns off automatically. If music or navigation is turned on, it turns off, then, when the camera is turned off, it turns on accordingly. An unpleasant feature is that at night, when driving in a narrow space, you still need to look in the mirrors; the glowing radio screen from the camera on is blinding. I found a solution: first turn on the radio or music, while the music is running, forcefully turn off the screen with the button in the upper right corner (the radio has a function that switches to day or night brightness (there is almost no difference between them) or turns off the screen), turn on reverse - image with The cameras are not displayed and you can safely move along the mirrors. I don’t know yet how quickly the camera will get dirty in this location, but I think wiping the camera is not a big problem. But the camera is positioned exactly in the center of the car and the image is not shifted anywhere.
Installing a rear view camera
for Lada Granta, Kalina, Priora and Vesta
It's hard to imagine a modern car without a rear view camera. Not much help for people who are looking for how to install a rear view camera on. AvtoVAZ understands this, which is why it equips the “luxury” version of the Lada Vesta with such an accessory. The following describes how to install a rear view camera on a Granta liftback and connect it to the standard radio (MMC), but similar instructions are also suitable for other Lada cars.
How and where should it be installed
Later in the article we will look at how to install a rear view camera. There is more than enough space in the car to install a video camera, but we need the most advantageous position. The camera eye must have a good view, which is not limited to any parts of the machine. Any camera will reveal its full potential if it is installed in the most advantageous location.
In our case, such a place is a niche above the rear bumper of the car; the camera should be placed in its upper part above the license plate number of the car. What this gives is viewing angles, your car radio will only show the road and not parts of your car. But it must be positioned so that it is not too recessed, but also does not stick out.
True, there is a minus here - your camera is accessible to dirt and the hands of others. If you place it inside the cabin on the rear window, then half of the screen will be occupied by the trunk, viewing angles will decrease and the image quality will suffer to some extent due to the glass. But it will be clean and inaccessible to strangers.
So you personally will have to calculate all the pros and cons of the external and external location of the camera.
Reviews
| № | Positive |
| 1. | Vitaly, 41 years old: connected the camera to the standard radio, did not flash anything additional. In total, I spent half an hour. I bought a Chinese Viori – 264897PR. |
| 2. | Gennady, 33 years old: the picture when reversing is good, the distance is marked. In case of insufficient lighting, I used side mirrors for objectivity of data. |
| 3. | Sergey, 31 years old: I work as a taxi driver and spend a lot of time on the road. In order to deliver/pick up a client as quickly as possible, it is necessary to maneuver in the limited space of courtyard areas. The camera is an indispensable assistant. |
| 4. | Kirill, 39 years old: a friend recommended a Viori rear view camera - 264897PR. I installed it and have been using it for over a month, no complaints. |
| 5. | Maxim, 42 years old: received a gift from his son for his birthday, installed it on his own. The lighting is good and the viewing angle is sufficient. |
| Negative | |
| 1. | Victor, 38 years old: I didn’t like the image on the standard radio, so I bought an additional folding monitor and installed it on the dashboard. The quality is good, no graininess. |
| 2. | Dmitry, 29 years old: I bought a folding monitor along with a rear view camera, since the image on my original radio was poor. I've been using it for two months, no complaints. |
| 3. | Vasily, 27 years old: I bought a car with a built-in rear view camera. I didn’t like the image quality on the “native” screen. I bought a folding monitor at the store. |
Conclusion The standard screen displays the image from the rear view camera with a resolution of 800 x 600 pixels. Obviously, this is not a 1920 x 1080 HD format, but the picture is quite legible. Those wishing to improve output quality can additionally purchase a portable monitor for an additional fee.
Installing a rear view camera on a grant
If music or navigation is turned on, it turns off, then, when the camera is turned off, it turns on. An unpleasant feature is that at night, when driving in a narrow space, you still need to look in the mirrors; the glowing screen of the radio, from the turned on camera, is blinding. I found a solution: first turn on the radio or music, while the music is running, forcefully turn off the screen with the button in the upper right corner (the radio has a function that switches to day or night brightness (there is almost no difference between them) or turns off the screen), turn on reverse - image with The camera is not displayed and you can safely move along the mirrors. I don’t know yet how quickly the camera will get dirty in this location, but I think wiping the camera is not a big problem. But the camera is located exactly in the center of the car and the image is not shifted anywhere.