Installation of a rear view camera on the Lada Granta is carried out independently or with the help of a specialist. Video devices are not included as standard, so they will have to be purchased separately. When choosing a rear view camera for a Granta Liftback, you need to take into account not only the cost, but also the technical characteristics of the equipment.
Where and how to install
The video system installation procedure includes the following steps:
- Choosing a place to fix the monitor. If the owner does not want to display information on the radio, use a folded monitor installed in a random area. The head unit is mounted in the trunk.
- Preparing tools. To install the camera you will need screwdrivers with different heads, sockets with cables and standard adapters.
- Dismantling works. Before installing the camera on the Lada sedan, remove the door sills on the left side, fold the rear seats and remove the trunk trim.
- Wiring. Cables from the central part of the console to the trunk are pulled through the standard place of the radio, the lower part of the dashboard, sills and rear door pillars.
- Parking sensor fixation. You can install the camera on the spoiler; this is done by drilling a hole. The video sensor can also be installed on the license plate.
Settings
The standard multimedia system does not require firmware. It is enough to launch the rear video review function using a special program. If the car owner installed the view camera with his own hands, you will have to perform the following steps:
If the machine is under warranty, the installation of the video system should be entrusted to specialists.
1. Removed the trunk door trim. It is attached with new caps: first you need to pull out the cap, then take out the cap. Removed the plastic trim on the trunk door. 2. The cover has space for installing a camera. I cut a hole for the camera in this shape:
3. Mating connector for YAZAKI 7283–8853–30 (AX951) camera. My connector was already crimped with wires. Pass the 4 connector wires through the seal of the stock wiring harness. The wires are thick and difficult to thread through, but possible. I crimped the EL 2×02 M connector onto the camera wires that go inside. Pinout of the camera wires: red - camera power + black - camera power - yellow - video signal white - video signal - 4. The camera wire was wrapped with shaggy electrical tape, placed in holders, connected connector The connector was secured to the cover plate with hot glue.
5. Installed the cover in place 6. Crimped the mating connector EL 2×02 F. As a cable for the camera, I used a simple three-core cable with a cross-section of about 0.5 mm2, which I got from some equipment. The camera's negative power wire was connected to the thickest black wire in the trunk door harness. There will be 3 wires going to the MMC: power +, video signal, video signal -.
7. I wrapped the camera cable with shaggy electrical tape and pulled it along the standard harness in the trunk door on the left side, in a rubber corrugation and along the rear pillar in the trunk, tying it to the standard harness. Before doing this, I disassembled the trunk trim.
8. In parallel with the standard connector, I also installed the EL 1×03 M / EL 1×03 F connector. 9. Next, pull the cable to the MMC along the standard harness. At the rear left arch, the same video cable from the trailer connector is connected to it (I have a camera installed on the trailer), as well as a trailer connection signal wire. 10. By tying the cable to the standard harness, I pulled it along the left side to the rear passenger’s feet. Then under the feet of the rear passengers to the starboard side. Then along the right threshold to the A-pillar. It went up the rack behind the glove compartment along with the antenna cable. In a place where there was no standard harness, I secured the cables with black tape, in the factory style:
11. Behind the glove compartment, where the cables come out of the rack, I installed the EL 3×03 M / EL 3×03 F connector. 12. Then, together with the antenna cables, placing them in their own holders, I brought the cables into the space under the MMC behind the climate control unit.
Connection: 1. According to information from the Internet, the power supply for the standard camera is +6V. I took a car phone charger, which is a +12V to +5V converter. I disassembled the case, took out the board, soldered three wires to it and crimped it with heat shrink.
2. Because I have two cameras, so I need a device that switches cameras. I assembled a relay circuit.
The device automatically switches video input and supplies power to the trailer camera when the trailer plug is connected. And also, by pressing a button, it forcibly turns on the rear view camera on the car. There are 4 connectors on the board: Connector X3 - video cables from the cameras that I connected earlier. Connector X4 is a voltage converter +12V to +5V. Connector X1—connection to the MMC harness. Connector X2—connection of the rear view camera power button. 3. Connect to MMS. In the MMC harness, cut the green wire for the reverse signal. Both ends will go to the switch. We connect to the orange ACC wire and the black minus wire. Insert the crimped contacts into the blue MiniISO MMC block: 16 - video input -, 19 - video input signal. I bought contacts in China a long time ago. We form a harness of six wires.
4. Connecting the button. I had the button with the camera symbol in stock, but with a green backlight. I bought a heated rear window button with white backlight 8450100638 and changed the button. You can order a button with the desired symbol here. We form a harness of three wires from connector X2 of the switch to the button. Block on the button: 1 and 2 - contacts; A, C - minus; B - backlight; D - indicator. I took the minus and the backlight from the adjacent heated rear window button. 5. In MMC you need to activate the video input. This is done in the NewMenu settings.
I secured the switch and converter boards under the MMC.
Result - I installed a standard camera: advantages (compared to Chinese ones) - standard appearance and quality, wide viewing angle; minus - price (3800 rubles). But I didn’t regret it, I’ve suffered through it with shitty Chinese cameras before. — Made the connection for the trailer camera. It helps a lot, especially when with an awning. — I forced the camera to turn on. You can control the load and trailer. — Now I see the tow bar ball, I won’t poke the bumper into the trailer anymore.
Part 1. Preparation. We read the blogs of other grants and understand that we need contacts for MMS. The blue connector is already available on the luxes, so feel free to buy a connector with approximately suitable contacts. We experimentally established that the contacts of the MF-2*01F connector (numbers may be different) fit perfectly - the contacts snap into place inside the block and the electrical contact also seems to be good. This connector is also used in computer power supplies. Link to our local store. You can also buy an RCA connector (ala tulip) to connect the video output of the camera, or you can simply solder it. A gas soldering iron, which I also bought from the Chinese, helped me with this.
Part 2. Buying a camera. All grant makers probably already know about this camera. Link. I thought it was plastic. It turned out to be metal.
Part 3. MMS. For me, the most difficult part of the entire installation process was removing the horseshoe from the panel. A good person under the nickname evgd1975 helped me with this task, who recorded a video:
Part 4. Saber! Still, it’s a cool name they came up with for this plastic thing. And so, we need to remove it. To do this: 1. Remove the additional casing. stop signal 2. Unscrew the self-tapping screws from the side casings of the trunk lid. 3. Unscrew the fastenings of the shelf ropes. 4. Remove the side casings (only the pistons remain) 5. Unscrew the 2 screws of the trunk lid casing and the 2 bolts on the “handles” of the trunk closure. 6. Remove the casing and see 6 “8” nuts that hold the saber. 7. Unscrew 6 nuts. We tuck the saber into our bosom and stomp home (or to the garage) with joyful long steps. 8. We estimate where the camera should be located. 9. Take a 6mm drill, insert it into a screwdriver, drill, or hammer drill (which is what I had to use). We drill, insert the camera, screw it on the back side.
Part 5. Wiring. They screwed the saber back. The wire was placed inside the trunk lid next to other wires. There I had to extend the power cord. I connected the mass to the rear wiper motor mount. We run the remaining wires down to the hinges of the trunk lid. We pass it through the corrugation under the roof, then we lead the power wire to the taillight, and we lead the video output wire to the MMC. Another difficult task seemed to me to be wiring the cables into this corrugation under the roof. To do this, I had to remove the seat belt mount on the roof (1 screw inside), two roof rivets, and move the roof trim a little. Next, I used a rigid wire to pull out the camera wires. It turned out to be not so difficult.
Then the wire goes above the roof trim near the doors, I pushed it there simply by removing the door seals. I also went down to the glove compartment, after removing it, I ran the wire to the MMC. We connect the camera's power wire to the green wire in the taillight - this is the power supply for the reversing lamp.
Rear view camera like mine, with a bumper mount: goo.gl/9e4XJa Rear view camera instead of the trunk lock cylinder: goo.gl/61gRBv Rear view mirror with screen: goo.gl/2fJ6j4 Folding screen: goo.gl/YSi7se Radio tape recorder : goo.gl/aSoKbC Shortened version of the radio without cutting the panel: goo.gl/9fyYnq Cheaper radio: goo.gl/dh99EZ Installing the radio: goo.gl/Cvs4Bt Installing parking sensors: goo.gl/ITQdcr
My VKontakte group: vk.com/club54215650 My other projects: new-granta.ru - a site with text versions of my videos and a lot of useful information. youtube.com/user/mithbuster73 - tests of Chinese parcels and online stores. Me, on DRIVE2.RU: drive2.ru/cars/lada/granta/granta/epidem.
Music: yshpvl x rnkrn† - you miss you too
I authorize the use of my videos only with a text and URL link to my channel. Comment, subscribe, ask questions and be careful on the road!
A rear view camera is not standardly installed on the Lada Granta, but the manufacturer has made the installation procedure for this option as convenient, simple and cheap as possible.
There is an opinion that a rear view camera is necessary exclusively for beginners who do not yet know how to properly park in reverse. In fact, even experienced drivers cause collisions when reversing, simply because there are areas behind them that are not visible through any car mirror.
Today, installing a rear view camera is quite simple, and the price of the equipment and the installation itself will pleasantly surprise you. Moreover, you can save on work by installing the camera yourself.
Equipment of Lada Vesta cars
The modern Russian sedan Lada Vesta has several trim levels: Luxe, Comfort, Classic. In addition, the standard set of equipment can be supplemented with option packages. The Classic package is equipped with the Start package, the Comfort version has an Image and Multimedia package, and the Luxury version has only Multimedia. The minimum configuration of the car is already equipped with all major security systems. How much the 2022 Lada Vesta costs in one configuration or another can be found on the official website page.
Classic
- airbags for driver and front passenger;
- “child lock” on the rear doors;
- automatic door locking while the car is moving;
- ISOFIX child seat mount;
- immobilizer;
- signaling;
- 3 headrests for second row passengers;
- ERA-GLONASS system;
- ABS is a system that limits brake locking;
- ESC is a system that provides directional stability;
- EBD – braking force distribution;
- HSA – hill start assist;
- TCS – system that prevents wheel slip;
- protection of space under the hood;
- folding backrest of the rear sofa in a ratio of 60/40;
- availability of 12V socket;
- gear shift prompt;
- on-board computer;
- electric power steering;
- adjustable steering column height and reach;
- the presence of seat belt height adjustment;
- central locking with remote control;
- folding key;
- electric drive of front door windows;
- heated first row seats;
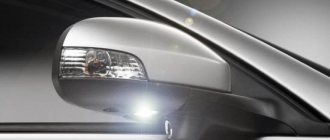
- heated and electrically adjustable rear view mirrors;
- additional direction indicators on the exterior mirrors;
- full-size 15” spare wheel on a steel rim;
- 15” steel wheels with decorative caps;
Today prices for Lada Vesta in this configuration with a basic engine and manual transmission start at 529 thousand rubles.
Classic/Start
Only Classic vehicles are equipped with the Start package. It includes:
- air conditioner;
- glove box with cooling function.
In this configuration, a Lada Vesta with a basic engine and manual transmission will cost 25 thousand more than the base, and with a robotic gearbox - 579,000 rubles.
Comfort
Lada Vesta Comfort The “comfort” version has a wide range of options in addition to those available in the basic configuration:
- driver's armrest with adjustable tilt;
- driver and passenger sun visor with individual mirror;
- case for glasses;
- driver's seat with adjustable height and lumbar support;
- parking sensors on the rear bumper;
- cooled glove compartment;
- audio system with monochrome display, four speakers, USB, Hands free, SD card slot, radio;
- air conditioner;
- coating of door handles and exterior rear-view mirrors in body color.
The cost of a car with manual transmission and a 106-horsepower powertrain is 582,000 rubles. A Lada Vesta automatic in the same configuration will cost 25 thousand more, and the presence of a “robot” paired with a top-end unit will cost 50 thousand more – 632,000 rubles.
Comfort/Image
This package complements the car’s equipment with several options:
- electric rear door windows;
- wheels on alloy wheels 16";
- heated glass;
- temporary spare wheel on a stamped disk.
The price of Vesta Lada with this package, manual transmission and base engine is 605,000 rubles. Equipping with a robotic gearbox increases the cost of the car by 25 thousand, and the presence of a top-end engine paired with a “robot” – by 50 thousand.
Comfort/Multimedia
The name of the package speaks for itself - first of all, it is the presence of a modern multimedia system, including:
- car radio with radio and six speakers;
- USB and AUX connectors, memory card slot;
- Hands free function;
- navigation system with 7-inch touchscreen;
- multifunction steering wheel with control buttons;
- Rear View Camera.
In addition, the package includes cruise control, which can also be controlled using buttons on the steering wheel.
Luxe package The maximum package includes the installation of a full set of options and additional equipment, some of which are included in the Image package:
- side airbags;
- fog lights;
- illumination of the front door sills when they are opened;
- electric rear door windows;
- rain and light sensors;
- alloy wheels on 16" wheels;
- spare wheel on stamped 15" wheels for temporary use;
- glossy radiator grille;
- climate control.
You can purchase a luxury version of the car for 645,000 rubles. The version with an automatic “robot” will cost 670,000 rubles, and when paired with a more powerful unit – 695,000 rubles.
Installing a rear view camera
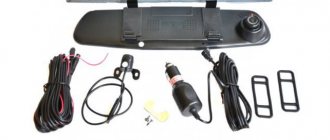
First of all, we collect all the necessary components:
- Rear view camera (Chinese stores offer a wide range, costing from 500 rubles and above);
- mini ISO connector (with blue block and tulip);
- Several meters of wire.
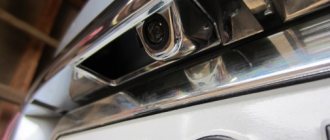
Next, you need to select a location to install the camera. Much will depend on what type of mount the camera itself will have, but on a Grant, the camera is most often installed in the bumper (above the license plate), if it is an old-style sedan, or in the “saber” (also above the license plate), if it is a liftback, 2022 wagon, hatchback or sedan. In all cases, the fastening scheme is identical.
Let's consider installing the camera in the trim above the license plate (saber), since in this case the camera is located quite high, it gets dirty less, gives a better overview, and the installation process is as simple as possible, because you do not need to remove the rear bumper.
1) Remove the trunk trim;
2) Remove the “saber”, it is held on by 6 M8 screws;
3) Mark the most favorable place for the camera and drill a hole;
4) Place the camera in place and secure it with a lock nut;
5) We first lay the cable from the camera to the MMC through the standard corrugation of the trunk door (the extra wire fits there with great difficulty), and then we lead it through the cabin.
There are options here, since the cable can be routed along the floor or over the doors. In the first case, it can be passed past the instrument panel, in the second case through the right front pillar. As a result, the wires should reach the back of the multimedia system. But before connecting, you will need to dismantle the cladding, and then the MMC itself, in order to make connecting the cable as easy as possible.
New AvtoVAZ
The new Lada Vesta model in a “universal” body has long been discussed in media sources and on automotive Internet portals. Photos of the Lada Vesta in its new guise presented on websites have caused heated discussions among car enthusiasts. Photos of the interior are very similar to the current interior of the sedan. The similarity in size and appearance is largely due to the fact that the station wagon will be assembled at the same plant in Izhevsk where the sedan is currently being assembled.
Most likely, the new Lada Vesta, like the sedan, will be equipped with three configuration options. What a real station wagon will look like will become known in the near future. The start of sales is scheduled for this fall.
Three years ago, choosing Vesta was a piece of cake: one body type, one engine... And now? Engine 1.6 or 1.8? Sedan or station wagon? Cross or with normal clearance? AMT or "handle"?
Connection instructions
To connect the camera to the standard radio, use the connector located on the rear wall of the equipment. Before purchasing an additional device, you should make sure that the installed player supports rear view camera switching. To power the camera, a cable marked Reverse is used, which is connected to the reverse lamp circuit. The RCA plug is installed into the standard video input jack located on the rear of the radio.
Connection to the Pioneer radio has several differences:
- The yellow plug of the camera is installed in the socket marked RC IN;
- The cable harness of the head unit contains a cord with purple-white insulation, which is responsible for providing a signal for activated reverse gear.
It is recommended to lay the commutation lines after installing the camera, since during the installation process unforeseen difficulties may arise that require the use of a different layout solution.
Installation process
Rear view cameras for the radio made by third-party manufacturers have a shape that does not match the license plate light used. To simplify installation, it is possible to trim the housing and then install the product between the backlight lamps. This design improves the viewing area of the lens and simplifies the calculation of the trajectory when maneuvering in reverse. Installation of the device is carried out after installing a 2 DIN standard radio with a liquid crystal screen.
An approximate algorithm for installing a camera on the rear of a car:
- Cut a rectangular hole in the plastic trim or metal casing located above the license plate mounting location on the trunk lid. Metal edges are treated with an anti-corrosion compound. It is recommended to select the installation point in such a way as to avoid trimming the body panel, since it is impossible to provide reliable protection against corrosion in artisanal conditions.
- To trim, you need to dismantle the plastic cover with the backlight lamps, which is secured with clips or screws. The installation method depends on the car model.
- The window is marked by drilling 4 holes with a diameter of 2-3 mm, then cutting out the opening using a file or jigsaw. The edges are smoothed with a file. A test installation of the camera is carried out to check the viewing angle of the selected layout solution.
- Mount the camera body into the mounting socket and secure the parts with 2-component epoxy resin adhesive. It is recommended to first verify that the lens is positioned correctly by connecting the equipment to the radio. Since the epoxy glue hardens within 3-5 minutes, the user has time to adjust the position of the device.
After installing the rear view camera, they begin laying patch cables that are routed through the car interior to the head acoustic unit. The type of connection between the cord and the player depends on the model and manufacturer. Pioneer radios are equipped with a special plug designed to connect a camera. Users confuse it with the yellow “tulip”, which is designed for switching equipment operating in manual control mode.
Connection
The correct connection diagram for the rear view camera ensures that the signal starts broadcasting only after reverse gear is engaged. For switching, a switch located in the speed selection mechanism is used. On some cars there is no such element, so a connection is used to the sensor for turning on the reversing lights or to the lamp sockets located in the rear lamps. The commutation cable is carefully inserted into the plug and held in place by the factory spring contact.
The instructions included with the radios contain recommendations on how to properly connect and adjust the camera. If the user experiences difficulties when switching or installing additional equipment, it is recommended to contact a service center.
Settings
Adjustment of operating parameters is carried out through menu sections. The user activates signal transmission and then adjusts the resolution of the picture on the display. After this, a balance of brightness and contrast is sought under different ambient lighting conditions. On Pioneer head units, a warning message appears on the screen informing the driver of the possibility of mirroring. The text is displayed when the camera is turned off; To disable it, you will need to adjust the polarity of the connected reverse signal cable.
Used when installing several parking cameras, a 2-position toggle switch allows you to display images from the front and rear devices. When the switch is set to receive a signal from the rear camera, the broadcast begins after moving the gearbox lever to the reverse position. To view the situation from the front of the car, you will need to move the lever to a different position. If you try to engage reverse gear, the image will not change.
Comparison by characteristics
Lada Vesta enters the market as a sedan. The Lada Vesta Cross modification has a station wagon body and increased ground clearance (203 mm versus 178 mm). Equipped with gasoline engines with a capacity of 106 and 122 hp. With. volume 1.6 and 1.8 liters. Two types of transmission: 5-speed manual and 5-speed robotic automatic transmission provide acceleration in 11.2 and 13.3 seconds to 100 km/h. Maximum speed is 186 km/h. For AI-92 gasoline, a 55-liter tank is provided.
In the Standard standard package, the car owner receives:
- front airbags (with passenger side deactivation);
- blocking the rear doors from opening by children while driving;
- emergency warning system ERA-GLONASS;
- ESD, ABS, EBD, BAS (braking assist system), ESC (electronic stability control system), TCS (traction control system), HSA (hill start assist system);
- height and reach adjustable steering column.
Car appearance
The design of LADA Vesta compares favorably with all previous AvtoVAZ models. The future appearance of the Lada was shaped by the British designer, author of popular models from the Mercedes-Benz and Volvo brands, Stephen Mattin. The modern, recognizable appearance of LADA Vesta is not inferior to the appearance of its competitors. The choice is determined only by the taste of the buyer.
Interior of competitors
In the basic configuration, the interior decoration of all presented cars differs little from each other. These include fabric upholstery for seats and armrests, an on-board computer showing air temperature, engine speed and mileage, a 12 V socket in the front, a case for glasses, door lights and front power windows.
Specifications
The weakest engine in the line is the Skoda Rapid - 75 hp. With. This is a good option for a small car for getting around the city. The Volkswagen Polo engine with 1.6 liter gasoline is one of the best in the database. Everyone has the upper limit except Renault Logan, with its maximum 113 hp. s., approximately at the same level - 122-125 l. With. At the same time, fuel consumption is the same, which indicates the quality of the power plants used.
Manufacturers recommend filling the tank with gasoline of a grade no lower than AI-92.
The Volkswagen Polo has the greatest variety of gearboxes: 2 manual and 2 automatic options. LADA and the Korean Kia Rio and Hyundai Solaris are in the middle of this rating, because An alternative to one manual transmission option is one automatic transmission.
The combination of engine and transmission makes the Skoda Rapid and Volkswagen Polo the most dynamic of the list, accelerating to 100 km/h in less than 10 seconds.
The vehicles are equipped with front disc and rear drum brakes. Luxury models can have rear disc brakes.
The Russian sedan has more ground clearance - almost 180 mm versus 160 mm for Korean cars and 155 mm for the French model. The Skoda Rapid has almost 8 mm less ground clearance, while the Polo has 150 mm.
Review and comparison of technical characteristics allows us to talk about approximate equality of competitors.
Comfort and safety while driving
In terms of the number of airbags in the database, Renault Logan is the worst - it does not have them. Other manufacturers have provided protection for the driver and front seat passenger in a frontal collision.
Renault designers considered that auxiliary active and passive safety systems were not needed. In Polo they decided to install ABS enough, and in Rapid - ESC. Korean cars, unlike European ones, have more functions, but Vesta with ABS, EBD, BAS, ESC, TCS and HSA is superior to all car brands considered.
The ERA-GLONASS emergency response system is installed on all vehicles reviewed, except Logan and Rio.
In terms of comfort, Renault loses to other brands. Seat and steering column adjustments are available in the base for all except the French model. The Škoda has the most spacious trunk - 530 liters, with the second row seats folded - 1470 liters. Customer reviews indicate that the level of convenience and ergonomics of the cars in question meet modern needs and demands.
The Lada Vesta Luxe version has a rain sensor: the speed of the wiper blades automatically adjusts to the amount of precipitation falling on the windshield. When the intensity of rain or snow constantly changes while driving, the ability to not be distracted by manually adjusting the wipers is of great importance.
Car prices and basic equipment
| Model | Cost, rub.) |
| Lada Vesta | from 575000 |
| Kia Rio | from 765000 |
| Renault Logan | from 554000 |
| Skoda Rapid | from 660000 |
| Hyundai Solaris | from 711000 |
| Volkswagen Polo | from 700000 |
Connecting a rear view camera
For Grant, Kalina and Priora cars, the rear view camera connection diagram is as follows:
Explanation. In the trunk:
- Black wire to ground;
- We connect the red wire to the +12V green reversing light.
We connect the miniISO connector to the radio, but we must first connect our “tulip” to it:
- Ground (outer tulip contact) of the connector to pin 16;
- The positive (inner pin) of the connector to pin 19.
If your car was purchased with a standard MMC, then no additional actions will be required at this stage. But for those who independently equipped their car with a multimedia system (it is not available in the “Standard” and “Norma” trim levels), it is necessary to additionally supply +12V from reverse to pin No. 1 of connector A1 of the radio.
Salon of the basic version
Now let's go to the salon. It’s quite good here when compared with previous AvtoVAZ models. A cabin filter is immediately installed - this will prevent the interior from dust from the street.
The updated steering wheel is immediately noticeable. The instrument panel looks high quality and readable. It contains: tachometer, speedometer and fuel quantity indicator. The seats are quite comfortable and made of high quality material. The plastic no longer looks cheap, the front panel does not shake. Everything is done efficiently and soundly.
But the most surprising thing is the space in the back. The rear passenger can sit there quietly without feeling discomfort. This is very good, considering that the same Priora did not have much space in the back and had to somehow huddle. Here we see that the basic version has L-shaped headrests.
New Lada: What is clearance and how to determine it in Lada Vesta?
In the basic version, the car will be equipped with two airbags - a driver's and a switchable passenger's. But the car cannot boast of a standard music player, only audio preparation.
Also included in this configuration is the function of automatically locking the doors when driving. LADA Vesta in its basic configuration boasts electric windows for the front doors. The rear passengers still have the usual “oars”. The car will also be equipped with a cooled glove box and air conditioning as standard. You can see all this in the photo of the basic configuration of the Lada Vesta.
How to connect
After the camera is installed on the Lada Liftback, you need to make a connection. This is done like this:
- the black cable in the trunk is connected to ground;
- the red wire is connected to the reversing light;
- a standard ISO connector is connected to the radio (a “tulip” is pre-installed on the connector);
- The outer contact of the connector is connected to pin 16, the inner one to terminal 19.
If the car has a built-in multimedia system, no auxiliary work needs to be performed at the connection stage. If the MMC is not included in the package, you need to additionally connect the wire from reverse to the first contact of the car radio connector.
Setting up MMS Lada for rear view camera
Standard MMC does not require additional firmware for the reverse camera. It is enough to activate this function using a special CAM on/off program.
1) We write the program to a flash drive using a computer and connect it to the MMC; 2) On the radio screen, hold down the “Settings” button, then click “Exit” and “Desktop”. After this you are taken to the desktop of the WinCE operating system; 3) Go to the “My Device” folder, then “USB disk” and go to the folder with the program; 4) Launch the CamOnOff program file, allow the camera to be used by clicking on the corresponding button; 5) Close the program and desktop;
More details about the process in the video:
6) Engage reverse gear and check the operation of the rear view camera.
Settings
The standard multimedia system does not require firmware. It is enough to launch the rear video review function using a special program. If the car owner installed the view camera with his own hands, you will have to perform the following steps:
- The CAM on/off program is downloaded to a USB flash drive by connecting to a computer. The drive is inserted into the USB connector of the radio.
- On the car radio screen, press the “Settings” button, and then go to the desktop. This provides the user with access to the WinCE operating system.
- Going to the “My devices” folder, find the “USB drive” item. By pressing the select button you go to the folder with the program.
- Run the installation file, allowing the use of the camera. The settings menu is closed.
- Engage reverse gear and check that the video system is installed correctly. Using the appropriate controls, adjust the required parameters.
If the machine is under warranty, the installation of the video system should be entrusted to specialists.
https://xn--80aal0a.xn--80asehdb/do-my-self/tuning/tuning-lada-granta/749-ustanovka-kamery-zadnego-vida-na-lada-granta-kalina-priora.html https ://lada-kalina2.ru/tuning/podkluchaem-kameru-zadnego-vida-k-shtatnomu-displeu-mms https://new-granta.ru/kamera-zadnego-vida/ https://www.lkforum. ru/blog.php?b=7922 https://autotuning.expert/parktronik/ustanovka-kamery-zadnego-vida-na-lada-granta.html
Nuances of multimedia firmware Grants (2190)
It is quite easy to carry out the firmware itself when installing the mms 2190 firmware. To do this, it will be necessary to use an SD card.
Among the common flaws that occur after the dashboard firmware is installed, even if it is the latest version, is the Lada logo freezing on the display of the head unit.
This moment can be provoked by the following factors:
- failure to comply with required formatting principles;
- the presence of an outdated version of the SD card that differs from “SDHC”.
After successfully formatting the card and selecting software (for example, “New Menu V7.391 Nitro”), you will need to acquire the latest firmware and unpack the product onto a previously prepared SD media.
Regarding the “Firm Ware” folder, note: the files located in it will need to be redirected to the root directory of the card itself. Upon completion of the copying process, disconnect the flash card from the PC, not forgetting about the safe removal technique.
Now we confidently insert the SD card with the prepared files present on it directly into the MMC. Then turn on the head unit. We wait for the full download to complete and by long pressing the volume button, we reboot.
The act of rebooting is characterized by four stages, the display of which is implemented in 4 lines of process status. After filling out these lines, the device starts in the usual mode, as evidenced by the appearance of the corresponding original menu. After a few seconds, the device transitions to the altmenu.
The USB splitter “DNS ATH-08” has acquired a significant advantage – multi-polarity. The GPS receiver and other USB modules connected to the “head” are combined with the altmenu, but become inactive.
After the MMS 2190 firmware is completed on a Lada Granta car, its display displays a new type of desktop, namely “Wince”. The 4 files previously mentioned and copied into the depths of the root directory of the map are “responsible” for the presence of the interface on the desktop.
The subsequent manipulation is associated with the need to configure new software in the standard multimedia device of the Lada Granta car. For these purposes, click the “Start” button, after which we follow the following route: “Start\Setting\Control Panel”. Sometimes owners complain about the slowness of the “Control Panel” opening process, but this phenomenon disappears after rebooting the MMC in forced mode.
When the control panel is open, in its interface click on the “Stylus/Calibration” symbol. With this action, the user of the new software gets the opportunity to calibrate the touch screen for response accuracy.
Upon completion of the simple calibration procedure, a timer appears; you should not wait for the completion of the counting process. Feel free to click on the screen.
Now the long-awaited time has come for the forced reboot process. Long and holding pressure on the volume key (10 seconds or more) allows you to implement this process in MMC. At this moment, the removable media, which contains the new software, continues to reside in the connector of the head unit of the Lada Granta car.
Having completed the reboot action, the device will first display the standard menu, and then, similar to the preparation procedure, the altmenu. If you need to return to the “native” menu, you should hold down the “Native” key.
The process of rebooting the device, after the dashboard firmware has been flashed, requires its connection via a USB splitter of the specified model with the Globalsat BU-353S4 GPS wave receiver. If there is none, then upon completion of the process itself the “head” will display the normal menu mode on the display.
Such common settings as sound, as well as audio or video, are present in any multimedia device in the domestic Lada Granta car.
“NewMenu V7.391Nitro” needs a manual way to install the indicated options, which will require:
- log in to the “soft/radio” folder;
- resort to activating the “start.exe” file.
The procedure will agree to associate present files with the extensions “exe” and “ahk”. This manipulation is quite important and allows you to achieve stable functionality of the MMC, which is used to flash the dashboard firmware.
Video
Another option for installing a rear view camera in the Lada Granta bumper, with wiring on the floor and through the instrument panel:
Did you find the article useful and interesting? Be sure to share it on social networks and join our groups to be the first to receive even more information.
Other useful articles on Grant are already on our website in a special section.
The article uses photos from the Lada Granta Liftback White Cloud logbook.
Whether or not to install a reversing camera is up to each driver to decide for himself. In this article we will tell you how to connect a rear view camera, and it’s up to you to decide whether you need it or not. Connecting a rear view camera requires some knowledge and skills, so not everyone can do it themselves. But if you still decide that installing a standard rear view camera is necessary for you, then use the tips from this article. With a small set of tools and basic removal skills, you can easily figure out how to connect a rear view camera.
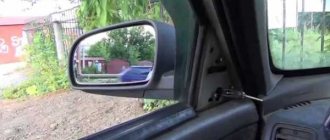
Side mirrors, and even your head turned 180°, will not give the desired effect; you may still not notice some little things, or maybe not little things. And then a showdown with the owner of the scratched car may begin, and this can cost you tens of times more than connecting a reverse camera. Later in the article we will look at which camera you can choose, whether a Chinese manufacturer is right for you, or whether you prefer something more solid. We will also discuss whether it is possible to install a rear view camera yourself, and how to properly connect the device you have chosen.
How to choose a good camera. Review of prices from different manufacturers
| № | Article/name | Price, rub.) |
| 1. | Kalina, Kalina-2, Granta (liftback), Vesta, Priora |
*prices are current as of September 24, 2018.
Technical characteristics of the rear camera of the Grant Liftback:
- Matrix type: CCD (photosensitive);
- Viewing angle: 170°;
- Resolution 800 x 600 pixels;
- Zoom level: 0.01 Lux;
- Aspect ratio: 4:3;
- Gradation: parking lines on the screen (0.5 / 1.0 / 1.5 meters);
- Moisture and dust protection: present, level IP 67;
- Brightness: 300;
- Recommended voltage for correct operation: 12V;
- Operating temperature range: - 25° - + 35°;
- Connection type: ISO connector, from the back of a 2-DIMM radio or a separate folding monitor.
Equipment Comfort Lada Vesta
The Comfort package is midway between the basic Classic and top-end Luxury. It already includes a lot of things you need for a comfortable ride: sun visors with a mirror, front seats with bolsters, a driver’s seat with height adjustment and lumbar support, side mirrors with electric drive and heating. Also, the Comfort package of the 2022 Lada Vesta already includes simple sound parking sensors and a 4.3-inch audio system with 4 speakers and support for USB, AUX, Bluetooth, Hands free.
From the exterior, it is worth noting the mirrors and door handles painted in body color.
The price of the Comfort configuration of the Lada Vesta is 582 thousand rubles with “mechanics” and 607 thousand rubles with “robot”.
In the Comfort package, it is possible to purchase the Optima package, which will include a heated windshield and 15-inch alloy wheels. The price of the package is 17 thousand rubles.
From May 9, 2022, it became possible to purchase an additional package of Multimedia options worth 7 thousand rubles in this configuration. The package includes a multimedia system, multifunction steering wheel and cruise control.
Technical characteristics of the Comfort package
In terms of technical characteristics, everything is similar to the Classic configuration - for now the only engine is 1.6 liters. and 106 hp with mechanics or with a robotic gearbox.
How and where should it be installed
Later in the article we will look at how to install a rear view camera. There is more than enough space in the car to install a video camera, but we need the most advantageous position. The camera eye must have a good view, which is not limited to any parts of the machine. Any camera will reveal its full potential if it is installed in the most advantageous location.
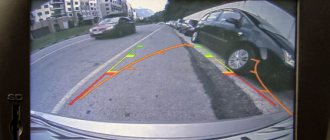
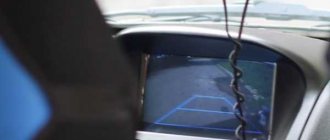
In our case, such a place is a niche above the rear bumper of the car; the camera should be placed in its upper part above the license plate number of the car. What this gives is viewing angles, your car radio will only show the road and not parts of your car. But it must be positioned so that it is not too recessed, but also does not stick out.
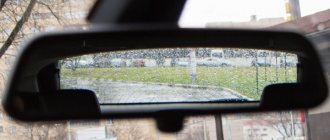
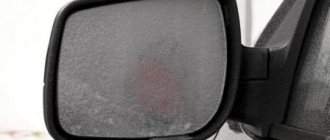
True, there is a minus here - your camera is accessible to dirt and the hands of others. If you place it inside the cabin on the rear window, then half of the screen will be occupied by the trunk, viewing angles will decrease and the image quality will suffer to some extent due to the glass. But it will be clean and inaccessible to strangers.
So you personally will have to calculate all the pros and cons of the external and external location of the camera.
The procedure and diagram for connecting the rear view camera
And now in more detail about how to install and connect a rear view camera to a Pioneer radio. Why go to this model, because it is the most common. If we take into account the unsafety of our video camera, and the best view, then its place should still be above the number, outside.
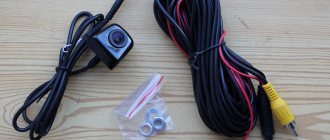
It should be installed closer to the edge to improve visibility, but not so that it is exposed. The installation of the camera itself is not complicated. The camera has the bracket necessary for installation; you only need to drill a couple of holes for the mounting bolts and one hole for the cable.
The rear view camera is not included in the standard equipment of the Lada Granta Liftback; owners connect the equipment themselves. You can purchase the accessory in a car store, car market, or on the Internet. Wide range, gradation by price categories, technical characteristics.
LADA Vesta 1.6 MT >(106 hp)
Add to comparison Compare: 0
- 1.6 MT Standard RUR 606,900
- 1.6 MT Classic RUB 626,900
- 1.6 AMT Classic Start RUB 676,900
- 1.6 MT Classic Start RUR 651,900
- 1.6 MT CNG Classic Start RUR 821,900
- 1.6 AMT Comfort RUR 704,900
- 1.6 MT Comfort RUR 679,900
- 1.6 MT CNG Comfort RUR 849,900
- 1.6 MT Comfort Image RUR 702,900
- 1.6 AMT Comfort Multimedia RUR 732,900
- 1.6 MT Comfort Multimedia RUR 707,900
- 1.6 MT Luxe RUB 742,900
- 1.6 MT CNG Luxe RUB 912,900
- 1.6 AMT Luxe Multimedia RUR 795,900
- 1.6 MT Luxe Multimedia RUB 770,900
- 1.6 MT CNG Luxe Multimedia RUB 940,900
- 1.6 MT Luxe Prestige RUB 788,900
- 1.8 MT Comfort RUR 714,900
- 1.8 AMT Comfort Image RUR 762,900
- 1.8 MT Comfort Image RUR 737,900
- 1.8 MT Luxe RUB 777,900
- 1.8 AMT Luxe Multimedia RUR 830,900
- 1.8 MT Luxe Multimedia RUB 805,900
- 1.8 AMT Exclusive RUR 881,400
- 1.8 MT Exclusive RUR 856,400
- 1.8 AMT Luxe Prestige RUR 848,900
- 1.8 MT Luxe Prestige RUB 823,900
- Equipment and options
- Specifications
– basic option – additional option
Price list
"Charged" car
Using the battery symbol, the Quto.ru website helps site visitors assess the degree of “charge” of the car. Its charge is determined by the presence of key options in the database
, selected by our experts in four categories:
Safety
– the presence of airbags, modern optics and active safety systems (ABS, ESP, etc.).
Comfort
– the presence in the car of instruments and devices that increase the comfort of the driver and passengers during operation (climate systems, heated seats and steering wheel, various electric drives, etc.).
How to choose a good camera. Review of prices from different manufacturers
| № | Article/name | Price, rub.) |
| 1. | Kalina, Kalina-2, Granta (liftback), Vesta, Priora |
*prices are current as of September 24, 2018.
Technical characteristics of the rear camera of the Grant Liftback:
The most popular gadgets are in the price category up to 1,500 rubles. Picture display quality, focusing, zoom level are at an average level. Of course, the image is grainy, pixels are visible, and the viewing angle is only 170 degrees.
The rear view camera on the Granta Liftback in the range of up to 3,000 rubles has improved characteristics, image output quality, and a viewing angle of 180°. Despite decent parameters, gadgets in this price category are beyond the means of most car owners.
Procedure for installing the rear camera on the Granta liftback
- We place the car on a flat area.
- Remove the rear door trim.
- Remove the driver's and passenger's door sills on the left side.
- We lay a block with wires from the center console to the rear door lid.
- We dismantle the saber - spoiler.
- We install the mount.
- We connect the wiring to the 2-DIMM radio.
The order may differ from the above. In the event that the owner does not want to display the image on the standard radio. In this case, use a folding monitor. The location of fixation is arbitrary.
Preparatory stage
- isolation;
- screwdrivers with different tips;
- plastic spatula for plastic;
- blocks with wires;
- adapter - ISO type connector.
Dismantling works
- remove the thresholds from the left driver and passenger doors;
- fold the back row of seats;
- remove the upper trim of the interior and luggage compartment;
- Unscrew the fasteners, remove the spoiler from the trunk lid.
Laying wires, power supply from the circuit
We lay the wiring from the central channel of the console to the trunk lid along the following route:
- location for fixing the standard radio,
- the lower part of the dashboard on the left side under the steering wheel,
- thresholds,
- rear door pillar,
- luggage compartment lid.
Connection to the power circuit from the positive cable of the reverse gear lamp. In the Lada Granta Liftback it is green and located in the luggage compartment on the right side. Powering is done by soldering; twisting is also permissible, provided that the connection point is well insulated.
Classic package
| Option | 1.6l, 106 hp with manual transmission | 1.6l, 106 hp with AMT |
| Safety | ||
| Driver airbag | ||
| Front passenger airbag with deactivation function | — | |
| Rear seat headrests 3 pcs. | ||
| ISOFIX child seat anchors | ||
| Locking the rear doors against opening by children | ||
| Automatic door locking when driving | ||
| Automatic door unlocking and hazard warning lights in the event of a collision | ||
| Immobilizer | ||
| Security alarm | ||
| Daytime Running Lights | ||
| Emergency warning system ERA-GLONASS | ||
| Anti-lock brake system with brake assist (ABS BAS) | ||
| Electronic Brake Force Distribution (EBD) | ||
| Electronic Stability Control (ESC) | ||
| Traction Control System (TCS) | ||
| Hill Start Assist (HSA) | ||
| Engine and engine compartment protection | ||
| Interior | ||
| On-board computer | ||
| 60/40 split folding rear seat | ||
| 12V socket | ||
| Gear shift prompt in the instrument cluster | — | |
| Comfort | ||
| Electric power steering | ||
| Height and reach adjustable steering column | ||
| Adjusting the height of the front seat belts | ||
| Cabin air filter | ||
| Light window tinting | ||
| Folding key | ||
| Central locking with remote control | ||
| Power windows for front doors | ||
| Air conditioner | — | |
| Cooled glove box | — | |
| Audio preparation | ||
| Exterior | ||
| Exterior mirrors with side direction indicators | ||
| Wheels stamped 15" | ||
| Decorative wheel caps | ||
| Spare wheel stamped full size 15" | ||
| Front passenger airbag with deactivation function | ||
| Heated front seats | ||
| Electric drive and heated exterior mirrors |
The Start option package (6FD) adds options with a manual transmission:
- Air conditioner
- Cooled glove box
Connecting wiring, installing standard casing
After installing the camera, connect the positive cable to the flashlight wiring. We place the block with wires in a corrugated material made of fire-resistant material, and fasten the casing.
From the back of the 2-DIMM radio, we connect to the miniISO connector:
- black wire: ground;
- red: 12V power supply from the reversing light.
The designations on the plug are: pin 16 and pin 19, respectively. For the standard MMC radio, no additional firmware is required. The screen automatically switches to camera mode when reverse gear is activated. We start the engine, activate “R” gear, an image appears on the screen of the standard rear view camera.
Reviews
| № | Positive |
| 1. | Vitaly, 41 years old: connected the camera to the standard radio, did not flash anything additional. In total, I spent half an hour. I bought a Chinese Viori – 264897PR. |
| 2. | Gennady, 33 years old: the picture when reversing is good, the distance is marked. In case of insufficient lighting, I used side mirrors for objectivity of data. |
| 3. | Sergey, 31 years old: I work as a taxi driver and spend a lot of time on the road. In order to deliver/pick up a client as quickly as possible, it is necessary to maneuver in the limited space of courtyard areas. The camera is an indispensable assistant. |
| 4. | Kirill, 39 years old: a friend recommended a Viori rear view camera - 264897PR. I installed it and have been using it for over a month, no complaints. |
| 5. | Maxim, 42 years old: received a gift from his son for his birthday, installed it on his own. The lighting is good and the viewing angle is sufficient. |
| Negative | |
| 1. | Victor, 38 years old: I didn’t like the image on the standard radio, so I bought an additional folding monitor and installed it on the dashboard. The quality is good, no graininess. |
| 2. | Dmitry, 29 years old: I bought a folding monitor along with a rear view camera, since the image on my original radio was poor. I've been using it for two months, no complaints. |
| 3. | Vasily, 27 years old: I bought a car with a built-in rear view camera. I didn’t like the image quality on the “native” screen. I bought a folding monitor at the store. |
Conclusion The standard screen displays the image from the rear view camera with a resolution of 800 x 600 pixels. Obviously, this is not a 1920 x 1080 HD format, but the picture is quite legible. Those wishing to improve output quality can additionally purchase a portable monitor for an additional fee.