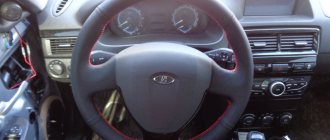
Continuation of the story about the installation of EUR from Priora...
In the previous post I tried to describe in detail how to install the EUR
, and now I’ll tell you how to connect it, and also tell you how to do independent diagnostics.
( more on this at the end
)
And so, to connect the EUR you will need:
1.
wire with a cross-section of about two squares (well, this is just my eye), in short, no thinner than what goes to the ignition switch, three meters (this is with a margin) 2. wire with a cross-section of 0.75, 8 meters 3. females are large, for connecting the steering column switches, 30 pcs (with a spare) 4. small mothers and fathers, for connecting wires from the EUR and a couple of other little things, 20 pcs (with a reserve) 5. fuse holder + fuse, 1 pc (they say at least 50 amps, I’ve already been driving for a week with 30 ampere) 6. corrugation, so that everything is neat 7. electrical tape, heat shrink 8. pliers, wire cutters 9. screwdrivers + and – 10. drill, drill bit 11. file
I think I mentioned everything.
And so, first of all, we pull the power wire to the EUR from the battery
.
I pulled it through the rubber band under the windshield
.
We place the fuse holder as close to the battery as possible.
We don’t install the fuse yet
. I threw the negative wire onto the adapter plate.
Next we run three wires to the speed sensor
, +, - and signal.
The main thing when connecting is to look at the pinout on your sensor
, it says there what goes where. I hooked up the positive wire from the sensor to the top fuse block, to the far left.
I took the minus from the pin that holds the panel. I attached a small terminal to the signal terminal and led it to the instrument panel.
Next, we connect the remaining wires of the EUR according to the diagram
.
I soldered the terminals to the standard wires for further ease of dismantling. ( Well, you never know...
)
Indicator lamp
I displayed “
not fastened seat belt
” on the lamp, soldered the wire, and for it to work you need to install an LED.
This lamp is useful for self-diagnosis of an ESD
.
( diagnostics will be described below
)
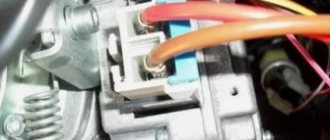
Then we connect the wires to the ignition switch.
,
steering column switches
on the left under the panel.
We connect them according to the diagram
.
Oh, I almost forgot, now you can use the wiper switch
, stick and
back
. We drag the wires from the key there.
Adjusting the steering column cover
, we file down
the emergency light button
. (
I placed it to the right of the steering wheel
) We assemble everything, plug in the fuse that was placed under the hood.
We start the engine and enjoy the light steering. ( the indicator lamp should go out after starting
)
PS
I installed a speed sensor, but the cable does not screw onto it, the airbag is in the way.
Therefore, I had to buy a tidy device from a chepyrka, but that’s a completely different story... Well, now there aren’t many words about self-diagnosis of the EUR.
For this you need a paper clip.
I write as I personally did, and not as it was written on various sites.
We insert a paperclip into the sixth pin of the EUR ( it is empty, see diagram
), so that it can be shorted to ground.
We start the engine, connect to ground and release, the warning lamp will blink slowly at first ( means that the EUR has entered the diagnostic system
).
Next, the lamp will begin to blink quickly ( we count how many times it blinks and see the explanation below
), after which the lamp will blink slowly again (
exited the diagnostics
).
— 1
The system is working — 2 No engine speed signal — 3 Malfunction of the torque sensor — 4 Malfunction of the EMUR engine — 5 Malfunction of the steering shaft position sensor — 6 Malfunction of the EMUR engine rotor position sensor — 7 Malfunction of the vehicle’s on-board network (below 10V or more than 18V) — 8 Malfunction EMUR control unit - 9 Malfunction of the vehicle speed sensor
( the sources say that the lamp blinks 10 times more, i.e. * 11 The system is working and so on, but I had it as I wrote
)
And I started looking for diagnostics, because... The EUR switched off while driving, but why? Yes, because I didn’t look at the inscriptions on the speed sensor, but connected it according to logic, according to the color of the wires on the chip from it, and it turned out that I mixed up the polarity))) That’s why I wrote that look carefully at your sensor
.
Good luck to everyone and see you in the new entry)))
PS
If you have any questions or see errors, please tell me))
In VAZ Priora cars, the electric power steering performs the function of making the vehicle easier to control. With the help of the ESD, the driver can easily turn the steering wheel with one hand. What malfunctions are typical for the amplifier and how to replace the EUR in a garage - we will talk about this below.
Possible malfunctions: signs and causes
Methods for determining mechanical damage to electric power steering and steering mechanisms
Self-removal and installation of the amplifier
Photo gallery “Removing the EUR”
Video “Do-It-Yourself Amplifier Repair Guide”
Comments and Reviews
The role of the electric power steering in the steering of the VAZ 2170 Priora
It's no secret that the electric control method plays an important role in ensuring safety while driving. EUR or power steering of Priora performs the option of reducing the level of load on the steering wheel while turning it. The key advantage of using such an EUR device on the Priora is comfort when moving as a result of improved feedback between the steering wheel and wheels.
The electric amplifier is a more modern and improved unit, which is not only easier to use, but also does not require the introduction of additional highways to ensure operation. In addition, this device does not take power from the power unit. The main advantage of the EUR is that it does not require frequent maintenance and fluid monitoring, unlike power steering.
But it should be noted that such a system has several disadvantages, one of them is rather weak feedback between the road surface and the control system. As a result, it may become difficult to drive in snow. Unlike Prior, foreign cars are equipped with additional mechanisms and units for blocking and stabilization, so the method of controlling the electric power steering in the domestic version is less reliable. In addition, in practice, a faulty electric booster with poor traction is a fairly common occurrence.
Lada Priora fuses: where are they located, replacement - AutoExpert
These include air conditioning, heated and controlled side mirrors, front airbags, a primitive ABS system, and if we compare the old “ten” modifications, then also electric power steering. Each of these electrical circuits is controlled by a relay and protected by appropriate fuses. All of them are distributed and located in separate blocks.
Relay and fuse blocks
The VAZ-2170 has three relay and fuse blocks:
- main block;
- mounting block;
- additional mounting block.
Luxury "Priors" with air conditioning have another additional block in which relays and fuses are located that are responsible for the operation of climate control equipment.
Main power fuse block
The main unit is located in the engine compartment of the car next to the battery and expansion tank. It is protected from above by a removable plastic casing. The main unit contains only six fuses that are responsible for the operation of the main (power) electrical circuits of the car.
| Fuse designation | Rated current, A | Case color | Electrical circuit |
| F-1 | 30 | Green | Electronic motor controller |
| F-2 | 60 | Blue | Ignition switch relay, power window control module, rear window defroster, radiator fan |
| F-3 | 60 | Blue | Signal, ignition switch, cigarette lighter, hazard warning lights, brake light unit, radiator fan circuit, interior lighting |
| F-4 | 60 | Blue | Electric generator |
| F-5 | 50 | Red | Electric power steering (EPS) |
| F-6 | 60 | Blue | Electric generator circuit |
To replace the fuses in the main unit, you need to disconnect the ground on the battery, remove the cover and replace the faulty part. VAZ-2170 mounting block
Relays and fuses in the cabin
The mounting block is located in the car interior under the dashboard on its left side. It is protected by a removable plastic panel attached to the “torpedo” using three latches. To remove the panel you need to turn each of these latches 900 degrees. After this, the panel will be completely removed.
The location, number, and markings of relays and fuses in the Priora mounting blocks may differ depending on the type of vehicle equipment.
| Relay designation | Purpose |
| In the “Norma” package | |
| K-1 | Radiator fan |
| K-2 | Rear window defroster |
| K-3 | Starter |
| K-4 | Additional relay |
| K-5 | Socket for backup relay |
| K-6 | Windshield wiper and washer motors |
| K-7 | High beam lamps |
| K-8 | Signal |
| K-9 | Alarm |
| K-10, K-11, K-12 | Sockets for backup relays |
| Available in “Lux” and “Lux Plus” configurations | |
| K-1 | Headlight and low beam lamps |
| K-2 | Rear window defroster |
| K-3 | Starter |
| K-4 | Additional relay |
| K-5 | Reserve socket |
| K-6 | Wiper mode switching module |
| K-7 | High beam lamps |
| K-8 | Signal |
| K-9 | Anti-theft alarm (sound signal) |
| K-10 | Fog lamps |
| K-11 | Seat heaters |
| K-12 | Relay for wiper operation mode |
Mounting block fuses
| Fuse designation | Rated current, A | Electrical circuit |
| In the “Norma” package | ||
| F-1 | 25 | Radiator fan |
| F-2 | 25 | Rear window defroster |
| F-3 | 10 | High beam lamp (right) |
| F-4 | 10 | High beam lamp (left) |
| F-5 | 10 | Signal |
| F-6 | 7,5 | Low beam headlight bulb (left) |
| F-7 | 7,5 | Low beam lamp (right) |
| F-8 | 10 | Signal |
| F-9 | 25 | Electric stove fan motor |
| F-10 | 7,5 | Interior lighting, instrument panel lighting, brake light lamps |
| F-11 | 20 | "Windshield wipers" (control) |
| F-12 | 10 | Connector “15” of the instrument panel |
| F-13 | 15 | Cigarette lighter |
| F-14 | 5 | Side lamp (left headlight) |
| F-15 | 5 | Side lamp (right headlight) |
| F-16 | 10 | Connector "15" ABS |
| F-17 | 10 | Left fog lamp |
| F-18 | 10 | Right fog lamp |
| F-19 | 15 | Front seat heater |
| F-20 | 5 | Immobilizer control module |
| F-21 | 7,5 | Fog lights (rear) |
| F-22–F30 | Reserve sockets | |
| F-31 | 30 | Electric package control module |
| F-32 | Reserve socket | |
| Available in “Lux” and “Lux Plus” configurations | ||
| F-1 | Reserve socket | |
| F-2 | 25 | Rear window heater, electrical package module, relay and connector “10” for connecting the rear window heater |
| F-3 | 10 | High beam lamp (right), instrument panel, high beam warning lamp |
| F-4 | 10 | High beam lamp (left) |
| F-5 | 10 | Protection of the mounting block, signal and its relay |
| F-6 | 7,5 | Low beam (left headlight) |
| F-7 | 7,5 | Low beam (right headlight) |
| F-8 | 10 | Anti-theft alarm relay, anti-theft alarm horn |
| F-9 | Reserve socket | |
| F-10 | 10 | Brake light switch, brake light lamps, connector "20", interior lighting |
| F-11 | 20 | Windshield wiper mode switching module relay, wiper mode switch, connector “53A”, rear window heater relay, rear window wiper motor (for VAZ-2171, 2172), connector “25” of the front airbag control module |
| F-12 | 10 | Connector “21” of the instrument cluster, connector “9” of block X2 of the dashboard, connector “1” of block X2 of the electric power steering control module, reversing headlight lamps, parking sensor control module |
| F-13 | 15 | Cigarette lighter |
| F-14 | 5 | Left side light, trunk light, warning light for license plate light, connector “12” of block X2 of the glass unit control module |
| F-15 | 5 | Right side light, glove box light |
| F-16 | 10 | Hydraulic unit of the ABS system |
| F-17 | 10 | Fog lamp (left headlight) |
| F-18 | 10 | Fog lamp (right headlight) |
| F-19 | 15 | Heated front seats relay |
| F-20 | 10 | Side and low beam relay, heater fan relay, lighting control relay, windshield wiper control module, climate system control module |
| F-21 | 5 | Connector “30” of the light alarm switch, connector “16” of the diagnostic block, clock, connector “14” of the automatic climate control unit |
| F-22 | 20 | Wiper motor, wiper motor relay, wiper control module relay |
| F-23 | 7,5 | Connector “20” of the wiper control module |
| F-24 - F-30 | Backup fuse sockets | |
| F-31 | 30 | Connector “2” of block X1 of the electrical package module, threshold illumination lamps |
| F-32 | Reserve fuse socket |
Disassembling the steering column
Conversion of Torque units. Torque units, torque units, torque units, torque units. Table
For this procedure you need to prepare:
- wrench 8 (socket);
- at 13 (end);
- Phillips screwdriver.
Before starting work, it is important to disconnect the battery. To do this, it is enough to remove the wire from the negative terminal
- remove the steering wheel;
- the plastic shields are removed from the column (they are held on by two screws and clamps each);
- dismantle the lower part of the lining by unscrewing 4 bolts;
- disconnect the wires from the lock and turn signal switch, etc.;
- using a 8 key, partially loosen the clamp holding the above-mentioned devices and remove them completely;
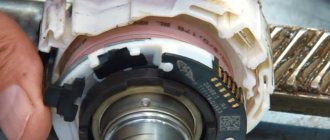
- pull out the connector terminals of the EUR controller;
- remove the plastic cover.
When driving a car, the steering mechanism and braking system play a huge role in safety.
Therefore, it is important to monitor the proper operation of these elements
Increasingly, a power amplifier is installed on the steering mechanism of a passenger car. Its task is to reduce a person’s effort on the steering wheel during maneuvers. At the moment, the car can be equipped with one of two types of power steering: hydraulic power steering (power steering) and electric power steering (electric power steering).
Installing electric power steering on Lada Priora
Installation of the steering column with EUR is carried out in the reverse order. Before installation, make sure that the groove on the shaft, the mark on the steering gear housing cover, and the marks on the protective cover are located properly.
Location of marks for installing the steering shaft:
1 - angular recess in the steering gear housing cover; 2 — groove on the steering shaft; 3 — steering gear housing cover; A - angular protrusion on the protective cover; B - cutout in the edge of the protective cover.
Make sure that mark A is located opposite the recess of the angular shape (No. 1), which is located in the crankcase cover, and the shaft is rotated so that its groove (No. 2) is located opposite mark B. Tighten the tie bolt nuts on the flanges of the intermediate shaft to a torque of 23— 28 Nm (2.3-2.8 kgcm). Tighten the steering column mounting nuts to a torque of 15-18.6 Nm (1.5-1.9 kgcm).
Common faults and solutions
Where is the speedometer sensor located on the VAZ 2110? Where is the speedometer sensor located?
Many prior drivers encounter device breakdowns, in particular, we are talking about a malfunction of the control unit. If the system control unit does not work correctly or is faulty, a corresponding error will appear on the on-board computer display. Having deciphered it, you can understand that the computer reports a failure of the EUR connection, which in most cases indicates the presence of problems in soldering. In particular, we are talking about the connection point between the amplifier board and the controller.
This malfunction can be solved either by replacing the system at the dealer, if the car is under warranty, or by repair. If you do not have experience in chip tuning or working with electronic devices, then solving such a malfunction should be entrusted to professionals. Of course, in order to accurately make a “diagnosis”, you will need to conduct computer diagnostics.
It often happens that the speed sensor malfunctions, which again contributes to the appearance of an error on the on-board computer. This type of malfunction can be solved by reprogramming the device or replacing the wires in the places where the regulator connects to the controller. If the regulator itself is not working, then it will have to be replaced (the author of the video is Alexey a-skorp).
Too low voltage level in the car's on-board network is also a common problem
In this case, it is necessary first of all to pay attention to diagnosing the generator device or wiring. Use a tester to check
In any case, if problems are detected in the operation of the system, it is necessary to repair the steering rack yourself. Operating a car with a non-functional ESD is not allowed until the problem is completely eliminated.
How to determine mechanical damage to the EUR and steering mechanisms?
Mechanical diagnostics are carried out if it is not normal, but the on-board computer does not generate errors. To check for mechanical damage, you need to turn the steering wheel left and right as much as possible, while the engine must be running. It should be noted that when turning the steering wheel, the vehicle must remain in one place.
If you notice that when turning the steering wheel you need to apply more force than usual, this may indicate a failure of parts or components of the amplifier. But this may also indicate a breakdown of other elements of the steering system (a video about diagnosing power steering using a paper clip is presented below, the author of the video is Gosha Vakhromeev).
To accurately identify what caused the problem, you will need to conduct a more thorough diagnosis. To do this, the vehicle first needs to be driven onto a lift and raised, while carefully checking all the elements of the chassis for operability. Racks, tie rods, etc. must be checked. This procedure can be carried out without any problems at any service station or on your own, but only if you have a lift and certain diagnostic skills. There is a possibility that repair of the EUR is not required, since it itself is operational, but repair of other elements is required.
To prevent the occurrence of malfunctions associated with the electric amplifier, it is necessary to clean the system, as well as contact nodes, from time to time. To carry out service yourself, you will need to remove your EUR, completely disassemble it, clean it and put it back. We will tell you more about this below.
Priora steering rack malfunctions
Problems with the functioning of the steering rack can be different. To identify them, it is not necessary to have a wealth of special knowledge; it is enough to periodically inspect the mechanism.
Large steering play
If you turn off the engine and actively turn the steering wheel, there should be no extraneous sounds. When not only suspicious noises appear, but also play is observed, the cause of the problem may be a weakened spool stop or insufficient elasticity of the torsion bar. The steering wheel may play due to severe wear of the silent blocks on which the steering rack is fixed. The same problem occurs when the angle of contact between the teeth and the screw is incorrect, or the curvature of the crankcase or shaft is caused by damage or the stroke of a screw-type bearing. To determine the malfunction, you will need to diagnose the rack bushing, steering rod joints and teeth.
The appearance of knocking and heaviness when turning the steering wheel
The steering wheel becomes heavy due to a soured cardan, but most often it is the knocking that occurs. There are a number of characteristic reasons for this phenomenon:
- noise occurs during the movement of the vertical bearing shaft;
- excessive wear of joints and crankcase;
- exhaustion of the life of a screw bearing, bushing or teeth;
- crooked shaft or crankcase, as a result the screw contacts the teeth with an offset angle;
- wear of silent blocks;
- loose rack fastening;
- steering wheel play.
In any case, you will need to carry out diagnostics, and if malfunctions are identified, you will need to dismantle and repair the Priora steering rack with replacement of worn elements.
Worn steering shaft center tooth
Wear of the mechanism with teeth occurs quite often. The main purpose of the steering shaft is to convert rotational motion into translational motion. Most cars are characterized by the exhaustion of the resource of the central teeth. The reason is simple: movement in city traffic is determined by driving in a straight line with slight deviations of the trajectory to the left or right.
To determine the malfunction, you need to swing the steering wheel to the sides from the middle position. If knocking noises are heard, it is better to carry out further diagnostics at a service station. If the central tooth is worn excessively, the entire shaft must be replaced.
Replacing the EUR
Where is the fan switch on VAZ 2114 photo?
So, you need to replace the electric booster on the Priora or simply check the condition of its contacts. In any case, repair involves complete removal of the unit. Prepare the necessary tools:
- Chisel and hammer.
- Deep head for 8 and 13.
- Extension and ratchet, alternatively you can use a wrench.
It’s quite easy to remove the amplifier itself with your own hands, but in order to get to its mounts and the control unit, you will need to remove many parts of the dashboard: the steering wheel along with the airbag, the casing and the ignition switch. Once these components are removed, repairs to the amplifier can begin.
Step-by-step instruction
- We take the “eighth” head, put on the ratchet and remove the contact group, as shown in the photo below;
Now you can study the contacts in detail and, if necessary, make repairs. If you know that the main components (control unit, motor) have failed, then you need to replace them. Installation of a new device occurs in the reverse order. The DIY repair is complete.
There are two types of power steering: electric power steering and hydraulic power steering. Priora was composed of both. The price is higher for EUR, but sometimes it doesn’t work. The electric power steering of the Priora car has an analogue of the AENK-K, but it is 2 times more expensive than the standard power steering of the Lada Priora. With Eur, the steering wheel of a Priora car becomes much lighter. With gur you feel the road. Compared to the Eur, the Priora has more spare parts, is attached to the pentosin liquid, it needs to be monitored, topped up - so that starvation does not occur! The price for replacement also differs depending on the system, the EUR is easier to replace and can be called with a diagnostic connector, so this is the electric motor. Electric power steering (EPS) for Priora comes in two types: geared and gearless - and the first is an outdated technology that was installed on the first Priora - read about it in the article below.
The presence of electric power steering on the Priora has become an indispensable requirement for every car enthusiast. This is justified: once upon a time, the owners of domestic “Zhiguli”, from the first years behind the wheel, learned to turn the steering wheel with both hands with maximum effort. On modern cars, you can turn the steering wheel even on the spot in a snowdrift with one hand, therefore, when choosing a Lada Priora in the cabin, electric power steering was the first mandatory item in the package for many. Later they began to install steering wheel and power steering in all configurations.
Electric power steering is not installed on the Priora in all trim levels - the simplest one has power steering. Knowing the power steering device and being able to “bring it to life” is the direct responsibility of the Priora driver, who loves his car.
Bottom line
You can carry out diagnostics and minor repairs to the Priora's electric power steering with your own hands. To do this, it is enough to determine what caused the failure and fix the problem, following our advice. It is better to entrust a complete replacement of the electric amplifier to professionals.
Most Lada Priora cars were equipped with electric power steering from the factory, produced by Avtoelektronika Kaluga. It is these EURs that are considered quite reliable and rarely fail. For comparison, problems with amplifiers produced in Makhachkala are much more common.
If for any reason you need to replace the EUR or simply remove it from the car, you can perform this repair yourself. For this procedure we will need a tool such as:
- 8 and 13 mm head - preferably deep
- ratchet or wrench
- extension
- hammer
- chisel
Chip errors
When a situation is observed that the wheels turn on their own, the reason is the electronic filling of the Priora electric power steering control unit.
As mentioned above, quality was sacrificed for the sake of economy. Now the situation with this seems to have improved and everything has been finalized, but if suddenly you feel that the steering wheel is starting to move by itself, go for repairs. If, along with the electric power steering, the speedometer also fails, then you need to look at the speed sensor. It was either simply dirty or broken. The same applies to the torque sensor installed on the amplifier. Clean them well and check their functionality.
Don’t forget to reset errors on the on-board computer; this can be done in several ways.
- Remove the terminal from the battery, wait a few seconds and put it back, the error should go away.
- Using a computer, the corresponding software can be found on the Internet.
Problems in the operation of the hydraulic booster
All breakdowns of the Priora power steering, as well as the causes and methods of eliminating them, are listed in the table:
| Malfunction | Cause | Remedy |
| When turning the steering wheel, you feel a kickback (shocks in the opposite direction) | Worn or loose pump drive belt | Replacing or adjusting belt tension |
| It takes a lot of effort to turn the steering wheel. | The pump belt is worn or loose. Low fluid level in the reservoir. The fluid reservoir filter is clogged. Low pump pressure or air lock in the system. Insufficient engine idle speed. | Adjust or replace the drive belt. Add liquid to the reservoir. Replace or clean the filter. Replace the pump. Remove the air lock. Adjust idle speed. |
| More effort is required to rotate the steering wheel in the middle position | Pump or steering mechanism faulty | Check, repair or replace the pump. Find and fix the steering mechanism problem |
| More effort is required to turn the steering wheel to one side | The pump has failed | Pump repair or replacement |
| Steering is unclear | There is not enough fluid in the reservoir or it is leaking. Air in the power steering system. Resource development. | Add fluid and fix leaks if any. Remove the air lock. Check steering components and replace if necessary. Replace tires. |
| It takes a lot of physical effort to quickly turn the steering wheel | The belt tension has weakened. Air in the system. The pump is faulty. Failure of parts of the steering mechanism. Floating idle speed. | Pull the belt. Remove the air lock. Replace the pump if it cannot be repaired. Check and eliminate faulty parts of the steering mechanism. Adjust idle speed. |
| Noise during power steering operation | There is not enough liquid in the tank. The liquid is discharged through the safety valve (a whistle is heard when the steering wheel is turned to the extreme position). | Add fluid and fix the leak. Remove the air lock. Check the pump pressure, repair or replace the part. |
| Steering wheel vibration | Airlock. The wheels are out of balance or the tires are damaged. | Remove air. Balance wheels or replace tires |
In practical terms, power steering is more often replaced with a new one or with a known good one. The original device costs a lot, so they choose analogues. Models from Chinese manufacturers have proven themselves to be an inexpensive option of good quality.
Advantages and disadvantages over power steering
Power steering (power steering) was once the ultimate dream for many, but you had to tinker with it - which only cost the constant addition of working fluid to the reservoir, plus a thrifty attitude towards the mechanism.
Benefits that the owner of a Priora with EUR receives:
More reliable mechanism. It's simple - there is nothing that often breaks (pulleys, hoses) or runs out (liquid). In addition, diagnostic data on faults can be obtained from the ECU. Installation, according to the manufacturer, will take no more than 1.5 hours - with wires everything will be much easier than with connecting hoses. In addition, you don't have to climb into the engine compartment. Passive impact safety Adjustability. Initially, after installation, the force will increase with increasing vehicle speed. This can be changed by reprogramming the data in the ECU - for example, reducing the force from the mechanism with increasing speed. Energy saving. The electric motor inside does not work constantly - it starts only when the driver starts to turn the steering wheel.
It would be wrong to remain silent about the shortcomings:
You don’t “feel” the road - power steering makes the car more sensitive, an experienced driver appreciates this. The EMUR mechanism (electromechanical power steering) is more expensive than power steering. Basic faults
The best plan is to identify the malfunction of the device before starting to move, otherwise a surprise while driving can lead to surprises. It turns out that while driving a person will continue to apply little effort to turning the steering wheel, which is why the car can go straight during the intended turn.
When turning on the ignition, always wait until all the sensor lights come on. The EUR sensor in the form of a steering wheel will also light up. Within two seconds, the electronic control unit diagnoses the entire system; if after this time the sensor does not burn out, the ECU has found a fault.
Not every malfunction of the ECU is reflected on the dashboard:
Shocks in the steering wheel; When the engine is off and when the engine is on, the hand effort is almost the same. As mentioned earlier, the ECU controls everything. Of course, you can find out about any breakdown through the diagnostic connector, to which you can connect yourself. It may produce the following error codes that relate to the EUR:
If the electric power steering on a Priora does not work, and it is not even possible to connect to the diagnostic connector, you can try the old “old-fashioned” method:
Insert the key into the ignition lock. In the eight-pin connector of the control unit, close contacts 6 and 7 (the first one is near the latch, upper right); Turn on the ignition, but do not turn on the engine. In this case, you need to look at the dashboard - at the place where the EMUR icon lights up.
Comments and reviews
Periodically, after replacing the ignition switch, the power steering began to turn off at low speeds. Especially when you turn around. Car Lada Priora 16 cl. 2011 mileage 80000.
Good evening) I need advice) EUR Kalina is not working) the power supply has checked everything is normal) the speed sensor is working) the tachometer is working) the rotor sensor is missing) I connected the scanner) two errors) 1011 incorrect DPR sequence and 1044 engine speed signal circuit no signal) I turn the steering wheel) on the scanner, phases A and B change values) but phase C does not) I WOULD BE GRATEFUL FOR CONSULTATION
The light on the dashboard came on, there was a squeak somewhere and the steering wheel turned hard, I have a Priora with electric power steering, pr. 100,000t.
The electric power steering light on the dashboard is on, so it doesn't work, maybe there are some fuses.
Electric power steering intermittently fails
Hello Sergey, I bought an EUR from Priora, installed it on a VAZ2114, connected it through the instrument panel, the steering wheel turns jerkily! Maybe you need to connect through the brain. I have an injector with brains.
EUR Priora does not work, the error suddenly came on
When you turn the steering wheel left to right, the power steering is turned off.
Good afternoon) It all started trivially with reviews and reviews, according to which the finalization of such a plan is simply a “fairy tale!”) Afterwards we experienced this miracle of technology from personal experience! Details.
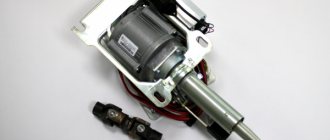
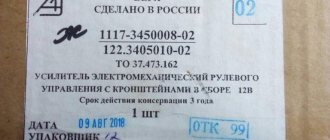
The unit was purchased from a 2012 Priora
(mileage 12,000 km).
It came with an adjustable shaft
, excellent condition. Will go for further improvements!
The hardest part was finding the wiring. In the end, they cut it out of the under-panel “braid” from the viburnum fret =) Ready-made versions are also sold (in the photo on the right).
In my case, the option from the store is not suitable, all the harnesses were redone, the power part of the wiring was moved to the engine compartment and located next to the battery. You only need connectors to the amplifier control unit and power wires (“+” and “-“).
About the plate and preparation of the intermediate shaft.
1)Adapter plate.
There are two options: - finished steel with a coating (buy in a store) - a drawing is available online which you can make yourself, or have it made to order.
Initially, I was confused by the comment on the drawing: “...for a VAZ 2110-2112 with an old instrument panel.” What about the Euro panel? Most likely, this plate is completely universal and in order to eliminate unnecessary gaps (between the panel and the steering column casing), you will have to adjust the outer mounting studs individually to the location... In fact, this is so! I didn’t make it to order because it’s cheaper to buy ready-made (Even taking into account delivery). Material: steel 5 mm, galvanic coating. There are no spacer rings included in the kit (needed to maintain the up-down adjustment of the steering column).
2) Intermediate shaft.
Made on the basis of a priority one with two cardan shafts. Subjects:
The original one is hollow at the base; a piece was cut off from it to lengthen it. The inside of the tube was machined at both ends. It was not possible to insert the part from the prior shaft any other way; the diameter is larger than the internal hole in the tube.
You need to act carefully near the crosspiece; you must not overheat the part! Otherwise, the rubber sealing the hinge joint will “float”. Finished product)
If desired, you can make any length. In the installed version with the adjusting bolt tightened, the result is slightly more than 26 cm, i.e. the middle of the possible tolerance. 3) Shred the plastic.
I don’t remember exactly how it worked out for others, but for me the EUR specifically hit the plastic. It seems that I didn’t see this in the reports, so I didn’t initially think about sawing the panel... Let’s act)
As I wrote at the beginning, there were no spacers included in the kit, and after trying it on, it turned out that they were not needed. I put three washers on the front studs (wide, about 1-1.5mm thick). Two were enough, but this resulted in a small gap between the body and the engine (when adjusted as high as possible)
Possible malfunctions, signs and causes
In what cases is the steering rack, power steering and power steering disassembled and repaired, what is the diagram, what functions does the torque sensor perform?
First, let's look at the main malfunctions of the system, why it does not work and how to fix them:
- Incorrect operation or breakdown of the control unit is one of the most difficult reasons for the inoperability of the EUR and power steering in the Lada Priora. If such a problem occurs, a corresponding error message will appear on the on-board computer screen. If you decipher it, you will find out that the computer has detected that the control module is inoperable. Such problems are usually associated with soldering problems. Most likely, the reason is a lack of connection or poor contact between the amplifier circuit and the controller. Such a malfunction can be solved by repair, that is, re-soldering, or replacement if we are talking about a car under warranty. You can find out more accurately about problems by conducting computer diagnostics.
- Failure of the speed controller. If the speed sensor breaks down, the electric booster turns off spontaneously or does not work at all, and an error message about inoperability will appear on the computer display. In this case, you can try to reconfigure the device or change damaged sections of the electrical circuit at the junction of the sensor and the control unit. Sometimes the reason lies in poor contact of the sensor with the on-board network, then the connector will simply need to be corrected. If the malfunction is associated with a non-functioning sensor, the device must be removed and replaced.
- The steering wheel turns with great difficulty. First of all, the reason should be sought in the lack of lubrication. If there is little oil in the system, the steering wheel will be difficult to turn, and uncharacteristic noise or creaking may be heard during rotation. Check the lubricant level and add oil if necessary.
- Prolonged operation of the electric booster without lubrication can lead to pump failure. The malfunction is accompanied by sounds uncharacteristic of the operation of the EUR, as well as difficult rotation of the steering wheel. If the pump can be repaired, then you can consider yourself lucky, but if it can’t, then the device will have to be replaced.
- Malfunctions in the operation of the electric amplifier can also be caused by reduced voltage in the machine's electrical network. If the voltage in the on-board network really jumps, then you should initially check the generator and the electrical circuit for its connection. For diagnostics, it is recommended to use a multimeter or voltmeter (video author - Alexander Loginov).
Wiring fault
In the case when the battery is in order, we look at the wiring; weather conditions, frost, rain or heat may be associated factors. If the electric power steering on a Priora turns off when weather conditions change, then this is a clear sign of a wiring fault. Check the soldering and insulation of the winding; a short circuit may occur.
The Priora's electric power steering does not work all the time. The maximum load on the electric motor occurs at low or no speed, and the minimum at high speed. So, in the Priora, at a speed of 110 km/h, the electric booster is completely turned off. At the same time, feedback to the steering wheel becomes maximum. Electric power steering "Kalina" turns off already at 60 km/h.
Diagnostics
First of all, it should be noted that a breakdown that occurs with the EUR is determined by the indication on the instrument panel.
It has a light bulb with a schematic representation of a steering wheel and an exclamation mark. Normally, after starting the engine, it lights up for a couple of seconds and then, after self-diagnosis performed by the ECU, goes out when no faults are detected. But when a problem is detected, the indication does not turn off.
Do not forget that the electric amplifier controller communicates peripherally with the vehicle's ECU. Therefore, it is better to identify this kind of breakdown at a service station using a computer.
However, individual devices are currently available for sale to test the functionality of certain electronic components. They are easy to use and are quite inexpensive - up to 1.3 thousand rubles.
Thus, an individual scanner allows you to find out what happened to the car. It should be connected to the ECU - the latter will generate error codes. All related to ESD malfunctions begin with “C”. In particular, C1013 signals that the voltage in the on-board system is too low - this means that it is not enough for the amplifier to operate normally.
According to experts, the most common problems are the following:
- breakage, burning or short circuit of the wires supplying the EUR (they are red and black, have a larger cross-section than the others, and are also included in a separate connector);
- fuse blown;
- low voltage.
In the latter case, you need to check both the battery and the generator.
The decoding is as follows:
- 1 long 1 short System OK;
- 1 long 2 short No engine speed signal;
- 1 long 3 short Torque sensor faulty;
- 1 long 4 short EMUR motor malfunction;
- 1 long 5 short Faulty steering shaft position sensor;
- 1 long 6 short Malfunction of the EMUR engine rotor position sensor;
- 1 long 7 short Malfunction of the car's electrical system (below 10V or more than 18V);
- 1 long 8 short Malfunction of the EMUR control unit;
- 1 long 9 short Vehicle speed sensor malfunction;
Malfunctions and their symptoms
Undoubtedly, the electric booster is a more reliable unit than a device running on hydraulics, but malfunctions also appear in the power steering. If they are detected, repairs must be carried out immediately, since the safety of the driver, his companions and other road users depends on the operation of the amplifier.
Complete failure of the EUR
As practice shows, this unit does not have many faults; breakdowns occur in the same parts. The first thing worth considering is the complete failure of the ESD. When you turn off the amplifier, you need to check the on-board computer screen; most likely, you will see a code there indicating a malfunction in the unit. But sometimes it is possible to determine when an amplifier is turned off only in practice.
We perform the following actions:
- Turn off the engine and turn the steering wheel in different directions several times;
- We repeat these steps, but with the engine running;
- Has the steering effort changed? This means the node has completely shut down.
Sometimes the amplifier and speedometer stop working at the same time. The cause of this defect is a speed sensor that has failed. Taking a look at the electrical diagram, you will understand that these three elements are connected. The torque sensor supplies data to the control unit, it compares it with speed and determines the force. If the cause is the speed sensor, then the repair consists of checking the wiring that leads to this element. It is also worth checking the wires connecting the sensor to the speedometer and power steering. If there are no breaks in the switching, then the sensor should be changed.
Low voltage in the car network can also lead to the ESD turning off. Faults should be looked for in the wiring insulation. If it is damaged, short circuits will appear in the network. Also, violations in insulation lead to malfunction of the generator. To troubleshoot the problem, check the wiring and generator. The torque sensor contains many contacts, which, if heavily soiled, help turn off the power steering. In this case, repair means disassembling the unit and cleaning the contacts of the torque sensor.
Unpredictable steering behavior
The driver is driving on a flat road, the position of the steering wheel does not change, and suddenly the car turns to the side. Such unpredictable behavior of the power steering requires urgent diagnosis, since at the most inopportune moment the electric power steering of the Lada Priora can send the car to the side of the road or into the oncoming lane. In such a situation, you should stop driving and turn off the amplifier. To do this, we need to remove the fuse, which is responsible for supplying voltage to the amplifier.
To remove this fuse, you need to do the following:
- The mounting block cover is located at the driver’s left foot;
- We turn the clamps and unclip the fasteners;
- You will find the block where the required fuse is located near the expansion tank;
- Feel free to take out fuse F5 (50 A) - it is responsible for providing the power supply circuit to the power steering unit.
The reason for this behavior is a malfunction in the electric amplifier device. This could be a torque sensor, control unit, clogged contacts or mechanical damage. It is recommended that diagnostics be carried out by professionals, since in a garage you will not be able to check the control unit; replacement can be done with your own hands.
The design and principle of operation of the Priora steering mechanism
On front-wheel drive vehicles, due to their design features, it is impossible to install a classic steering mechanism. The first thing engineers encounter is lack of space. A standard mechanism cannot be installed, even if a transverse engine is used instead of an in-line engine. For this reason, the classics, which are not distinguished by modest dimensions, have been replaced by a compact steering rack, which transmits the force when turning the steering wheel to the front wheels.
To save as much space as possible, on Priora and many other cars the rack is rigidly fixed to the front panel of the engine compartment - between the engine and the passenger compartment. It connects to the steering column, which extends into the cabin and ends with the steering wheel. The steering rack is a toothed metal rod. Its teeth engage with the steering wheel drive in the form of a shaft. They are located relative to each other at right angles. This is an improved worm drive.
The driver rotates the steering wheel along with a shaft, the teeth of which move the steering rack inside the casing, engaging with a toothed rod. There are holes in the rack casing through which the steering ends (rods) are connected. In the center of the rack itself there are holes for attaching these tips, which are attached to the steering knuckles of the front wheel strut using rods and special levers.
How to remove the EUR on a Priora with your own hands
In fact, the electric power steering can be removed without any problems, you just have to remove quite a lot of parts first. Namely, you will need to do the following:
After that, using an 8 mm socket and a ratchet, unscrew and remove the contact group.
We remove it from the shaft completely so that it does not interfere.
Now you need to disconnect all the power wires from the power steering control unit, which are clearly shown in the photo below.
Each of the plugs has its own lock, so be sure to first look at the design of the lock so as not to damage it when removing it. When you have dealt with the wires, you need to unscrew the coupling bolt at the fastening of the driveshaft with the steering rack.
Using a chisel and a hammer, we slightly expand the coupling “collar” of the cardan shaft. Then you can begin to unscrew the nuts securing the EUR to the body. Two nuts are located at the front.
And two from the bottom.
Of course, when unscrewing the last fastening nuts, it is necessary to hold the EUR so that it does not fall. Next, we pull it off the steering rack shaft and remove it completely. If necessary, we replace it with a new one. This mechanism is installed in the reverse order and we connect all the necessary wires to their places.
Fuse box location
If you suspect that a fuse has blown and you want to check it, then the question arises: where is the Priora electric power steering fuse located? The control mounting block is located to the left of the steering wheel. Its opening scheme is simple. All you need to do is turn the three latches 90˚ and remove the cover, as shown in the photo, and you get to the brain stuffing of the car.
Here you can check and replace the failed fuse, then close the lid by pressing it tightly and snapping the three latches back 90˚ in the opposite direction.
Removing and installing EUR at home
In order to remove the device from the car, you will need to prepare in advance everything that may be useful to you in the process. In particular, we are talking about flat-head and Phillips-head screwdrivers, as well as a set of socket wrenches.
So, how does the procedure for removing and installing the electric amplifier take place:
- First of all, you need to turn off the power to the on-board network; to do this, disconnect the negative terminal from the battery. Then dismantle the steering wheel by first removing the plastic cover under it and on the control panel. The steering wheel is dismantled in accordance with the service book for the car.
- Using a Phillips screwdriver, you need to unscrew the four bolts that secure the decorative trim on the steering panel.
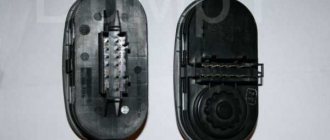
- Having done this, you will be able to see the wiring pads - they need to be disconnected from the steering column switch, and the slip ring is also disconnected.
- Using a size 8 wrench, you need to unscrew the screw that secures the wire blocks that run from the ignition switch.
- Next, you need to press on the plastic fixing elements and disconnect the pads with wires at the top and bottom of the column itself.
- In the place where the electric power steering wheel is attached to the column itself, you will need to dismantle the so-called plastic curtain; to do this, disconnect the clamps.
- Using a socket wrench, you need to slightly loosen the nuts that secure the assembly to the bottom of the column.
After completing these steps, the amplifier itself is removed - it is dismantled along with the intermediate shaft. But in order to make it more convenient for you to clean the assembly and then perform the installation in reverse order, it is advisable to disconnect these components from each other in advance. To do this, use a 13mm wrench to unscrew the screw securing the universal joints to the shaft itself. Then you will need to unscrew the two fixing nuts at the ends, after which the steering column itself can be removed.
Then you will need to remove the screw and remove the cardan from the splined pulley of the unit. To make the reinstallation procedure more convenient after removal, it is advisable to make sure that all marks match. We are talking about marks on the protective cover, pulley, and also the starter cover
Cleaning the contact group mechanism and other elements of the system must be done carefully so that all components remain intact and undamaged. If you seek help from specialists in this matter, the cleaning procedure will cost you on average about 30-50 dollars, depending on the region
Today, every Priora is equipped with electric power steering, this also applies to the basic configuration. Although initially the device was intended as an additional comfort function. Owners of this model know that the unit often jams and breaks, but if necessary, repairs can be done with your own hands. More on this later in the article.
Thanks to the operation of the electric power steering, the load and force on the steering wheel are reduced when turning. The unit greatly facilitates vehicle control and does not allow dangerous maneuvers to be made at high speed. The node includes the following elements:
- Electric motor.
- Column.
- Steering wheel.
- Torque sensor.
- Electronic control unit.
- Steering mechanism.
When you turn the steering wheel, the EUR is activated. The torque is provided by the electric motor present in the design of the electric amplifier. The torque sensor measures the indicator and sends it to the electronic unit. Depending on the angle of rotation, the ECU calculates how much power needs to be given to the engine. The switch, which is located under the steering wheel, has a device that determines the angle of rotation. The rotation and torque sensors transmit information to the electronic unit, which determines whether the electric motor is operating at the required speed.
On previous generations of VAZ, a hydraulic booster was installed, which gave virtually the same force in all rotation ranges. As for the electric booster, the degree of effort here depends on a lot of factors: the speed of rotation of the steering wheel and its angle, the speed of the power plant, and driving speed.
We install the EUR from Priora in the VAZ 2108, description, connection diagram.
I have long dreamed of installing an EUR because...
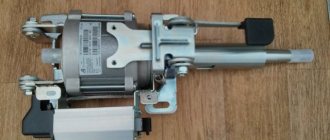
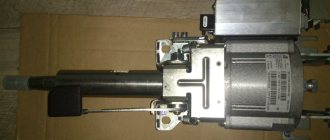
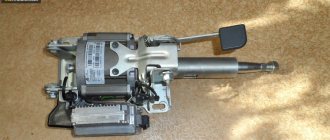
It’s very difficult to turn a small steering wheel with 195 tires and 3.5 castor, and now it’s finally happened. At first glance, everything seems simple, the topic is hackneyed, but when I was looking on the net for answers to some questions, I realized that the topic, so to speak, was not fully covered, so I’ll try to create a full report. I bought an EUR from Priora, an adapter plate for 2108 and two cardan shafts from servo steering wheels 2110. The installation went without problems, the plate fit perfectly, the EUR was perfectly screwed to it. With the shaft, everything is also simple, we take both shafts, cut off the excess, adjust the length and cook, the splines fit.
shaft
The connection is also not complicated, there are plenty of diagrams, both on the Internet and on the drive, here is the one I used
scheme
The first impression is simply cosmic, the steering wheel can be easily twisted from one extreme position to another with one finger, everything is super.
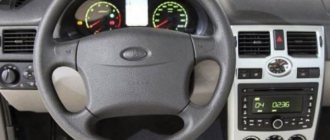
But all this joy was slightly spoiled by the assembly of the interior (the EUR was installed when there was no torpedo yet), I installed a torpedo, and on the EUR I put a casing from a VAZ 2110 (the second model) and two problems were discovered: the first problem was the height, the steering wheel actually blocked the tidy.
sadness
the second problem is also the height, the steering column of the Eura is lower than usual, but also the casing from 2110 is thicker than the original one. With my height, it was not convenient for me to stick my right leg under the steering wheel. It was decided not to raise the EUR at all costs; I was already thinking about removing the dashboard and welding the steering column bracket, but everything turned out to be simpler. The adapter plate comes with two spacer washers, so they need to be replaced with thinner ones
old washer and new ones.
and add two washers closer to the pedals
from each side
Due to the removal of the washers, the EUR has moved closer to the stove and rested the ignition switch against the stove itself; the lock will need to be filed a little. After carrying out these procedures, the steering wheel rose up, there was room for legs and the tidy became visible
that's better
The next stage was the production of an adapter for the steering wheel, the steering wheel was slightly longer than the original column, and the steering wheel was moved towards the driver. This is also not difficult, we take an adapter for 2108, saw, drill, and screw it together. there is nothing to tell, the whole process is clear from the photo
look
drill and assemble
Another consequence of the longer EUR column is missing signal slip rings
missing 2cm
Everything is generally simple here: put 4 M6 nuts under each screw and you’re done.
the nuts are just 0.5cm
After defeating the signal, you should also pay attention to the switches of the turn signals and wipers, all these are the consequences of shortening the steering wheel adapter, the switches have become really close to the steering wheel.
uncomfortable
The solution is simple - we buy switches from Shnivy, everything falls into place, the connection is standard.
another thing
to get rid of the gap between the steering wheel and the casing
no good
We use the remnants from the adapter, cut off the old elastic band and put it on the modernized adapter.
Standard electric amplifier article number and price
On the market you can find geared (outdated) and gearless EPS (electromechanical power steering) for Priora. It is worth concentrating on the second option, there are reasons for this:
Fast request processing: the “intermediary” - the gearbox - disappears - the ECU copes faster with the driver’s commands; More durable. The gear transmission of the gearbox can break at an inconvenient moment, but in a gearless electric power steering system the moment is transmitted directly to the steering rack. The noise level is reduced. The article number of the gearless EUR for the VAZ 2170 Priora is 2172-3450008-02. The price ranges from 20,000 to 25,000 rubles. The cost of a geared EUR is two thousand lower, but is it worth it - to skimp, pay less money, and then deal with frequent breakdowns?
Wiring diagram for Lada Priora. Pinouts
The domestic model VAZ 2170 or Priora is a popular car, in demand due to its moderate cost and good driving characteristics. However, the machine has one weak point - the electrical circuit and wiring. Consequently, the buyer often has to deal with troubleshooting these systems. Also, before repairing a car, you must carefully study the diagram of the required wiring section.
Schematic diagram (pinout) of connecting the front wiring harness on the Priora
The front part of the vehicle's electrical circuit is designed to supply voltage to the primary and auxiliary power circuits of the vehicle's on-board systems. The decoding of contact group chips is as follows:
- 1 – starter power supply;
- 2 – battery;
- 3 – charge supply from the generator;
- 4 – connecting block for the bundle (1 – 3);
- 5-7 – power supply to the device;
- 8 – engine compartment lighting lamp;
- 9-10 – head light;
- 11 – brake expansion tank level indicator;
- 12 – outside temperature;
- 13 – washer drive;
- 14 – external indication of reverse gear;
- 15 – cooling system fan;
- 16 – stove reducer;
- 17 – reserve resistor;
- 18 – wiper drive;
- 19 – interior relay and fuse module;
- 20 – stove motor;
- 21 – sound alarm indicator;
- 22 – horn power supply;
- A1/2, B1/2 – mass.
Purpose of the unit
Due to the operation of the ESD, the load and force on the steering wheel are reduced when making a turn. The unit greatly facilitates driving, and at high speed it does not allow dangerous maneuvers.
The unit includes the following components:
- Steering wheel;
- Column;
- Shaft;
- Electric motor;
- Steering mechanism;
- Electronic control unit (ECU);
- Torque sensor.
When turning, the electric power steering is activated. The torque is provided by an electric motor, which is present in the EUR design. The torque sensor measures the indicator and sends it to the ECU. Depending on the angle of rotation, the block calculates how much power needs to be given to the motor. The switch located under the steering wheel contains a device that determines the angle of rotation. The torque and rotation sensors transmit data to the ECU, which “determines” whether the electric motor is running at the desired speed.
On previous generations of VAZ cars, a hydraulic booster was installed; it gave almost the same force in all rotation ranges. As for the electric power steering, the degree of force depends on many factors - the speed of rotation of the steering wheel and its angle, the speed of the power plant, the speed of movement.
How does the electric power steering wheel work?
The automotive device we are considering in this material for the Lada Priora consists of the following components:
- ECU with corresponding peripherals. This block contains connectors with special sensors.
- Electrical part. This part is the motor of the device. Mostly this component is the most vulnerable.
- Mechanical component. This includes steering components, fasteners and connecting parts. This component consists of: an adjustment lever necessary to change the angle of the steering wheel, as well as the output and input shafts, here you can also add springs, nuts, and do not miss the studs and bolts.