Below watch a video about how to fold the rear seats of a Lada Granta and express your opinion about it in the reviews of the article.
Video quality: DVD
The video was uploaded to the admin from the user Avtandil: for immediate viewing on the portal.
To give the correct answer to the question How to fold the rear seats of a Lada Granta, you need to watch the video. After viewing, you will not need to seek help from specialists. Detailed instructions will help you solve your problems. Enjoy watching.
Humor on the topic: Boys and girls, if you experience awkwardness and embarrassment during dating, then it’s better to immediately move on to sex.
Any modification or tuning of a car begins with the disassembly stage. It is necessary to dismantle the seats in a number of cases, for example, to install additional sound insulation, install seat covers, etc. Below you will find instructions for removing the Lada Granta/Kalina 2 seats yourself.
Front seat
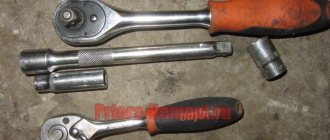
You will need : TORX E10 wrench (asterisk).
- Move the seat as far back as possible and unscrew the 2 bolts securing the slide (in Fig. No. 2).
- Move the seat forward as far as possible and unscrew the 2 rear bolts (No. 3 in Fig.).
If your car is equipped with heated seats, then you should disconnect the block with wires. Then remove the seat of the Lada Grant.
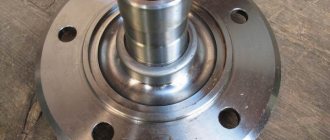
Catalog number of front seat assemblies: 21900-6810010 and 21900-6810011.
Lada Granta: repair, operation, tuning and maintenance
Sometimes situations arise when it is necessary to remove and install Lada Granta seats. If you know the correct algorithm for these manipulations, such work will not take much time. It should be noted that the methods of attaching the front and rear seats are completely different. Therefore, the methods of installation and dismantling work are completely different.
Removal and installation of Lada Granta front seats
The front seat is attached to the slide using two pairs of nuts and bolts. In order to remove the seat, you will need to unscrew them. In the normal position of the chair, the nuts are inaccessible and their removal is difficult. Therefore, to remove the chair, you should perform a couple of manipulations.
First, the front pair of nuts is unscrewed. To do this, you need to move the seat to the maximum rear position. To do this, press down the lever attached to the slide. It is located under the front of the chair. And then move the seat back all the way. After this, you can freely unscrew the front nuts 1 that secure the seat to the slide.
Driver and passenger front seat overview. Adjustment mechanism
The ergonomics of the driver's seat are good, the range of settings for the steering column and seat allows a driver with a height of 180 cm to fit comfortably. However, the longer the distance, the faster fatigue sets in; the right leg increasingly becomes numb from the limited position.
For the first time in the Lada Granta Liftback model, the seat is equipped with lateral support. This was previously installed in the second generation Kalina, Kalina Sport. Scheme for manufacturing the structure:
- metal frame;
- foam pillow;
- back.
The frame is a supporting structure. The backrest and cushion are installed on the movable hinges of the frame. In the Liftback model, the backrest is solid, the height is proportional to the height of 170 cm. There are bolsters on the sides that provide a comfortable seat for the driver and passengers.
How to remove the seat trim of a VAZ 2110
The most common problem with the driver's seat of the VAZ 2110 is its misalignment. The reason lies in the breakdown of the seat frame, backrest or brackets that connect them. Naturally, there is no point in buying and installing a new seat, since you can repair the old one. To repair a seat, you need to disassemble it, find the cause and eliminate it.
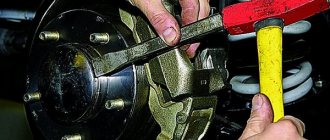
Removing the seat of a VAZ 2110
First you need to move the seat forward completely, after which, using a screwdriver, we remove the torsion bars from the brackets that are located under the seat at the rear and remove them. Then you need to move the VAZ 2110 seat all the way back and unscrew the nuts that secure the brackets.
We remove the brackets. Now you can lift the seat and unscrew the bolts that secure the slides, first the front ones, and then, by moving the seat forward, the rear ones. Now you can remove the seat and continue disassembling it.
The seat belt bracket is secured with a bolt passing through two bushings. Unscrew it and remove the bracket. In order to disconnect the slide, you need to release its axle by removing the locking ring, and then remove the spring.
They are attached in exactly the same way as the seat belt bracket, so we unscrew the bolt, remove the bushings and disconnect the slide.
Removing seat upholstery VAZ 2110
First of all, you need to disconnect the seat from the backrest. To do this, unscrew two bolts on each side that hold the backrest and seat frames together. When this is done, we disconnect the seats and begin to disassemble it.
The standard seat bottom upholstery is secured with plastic pads. In order to remove them, you simply need to pull the pads one by one towards the center of the seat, after which they will come off the metal frame. Now you can remove the filler.
In order to remove the upholstery from the backrest, you first need to remove the headrest. At the lower end of the backrest, the upholstery is secured using metal teeth. We straighten them with pliers and release the upholstery.
Now we remove it (there is no need to pull it up), turning the front and back sides inside out alternately. When the seat back cover is almost completely removed, you need to use two flathead screwdrivers to remove the fasteners in which the headrest was installed. Now you can remove the filling and the soft foam part of the back.
Nuances of VAZ 2110 seat repair
A crack or rupture can occur in any part of the metal frame of both the back and seat of the VAZ. Carefully inspect all parts of the frame, since the appearance of one crack may trigger the appearance of another.
The places where there are breaks need to be thoroughly boiled and cleaned with a grinder, after which it is advisable to prime and paint them. If a crack or rupture occurs on a removable part of the frame, or on the brackets that connect two parts of the seat, welding work must be approached with particular care.
It is best to cook “in place” - set the frame to its normal position, connecting the backrest to the seat. If it is necessary to weld brackets, one of them (whole) must be used as a sample so that the geometry of both matches.
It may happen that the situation was neglected and the frame “led”. In this case, before carrying out work, you need to level it so that the frame takes a symmetrical shape and all fastening parts coincide with the corresponding places.
Almost all modern cars have heated seats. Naturally, VAZ owners would not refuse it either.
The cost of such a procedure is about 1000 rubles.
Adjusting the front seats of the car
longitudinal: to adjust, pull the lever under the seat up. Move the seat, release the lever.
Note to the driver. Do not adjust the seat while the vehicle is moving. Even the slightest jerk with your hand will provoke an accident.
vertical : adjustment with the handle located on the left side of the seat. By rotating your hand, you select the most optimal position for the backrest.
head restraints: by mechanically pressing your finger on the bracket on the right side, set the appropriate height.
It is important to know. The natural position of the head restraint is when the upper perimeter is at the level of the driver’s (passenger’s) head.
Optionally, the owner can install heated seats on the Grant Liftback. The process is not complicated and will take no more than half an hour.
Installing and removing seats on a Lada Granta car
Agree that sometimes every car owner may have a situation in which it becomes necessary to remove the seats of his vehicle. It is worth noting that after this procedure you will certainly have to reinstall them. That is why experts recommend knowing the technique for removing and installing the seats of your car. In addition, this will allow you not only to avoid possible mistakes, but also to reduce the time for all procedures. Remember that the mounts that are located in the rear seats of your vehicle are comparatively different from those in the front of your vehicle. That is why the algorithm of necessary actions itself will also differ radically.
...and tilting the right side of the seat back forward, unfasten the buttons for fastening the trunk trim.
We press the latches on both sides of the seat cushion...
...and remove the pillow.
Using a Phillips screwdriver, unscrew the two screws on the top fastening of the plastic partition.
Using a 10mm socket, unscrew the two nuts securing the armrest hinges to the body...
...and remove the armrest...
Rear seat overview. Adjustment
In the back of the Lada Granta Liftback it’s already cramped for three, but there’s plenty of space for two. The sofa is flat, without ergonomics. For tall passengers, long trips will be painful.
Adjustment of the sofa is not provided, unless you move up and down around the perimeter yourself. Don't forget about the restrictions on the back of the seat back and roof lining.
In order to increase safety and reduce the likelihood of injury to passengers, the rear row of seats is equipped with seat belts.
How to fold out the seats in a Grant Liftback
The rear backrest folds in a 60/40 ratio, which is very convenient and practical when transporting non-standard loads. Press the side clamps of the upper backrest and lower the desired side.
If necessary, the back row folds completely onto the floor, forming a flat platform without steps or bends. Folding the seats is easy: just press the side hinges of the upper backrest. The lower sofa is fixed with metal hinges at the base.
Owner reviews
| № | Positive |
| 1. | Kirill , 33 years old: I am completely satisfied with the original seats on the Granta Liftback, comfortable, ergonomic. Height is 175 cm, I don’t feel any discomfort. |
| 2. | Vitaly , 41 years old: I installed heating on the standard seats, nothing else is needed. It’s very nice that they installed lateral support, it was so lacking in Priora and Vesta. |
| 3. | Mikhail , 30 years old: my positive review of the back sofa. Comfortable, practical, good material, easy to clean. |
| 4. | Gennady , 29 years old: the quality of the seats is average, I’m satisfied, I put on the covers. I'm going to install heating. |
| Negative | |
| 1. | Victor , 24 years old: I don’t like standard seats, I bought a second generation Opel Astra at the market and installed heating. My advice to motorists. |
| 2. | Peter , 36 years old: everything is good in the Grant Liftback, except for the seats, they are not comfortable, too soft, the fabric is the cheapest. Replaced from third generation Ford. |
| 3. | Vitaly , 28 years old: my height is 185 cm, my original seats are not equipped with height adjustment, it’s so lacking. Replaced from Opel Astra. |
Removing and installing the rear row of seats on Priora hatchback 2172
So, the first step is to remove the lower part of the seat, since it is the easiest to dismantle. To do this, use a flat-head screwdriver or use your hand to pry up the canopy cover, as shown in the photo below:
And in the recess we unscrew the nut using a 10 mm socket:
Now the canopy is moved to the side, because nothing else holds it.
We perform the same procedure with the second half. Then, by pulling the special belt in the back of the seat, on both one side and the other, we lift them and remove them from the passenger compartment.
As for the back, everything is also quite simple to do here. First of all, we recline the backrest, lifting the clamps next to the headrests, and from the inside we see several fastening nuts, both on one side and on the other. We unscrew them with a key number 13.
To show everything more clearly, below is another photo.
Also, on the back side there are still nuts that need to be unscrewed:
On the other side we do the same. After which you can begin removing the seats from the Priora. Once again, it is worth noting that the fastenings on the sedan will be different, so this procedure will have to be considered in the following articles. Installation occurs in reverse order.
Lada Kalina Cross. SEATS
Front seats. To adjust the front seats longitudinally, pull locking lever 1 (Fig. 9) up. Once the seat is in a comfortable position, lower the lever and move the seat back and forth slightly until it is securely seated.
Front seat height adjustment
In a variant in
The car has a front seat height adjustment function. To change the angle
tilt and position of the seat cushion, raise or lower the lever (see Fig. 9a) located on the outside of the cushion. To lower the seat cushion, push the lever down several times. To raise the seat cushion, pull the lever up several times. The tilt of the seat back is infinitely adjustable by rotating the round knob on the side opposite the seat adjustment lever.
It is prohibited to adjust the position of the driver's seat
days while the vehicle is moving. The seat may move suddenly, causing you to lose control of the vehicle.
The tilt of the seat back is infinitely adjustable by rotating handle 2.
In a variant version
The front seats are equipped with electric heaters, which are turned on with switches 1 when the engine is running (Fig. 10).
The height adjustment of the headrest (Fig. 11a) occurs by direct action
on the headrest. The headrest is raised by pulling it to the required height. To lower the head restraint, press the stopper lever 1 (on the right side of the head restraint) and push the head restraint down. To remove the head restraint from the seat back, lift it to its full height, simultaneously press both locking levers 1 and 2 (on the right and left sides of the head restraint) and pull the head restraint up.
The optimal position of the headrest is when its upper edge is at the same level as the top of the head (Fig. 11 b). If this is not possible, for very tall people the head restraint should be raised to its highest position, and for very short people it should be lowered to its lowest position.
Only drive with a correctly adjusted head restraint.
Rear seats
. The head restraints of the rear seats are adjusted and removed in the same way as the head restraints of the front seats (Fig. 11 c). To increase the luggage compartment area, the rear seat can be folded down.
In a variant version
Each of both parts of the seat can be folded out separately if necessary. When any part of the rear seat is folded down to carry cargo, the remaining part can accommodate only one passenger. The rear seat head restraints are adjusted and removed in the same way as the front seat head restraints.
Before folding the rear seat (or part of it), it is necessary to pass the tapes of 2 rear side belts (Fig. 11 d) through the holders of 1 tapes (in the variant), remove the tongue of the middle seat belt from the mini-lock (see Fig. 156) and install all the locks rear seat belts into the buckle holders located in the lower part of the backrest. Removing the middle seat belt tongue is done by pressing the button on the side of the mini-lock with a sharp object, such as an ignition key.
When returning the backrest to its working position, make sure that the shoulder branches of the side belts do not fall behind the backrest.
After returning the seat to its working position, the seat belt buckles must be removed
from the holders, and insert the tongue of the middle seat belt into the mini-lock, aligning the index arrows.
Do not allow the belts to be behind the backrest when returning it to the working position to ensure that they can then be used for their intended purpose and to avoid damage to the belts by the backrest lock.
Lay out the rear seat in the following sequence:
— remove the head restraints from the seat back (in the optional version),
— pull loop 4 (Fig. 12) and place pillow 1 in a vertical position. If necessary, move the front seats forward;
— pull the handle 3 of the lock drive and place the backrest 2 in a horizontal position;
Reinstall the rear seat in its normal position in reverse order.
Video on the topic “Lada Kalina Cross. SEATS"
Source