Have you ever wondered what exactly your safety on the road depends on? You can, of course, refer to other road users or the condition of the roads. But it will be much more relevant to talk about the technical side of the issue. The hero of our today's article on the VAZ 2110 is the caliper.
Front brake cylinder VAZ 2110
An incredibly simple mechanism in design and operation, at the same time it is an extremely important part of your VAZ car. A properly functioning caliper can give you those precious few meters of braking distance in reserve, which can protect you from a terrible disaster or damage to your vehicle.
Not every motorist knows how to properly monitor and maintain the brake mechanism, has a vague idea of how to dismantle it and, perhaps, will generally look at his interlocutor with a blank look when mentioning a certain VAZ caliper. But servicing this element of the brake system is quite simple and does not require much effort.
VAZ 2110 caliper maintenance
On the road you should not rely on the Almighty. Therefore, if you feel that something is wrong with the braking distance of the car, it is better to take the initiative into your own hands. Arm yourself with a modest arsenal of locksmith tools, consisting of a small number of open-end and socket wrenches, as well as a certain amount of theoretical knowledge - get down to business.
Major breakdowns
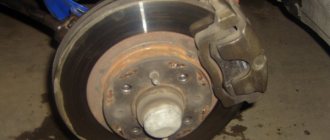
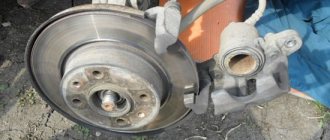
The front caliper of the VAZ-2110 is a structural element that holds the brake pads and is responsible for the level of pressure of these elements on the metal discs. It also helps ensure even pad wear, which guarantees effective braking in any situation. The body is made of aluminum alloy and the piston is made of steel.
Between these elements there is an oil seal that prevents brake fluid from leaking out of the system. The main caliper failures are as follows:
- The appearance of oxidation on the surface of the guide elements.
- Oxidation on the main piston, which leads to deterioration of the mechanism.
Failure can be identified by uneven wear of the pads, as well as by an increased braking distance. If such malfunctions are detected, be sure to change the pads.
Front caliper jammed: reasons
When the driver is used to driving at high speed, a little carelessly, then the front caliper often jams. This type of breakdown is more common in modern vehicles, where this mechanism operates faster in the front part. As a result, a colossal load falls on the caliper.
Most cars have a pressure regulator, which is popularly called a “sorcerer”. If you brake sharply, fluid access to the rear of the car is blocked. The front one continues to function and heat up.
Brake fluid
Any brake fluid that is used in automotive systems absorbs moisture very well. It is hygroscopic, therefore it oxidizes the piston mechanism from the inside, which leads to failure of structural elements. This makes the piston stroke more difficult and the brake pads wear unevenly.
The front wheels may become jammed. For these reasons, it is necessary to replace the brake fluid. Its service life is about 90,000 km, but not more than two years. These solutions contain many useful additives that improve cooling and increase braking efficiency.
But over time, under the influence of high temperatures and pressure, these additives evaporate. And the consistency of the brake fluid becomes more like water, and this reduces the efficiency of the system.
Care
In order for the mechanism to serve for a long time and properly, the condition of the caliper should be regularly monitored. Below are some useful tips:
Once every six months, inspect the visual condition of the caliper
Pay special attention to drips. They should not be on the hoses or at the connections.
If there are any, you need to urgently look for the source of the problem. This is usually a frayed or worn hose. It has a two-layer design, but even if the first layer is damaged, such an element must be replaced. Why is this dangerous? Due to leaks, the fluid level in the system constantly drops. This will make it impossible for the piston to work, as it will not have enough pressure. Check how freely the piston moves. If you do not change the brake fluid for a long time, it may turn sour due to rust. At best, you will experience poor braking performance. At worst, you will have to replace the entire cylinder. Keep an eye on the remaining friction material on the pads. Modern manufacturers equip them with mechanical sensors. When the thickness of the pads approaches two millimeters, the metal plate begins to touch the edges of the disc when braking. As a result, the driver hears a characteristic squeak. This indicates that the pads have become unusable. If they are not replaced in time, the metal itself – the pad lining – or even the caliper will rub against the disc. This leads to increased wear of both elements. If significant scuffing occurs, such mechanisms can no longer be used.
Repair kits
You can purchase special kits designed for caliper repair. But there is no point in purchasing it. It is much better to replace the VAZ-2110 caliper. In this case, you will increase the life of the entire braking system and also improve its reliability. Such repair kits contain the lubricant that is necessary for the piston and guides.
You cannot use graphite lubricant such as CV joint or Litol-24, as this will cause the protective shock absorbers to swell and the guides to simply oxidize. As a result, repairs will not bring the desired effect for a long time.
If the brakes rattle
This type of brake has pressure springs or floating calipers.
They are responsible for securing the pads to the caliper body. The reason for their failure is metal fatigue or poor quality. As a result, they lose their elasticity and stop pressing the pads against the body. Because of this, the pads rattle at the slightest passage of irregularities and may come into uneven contact with the disc, which will lead to the appearance of a shoulder or grooves on it. Also in this case, the staples themselves may rattle.
What should you do when your brake calipers or pads rattle? If it is not possible to replace them, then you should try to loosen them with your own hands using pliers to make them more rigid. To do this, you need to pull them out of their seats, unclench them and insert them into place, after which they will stop rattling for a while.
Calipers for VAZ 2110: repair and maintenance
Have you ever wondered what exactly your safety on the road depends on? You can, of course, refer to other road users or the condition of the roads. But it will be much more relevant to talk about the technical side of the issue. The hero of our today's article on the VAZ 2110 is the caliper.
Front brake cylinder VAZ 2110
An incredibly simple mechanism in design and operation, at the same time it is an extremely important part of your VAZ car. A properly functioning caliper can give you those precious few meters of braking distance in reserve, which can protect you from a terrible disaster or damage to your vehicle.
Not every motorist knows how to properly monitor and maintain the brake mechanism, has a vague idea of how to dismantle it and, perhaps, will generally look at his interlocutor with a blank look when mentioning a certain VAZ caliper. But servicing this element of the brake system is quite simple and does not require much effort.
VAZ 2110 caliper maintenance
On the road you should not rely on the Almighty. Therefore, if you feel that something is wrong with the braking distance of the car, it is better to take the initiative into your own hands. Arm yourself with a modest arsenal of locksmith tools, consisting of a small number of open-end and socket wrenches, as well as a certain amount of theoretical knowledge - get down to business.
Why is a caliper so important in a car?
Almost every detail in a car can be said to be very important. But, if the engine or any other part fails, the car will simply stop moving. Therefore, the driver will not be exposed to any danger, because there is no traffic.
In case of some problems and repairs to the brake system of the VAZ 2110-2112, the necessary action will be to remove the front wheel caliper. If the task is, for example, replacing brake discs, then the caliper can be removed as an assembly without disconnecting anything else.
Below we will look at this procedure more clearly. So, for this repair we will need the following tool:
Do-it-yourself dismantling of the caliper on a VAZ-2110
The very simple design of the product and the triviality of the process of dismantling it allow even a novice motorist to carry out repairs and maintenance. If you carefully follow the recommendations below, you are unlikely to encounter difficulties at any stage of the process. You will save a lot of money spent on a trip to a service station, and a considerable amount of time, because the service time is comparable to the time required to travel to the workshop.
Dismantling VAZ caliper
The sequence for dismantling the product is as follows:
- The first step is to jack up the car and remove the wheel. To be on the safe side, it can then be placed under the bottom of the car in case the jack fails;
- On a VAZ 2112, the caliper is attached to the bracket using two M17 bolts, which you should unscrew. Penetrating lubricant may be needed to strip the bolts;
- If you need to replace the VAZ caliper or carry out a comprehensive repair, unscrew the product from the brake hose. You seal the hose tip and you can begin further disassembling the product.
Types of faults
The brake system in cars is designed approximately the same. Therefore, we can say with confidence that the brake system is most often susceptible to breakdowns:
- discs - over time they wear out and wear out;
- Hoses are fragile elements of the brake system. Depressurization of hoses occurs frequently and regularly - this depends on the careful use of the brakes;
- Brake fluid is directly related to the operation of the brake system. As a result of operation, water, decay products, and other particles appear;
- calipers - despite the fact that these are one of the most durable elements of the system, some of its parts fail quite quickly and often.
- However, despite the apparent complexity, in case of minor breakdowns, the motorist can independently fix or at least diagnose the problems.
Diagnostics
To check the front brake caliper of the VAZ-2110, you will need to perform the following steps:
- Assess the condition of the metal piston and the ease of its movement inside the cylinder.
- Check for metal oxidation, oxide formations or build-ups, or moisture on the elements.
- Assess the condition of all rubber boots.
- Check the condition of the VAZ-2110 caliper guides. You must make sure that there is no abrasion, deformation or scuffing on their surface.
Any damage to the caliper body and its and other elements should alert the driver. In this case, it is necessary to change the mechanism.
A few important points
If, after removing the guide calipers, you notice that the pins are very worn, then there is no point in repairing them; it is easier to replace them. It will be both faster and cheaper. Remember that during city or aggressive driving with frequent braking, you need to buy a lubricant that does not change its composition and properties with increasing temperature. The reason for this is that the discs can heat up to 300 degrees Celsius or even higher. As for the repair itself, this is a rather expensive procedure, which is not always advisable. However, if you still decide to do it, then purchase repair guide pins and drills of a suitable diameter. The whole point is that the purchased finger has a diameter of 10 mm, while the standard one is 9.5 mm. It is bored out, lubricated and put back into place.
Detailing
Assembly elements on the front brake mechanism:
- Dustproof cover;
- Pad holder;
- Noise protection gasket and spring;
- Two pads: internal, with a wear indicator, and external;
- Fastening plates;
- Cylinder cover and piston;
- Caliper;
- Bracket;
- Air release valve;
- Gasket, bushing, pin, seal.
For the tenth to twelfth VAZ models, these units are structurally the same, only the VAZ 2110 caliper bracket is different. Therefore, it becomes possible to install not only the “native” unit, but also from “related” models. Naturally, this requires replacing the bracket itself.
It plays a vital role in securing the caliper and brake mechanism, and also forms the front clamping mechanism along with the caliper, piston and caliper.
Thus, the bracket is not only a holding element, but also a guiding element of the front wheel locking mechanism.
Front caliper parts
Naturally, when it fails, the entire assembly is often replaced, but individual elements can be repaired, for which there are special repair kits.
The price of a repair kit averages about 500 rubles and includes:
- 1 hose fitting with cap;
- 2 protective covers for guides;
- 1 O-ring;
- 1 caliper protective ring.
The price of a new left or right front caliper fluctuates around 1000-1500 rubles.
The piston (cylinder) is faulty
Poor quality of brake fluid, the appearance of rust on the surface when the boot of at least one piston (cylinder) ruptures or as a result of prolonged downtime of the machine entails its partial jamming.
This will initially be heard when its operation is delayed, when the pads begin to knock on the disc. In order to make the repair yourself in this case, you need to disassemble the caliper and pull out the rusty piston; this must be done after the guides have been unscrewed and the boot and retaining ring have been removed.
If the cylinder still moves even slightly, you can squeeze it out using a compressor by inserting a hose into the hole for supplying brake fluid. This can also be done without first disconnecting the housing from the brake system; you just need to press the pedal, after which the created pressure will squeeze the cylinder out of its seat. If it is tightly jammed, then a preventive measure can be soaking it in gasoline and other similar liquid.
It is worth considering that the rear caliper piston cannot be removed, but is simply unscrewed along the threads with pliers or a similar tool. After this, you need to wash the cylinder seat and clean it of dirt and rust. It is also worth doing with the piston (cylinder) itself. Next you need to insert the cylinder into place. It would be useful to replace its boot with a new one during assembly. You can see this in more detail in the attached video.
VAZ-2110 caliper maintenance and repairs
It is mandatory to service the VAZ caliper after each replacement of brake pads, as well as in the event of a forced inspection due to its malfunction, for which it is first necessary to check the condition of all rubber elements, shock absorbers and anthers. It is also imperative to replace the grease for the caliper guides. You need a good synthetic based silicone lubricant that can withstand high temperatures.
To remove the piston from its seat, it is necessary to create the appropriate force using an air compressor (pistons are repaired one at a time, the stroke of the second is blocked, for example, by a wooden block). With the same success, when removing the product from the car, you can press the brake pedal without disconnecting the VAZ 2112 caliper from the brake hose. It is advisable to use a rubber adapter in order to absorb the sharp impact of the freely moving piston and its “shot”.
VAZ 2110 caliper repair
The piston is pushed back using a special clamp. In this case, the boot should be bent to compensate for excess air pressure. The hole for the piston and for the guides are cleaned and washed with carburetor cleaning fluid, all gaskets, boots and seats are also thoroughly lubricated.
Is it possible to repair the rear brake cylinder?
This is indeed possible, you just need to have the skills to disassemble the part and know the design features. To properly disassemble the product, repeat the following steps:
- Remove the protective caps.
- Remove the pistons and elements that regulate the automatic gap from the body; this mechanism appears between the drum and the brake pads.
- After turning the piston and fixing it, you can already unscrew the stop screw.
- Slide out the O-ring and spring support cup.
- Disconnect the thrust ring and screw from each other.
Now carefully inspect the details:
- All surfaces must be smooth; scratches and roughness are unacceptable, as this will cause brake fluid to leak.
- If there are defects on the mirror base, use grinding or lapping - the latter method is gentle. The inner diameter of the cylinder must retain its dimension.
- Replace seals and protective caps.
Step-by-step video instructions for replacing the rear brake cylinder are presented below:
The procedure for removing the caliper and video instructions using the example of a VAZ 2110
So, let's look at the order of actions that need to be performed.
- Raise the car with a jack
- Remove the front wheel
- Disconnect the brake hose from the front strut.
- Unscrew the two caliper mounting bolts from the inside
See the step-by-step instructions using the example of the VAZ 2110, which was made specifically for this article:
As you can see, this process can be completed in 5 minutes, the name of the necessary tool is at hand and an idea of all the necessary actions. A new caliper complete with brake pads has a price of 2,000 rubles for original AvtoVAZ products. If we consider cheaper analogues, then you can buy a caliper for 1,500 rubles - a piece.
Of course, in most cases it is necessary to change only the necessary spare parts of this entire structure, because the cylinder, bracket and pads are sold separately. And for many car owners it simply doesn’t make sense to buy the whole thing assembled.
The design of this brake element
There are two types of disc calipers - front and rear, their design and repair method are slightly different, but their main elements are the same:
- The housing in which the piston (cylinder) is mounted.
- Bypass valve.
- Sealing ring.
- Piston (cylinder).
- Cylinder boot.
- Retaining ring.
- Frame.
- Pressure bar.
- Pads.
- Guide boot.
- Guides.
- 14. Fastening bolt.
- Brake hose.
The difference between the rear disc caliper is the presence of a parking brake.
Therefore, the piston (4) has a special thread through which it is screwed onto the parking brake rod (1). Thanks to this, it can operate under the influence of two drives - mechanical (parking) and hydraulic.
Checking the caliper and restoring it
The caliper is installed on the front and rear brakes. Its verification and restoration can be carried out independently, but, in the absence of the necessary practical skills and theoretical knowledge, it is best to turn to professional specialists. Let's consider in theory a method for checking and restoring a caliper on a VAZ 2110, the price of which is one of the lowest on the market.
The main task comes down to properly disassembling the caliper, cleaning it of old grease residues, applying a new special compound and checking the integrity of the rubber seals. First you need to gain free access to the front brake mechanism, which is located directly behind the wheel. For these purposes, supports are installed that help to easily and quickly remove the wheel.
After this, they begin the process of replacing the brake pads on the front caliper of the VAZ 2110. To do this, you need to remove the lower bolt, which is responsible for fastening the caliper, using a screwdriver, the body of which can easily be tilted up. When replacing old brake pads, you should remember their location, since the installation of new parts should be carried out in the same place.
If the VAZ 2110 caliper body was folded up and the brake pads were removed, then you can proceed to the next stage. In this process, you will need to unscrew the upper bolt responsible for fastening the caliper. It is worth noting that the line and brake fluid must remain connected.
Next, the bolts that serve to connect the knuckle and caliper bracket are unscrewed. After removing the bolts, you can remove the bracket (along with the brake pad clamps and guides). Subsequently, the piston is removed from the caliper body. It can be quite difficult to do this yourself, so you can use the services of professional auto repairmen working at service stations.
If you decided to check and restore the VAZ 2110 caliper yourself from start to finish, then you can try to carry out the following steps:
- conveniently position the caliper body without disconnecting it from the brake line.
- press the brake pedal and release it only when the piston is pressed out of the cylinder by the pressure.
Do not be alarmed if liquid suddenly leaks from the cylinder, as this is quite normal for removing the piston using the above method. Next, you need to interrupt the brake line connection and also plug it (to prevent further fluid leakage). Once the so-called “blockage” has been established, the process of disassembling the “tens” caliper can be considered successfully completed.
It is worth considering the fact that the above steps do not cover the replacement and reassembly of the brake system. But, based on their complexity in describing the initial stage, one can understand how complex a part the caliper is.
Which cylinder is best to buy for replacement?
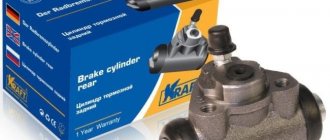
Rear brake cylinder from Kraft.
If you definitely decide for yourself that you will not go to a service station for repairs, then the spare part necessary for repairs will need to be purchased at a car store. Since spare parts for domestic cars are inexpensive, there will be no problems when purchasing.
When purchasing, you can buy both the original, which has the article number 21050-3502040-00, and a “non-original” from another company. Unlike spare parts for foreign cars, where the original spare part is always better, the situation with spare parts for VAZ is the opposite. It often happens that non-original spare parts turn out to be of higher quality than the original.
Do-it-yourself dismantling of the caliper on a VAZ-2110
The very simple design of the product and the triviality of the process of dismantling it allow even a novice motorist to carry out repairs and maintenance. If you carefully follow the recommendations below, you are unlikely to encounter difficulties at any stage of the process. You will save a lot of money spent on a trip to a service station, and a considerable amount of time, because the service time is comparable to the time required to travel to the workshop.
Dismantling VAZ caliper
The sequence for dismantling the product is as follows:
- The first step is to jack up the car and remove the wheel. To be on the safe side, it can then be placed under the bottom of the car in case the jack fails;
- On a VAZ 2112, the caliper is attached to the bracket using two M17 bolts, which you should unscrew. Penetrating lubricant may be needed to strip the bolts;
- If you need to replace the VAZ caliper or carry out a comprehensive repair, unscrew the product from the brake hose. You seal the hose tip and you can begin further disassembling the product.
Preventive actions
To avoid such an unforeseen situation when the caliper jams on the road, you need to take a number of preventive measures:
- Preventative maintenance of the caliper should be carried out when replacing levers. They are changed every 2 years.
- During diagnostics, all parts of the car should be inspected, including the adjustment of the hand brake. It is worth taking your car for inspection once every six months. If any suspicious noise occurs, send it to a service station immediately.
- Due to the large loads to which the clamp is subjected, it is necessary to use lubricants suitable for a particular vehicle. If you save money and buy low-quality compounds, they will quickly harden and deteriorate due to moisture. The lubricant must have minimal dripping characteristics, be moisture resistant, and not susceptible to the influence of chemicals. If you can’t make a choice yourself, the service station technicians will select the appropriate composition themselves. An alternative to expensive lubricant is WD-40. The composition protects automotive parts from corrosive plaque.
With timely care and careful operation of the car, the risk of the caliper getting stuck on the road is minimal. If such a nuisance happens on the road, you need to react quickly and clearly. Remember, if the caliper is jammed, this is fraught with an accident if you cannot cope with the vehicle.
Has your caliper jammed on the road? How did you deal with such a situation? Share your experience with other car enthusiasts.
What to do if the caliper sticks? Answer in video:
To give the calipers an aesthetic appearance, they can be painted. How to do this correctly - read the feature article.
how to remove the caliper on a VAZ 2110 video Video
Video instructions on how to independently replace the front wheel brake caliper on a VAZ 2108-2109,…
Diary of an Auto Mechanic - A kit for brake calipers can be purchased here▻ https://ali.pub/oxsvd This video shows...
In this video I'll show you how to replace the brake caliper and bleed the brakes. To replace you will need a special...
The procedure for replacing front brake pads on VAZ 2108-099, VAZ 2110-2115, Lada Kalina, Priora, Granta. Lada repair...
High-quality used spare parts for Daewoo - https://avtolanos.com.ua.
Video review of replacing the front brake cylinder on a VAZ 2110-2112, Kalina, Granta, Priora.
Lubricating caliper guide pins, replacing pins and boots, video review of repairs. For all cars...
Trialli repair school: the video used brake discs https://www.trialli.ru/catalogue/tormoznaya-sistema/diski-tormoznye/df-142/ and brakes…
Trialli repair school: brake pads were used in the video https://www.trialli.ru/catalogue/tormoznaya-sistema/kolodki-tormoznye/pf-965/
How to replace brake discs and pads on a fret.
Repairing a stuck caliper. What happens when the brake caliper is stuck (the brakes get hot and the brake sticks...
Video guide for replacing front wheel brake discs on VAZ 2110-2112, 2114-2115, Kalina and Granta, Priora,…
We remove the brake caliper to replace the cylinder of a VAZ classic car. Tips on how to allow less air…
REPLACEMENT OF FRONT PADS FOR VAZ 2110,2111,2112.
Quick caliper repair. Detailed description of how to do it and in what order.
Do-it-yourself lubrication and repair of a brake caliper using the example of the front caliper of a VAZ 2112. Repair and maintenance…
Replacing a boot with a caliper For many car enthusiasts who are faced with repairing brake calipers...
A surefire way to press in the front brake piston yourself when replacing old pads with new ones without any...
Video guide on replacing the rear brake cylinder on VAZ front-wheel drive vehicles!
Source
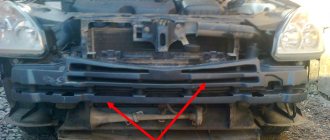
Main elements of the front brake system
- Brake disc – position 1 in the photo.
- Caliper, pos. 3.
- Brake pads – 4.
- Cylinder – 5.
- Piston – 6.
For the front wheel, the brake mechanism has automatic adjustment of the gap between the disc and pads, with a pad wear indicator and a floating caliper. The bracket includes the front brake cylinder of the VAZ 2110 and the caliper; they are secured to each other with bolts. The piston is installed in the cylinder cavity with an o-ring. The optimal clearance between the brake disc and pads is maintained due to the elasticity of the installed ring. How to change the brake cylinder of a device with your own hands is suggested in the article.
Replacing brake caliper guides for VAZ 2110, 2111, 2112
Lately, there has been a grinding noise when braking. An inspection of the brake system showed that the discs and pads were in good condition.
One of the reasons for grinding and rattling of calipers may be worn guides. Also, worn guides can lead to uneven wear of the pads (when one of the pads wears out faster than the other). This is exactly the wear that was on the old pads when they were last replaced.
Inspection of the guides showed that they are not jammed, but the lubricant has coked and thickened, and there is also noticeable play.
4 guides were purchased along with anthers, the price was 40 rubles per piece. And also a special lubricant for brake systems BOSCH SUPEFIT (5000000151) for 50 rubles. One bag is just enough for four guides.
It is important to know that not any high temperature grease will work for caliper guides. Do not use ceramic grease or copper-based grease. These lubricants coke and cause the guides to jam.
They can also be aggressive towards anthers. As it turned out later, BOSCH lubricant is not suitable for guides; the temperature range is only -25°C +130°C, which is naturally not enough for this unit. Although the manufacturer claims that this lubricant is universal and is exactly suitable for guides. I found supporting information in the official brochure about the use of lubricant
These lubricants coke and cause the guides to jam. They can also be aggressive towards anthers. As it turned out later, BOSCH lubricant is not suitable for guides; the temperature range is only -25°C +130°C, which is naturally not enough for this unit. Although the manufacturer claims that this lubricant is universal and is exactly suitable for guides. I found supporting information in the official brochure about the use of lubricant.
We'll ride it for now, and we'll see.
Before replacing the guides, remove old grease and thoroughly wash the bracket. To remove the old grease I used 646 solvent.
Its disadvantage is that it is aggressive to the rubber from which the anthers are made, so after using the solvent, I washed the staples with a degreaser. New lubricant should be applied in a thin layer.
The boots on the new guides turned out to be complete crap, several tore at once, so I had to install the old ones, which turned out to be in good condition. By the way, when assembling, you should first put the boot on the bracket, and then on the guide. This makes it much easier and less likely to tear the boot.
After replacing the guides, the grinding noise when braking no longer bothers me.
Which wheel is sticking?
If suddenly the car stops driving normally, nods, making characteristic grinding sounds and creating the impression that there is a weight hanging on each wheel, then we can safely state that some element of the brake system of one of the four or several wheels at once is jammed. Typically this list includes the handbrake cable, calipers, pads or the brake cylinder itself.
For this it is recommended:
- let the mechanism cool (half an hour is enough);
- drive about 10 meters, although the car will most likely move at a stretch, resisting movement in every possible way, as if the parking brake was on;
- feel the brake discs of all wheels with your finger, using the air vent holes for this purpose.
A hot disc indicates that this particular wheel is seizing, after which it will be much easier to identify and fix the problem.
A simple way to balance a wheel at home - a minimum of investment and time
Installation of calipers from Volga on VAZ 2110
| There are never too many 'brakes', so many are trying to improve their efficiency by replacing the original brake discs and pads with alternative, imported ones. There are also more advanced modifications to the brakes, for example, installing GAZ 3110 brakes on a VAZ 2110. |
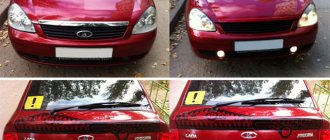
Brakes GAZ 3110 and VAZ 2110, what is the difference?
The negative aspect of switching to more massive calipers from the Volga is in weight. For example, the weight of a VAZ caliper with pads is 3.2 kg, and the weight of a Volga caliper with pads and adapter is 5 kg. That is, by replacing the standard 'tens' calipers with Volgov calipers, we increase the amount of unsprung mass of the car.
The positive aspect of the Volga brakes is that the large pad area allows for better heat dissipation. Car enthusiasts also note their better efficiency compared to standard VAZ 2110 brakes.
Adapter for GAZ 3110 caliper for VAZ with front-wheel drive
Drawing of an adapter for the Volga caliper for VAZ 2108/2110/1118/2170 (AutoCAD format)
In the archive there is an adapter for brake discs R14 and R15, archive password: lada2111rf
Gas 3110 from storage. Automobile equipment surplus, used sale.nelikvidi.com
Installation of calipers from GAZ 3110 to VAZ 2110 (R15)
You will need: Volga calipers along with pads, an adapter for Volga calipers on a front-wheel drive VAZ (2 pcs), caliper hoses from a Chevrolet Niva (short).
Remove the caliper along with the bracket, and then disconnect the hose from the tube. Drill out the hole in the bracket on the body that holds the connection between the hose and the tube. This is done in order to thread the hose fitting. Connect one end of the hose to the tube. The other end is with a caliper.
Next, screw the adapter to the guide of the GAZ 3110 pads using M12x25 bolts with a pitch of 1.25 (it is advisable to use bolts with the letter 'X') and M12 bolts. Then screw the adapter with the guide to the steering knuckle using standard M10x25 bolts, pitch 1.25. Install the Volga pads, having previously cut off the wear sensor wires from them. Install the caliper. The bleeding fitting must be at the top, otherwise it is impossible to bleed the brakes. All that remains is to bleed the brakes, and here it is worth considering that with GAS calipers, more brake fluid is poured into the system.
Installation of calipers from GAZ 3110 to VAZ 2110 (R14)
In general, the installation is similar, but there are a number of points that are worth paying attention to: 1. Due to the fact that when installing R14 brake discs, the guide will move towards the steering knuckle, so we saw off the edges of the boot using a grinder. 2
The adapter is used for R14 brake discs. Bolts should be used 5mm shorter, M10x20 pitch 1.25 with an M10 lock washer. Otherwise, the bolt will press the adapter to the brake disc and the disc will not turn
2. The adapter is used for R14 brake discs. Bolts should be used 5mm shorter, M10x20 pitch 1.25 with an M10 lock washer. Otherwise, the bolt will press the adapter against the brake disc and the disc will not turn.
3. The Volga’s caliper is larger than that of the “ten”, so you have to install a disc with a different offset, in this case the ET35 offset. An 11mm spacer for the wheel rim is also used. When installing disks, the seat may cling to the disk guide; in this case, you can grind the guide or use a spacer of the required thickness.
Conclusion
The negative point, which is the large weight, in practice does not affect the behavior of the machine. And the performance of brakes with GAZ calipers is significantly better.
By the way, this is not the only way to tune the brakes; rear disc brakes are very popular, as well as simply replacing brake discs from R14 to R15.
Repair of brakes, calipers VAZ 2101, 2106, 2107 CLASSICS
Installation of front brakes from VAZ 2110-12 on VAZ Classic
Having gone through the procedure of replacing the brakes on my car, I would like to share my experience and advice with those who are just planning to perform such an operation. Let me remind you that the brake mechanisms of the VAZ 2110 are designed for 13′ brake and wheel discs, while the mechanisms of the VAZ 2112 are designed only for 14′ discs. Since I have both sets of 13′ wheels, the choice fell on the VAZ 2110 brakes. Let's start with the reasons. The main one is braking efficiency, especially from high speeds (about 110 km/h). It’s no secret to any of the owners of the Classic that the standard brakes are enough for two or three powerful emergency braking from decent speeds, after which you can safely go to the store for new discs, because the old ones are caused by overheating. Ventilated brake discs allow you to use your brakes without thinking about how hard they are working. Another reason is the ease of maintenance of the 2110-12 calipers; changing pads is a pleasure, plus the ability to install squeaks on the pads, which will help you remember to replace them in time. Well, for now the last reason, which was a pleasant bonus: the caliper with the VAZ 2110 disc to the touch weighs 4 kilograms less than the original brakes. Already when leaving work, I felt that the front suspension began to work out more little things and, in general, work more softly. Actually, let's move on to the procedure for purchasing and installing brakes. Purchase
To install a set of VAZ 2110 brakes on a classic, you need to buy:
A set of adapters (2 pieces)
for installation on the front axle of the Classic calipers VAZ 2108-10-12, like these:
Brake discs VAZ 2110
, I opted for wheels in the Lada-Sport package - ventilated, perforated, with grooves. Upon closer inspection, the disks turned out to be manufactured by , which has established itself as a manufacturer of high-quality components.
I highly recommend purchasing in advance all the fasteners for the steering knuckles and bipods, as well as the steering bipods themselves (in stores they are listed under the name “steering knuckle lever VAZ 2101-07”). The long bolts soured in the bipods so much that I couldn’t knock them out or drill them out, so in the end I replaced both bipods; they were also purchased at the Rus-Trade store. I fastened the caliper to the adapter using the bolts for fastening the ball joints of a VAZ 2108 (there were a lot of new ones lying around at work, they have 16 turnkey hats, they come with a grower). Depending on the condition of the wheel bearings and hub seals, they can also be replaced; the hub will still need to be removed during installation. Installation
The installation should begin with the fact that under the hood of the car you need to tightly clamp the hose that goes from the brake fluid reservoir to the piston of the front circuit of the main brake cylinder (there are two of them, we need the one that is closer to the engine shield, i.e. the rear one in the direction auto).
This must be done to avoid severe airing of the circuits after removing the original calipers and hoses. It is very convenient to use a medical clamp with a lock for this; if you don’t have one at hand, you can get by with thin-nose pliers/pliers, repeatedly wrapping their handles with increasing force with a tight rubber band or rope. Next, we dismantle the original brakes, there are no difficulties here - we unscrew the caliper from the knuckle, then the brake hose, remove the brake disc, and, unscrewing the hub nut (it’s better to loosen them with a sharp bit before doing this, you won’t spoil the threads and you don’t have to buy new nuts), remove the hubs . Attention!
The thread on the right hub nut is right-handed, i.e.
the nut is unscrewed clockwise
. Next comes the most difficult part - you need to unscrew the original caliper adapter and bipod from the fist. On the one hand, I tried to unscrew them, the short bolts came out without any problems, but the long ones that hold the bipod were a problem. If you have access to an angle grinder, cut them down immediately, saving a lot of time and nerves. Another option is to drill out the caps. They come out of the caliper adapter and knuckle normally, but you don’t even have to try from the bipod. I forgot to say, the steering ends will also have to be removed, who knows what, I used the Force universal ball joint remover and a pneumatic impact wrench. The main thing is not to spoil the carvings on your fingers. It is better to do the next operation in advance. Back at home, having attached the adapters to the 2110 calipers, I saw that the adapters would have to be sharpened from the side of the brake cylinder, otherwise one mounting hole would not match. This is clearly visible in the photo:
After filing with a grinder along the intended lines, you should end up with something like this:
After this you can start assembling
. Thoroughly clean the mating surface of the knuckle from rust with an iron brush. During the assembly process, I highly recommend lubricating all mating surfaces and bolts with any grease (litol, CV joint, etc.) to avoid souring and to facilitate future disassembly of the assembly, if necessary. I used universal high-temperature lithium grease from MS
We install the adapter on the fist (do not confuse the right with the left), the bipod, and tighten all the bolts properly. You can ignore the fact that one edge of the head of the original bolts is ground off so that it does not touch the hub; nothing touches me with ordinary heads. We tighten the wheel nut by hand; adjusting the bearing clearance will need to be done at the very end, with the wheel installed.
We install the brake disc (if they are not standard, do not confuse the right with the left), and the caliper:
Next, we connect the hydraulics and pump the brakes according to the standard scheme. On the other hand, we repeat all operations. After installing the wheels, it is necessary to adjust the thermal clearance of the wheel bearings. There is nothing complicated in this procedure, the information is on the Internet, just in case, I’ll tell you how I do it. The bearing is slowly tightened until you can no longer feel the play of the wheel along the vertical axis with your hands (we shake the wheel by holding it with your hands at 12 and 6 o’clock), after which the nut is unscrewed by 10 degrees. This will provide the necessary thermal clearance for normal operation of the bearing. We lock the nuts with a sharpened beard. Don't forget, the thread on the right nut is right-hand, the nut is screwed counterclockwise. That's all. We drive and enjoy the work of the new system.
Even if they are not ground in, with crappy standard pads they brake a little better than the original brakes, I can imagine what will happen with the ground in TRW pads. And one more thing that will need to be corrected is the dangerous proximity of the brake hoses to the levers, this is clearly visible in the photographs, a little later I’m thinking of putting back the standard hoses, or coming up with some kind of fasteners for these to avoid chafing with the levers. Well, due to the replacement of the bipod, the toe-in was slightly out of whack, so we'll have to go to a wheel alignment.
Removal and repair of front calipers on VAZ 2101 (front brakes)
I noticed that when the car sits overnight after a trip, you can barely move it at normal engine speeds. I had to change the throttle and “rip off” the wheels, so to speak. I didn’t sin on the rear wheels, since I recently changed the pads and adjusted them more or less normally. But there is some kind of problem with the front brakes. Even when I got “wheels,” the first and second thing I did was change the running gear consumables and the front pads (the rear ones were still intact at that time). 3 years have passed and the problem has not gone away. So, vacation has arrived, a convenient moment to implement our ideas and off we go... The first thing we need is TOOLS, namely: a jack, a wheel wrench, keys for 10, 14 (many have 13) and 17 and, if available, the same heads, screwdriver, pliers , a hammer, a split wrench for pipes, a stationary vice, some kind of container for collecting parts. What I didn't indicate, look at the photos.
Tool used for removing front calipers on VAZ 2101
Parts: Brake fluid (1l, but less can be done), repair kit for front brake cylinders
I also had a Soviet set, but in the same quantity
If you decide to replace the brake cylinders completely, it is advisable to change them in pairs (internal + external). Let's start with... Jack up the wheel, turn it by hand and at the same time check for play in the bearings (it won't hurt)
Remove the wheel and see the following picture
We have a hub, caliper, hoses, etc.
Unscrew the bolt securing the brake hose bracket to the caliper and remove the bracket.
We unscrew the bolt securing the brake hose and remove it with the upper sealing washer and the brake hose. You need to be careful here, because the second (lower) sealing washer remains on the brake cylinder. Don’t lose it, otherwise you will have to look for it in your hardware, because you can’t live without it. As soon as you start unscrewing this bolt, brake fluid will begin to ooze from under it, and only the degree of your skill will determine how much brake fluid you will then have to add to the reservoir. When you unscrew and remove the bolt from the hose, the hole will need to be closed with something (for example, a piece of rubber from a camera twisted into a cone did the job perfectly). So, the hole was plugged, the removed parts were put in one place and the copper washer was not lost. Remove two cotter pins from the fingers; we knock out the fingers from the brake cylinders; remove the brake pad pressure springs and take them out.
If they do not give in, and in most cases with jammed brakes this is the case, then a hammer, punch or something similar comes to the rescue and carefully knock out the pads. By the way, the pads may be prevented from coming out by the shoulder on the disc formed by the wear of the pads.
It's time to unscrew the two caliper mounting bolts. I read several manuals that write about lock washers, but I didn’t see (or feel) anything other than the Grover (which is essentially a lock washer anyway). We take the key (head and knob) 17 in our hands and boldly unscrew it with Virastyuk’s effort
This is the end of removing the caliper. By the way, without pads, the brake disc spins very happily!
Installing the caliper is the reverse of removing it, so there shouldn't be any problems. But I had an embarrassment - the batteries on the camera ran out, so no further photo accompaniment. We take the removed caliper and first go to a convenient place to remove the connecting line, and then to the vice along the way, grabbing a hammer and a wooden block (after all, it’s aluminum, it’s a pity). Here you need to remember about the retainer, which rests on each cylinder and can be seen by the slot in the caliper body. And it rests with me because everything is covered with dirt and after pressing it once, it never returned to its place. It's okay, we'll fix it. The main line can also become sour and not succumb to provocations, so you should consider purchasing spare ones. First, we fix one side of the caliper, and on the other we knock out the brake cylinder and remember and mark the side from which it was removed. We repeat the same procedure with the other brake cylinder. Having examined the removed cylinders, I fell into a stupor. How to pull out the pressure cylinder itself. and came to the conclusion that you need to connect it back to the brake hose and pump the brake pedal several times and it will come out of the housing. This is how it happened, but the main thing here is not to overdo it, because you can lose a lot of brake fluid, which is what happened on my first sampler. That's why you need 1 liter of liquid))). I did the same with the other cylinder, only I screwed the plugged tube from the line (lying around in the parts) into the adjacent hole. Now we carefully wipe them and diagnose them. I got by with a small scrape of oxidized aluminum on the edges with a knife and that’s it. For each cylinder there is one oil seal, which is placed inside the housing, and one boot - tensioned after installing the pressure cylinder in place. Before installation, coat everything in brake fluid and assemble it. I’ll say right away that the pressure cylinder is very bad, it almost doesn’t fit into the body, so it needs to be driven in with a hammer at both ends at the same time (I hope you’ll understand).
I forgot to mention the retainer. I pulled it out, blew out the hole with lung air, lubricated it with lithol and put it back. We put everything back together, and then back again, install it on the car and pump this wheel. There is no point in pumping other wheels, since the sorcerer (force distributor) did not allow air to enter the rear cylinders.
Installing VAZ 2112 brakes on a VAZ classic
I am posting a manual for installing VAZ 2112 brakes on a classic.
Necessary tools and small parts
7mm wrenches - unscrew the studs, 8mm - bleed the brakes, 13mm - install the pads in the new caliper, 14mm - unscrew the old brake hose from the old caliper and screw it to the new one, 15mm wrench - remove the brake hose from the VAZ 2112 caliper - provided that it is attached there, wrench 17mm head + ratchet and standard, 27 mm - socket or head.
Washers for the brake hose - 4 pcs., long bolts for fastening the washers plan 99% that the original ones are attached - 4 pcs. That's all. Litol - 24 and brake fluid.
So, the list of stages and sequence:
1. Remove the wheel - 4 unscrew the 4 bolts. 2. Remove the original 13″ caliper - without unscrewing the brake fluid hose
held on by 2 17mm bolts
caliper mounting points
3. Remove the 13″ brake disc along with the hub - 1 nut per 27mm, having previously unscrewed the studs. 4. Remove the original faceplate, along with the boot - 4 17mm bolts
Further about the stages of assembly and what needs to be done first: 1. You need to take metal scissors or a grinder to cut the boot - just like in the photo and straighten it with a hammer. Otherwise the 14″ disk will not fit.
Please pay attention to where else it is necessary to cut the boot so that the new caliper can easily fit into its seats. Cut only for installing the caliper.
2. We fasten the new faceplate (you can see how to install it in the figure above), I warn you, do not forget to insert the lower bolt into the new faceplate, otherwise the lever simply will not allow you to install it later, and I also advise you to install the upper bolt there instead of the lower one with a flat head, and not round
together with the boot also 4 bolts back, it is impossible to confuse the installation locations of long and short bolts). The only thing I draw attention to is the need to install brackets to firmly secure the bolts and nuts from loosening.
3. You must first grind off the small protrusion on the hub in a circle in any convenient way, otherwise the brake disc will not fit, see the photo, you can clearly see where to grind
4. Install the new disc back onto the hub. Sharpen the hub better - otherwise you will have ABS to check whether the disc is level. We put it on the hub without pulling it and try to swing it from side to side, if there is any play, then we continue sharpening
tighten with studs and twist; also check for evenness of rotation, do not overtighten the hub! It’s better to tighten it to the same riveted places on the nut and rivet them again. 5. We put pads into the brake caliper and put them on top of the disc, fix the caliper with 2 bolts). Once again we check for smooth rotation - runout of less than 0.2 mm is allowed... 6. Unscrew the brake hose from the old brake caliper - 14 mm nut. Take new bronze washers and attach the original hose from the VAZ 2101 or a new one to the new caliper. This is so that the main brake does not catch air and the loss of brake fluid is minimal. The nut is marked in the photo
7. Bleeding the brakes, preferably all circuits.
Here is the finished result:
From force majeure: I had to replace one hub (the thread on one of the bolts was eaten up); the disk and tires were held on by three bolts and a new internal boot was attached to it. I’m sharing my first impressions, the new brakes are starting to gain momentum, the pads are being quickly ground in, their effectiveness is starting to increase, but I feel that maximum aggression is yet to come.
Useful drawings for installing VAZ 2112 calipers in a VAZ 2107
And this is my drawing.
Here are some drawings that might be useful to someone.
https://www.drive2.ru/l/3010828/, https://www.drive2.ru/l/5668721/, https://www.drive2.ru/l/288230376152186883/, https://www .drive2.ru/l/925982/
next article:
Parking brake (handbrake) VAZ 2101, 2106, 2107 classic
Contents of the article: Installing a hydraulic handbrake on a VAZ 2101. Sound signaling device for the parking brake (handbrake) on a VAZ 2103 1.
Rating 0.00 [0 Vote(s)]
Caliper repair
If you decide not to replace, but to repair the mechanism, then you can purchase a special kit for this purpose. It consists of the following components:
- Gaskets.
- New piston.
- Guide elements.
The cost of the repair kit is about 500 rubles. And a new caliper for a car of the tenth family, depending on the greed of the seller, may cost 2-3 times higher.
But before installing the new elements that are included in the kit, it is necessary to completely disassemble the VAZ-2110 caliper. To do this you will need to use an air compressor. Connect it to the hole for the brake pipe, and then gradually supply air. It is advisable to install a rubber spacer or a wooden block under the piston. This will avoid a shot, since the piston moves freely.
A similar action can be performed immediately before removing the mechanism. To do this, you do not need to disconnect the caliper from the system; instead of the brake pads, install a small wooden block. Gently press the brake pedal to build up pressure in the system. In this case, you will lose some amount of liquid, but if you were planning to fill in a new one anyway, then this is not a problem.
Installation of a new piston is done using a clamp. Be sure to bend back the boot to avoid damaging it. Before installing the piston, it is necessary to remove contaminants on the internal surfaces with non-aggressive liquids. It is not recommended to use liquid to clean the carburetor, as it can damage rubber and plastic products.
What breakdowns indicate wear or damage?
The brake caliper is in motion, so it often fails. Moving parts are subject to the greatest wear. Common breakdowns affect safety and require elimination:
- The guiding elements jam during operation. To detect a breakdown, you need to check the functionality of moving components and systems. The rubber boots on which the seal depends often wear out. When moisture or dust comes into contact with the lubricant, its original condition deteriorates and its basic properties are lost. It begins to gradually damage internal parts and metal fasteners.
- Souring of guides. This is also a common problem. Vehicle owners can clean the surface of rust themselves. Specialists and technical service technicians advise buying new parts.
- One or more pistons are stuck in a certain position. The main reason is the appearance of corrosion and rust. In this case, you need to check the integrity of the anthers for cracks and damage. They are often not visible during examination, so it is necessary to seek help from specialists.
- Brake fluid is leaking from the structure. Traces of oil appear when the internal elements are heavily worn. In this state, moisture begins to seep in. To solve the problem you need to buy high-quality seals. Many manufacturers offer ready-made repair kits for replacement.
- The fastening of the pads was destroyed, play and loosening appeared. Metal inserts are used for fixation. To save money, you need to change the inserts along with the pads. Thanks to this, costs are minimized.
These are the problems that drivers face while operating the car. Also, the piston system often becomes immobile when jammed, worn or damaged. It is necessary to regularly check the integrity and performance of the guide elements and the hydraulic system.
Symptoms of failure:
- Problematic braking. To stop the vehicle, you need to press hard on the brake pedal. The main symptom is a long braking distance.
- During operation, the elasticity of the pedal disappeared and it became soft. Punching is carried out sharply.
- Braking occurs unevenly. Sometimes drivers notice that the car begins to pull to one side.
- After the driver stops braking, the system seizes.
- Brake pedal knocking.
- When the driver sharply presses the brake pedal, the structure jams or completely blocks.
- During operation, an extraneous sound, knocking, whistling is heard.
If such malfunctions are discovered while driving a car, you must not delay repairs and seek help from specialists. They will be able to accurately determine the malfunction and fix it within a short time.
Repair
The first rule: if you don’t want further troubles, especially when one of the wheels jams, never repair only one caliper, always both together!
To sort through, repair or replace individual parts, and possibly completely change the unit if it turns out that there is nothing left to repair, you need to follow the following algorithm:
Remove the ring securing the cover, and then the cover itself; To avoid damaging anything, place a piece of wood or a rag between the caliper and the piston, then remove the piston
Also watch your fingers - parts of the mechanism can press them; After removal, pay attention to the piston and cylinder. If you find any damage on them, then the entire assembly needs to be replaced; If everything is fine, using a wooden or possibly a plastic tool, remove the piston seal from the caliper cylinder; If you have a PD51 model, you need to squeeze out the bushing, remove the covers protecting from dust on both sides; All elements should be washed with a liquid intended specifically for cleaning brake mechanisms; You probably purchased a repair kit
From this, “push” a new seal onto the piston, then place it in the cylinder. This must be done without using brute force, otherwise the brake mechanism may subsequently jam; Install the piston dust cover - a new one, from the repair kit; The bushings must be lubricated with silicone grease, which is also included in the repair kit, then installed in the corresponding holes; Install the dust covers in their proper places; Before installing the caliper on the car, replace the copper gaskets on the hose connection.
The front brakes can now be completely reassembled. A prerequisite after repair is to bleed the brakes.
All that remains is to check whether the wheels lock properly when you press the brake pedal, and whether the caliper is sticking. Everything is fine? So, you can hit the road.
Source
What's good about a disc brake?
The main advantages are as follows:
- Compared to a drum, a disc is more reliable, and the braking is “sharper”, due to which the braking distance is reduced;
- The pedal responds faster after pressing;
- The system cools better, which is important when driving in conditions where you need to brake frequently;
- Very convenient to operate and repair, such brakes are easier to dismantle;
- They do not freeze after driving into a puddle of water or after washing.
VAZ-2110 caliper maintenance and repairs
It is mandatory to service the VAZ caliper after each replacement of brake pads, as well as in the event of a forced inspection due to its malfunction, for which it is first necessary to check the condition of all rubber elements, shock absorbers and anthers. It is also imperative to replace the grease for the caliper guides. You need a good synthetic based silicone lubricant that can withstand high temperatures.
If you had to buy a repair kit, it contains such lubricant, all the necessary gaskets, new guides and a piston. The price of such pleasure will cost you about 500 rubles. Buying a new VAZ-2110 (2112) caliper, depending on the store and region of Russia, will cost from 1000 to 1500 rubles.
To remove the piston from its seat, it is necessary to create the appropriate force using an air compressor (pistons are repaired one at a time, the stroke of the second is blocked, for example, by a wooden block). With the same success, when removing the product from the car, you can press the brake pedal without disconnecting the VAZ 2112 caliper from the brake hose. It is advisable to use a rubber adapter in order to absorb the sharp impact of the freely moving piston and its “shot”.
VAZ 2110 caliper repair
The piston is pushed back using a special clamp. In this case, the boot should be bent to compensate for excess air pressure. The hole for the piston and for the guides are cleaned and washed with carburetor cleaning fluid, all gaskets, boots and seats are also thoroughly lubricated.
Why do brake discs get hot?
Heating is not a malfunction if it occurs evenly on both sides and the temperature value does not exceed acceptable limits. In this article, by the word “heat” we mean overheating.
Most discs are made from cast iron. This metal is suitable for daily use - it is inexpensive and has good frictional properties. But it also has its drawbacks: due to frequent braking, the cast iron gets very hot, even to the point of smoke. The pads begin to melt and warp.
To reduce heating, or rather, speed up cooling, discs are produced with voids inside (ventilated). This has almost no effect on the characteristics.
To improve performance, perforations and alloys began to be used. If you replace standard brakes with drilled ones, they will cool down faster.
Why do brake discs get hot? The cause is almost always friction. In 99% of cases
And it doesn’t matter whether the front ones are heated or the rear ones, left or right. Having discovered a problem, car enthusiasts usually check the free play of the wheel:
- remove the car from the handbrake or gear;
- jack up the car;
- spin the wheel.
If you hear a rustling sound or the wheel rotates with force, the problem is most likely in the brake caliper, which does not release the pad (or pads) even when the pedal is released.
Often, rust covers the cylinder bore or the outer walls of the brake piston, which prevents it from moving freely. It can also cover the guides. Restoring a caliper at a service station is called development. It is necessary to change the rubber seals - this can only be done if you have a repair kit. Sometimes you have to change the piston too.
Another reason why the wheel rotates slowly and the brakes heat up is wear of the wheel bearing (when the brake disc heats up on one side). Actively heating up, it transfers heat to the disc brakes. True, in this case the movement will be accompanied by a howl or hum at certain speeds.
Well, what if the wheel rotates freely in a suspended state, but after the ride it burns your fingers badly? This can happen for a number of reasons:
- Severe wear or deformation of discs. As their thickness decreases, heating occurs faster.
- Installation of new low-quality pads.
- Replacement of brake fluid with inappropriate one.
- Large production of pads.
- The front brake discs heat up on cars with rear drum brakes - because the front axle bears a large load when braking.
- Excessively aggressive driving. With constant acceleration and sudden stops, the brakes do not have time to cool down.
- Delamination of the inner surface of the brake hose. This is an obstacle to the circulation of brake fluid - the pads will not be able to diverge normally.
- Air in the brake system circuit.
Front brake discs
Causes:
- wear;
- wedging caliper;
- low quality pads;
- aggressive driving with rear drum brakes;
- The pads were installed incorrectly.
On the one side
Typical problems are a stuck caliper or a worn wheel bearing. A crooked block may also be the cause.
After replacing the pads
If you did not have such a problem, but it appeared after replacing the pads, the problem is most likely due to the poor quality of the latter or the fact that you selected them incorrectly.
The cause may be improper pumping. Let the pads get used to it (which will happen over several hundred kilometers) - then the problem will disappear.
Removing the caliper
The mechanism is of a very simple design; dismantling can be done without much difficulty. Even a novice motorist can cope with such work. In order to remove the VAZ-2110 caliper, you will need to perform the following steps:
- Loosen the wheel bolts on the side being repaired.
- Raise the side to be repaired using a jack and remove the wheel completely. Install it under the bottom of the car. This will protect you in case the car suddenly falls off the jack.
- Cars of the tenth family have the caliper attached to the bracket using two M17 bolts. They need to be unscrewed. If you can't strip the threads, use a penetrating lubricant.
- Unscrew the brake hose, which is located at the top of the caliper.
When dismantling, evaluate the condition of all rubber tubes. If there is damage on them, even small cracks, it is imperative to install new elements. Such breakdowns can lead to the brake system depressurizing while driving.
Where is it located?
Based on the name, it is not difficult to guess that the rear brake caliper of Opel and other cars is located on the rear axle. This element is attached to the hub using bolted connections. There are pads inside it (both on the left and right sides). The Chevrolet Lacetti rear brake caliper is driven by a hydraulic drive. The same scheme is used on other passenger cars.
But as for trucks, here the rear brake caliper (left and right as well) is driven by a pneumatic system. Not long ago, trucks used a combined drive system. So, the rear right and left brake calipers worked first from hydraulics, and then from pneumatics. But now this design is no longer used. If we talk about minibuses and SUVs, hydraulic drive is also used here.
Guide faulty
The main problem if the brake does not work can be jamming and souring of the caliper guides.
Repairing this malfunction with your own hands will not be difficult. By the way, in this case there is no difference when disassembling both the front and rear calipers. To do this, you need to unscrew and pull out both guides. Clean them from dirt or poor-quality lubricant, remove and replace the torn boots with new ones, after filling them with special grease for calipers.
Then put them in place, insert and screw the guides back. Then you should try how freely the pressure bar moves along them. This can be seen visually in the attached video at the end of the article.
We should not forget about the housing of this brake element. If significant rust, dents, sagging or other mechanical damage is found on it, it should be replaced completely.
If the repair had to be done on a removed caliper, then after installing it in place, the brake system should be bled.
Causes of brake jamming
There are several elements in the brake system that lead to partial or complete wedge, and first of all these are the caliper guides, which owners forget to lubricate when replacing a set of pads or lubricate with the wrong thing. As a result, the “guides” rust or coke and prevent you from moving in space.
Soured caliper guides most often lead to a wedge
Caliper pistons appear a little less frequently in jamming statistics. They also fell into the zone of personal hostility to corrosion, but sometimes the cause of the problems is banal wear, due to which the piston loses alignment with the seat in the caliper and it jams in one place. However, the same thing and for the same reasons sometimes happens with the main brake cylinder, although this happens much less often. And the owner finds out about what happened immediately and, most likely, remembers it for the rest of his life.
Caliper pistons don't last forever either.
Handbrake pads also sometimes “sin” in winter. And it’s okay if the rear wheels just freeze to them and after some time “come unstuck”, because there are cases when the clutches and brakes are torn out of their seats, what? That's right - it sticks.
Uneven wear is one of the signs of brake jamming.
Guide faulty
The main problem if the brake does not work can be jamming and souring of the caliper guides.
Repairing this malfunction with your own hands will not be difficult. By the way, in this case there is no difference when disassembling both the front and rear calipers. To do this, you need to unscrew and pull out both guides. Clean them from dirt or poor-quality lubricant, remove and replace the torn boots with new ones, after filling them with special grease for calipers.
Then put them in place, insert and screw the guides back. Then you should try how freely the pressure bar moves along them. This can be seen visually in the attached video at the end of the article.
We should not forget about the housing of this brake element. If significant rust, dents, sagging or other mechanical damage is found on it, it should be replaced completely.
If the repair had to be done on a removed caliper, then after installing it in place, the brake system should be bled.
Published on August 28, 2016
Front caliper repair. DIY caliper repair
Please tell me, the piston is seated very well and is not squeezed out or pressed in. car ford orion 1991 how to get it from there? Thank you in advance
How to completely change the brake fluid in an Audi A4 2007? with a manual transmission, because the clutch is also connected to the brake, I just can’t find information
Lubricate the piston with VD? Did I miss anything? But what about special heat-resistant lubricants?
Well, you are a master! Pop the vd. There is a special mounting lubricant for calipers. You're killing people with brake repairs like this.
the anther is as old as mammoth shit. I would throw this caliper at the owner. cutter
Won't wd40 cause rubber bands to swell?
I wonder why there are colored marks on the cuff?
I'm giving a minus - I didn't see how they cleaned the working surfaces of the piston and caliper?
Absolutely the same, you can get the repair kit here - support-tuareg.rf
This is all crap, I was the only one who did this and regretted it because I had to remove the caliper. And accordingly, then you will have to bleed the system. On the second caliper, I took a wrench from a grinder to tighten the disk; it fits perfectly into the rims of the piston and pressed it in place.
man you're great, don't pay attention to some negative comments
Friends, please answer how to lubricate the piston under the boot, what is the name of the lubricant. thanks for the answer..