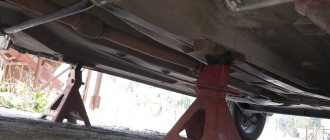
We carry out the work on an inspection ditch or overpass. We carry out work to replace the external and internal joints of wheel drives, their dirt-proof covers, drive seals, as well as when dismantling the gearbox or power unit. Remove the middle mudguard of the engine compartment (see “Removing the mudguards of the engine compartment”). Drain the oil from the gearbox (see “Changing the oil in the gearbox”). We unscrew the front wheel hub bearing nut (see “Replacing the front wheel hub bearing”) from the side of the drive being removed. We hang up the front of the car and remove the wheel. We unscrew the two screws securing the ball joint to the steering knuckle (see “Removing the ball joint”). When removing the right drive, turn the steering wheel to the extreme left position (when removing the left drive, to the extreme right position) so that the steering rod output has its maximum value. This will allow the outer joint housing shank to be removed from the wheel hub without disconnecting the tie rod end from the steering knuckle. When removing the right drive...
… using a wrench or a socket “10” we unscrew the nut securing the heat shield of the protective cover of the inner CV joint... . and two bolts securing it to the rear support bracket of the power unit (see “Removing the catalytic converter”).
We move the steering knuckle with the shock absorber strut to the side and remove the splined shank of the outer joint housing from the wheel hub. We place the drive on a stretcher. We install an adjustable stop under the gearbox housing by placing a wooden block under the housing.
Using a 19mm head, unscrew the top two...
...and with a “17” head one lower bolt securing the rear support bracket of the power unit to the clutch housing.
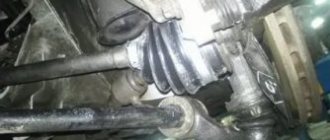
We press the bracket of the rear support of the power unit down and insert the mounting blade between the housing of the internal drive joint and the clutch housing...
...push the shank of the hinge housing out of the spline hole of the drive gear.
Do not damage the protective ring of the drive oil seal located on the inner joint housing. We remove the right drive, being careful not to damage the oil seal. When removing both drives, after dismantling the first one, it is necessary to insert a clamp, for example, a wooden or soft metal roller with a diameter of 20 mm and a length of 150 mm, into the hole of the drive gear. Otherwise, the differential drive gears may become misaligned and the drives may not be able to be installed. When dismantling the left drive...
…it is convenient to rest the mounting blade through the spacer onto the gearbox housing.
Remove the left drive. Before installing the drive...
... use a screwdriver to pry up the retaining ring of the shank of the internal joint housing, which secures the drive in the gearbox.
Replacing the CV joint on the Lada Grant. Service life and causes of malfunctions of the “grenade”
Causes of grenade malfunctions and its diagnosis
Usually the CV joint does not break right away.
You will feel the car accelerate jerkily and hear a knocking sound from somewhere in the front suspension. Over time, symptoms worsen. Diagnostics is very simple: put the car on a jack and swing the CV joint of the suspended wheel. Do you feel any play? It's time to change the part. There are 4 main reasons why CV joints fail prematurely:
1) The part itself is of low quality or defective;
2) The vehicle is used off-road;
3) The boot broke and dust and abrasive particles got inside;
4) Aggressive driving style.
If you turn to specialists for help, you will have to fork out money. Replacement service costs an average of 1,500 rubles. for 1 CV joint.
You can save money by doing your own repairs: the cost of a spare part in auto shops starts from 1000 – 1500 rubles. for 1 “grenade”, complete with drive components cost about 3000 – 4000 rubles. There are a lot of manufacturers, but it is better to take the original from AvtoVAZ.
Tools and materials
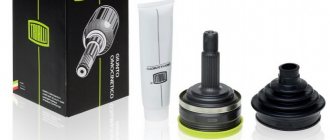
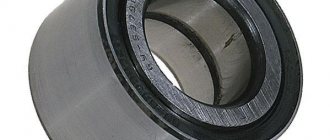
- new CV joint (the grenade itself, without the drive) and lubricant for it;
- jack, hammer;
- wheel wrench, mounting, pipe of suitable diameter;
- a set of wrenches and sockets, a screwdriver;
- graphite lubricant.
Replacing the “grenade” with the Lada Granta
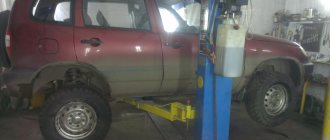
1) First, you need to place the car on a hard, level surface so that you can jack it up.
2) Remove the wheel using a wheel wrench.
3) Loosen the hub nut with a 30mm socket. If it is difficult to turn, use an iron pipe as a lever.
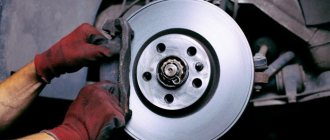
4) Remove the brake caliper.
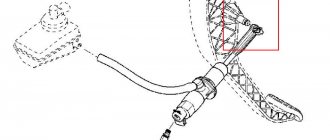
5) Remove the 2 bolts from the ball joint.
6) Unscrew the hub nut completely, take the mounting tool and remove the hub from the CV joint (and from the ball joint).
7) Pull off the boot and remove the grease, otherwise there will be a lot of dirt.
 Using a hammer, carefully knock out the “grenade”.
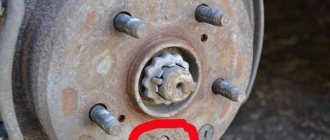
9) Don't forget to remove the retaining ring with a screwdriver.
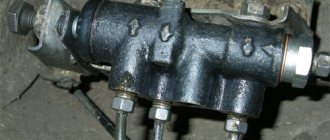
10) On the left in the photo is a CV joint made by AvtoVAZ, and on the right is Belmag. As you can see, of these particular samples, the VAZ one is preferable, since it has better calcination.
11) Take the grease and fill the entire grenade bearing with it.
12) Put on a new boot and put lubricant in it. Then install a new retaining ring.
13) Screw the hub nut onto the CV joint.
14) Hitting the nut with a hammer, hammer the “grenade” into place. During the process, it is extremely important to keep the CV joint straight in relation to the drive.
15) Tighten the boot clamps.
16) Unscrew the nut, then reassemble everything in the reverse order of removal. We recommend coating all bolts with graphite to prevent them from souring.
17) Do not forget to move the ABS ring from the old CV joint if it is not on the new one, otherwise problems with its operation may arise.
CV joint Lada Granta | transmission gearbox clutch Lada Granta
1. Replacement of the outer CV joint for the Lada Granta
2. Video: “Replacing the boot of the outer and inner CV joint (grenade)
Replacement of outer CV joint for Lada Granta
Still, I decided to change the CV joint today. because then there will be no time. I made a photo report, as detailed as I could.
sit down and remove the wheel
While the car is still with the wheel, loosen the hub nut using a 30mm socket and use a metal pipe for reinforcement.
Next, unscrew the caliper assembly. Some will say that there is no need to do this, because you can change the grenade anyway, but it’s convenient for me so that he doesn’t interfere with me.
then unscrew the two bolts from the ball joint
then unscrew the loose hub nut completely, and using a mounting tool (a small pull) remove the hub from the ball and at the same time from the CV joint
remove the boot from the CV joint and remove all possible lubricant so that there is less dirt
and start trying to knock out the grenade with a hammer. And she gave in quite easily, not like last time, we beat her for almost 2 hours.
remove the old retaining ring.
This is a comparison of CV joints from two manufacturers, on the right is BELMAG, and on the left is produced by AVTOVAZ. The difference is immediately visible, AVTOVAZ has a deeper CV joint calcination than BELMAG, which already gives AVTOVAZ a big plus. Let's hope that the new CV joint lasts at least 30 thousand km, and not like BELMAG only 3000 km went before it cracked. The cost of the AVTOVAZ CV joint is 1500 rubles, and the BELMAG CV joint is 1000 rubles, and the kit includes CV joint grease.
Fill the entire CV joint bearing with grease.
We put on a new boot, fill it with the remaining CV joint grease, and install a new snap ring. If the anther does not want to get dressed, then a screwdriver will help, as an option
We screw the old hub nut onto the CV joint.
hold the CV joint straight on the drive and hit the screwed nut with a hammer and hammer the CV joint into place.
But no! Let's take a larger hammer - 2 precise blows and the CV joint sits in its place.
Pull the boot and tighten the clamps on the boot.
When assembling the unit, we do everything in the reverse order, but do not forget to lubricate all the bolts with graphite grease so that nothing sticks.