Joker062RUS Was 29 minutes ago
Seryoga 62RUS, 29 years old I drive a Chevrolet Niva NaFaNya (before that - Lada 2106) Ryazan, Russia
Message
Full size
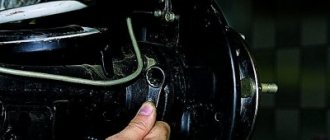
Analysis according to the manual. New brt oil seal Gasket Hermetos Roller bearing RK from Hunter. I haven’t installed my relatives for a long time
Full size
Full size
Full size
Previously Replacing axle bearings Next Replacing iveco wheel hubs
Step-by-step replacement of the internal grenade of a Niva Chevrolet
- Unscrew the 3 nuts securing the bearing housing of the drive's inner CV joint.
- front axle bearing cover to the transverse part of the suspension.
- front axle gearbox mounting bracket .
- Unscrew the nut and remove the fastening of the axle bearing cover to the transverse part of the suspension.
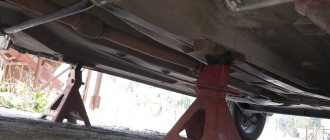
- Using a jack or other device, it is necessary to raise the front axle and secure it in this position.
- Unscrew the hub nut.
- Remove the drive nut and centering sleeve.
- By lifting the lower arm, it is necessary to compress the spring to remove the lower ball joint by unscrewing the 3 bolts from the arm.
- Move the axle aside.
- Unscrew the exhaust pipe from the manifold and the catalyst housing, and then move it closer to the engine. Replacing the boot of the inner CV joint with your own, replacing the stud on the hub of a Gilly Emgrand EC7. Replacing the inner CV joint Niva v video! -. If the left drive is being removed, this operation is not required.
- Move the gearbox back and remove the desired drive from it.
- The axle drive is installed in the reverse order.
Varieties of CV Joints
Around the middle of the 20th century, this part began to be installed on cars. Thanks to the CV joint, simultaneous rotation and steering of the wheels occurs up to 70 degrees.
Currently, 4 technical solutions for units are used in the automotive industry. These include the following:
- Tripoid.
- Cam.
- Ball.
- Twin cardan shafts.
Hinge joints can also be subdivided:
- To external ones - they are the most mobile and transmit without power loss.
- And internal. Their main feature is that they rotate up to 20 degrees.
Disassembling the axle shaft
To access the inner CV joint, it is necessary to carry out the following disassembly operations:
- Remove the grenade boot clamps and remove the inner CV joint boot .
- Knock the CV joint off the drive shaft.
- To remove the inside of the hinge, you need to remove the retaining ring of its cage.
If, when removing the inner CV joint , chips were found in the boot, and there is any damage on the hinge, then replacing the inner grenade is simply necessary.
Before putting the boot on the new inner
CV joint, it is necessary to fill it with special CV joint grease -4 (quantity 150 cm). Replacing the outer and inner CV joints on a VAZ 2110, VAZ. To ensure that there is enough lubricant in the grenade, it is recommended to stuff lubricants under the boot.
What is a CV joint?
Before front-wheel drive cars appeared, CV joints were not used as an option. As for the torque, it came to the wheels through the power unit. The driveshaft was also involved in this process. After front-wheel drive appeared, there was a need to update this mechanism, that is, it was very important that the wheels turn more easily.
Especially for this, specialists had to replace some elements, namely, develop a completely new part, which became known as a CV joint.
This abbreviation stands for constant velocity joint. Now it is this part that specialists use on front-wheel drive SUVs to transmit torque.
Many drivers also called this part a “grenade”. In appearance, the CV joint very much resembles it.
Previous posts from the category: NIVA CHEVROLET
It is known that the correct operation of the engine, namely the fuel system, directly depends on the condition of the air filter. The manufacturer recommends replacing the filter element every 30,000 kilometers.
Replacing the front axle oil seal on a Chevrolet Niva
Replacement
The front axle seal of the Chevrolet Niva is carried out in the event that it has lost its tightness and is leaking transmission oil, the leakage of which threatens the failure of the front differential.
Replacing the bearing and oil seal of the rear axle shaft of a Chevrolet Niva
For trouble-free operation of the car, you need to be sure that it is in good working order. If you have problems replacing the fuel filter, Chevrolet Niva filter video “replacement. Parts such as rear axle shafts and bearings, if they fail, can lead to the wheel stalling right on the road, which is very dangerous, so at the first sign of its malfunction (humming, crackling, howling), it must be replaced.
Replacing antifreeze on a Chevrolet Niva
When replacing coolant on a Chevrolet Niva
It is better to pay attention to the change in color of the coolant; if it has darkened, it is time to change it. To replace, we will need a new 10 liter coolant, a 13 liter wrench and a container for draining the used coolant, but if you are not an environmentalist, you can drain it directly […]
Replacing the timing chain of a Chevrolet Niva
On the left is Trialli, set it and forget it. On the right is Avtovazovsky. The knock-knock-knock started when driving especially uphill and turning to the right. The sounds are getting louder. The symptom is known, we go to change it. Brief instructions for those who still doubt whether to change the studs in the bridge to bolts or not.
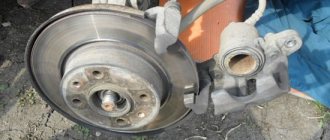
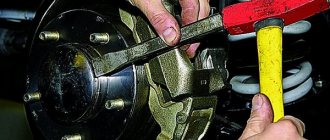
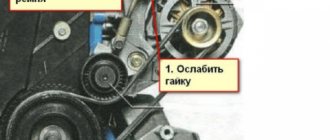
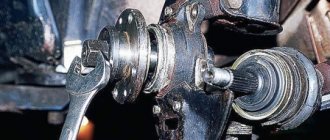
We remove the wheel, unscrew the lower ball joint, and use a suitable device to hang the fist with the hub-disc. I use a generator belt from Niva. I cling to the amma mount and 2 studs on the hub.
[Info] Catalog numbers of spare parts
List of catalog numbers of imported analogues of spare parts for Niva and their derivatives
Consumables
1) Timing belt repair kit INA -
530 0441 10
(Chevrolet Niva FAM1) 2) Timing belt guide roller SKF -
VKM 25158
(Chevrolet Niva FAM1) 3) Timing belt bypass roller INA -
532 0478 10
(Chevrolet Niva FAM1) 4) Belt tensioner roller nya Timing INA -
531 0518 30
(Chevrolet Niva FAM1) 5) Timing belt Dayco -
94787
(Chevrolet Niva FAM1) 6) Oil pan drain plug Febi -
04572
(Chevrolet Niva FAM1) 7) Opel engine oil filter -
06 50 401
(Chevrolet Niva FAM1) Contitech alternator poly-V-belt -
5PK1885
9) Contitech air conditioner compressor poly-V-belt -
4PK810
10) Ina alternator belt tensioner roller -
531 0760 10
The principle of operation of the CV joint
This part can work according to the following principle:
- There are special built-in grooves on the inner surface of the holder. Their number corresponds to the number of bearings that are inside.
- The cage is held in place by bearings. It is worth noting that the bearings separate the housing itself and the fist.
- As for the movement of bearings, it is carried out along the path of a smaller diameter fist and a larger diameter housing.
- Thanks to this, an impulse is generated that transmits torque to the driven shaft.
Symptoms of a problem
The main malfunction of the drive on the Niva is the appearance of play inside the CV joint or tripod. As they wear out, the balls erase the surface of the inside of the glass and make indentations, inside of which they then begin to dangle.
Often, a torn boot, which allows dirt and moisture inside, accelerates the wear process. They wash out the lubricant and scrape along the surface of the working parts.
Malfunctions of grenades on Niva appear as follows:
- The appearance of significant play in the transmission when starting or shifting.
- A crunch when starting with the wheels turned out is a sign of a malfunction of the external grenade on the Niva.
- A hinge knock or vibration during acceleration is a sign of the development of internal grenades or tripoids.
If these malfunctions are present, it is recommended to drive into the inspection hole and grab the drive with your hands. Rock them in a vertical plane. If play is felt inside the glasses, then the CV joint is worn out. Axial play when turning the drive is normal. The main thing is that it is not too big.
Import manufacturer, FAG (Germany)
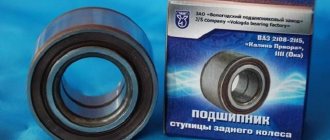
Niva axle bearing, FAG (Germany) The bearing of this standard size is made by the German manufacturer FAG.
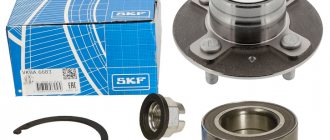
I circled three symbols on the bearing with red circles. The name of the manufacturer (FAG), at which plant the spare part was produced (Turkey) and the designation of the bearing according to the European classification (62208 2RS). Of course, this bearing is made of higher quality than the domestic one. This is confirmed both purely visually and tactilely when you pick it up, and by the rolling of the car after its installation. The advantage of this bearing is its service life and work with wheels of large diameters and discs of non-standard offset. The disadvantage is its price today. As of November 2022 – 1900 rubles per bearing. However, if you go through a node based on the “go through and forget” rule, then this is normal. On cars in which FAG bearings were installed in the hub assemblies and axle shafts, a drop in gasoline consumption of about a liter per hundred kilometers was repeatedly recorded. It is not difficult to calculate the further payback of bearings. Delivery of this item is carried out only upon order, with prepayment. Delivery time 2-3 weeks. Source
Bearing selection by manufacturer
Experienced car mechanics know that it is better to choose a bearing that is completely identical to what was before. It would be good if it was an item with the original box and logo. Such parts often correspond to their counterparts that were originally supplied to the assembly line. The price of the bearing is not always affordable, because they are produced in a limited batch for a batch of cars.
But there are other bearing models whose characteristics are in no way inferior to the original ones. And the cost of non-original bearings is lower only due to the use of a different brand. Here are just a few bearing suppliers that have become popular in today's automotive market.
- SNR – French company;
- SKF is one of the largest manufacturers in the world;
- FAG is a German manufacturer, one of the largest companies;
- NSK - from Japan;
- NTN is another representative of the Land of the Rising Sun.
Manufacturers from Japan often deliver their parts directly to the assembly line. Therefore, practically nothing is known about them on the regular spare parts market. You can ignore the country of origin in the case of the companies mentioned above. It often lists one of many offices and branches around the world.
If a bearing manufacturer is allowed onto the assembly line, this is already confirmation that a strict selection process has been passed in the first stages. This means that the quality system meets the stringent requirements for manufacturers and their parts.
The most common and popular part numbers of Chevrolet Niva bearings
- The part number of the front wheel bearing is 2007108 (catalog number: 2121-3103020-10 , foreign equivalent: 32008 );
- The part number of the rear wheel bearing is 2403080 (catalog number: 6-180508AK2US9 , foreign equivalent: 62208.2RS );
- Clutch release bearing number - 21230160118000;
- The part number of the gearbox input shaft bearing is 50706 (foreign equivalent: 750706 );
- The generator bearing part number is 180201
(foreign equivalent:
6201-2RS
).
Preparation
The main stage is preceded by training, which includes: 1. Drain the oil at speed through the drain hole;
2. Disconnecting the propeller shaft using wrench 13
3. Removing the right drive.
4. Removing the lower hinge on the left side.
5. Removing the suspension.
6. Removing the gearbox from the brackets to the right and left using a stop.
This is followed by disassembling the gearbox, thoroughly cleaning the surfaces from dirt and grease, and troubleshooting components.
Conclusion
Knowing the features of the CV joint and how you can identify its malfunction or replace it, you can cope with such work on your own , having little experience in this work.
Replacing the outer CV joint on a Chevrolet Niva is an important undertaking, because if the breakdown is not repaired in time, the consequences can be very sad; the wire may simply jam while driving. One of the first symptoms of this problem is a slight cracking sound when the steering wheel is in the turned position at the beginning of the journey.
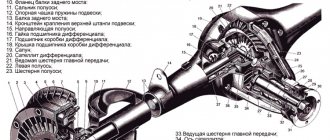
Lateral clearance in GP and differential bearing preload
According to the instructions, the lateral clearance and preload on the bearing are adjusted using tool A.95688 / R.
In its absence, a caliper of the appropriate size will perform this role.
To ensure the required preload, the distance to the bearing caps is recorded at the beginning and end of tightening. The required difference in values is 0.2 mm.
The side clearance is adjusted by moving the driven gear towards the drive until it disappears. First, one of the nuts is in a loose position, the other (working) is tightened. After eliminating the gap, gradually tighten the feed nut until the caliper jaws are 0.1 mm apart. The backlash adjustment stops when the teeth click slightly. Then both nuts are tightened evenly to a distance of 0.2 mm. Correct operation is indicated by uniform play in any position of the gears.
Drive gear adjustment
To carry out the operation, use the original device A.95690, mandrel A.70184 or an analogue made according to the drawing.
The crankcase mating plane is positioned so that it assumes a horizontal position. Then an absolutely flat metal rod is installed on the bearing bed. The distance from the bar to the mandrel is measured by inserting the adjusting rings from the set into the gap under the bar in increments of 0.05. The measured value (crankcase base) is consistent with the correction applied to the drive gear. When assembling the unit, it is recommended to abandon the standard spacer sleeve to prevent repeated repairs. Instead, a non-deformable steel bushing 48 mm long is suitable (with a margin, shorten if necessary).
During turning, the parts control the force when turning the gear (should be 157–196 Ncm); for used bearings, a torque of 39.2–58.8 Ncm is valid. The use of a proprietary dynamometer 02.7812.9501 is not necessary.
Acceptable accuracy will be provided by a household steelyard. When working with it, you should wind one end of a 1 m long cord around the flange, and secure the other end to the scales. By pulling the device in a perpendicular direction, fix the turning torque. So, new bearings should provide 7-9 kg, and with mileage - 2-3 kg.
