There is nothing particularly difficult in the process of installing an alarm system on a car with your own hands. The main thing is that you have certain skills in electricity and reading electrical diagrams.
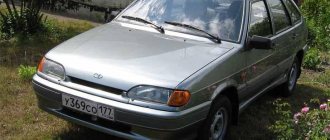
Installation of alarm system on VAZ 21099
List of equipment, materials and devices that may be needed during the installation of an alarm system on a car: 1. First of all, the alarm system itself is required. 2. Special central locking control unit. 3. Four door activators. 4. Nylon ties, they are equipped with the alarm system. 5. MALE-MALE terminals may be required. 6. Soldering iron with the necessary reagents. Installing an alarm system on a car can be done without using a soldering iron, but soldering is much stronger and more reliable than twisting wires. 7. Multitester and control light. 8. Wire cutters. 9. Insulating tape. 10. Heat shrink 11. Gas canister and gun or lighter. 12. Construction knife for stripping wires. 13. A set of screwdrivers for removing trim and decorative trims in the car interior. 14. Drill for installing an alarm system under the hood. 15. Special pliers for cleaning wires from insulation. Study the diagram and instructions supplied with the alarm system.
Instructions for the alarm
After studying the diagram, disconnect the ground terminal from the battery. Plan where to locate the main unit of the alarm system. Can be located directly under the dashboard, but keep in mind that the terminal blocks are located on both sides of the block. This leads to the fact that the wires are connected to the terminal blocks of the block with a large bend, and this contributes to chafing of the insulation and the possibility of a short circuit. It would be optimal to place the block under the torpedo.
After this, take the multi-wire cable and divide it into braids in the following order: The braid intended to be placed under the visor is behind the dashboard. This braid includes wires of green-black, green-yellow, gray-black, orange-violet colors. The braid for placing under a torpedo includes wires in black, blue-black, orange-white, black and blue. The cable for inserting under the hood consists of gray, orange-gray and black wires. It would be best to cut off the remaining wires of other colors and insulate the ends. The alarm system main unit terminal block has a black loop. It needs to be cut during installation. This is necessary for the alarm to understand that you have a manual transmission installed in your car; this is necessary for normal starting of the engine remotely.
After wiring the wires, the installation of the alarm system itself is carried out. The antenna is attached to the top left corner of the car windshield. The wire from the antenna is neatly hidden under the car's headliner, and then under the pillar panel. The hood end is attached. Sometimes it has to be cut almost flush, otherwise the hood may not close. After this, the trunk limit is installed. When work with the trunk and hood end switches is completed, the LED is installed. The best place to install it is the lower part of the left windshield pillar of the car. We install the siren next to the right pillar. The temperature sensor is attached using a nylon tie to the expansion tank pipe. You should not attach the sensor to the engine, as high temperature can damage it. The optimal location of the shock sensor is the front left pillar of the body.
After all elements of the alarm system are secured, you can proceed to the connection. Connecting the system under the hood. Orange-gray, black and gray wires are pulled through the headlight range control spacer. The orange-gray one is connected to the hood switch, the gray wire is for connecting to the siren, in addition to this wire, remember about the ground wire. The temperature sensor is connected as follows: the orange-gray wire is connected to the hood switch wire, while the black wire is connected to the black wire, which is paired with the orange-gray limit switch wire. Connection under the dashboard. The connection is made to the dashboard in this order: A green-yellow wire is attached to the direction indicators, connected to the blue-green wire of the white block, the green-black wire is attached to the blue wire on the red block. A gray-black wire from a brown-red red block is connected to the tachometer. After connecting, do not forget to reprogram the engine control. The point is that the factory programming is for voltage, but what is required is for the tachometer. To the handbrake switch: the orange-violet wire is attached to the brown-blue wire of the red block. When attaching the wires, do not forget to solder a diode into the gap, with the anode facing the parking brake light
Under the dashboard: a black wire is attached to ground. The most convenient way is to attach it to the steering column, the blue-black wire is attached to the driver's door limit switch, the orange-white wire is attached to the trunk limit switch, and the yellow-black wire is attached to the luggage compartment solenoid.
→ Get useful materials for VAZ 2101-2110 Thanks for subscribing!
The blue wire can be used at your discretion. Using it you can power, for example, decorative lighting for which you will have to install an additional relay. To attach the package to the snout, it is advisable to make a special fastening.
Relay holders, a very convenient solution
If you plan to use all channels of the alarm system, it is advisable to make your own mount for the many relays that you will have to connect to the system.
Installing a car alarm on a VAZ 2109
Central lock design and diagram
Central locking allows you to lock and unlock four doors by turning the key in the lock on the driver's side using an electronic key fob or a button in the cabin . The universal mounting kit is sold in specialized stores of electronic car accessories.
We recommend that you pay attention to the kit with remote control. This function will allow you to lock all car doors by pressing one button on the remote control. The second usefulness of the set is the presence of a blank for the ignition key. By contacting a special workshop, you will receive a set of spare keys for your car.
The installation kit contains everything you need to successfully install the central locking system in any car.
The universal central locking kit includes:
- Control block;
- four electric motors with worm gearboxes;
- metal rods;
- wiring;
- fuse;
- auxiliary mounting plates made of metal;
- self-tapping screws
The central locking control unit is connected to the vehicle's electrical network. When receiving a signal from the remote control or after turning the key in the driver's door lock, the electric motors begin to work. Through the gearbox and rods, the force is transmitted to the lock mechanism. As a result, the doors are locked or unlocked.
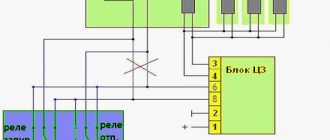
1 - standard connector on VAZ 2109, 2 - 10 A fuse, 3 - central locking control unit, 4, 5, 6 - electric drives for passenger doors, 7 - electric drives for the driver's door
How to choose an engine autostart module?
In principle, the system can be installed on absolutely any car, except that cars with manual transmissions are best left with the gears turned off, otherwise there may be a jerk when starting the engine
. But, before you go to the store and buy an engine autostart module, you need to pay attention to the following parameters of your car: what kind of gearbox is installed in it - automatic transmission or classic mechanics, engine type, gasoline or diesel.
And, of course, it is important to decide which method of turning on the engine you prefer, automatic or remote? In the first case, the engine starts independently at a previously set time. With the second option, you can turn it on from a distance by simply pressing a button at any time convenient for you. True, it is a little inconvenient to limit the operation of the key fob, only 400 meters, but this way you can still start the engine directly from the balcony without going outside.
Alarm Installation Instructions
Before installing the alarm, you need to prepare everything you might need:
- alarm kit;
- insulating tape;
- corrugations for laying wires;
- stationery knife;
- drill;
- Screwdriver Set;
- plastic clamps for fixing wiring (video author - Sergey Zukol).
Stages
How to install correctly and how to connect the signaling system in a VAZ 2109:
- First of all, you need to disconnect the battery.
- Then the upholstery is removed from the doors, you also need to dismantle the plastic trim elements on the sills and side pillars, use a screwdriver to do this.
- Next, the executive motor, that is, the solenoid, should be fixed to the door. For fixation, use plates and screws.
- After this, the dial rods are connected to the lock rod. If their length does not match, then they can be slightly bent.
- A siren is installed in the engine compartment; it must be located away from the engine. When installing a siren, remember that its operation is negatively affected by high temperatures and moisture . The siren needs to be installed with the horn down, the wiring from it is thrown into the cabin.
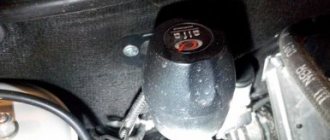
- A control module is installed in the lower part of the center console, in particular under the instrument panel. Please note that it is better to install it so that if the car is broken into, the unit cannot be found by an intruder.
- If there are no standard holes in the racks and doors, they will need to be drilled using a drill.
- Then the wiring from the electric motor to the control module is laid. The electrical circuit installed in the door must be protected using a pre-prepared corrugation. If there are places where there are twists, they should be insulated.
- The above points, in addition to installing the siren and control module, are repeated for each door.
- Then the shock sensor is installed; it needs to be installed somewhere in the central part of the body, so it will record impacts on it from all sides.
- An antenna with a diode indicator is placed on the windshield, preferably as high as possible. The antenna adapter must not be placed in close proximity to metal parts of the body, as this will cause interference.
- Now all you have to do is connect all the elements in accordance with the diagram included in the kit, and also connect power to the control module. It is better to protect this circuit with a fuse. Then the performance of the anti-theft system is diagnosed, if everything works fine, but assemble the interior trim.
Photo gallery “Installing a signaling system”
Price issue
Today you can buy a more or less high-quality central lock for 1 thousand rubles. As for alarms specifically, in this case the range of anti-theft systems is quite large. The cost of the simplest alarm system for “Nine” will be about 2,500 rubles. More functional systems will cost around 6-10 thousand rubles. You can also find expensive alarms on the market, the price of which will be above 30 thousand rubles.
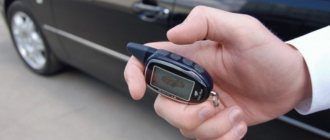
Does your alarm have an auto start function?
Survey
- Yes
- No
- Don't know
- I don't have an alarm
Loading …
How to install an alarm system with auto start yourself
If you nevertheless chose not the reliable hands of professionals, but your own, then to begin the connection procedure you must have a set of tools, a voltmeter and improvised means in the form of electrical tape and a utility knife.
First you need to open access to the wires. To do this, you need to remove the casing, beard, dashboard cover and plastic sill on the driver's side. Also, before installing the system with your own hands, the speedometer cable must be removed and secured away from the installation site to avoid problems.
Adjusting the door lock on a VAZ 2109
If the doors of your four-wheeled beast are not closing well, or are difficult to open, then it's time to take a closer look at them. This situation can be changed by adjusting the door latch.
Important! Waterproof sandpaper is installed under the door latch. It will help not to disturb the position of the latch and perform the function of a gasket.
It is thanks to the sandpaper gasket that the distance between the clamp and the stand is controlled. Thus, the latch does not touch the outer lock cover.
In principle, adjusting the VAZ 2109 door lock is quite simple. If the door dangles and moves away, the latch must be tightened; if it moves tightly, then, on the contrary, loosen it. The same logic applies if the door does not fit tightly. The main thing is to determine exactly how many centimeters and in which direction it is shifted.
For more accurate adjustments, it is recommended to mark the location of the lock before making adjustments.
Door lock adjustment
It must be remembered that in any case the gaps between the body and the door must be the same.
The simplest anti-theft systems
It should be borne in mind that an alarm, as a device designed to notify the car owner and others about attempts of unauthorized entry into the car, is not the only means of protection against theft. There are others, often simpler, but no less effective. It's worth paying attention to them.
The simplest anti-theft systems in design are of the mechanical type. This may be a special bar with a mechanical lock that prevents the steering wheel from turning. Or a bracket on the accelerator pedal, which attracts it to the steering wheel and is also closed with a mechanical lock. Another option is a steel pin that goes through a hole in the transmission housing and prevents the gears from rotating. Despite their simplicity, such devices are quite effective. They are made of good grade steel and are difficult to destroy. In any case, their dismantling requires time, special devices and serious effort. Often this is enough to prevent theft.
Marking car parts is considered an effective technique. It is difficult to sell the entire body of a stolen car precisely because it has a license plate. This means that hijackers will have to forge license plates and produce false documents.
Many car owners mark, for example, windshields. This is inexpensive and gives the car owner an additional feeling of security for his property, albeit rather psychological, but pleasant.
Operating principle of central locking
The central locking system, as a rule, comes from the remote control. For this purpose, a special sensor was specially built into the lock handle, and a receiving antenna was built into the main block. You can drive the car from a distance of up to 10 m.
To activate, press a button on the remote control, the signal is transmitted to the antenna and the doors are locked. At the same time, the alarm immediately comes into readiness.
- Google+
- LJ
- Blogger
In the event of an emergency, locked doors open automatically.
During locking, microswitches are activated via the remote control or by turning the key. What happens next is:
- The central locking wiring diagram analyzes the received pulses.
- The communicator sends signals to the main and other units.
- The actuators receive a signal to block. All locks close automatically.
- Google+
- LJ
- Blogger
Overcoming final doubts before purchasing
The blocking algorithm for the anti-theft system breaks the chain that makes the vehicle impossible to move. The alarm monitors the condition of the doors, trunk and hood, which if the seals are broken will give an alarm to the siren of the protected areas. Due to the different type of transmission and engine, the choice of system is narrowed. The most popular service for connecting an alarm system with auto start to cars:
Important parameters that the purchased product must have, selected according to the criteria of the selected device, which in relation to the system:
When purchasing to connect and install an alarm system with auto start yourself, you need to determine the desired requirements for it. But with a huge choice on the market and not quite the right purchase, all additional equipment can be purchased later. It is safer to purchase equipment in a specialized store with the necessary documents and a warranty card for the product.
Tired of paying fines? There is an exit!
Forget about fines from cameras! An absolutely legal new product - Traffic Police Camera Jammer, hides your license plates from the cameras that are installed in all cities. More details at the link.
Installation instructions
To independently integrate the central lock into a VAZ 2109 car, you will need:
- installation kit;
- insulating tape;
- s-shaped corrugations for wiring;
- wire cutters;
- screwdriver or drill;
- screwdriver;
- plastic clamps.
Tools and materials in the photo
Kit for installing central locking
Screwdriver
Rubber corrugation
Wire cutters
Insulating tape
Clamps
Some important points
- Before installing the central locking system, be sure to remove the terminals from the battery. This will help avoid accidental short circuits during installation and protect the vehicle's electronic devices.
- The central locking control unit is located under the front panel. This will make it easier to connect to the electrical network.
- An electric drive with four outputs is installed in the driver's door.
- Before installation, consider how the wiring will go to the rear right door. Most often it is placed under the carpet and secured with plastic clamps.
Step by step guide
- Remove the door trims and plastic decorative trims from the sills and side pillars.
- Attach the control motor to the door.
Use mounting plates and screws. Mounting strips and self-tapping screws are used to secure the electric drive. - Connect the kit rods to the door lock rod. If the length is too long, a slight bend is allowed.
- Place the control unit under the dashboard.
The electronic unit is installed under the dashboard - If there are no standard holes for wiring in the doors and pillars, drill them using a screwdriver or drill.
- Route the wiring from the electric motor to the control unit. Protect the wires from the door to the stand with S-shaped corrugation. Possible twisting points must be insulated.
- For each door, repeat steps 2-6.
- Connect power to the central locking control unit through the fuse.
- Secure the wiring and block with clamps.
- Reinstall the door trim and interior parts.
Nanofilm invisible to cameras for license plates
Fines for crossing the stop line and speeding will no longer bother you!
Video on installing central locking on nine
Below is a video. It will help you avoid difficult moments when installing yourself:
After watching the video and reading the instructions, every car enthusiast can easily install central locking on a VAZ 2109. The whole process will take about two hours. A ready-made kit will facilitate installation and save time.
- Author: Dmitry Kuznetsov
Let's get acquainted, my name is Dmitry Kuznetsov. Rate this article:
- 5
- 4
- 3
- 2
- 1
(6 votes, average: 4 out of 5)
Share with your friends!
Related posts:
Reasons for the lack of spark on a carburetor VAZ 2109 and their elimination
We change the silent blocks of the rear beam of the VAZ 2109 ourselves
Changing the front wheel bearing of a VAZ 2109 with your own hands
Characteristics
| See all advertisements in the archive |
| Model | VAZ 2108-099 “Samara” |
- Post office. Delivery to your locality depends on the distance from Tolyatti. On average 5-14 days in Russia. Delivery cost from 200 rub.
– Russian Post 1st class. Delivery to your locality depends on the distance from Tolyatti. On average 2-6 days in Russia. Cost from 250 rub. and the weight of the parcel is no more than 2 kg.
- Transport companies . We cooperate with many transport companies. During our work, we found out which companies carry out their activities efficiently and inexpensively. Transport companies deliver within 1-10 days across Russia and 5-14 days to Kazakhstan.
– TK PEK (pecom.ru) – One of the large transport companies. Many branches throughout Russia. Delivery from 300 rub.
– TK Ratek (rateksib.ru) – Shipments throughout Russia and Kazakhstan
– TC Business Lines (dellin.ru) – you must send your passport details
– GTD (Former KIT)
– Dispatch across Russia and Kazakhstan.
– ZhelDorExpedition (jde.ru)
– Energy (nrg-tk.ru)
– Pickup . You yourself come and pick up the goods from our office/warehouse. Only by prior appointment.
Notification: Upon dispatch, we will notify you and send you an invoice number (identifier) by which you can track your cargo. Upon arrival at the transport company's branch warehouse, managers will notify you about the arrival of the cargo, the delivery amount and the address by phone and/or SMS.
Russian Post. An arrival notification will be sent to your email address.
1) Through banks and ATMs:
– Sberbank Visa card (via cashier, from card to card, Sberbank online)
– Sberbank MasterCard (via cashier, from card to card, Sberbank online)
– Blitz transfer (hummingbird, contact, western union)
The most profitable, safe and convenient way to pay for goods. Payment can be made on a card-to-card basis (if you have a Sberbank card) through an ATM or using the Sberbank Online service. If you are not a client of this bank and you do not have a card, then you can top up your balance at any bank branch through an operator, they will accept cash payment and top up the balance of our card. Commission from 0 to 1%
Be sure to save the payment receipt or a screenshot of the transfer.
2) Online payment via Yandex:
Car alarm installation
Before purchasing, study all kinds of models, select the ones that are suitable for the VAZ-2109.
There are quite a lot of them, they differ in functionality and depending on whether you have a carburetor or an injector installed.
Check for these features:
- turning on the engine from the key fob;
- remote engine stop;
- mechanical impact indicator;
- communication and communication signaling device;
- turning on the alarm whenever the car is opened;
- possibility of canceling the program.
Instructions are included with each device. If you install it yourself, you need to familiarize yourself with it carefully. Even after a high-quality self-installation, there may still be some nuances. For example, a monolithic alarm system is easier to install, mobile, it will not be difficult to install it anywhere on the car, but it is easier to hack if it is stolen.
To install this device, you will need the following devices and tools: a voltage meter with limit data up to 12 V, insulation, Phillips and regular screwdrivers, a wire stripper, a soldering iron, single-core and stranded wires (length up to 10 meters).
Recommendations
Helpful Tips:
- The description and instructions for the alarm need to be saved or at least remember its brand and name. After installation, you need to ask for instructions and do not throw them away. If it is necessary to reprogram the key fob or repair the security system, a description and diagram may be needed. Knowing exactly the name of the installed alarm, the technician will be able to find parts with the necessary data and characteristics in the catalog.
- You need to know which circuits are blocked by the security alarm - fuel pump, ignition coil, etc., and also remember where exactly the alarm unit is installed in the car.
- You need to remember the location of the shock sensor, the sensitivity of which is adjustable, as well as the location of the “jack” button.
- If problems arise, you need to study the instructions, which describe in detail many issues regarding the operation of the alarm and troubleshooting frequently occurring problems.
- It is necessary to promptly change the batteries in the key fob.
- It is not at all necessary to stick an advertising brand on your car with the name of the alarm system installed on it.
- It happens that some car dealerships and insurance companies make duplicate key fobs and security systems so that you can pick up the car in case of non-payment of the loan, when CASCO insurance expires, etc. Therefore, it is advisable to install security systems from different specialists.
In case the key fob is lost or the car is used by several drivers, you can program an additional one or two key fobs.
Installing the trunk lock
Those who have at least once in their life owned a car similar to the VAZ 2109 remember that in the cold season you can basically forget about the trunk. If the trunk lock has not yet rusted, then it is most likely frozen. And the most interesting thing comes when he freezes on the way. That is, you came to the dacha to replenish your supplies of pickles, but upon returning home your beloved “swallow” refuses to open. Or, on the contrary, you are driving happily about your business, but the trunk lid opens on its own, you have to stop and adjust it.
At such moments, the desire comes to install a lock on the VAZ 2109, which will allow you to open the trunk automatically. Instead of suffering, jumping around it with a defrost, a screwdriver or ropes.
To install the trunk lock we will need:
- The castle itself;
- Reciprocal part of the lock;
- Button;
- Any electric drive;
- Grinder, pliers and wire cutters;
- 4 bolts;
- A metal cable and one long wire.
Installing a trunk lock from Kalina on a VAZ 2109 is considered the most successful option. The most important moment in installation is to adjust the lock to the dimensions you need, so that it fits well and the lock tongue does not rest against the trunk lid. For this we use a grinder.
Next, we use the rear wiper motor to connect the electrics. We install the back part of the trunk; it should fit perfectly, since it is no different in size from the one you had before. The only thing is that you may have to hit it a couple of times with a hammer, since it may protrude to the left by 5 millimeters, no more.
Well, now we close the trunk and check the functionality of the lock. If the door moves a little, you should tighten the washers or, on the contrary, loosen them.
Conclusion
It is more correct to consider the system as a convenient tool, rather than a magic wand. If you're looking for a quick fix to the winter woes, you'll probably be disappointed with the autostart. No manufacturer offers a ready-made solution.
By setting the optimal switching duration, you can avoid running the engine at idle speed. Having prudently secured the handbrake, you can detain the intruder. The right attitude towards the machine is the key to its long operation and your excellent mood, and therefore the choice should begin with the question “How to use it?”
Winter is no longer tanning and the time will come again to dream of being able to get into a car with the engine already turned on and warmed up in the chilly twilight of a December morning...
Unfortunately, most budget-class alarm systems are not equipped with a remote car start function (the so-called autostart), however, the traditional presence in such systems of free additional channels allows, with little effort and money, to implement this opportunity on cars of any brand and, in any case, , on a VAZ 2110.
In order to provide remote start of the VAZ 2110 you will need:
Practical implementation of the autostart scheme
Below is a schematic electrical diagram of autostart with color-coded wires for almost all variants of the VAZ 2110 car (to be on the safe side, you can conduct a comparative analysis with the wiring diagram of your particular type of car).
In order to implement the circuit in hardware, first of all we fasten the pads in one row using electrical tape, after which, if the pads have more than 4 contacts, we remove the excess wires from them (this way there is less chance of mixing something up). Also, in order to make our device more compact, the wires of the pads can be shortened somewhat. Next, we carry out soldering in strict accordance with the diagram, protecting the joints with cambrics and insulating tape.
As mentioned above, this device is designed to work with standard feedback signaling having two additional channels.
There are usually no problems with having at least one free channel, but to use the second channel you often have to limit yourself in some way (say, refuse to open the trunk remotely). The first and second relays are connected to the indicated second and first channels, respectively. We connect the fourth relay to the handbrake limit switch - on a VAZ 2110 this is most conveniently done on the universal connection block of the instrument cluster. This relay is designed to prevent relays No. 2 and No. 3 from turning off after the first alarm channel opens (on some alarm systems this happens in less than three seconds, which is clearly not enough). Relay No. 2 supplies +12V voltage from the ignition switch (thick pink wire) to the power circuit of the electric pump and to turn on the instrument cluster.
As for relay No. 3 (with the green wire coming from it), then, at your discretion, it can be connected to the headlights or dimensions. This solution will make it easier to find a car in the dark and will confirm from a distance that the device has been activated.
And finally, relay No. 1 plays an important role in starting the starter. It is this relay that supplies current to the starter after the second alarm channel circuit is closed.
For ease of placement in a car, the assembled device is placed in a case of a suitable size, or, without further ado, all four relays can be connected to each other with ordinary electrical tape (the main thing is not to forget to clearly mark the output terminals). At the next stage, all the above wires are connected (after first disconnecting the power wires from the battery). The additional unit itself is located behind the dashboard or in the free space of the steering casing.
Automatic startup sequence (using the Tomahawk alarm as an example)
Please note that without installing the car on the handbrake, the car will not start remotely (and therefore will not move without a driver in the cabin). According to the logic of the operation of some security systems, after removing the handbrake, the car may stall. You shouldn’t be afraid of such situations - this is just another step of protection from intruders (as a rule, to avoid turning off the engine, before removing the handbrake, you should insert the key into the lock and turn it one notch).
Types of electrical circuits
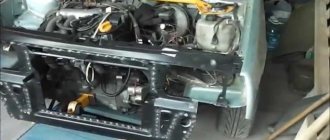
We disconnect the steering wheel, steering column trim and steering column switches.
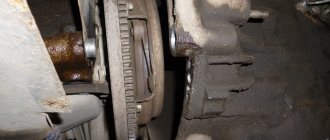
Broken wiring Injection motor As for injection internal combustion engines with injectors, malfunctions in them, as practice shows, are usually associated with failure of the sensors or the electrics themselves. Therefore, any electronics check begins with checking this unit. And special sensors that the engine is equipped with are responsible for this: DPKV crankshaft position sensor.
The heater should be assembled in the reverse order of disassembly.
Adjust the center shutter. New clamps should be used.
See also related news
Be sure to adjust the travel of the dampers. VAZ diagram old versions VAZ diagram new versions There is no brake pad wear sensor. Previously, the handbrake lamp blinked when the lever was raised, and lit up constantly when the sensors on the brake pads were activated. The VAZ injector, electrical diagram, includes many sensors and fuel pump regulators, their diagram is posted on the websites of car enthusiasts.
If the sensor reacts to metal, it means it is working. Adjust the center shutter. All these control and monitoring lines are assembled into one block and at the output they are connected to the nodes using connectors on the control circuits and signal sensors from the mechanisms.
What kind of problems does an electrical circuit help to solve?
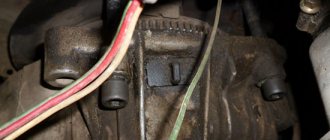
Connection diagram for starter VAZ, VAZ, VAZ A - pull-in winding; B - holding winding; 1 - starter enable relay; 2 — mounting block; 3 — ignition switch; 4 - generator; 5 - battery; 6 — starter Fig. You can disconnect the alarm wiring and the backlight lamp. Modification of a car with a VAZ carburetor engine, 1.5 liters and 73.4 horsepower.
This circuit is used to identify a malfunction in the automotive mounting block. Years of production: — in Russia, — — in Ukraine. Limit switch for reverse gear lights. what is required to install the injector on a vaz
Standard anti-theft system "Nine"
Almost all “nines” at one time were standardly equipped with central locks.
The central locking circuit diagram consists of:
- Control module or relay. This device is designed to transmit impulses to gear motors located in the doors. The control module is a circuit that is installed in a plastic case. It has special fasteners with which the device is fixed in the seat.
- The central locking system involves the use of input controllers. They can be made in the form of limit switches that are mounted in the doors, or in the form of special microswitches installed directly in the locks. Limit switches are used to fix the position of the door at a given moment and transmit an impulse to the control module. As for the microswitches, they are designed to fix the position of the main components of the lock itself.
- The central locking system is also equipped with actuators designed to ensure the opening and closing of locks. Such devices include in their design rods connected to the rear door rods.
- A control panel connected to a central unit, used to transmit signals.
Installing a central lock with your own hands is not a particularly difficult procedure, but today such anti-theft devices are no longer relevant.
Immobilizer and its location
Not all Nines were equipped with immobilizers as standard. Immo installation was provided for car modifications with a high center console. The purpose of the immobilizer is to lock the steering mechanism after the ignition key is turned off. This device also allows you to block the engine in case the car is broken into. In VAZ 2109 cars with a high console, the immo block is installed behind the dashboard, in particular, between the steering column and the steering column, where a choke is installed in carburetor versions.
Why doesn't the central locking work?
For what reasons the central locking system may not work:
- The battery in the control panel is dead. Accordingly, the system will not respond to turning the locks on and off from the key fob.
- The keychain is broken. If the remote control fails, most likely, its circuit board will have to be repaired.
- Failure of the control unit. If problems occur in the operation of the control module, this can lead to incorrect operation of the system or its complete failure. The reasons can be different, ranging from wear and ending with damage caused by the operation of the module in vibration conditions. The reason may also be moisture getting on the board. In any case, the board itself must be repaired.
- Failure of input sensors. As practice shows, limit switches and microswitches wear out over time, so it is quite normal that they fail. Failed elements must be replaced.
- Failure of the actuator or solenoid. If this device breaks down, the car owner will face a problem when one of the car doors does not work. A failed solenoid can be easily replaced with a new one.
- Poor contact of sensors or control unit with the on-board network. If the contacts are broken, full operation of the central lock will be impossible. If possible, the contacts can be cleaned; if not, then replaced.
- Damage to the electrical circuit. It happens that as a result of prolonged use, as well as temperature changes, damage to the insulating layer of the wires occurs. In this case, damaged sections of the electrical circuit must be replaced (the author of the video is TAZavod channel 42).