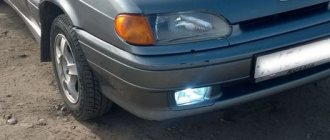
Weather conditions in the form of fog often spoil the lives of motorists. When moving in it, not only the driver has poor visibility in front of him, but other road users may notice him too late. This is especially dangerous when overtaking on the highway during fog. It is held above the ground, which creates a small gap where the light from the fogs enters. The beam of light from them is wide horizontally and narrow vertically, which allows the driver to increase visibility. If you decide to install PTF, you will need a diagram for connecting PTF to the VAZ 2114. Let's take a closer look at it.
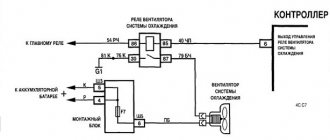
PTF connection diagram
Voltage is supplied to the electrical circuit by contact B+ from the generator. The mass is taken from the car body, not far from the location where the PTFs are installed. They begin to work when the switch key is pressed, provided that the low or high beam is working. To reduce the load on the contacts, a relay is connected to the circuit, which is installed from the factory in the engine compartment on the left mudguard; in addition, three fuses F8, F9, F10 are installed in the mounting block, which protect the fog light circuit.
Tail light repair
The most common reason for the failure of a VAZ 2114 rear light is the failure of a flexible printed circuit board or a connector made directly on it with conventional metallization. You can, of course, just buy a new printed circuit board and replace the faulty one with it, but, firstly, for how long?
And secondly, we are not looking for easy ways. So we will try to eliminate this malfunction on our own, at minimal cost and in such a way that it will last forever. Let's start with the connector for connecting the flashlight to the on-board network. It looks something like this:
There are many reasons for this connector to fail. For example, we removed the power supply from the flashlight too often and simply partially erased the traces, which have a very small thickness of copper deposition on the plastic. Another reason is that the conductive paths next to the connector broke due to constant vibration. Well, the most banal thing is that the tracks burned out due to overload or short circuit.
The photo shows a flashlight connector of a different modification, but the meaning of the problem is the same. All these issues can be solved with the help of a soldering iron, mounting wire and a regular six-pin (or more) connector with a mating part.
For repairs you will need this block with a mating part
We clean the connector contacts on the board using a student eraser (not sandpaper - the foil is very thin!) and service them.
You need to tin the tracks very quickly with a well-heated soldering iron. Otherwise, the tracks will simply fall off the substrate.
We solder the wires from the block onto the tracks, not forgetting to mark them, and fill the soldering area with sealant or a hot glue gun.
Mounting block soldered to the rear light board
We cut off the standard power harness block, and in its place we solder the mating part of the new one. We assemble the flashlight, connect it to the on-board network - and check it. If we haven't messed up the wiring of the pads, then everything will work right away with a bang.
What to do if the tracks are burned out or broken? You can get out of this situation as follows. Immediately after the fracture, we clean the protective varnish from the tracks, tin, and solder the block. It will look like this:
You can, of course, limit yourself to this (until next time), but if you spend a little more time and effort, you can make more serious repairs. Flashlights modified in this way will serve faithfully for many years. Such a repair will save you from the eternal problem of contacts of flimsy standard sockets - this is also a very common malfunction of VAZ 2114 headlights.
To implement this idea, in addition to the six-pin block with a mating part (see above), you will need five cartridges from the VAZ 2106 direction indicators and a dozen terminals for them.
We remove the lamps, standard sockets and flexible printed circuit board from the panel. We place the purchased cartridges in the right places on the panel and mark their centers. Special precision is not required here, the main thing is that each lamp shines into its own “window”. We drill holes according to the diameter of the base parts of the cartridges.
Holes for future cartridges
We insert the cartridges into the holes, mark the mounting holes, drill them, and screw in the screws. Now the cartridges are firmly fixed in the panel.
We secure each cartridge with two self-tapping screws
Using a mounting wire with terminals pressed onto it (you can crimp it with ordinary pliers and solder it to be sure), we assemble a circuit that repeats the layout of a standard flexible printed circuit board. To be sure, the terminals can be insulated with heat-shrinkable tubing, but in principle this is not necessary - the panel on which the cartridges are mounted is plastic. We solder our block to the ends of the wires.
We solder the mating part of the block to the power supply harness of the lights, having first cut off the old one. We solder it, not twist it together. The twist will oxidize in a week, and problems will begin again - sometimes it burns, sometimes it doesn’t. We insulate the solder joint with heat shrink or cotton (black rag) tape. PVC electrical tape is an extremely bad option. It can unfold over time. This kind of isolation is no good.
We admire our work for a couple of minutes, insert the lamps, connect them, check them. Is everything working as expected? We assemble the lantern and connect it.
LED analog P21W
Required parts and tools
If you decide to install fog lights on a VAZ 2114 yourself, in addition to the kit of the element itself, you need to have a suitable tool for the job on hand:
- Drill and drill bits;
- File;
- Electric jigsaw;
- Tape measure and marker.
Don't forget that additional wiring will be required, so you will need:
- Set of wires;
- Electromagnetic relay;
- PTF power button;
- Ties and clips for fixing wires.
Perhaps everything will come as a set when purchasing fog lights, but it is best to purchase according to the list and not be distracted during the work by unnecessary trips to the auto store.
Useful : 7 reasons why foglights do not light up
The fog lights must be connected via a button and a relay, since the system has high battery consumption. If you neglect this advice, you may later encounter problems with rapid current consumption while parked. A kit for connecting fog lights can be found in car stores, the price is about 500 rubles. And light elements from a good company Bosch will cost about 1000 rubles.
What are fog lamps for?
The main task of the PTF is to illuminate the space in front of the car. Correctly adjusted “fog lights” can illuminate a section of road 10–15 meters long. This distance is quite enough for safe movement by car in poor visibility conditions. The switching on and off of such lighting devices must be fully controlled by the driver.
Adjustment of fog lights is carried out during their installation. The procedure does not take much time, but requires care and precision. You can install the rear and front PTFs yourself.
The process of connecting fog lights on a VAZ 2114
When you have prepared everything, you can proceed to the stage of installing and connecting the fog lights. It is best to perform installation according to the instructions presented below, following the sequence of actions:
- Connecting fog lights on a VAZ 2114 begins with determining the location of the button on the dashboard. You can choose any one, but it is best to install it in the standard version by removing the plug.
- Remove the grille from the front panel. Behind it there will be two blocks used to turn on the headlights, indicate the operation of the fog lights and illuminate the button. The PTF connector is installed from the factory, regardless of the vehicle configuration.
- Having placed the button in the chosen location, we connect it, and then put the panel back together.
- We need to unscrew the fuse block, lift it and find two blocks numbered 7 and 8.
- We lay a harness of 4 wires with contacts that should be included in the kit to the block from the relay installation location.
- Afterwards we connect the relay. We will need a diagram for connecting fog lights on a VAZ 2114. We connect the wire from the 30th contact of the relay to block No. 8 of the mounting block to terminal 8. Contact 87 goes to terminal 1 of the same block. 85 is connected to block No. 7 at terminal 17, and 86 is supplied to ground.
- Voltage to the fog lights is supplied from the 2nd and 3rd contacts of the block at No. 8, and the ground is mainly secured to the nut of the headlights.
- From the 1st block from the 6th contact there is a wire to the 1st contact of the external lighting switch, and from the 4th block of the mounting block from the 4th contact to the 2nd contact.
- Then you need to connect the control button. Pins 5 and 19 of pin 4 of the block are involved here (you can see more details in the diagram described above).
Remember that the connection must be made through a button and a relay!
- Next, you should install the fog lights in the right place. If you already have a standard bumper that has holes for fog lights, then just install them in the stock place.
- If not, prepare the holes. To do this, it is better to use GOST, which states that PTFs must be installed at a height of at least 250 mm above the ground, and no more than 400 mm from the overall width.
- Before cutting, it is better to find the owner of a VAZ 2114 with PTF already installed, measure the bumper and prepare a stencil for the holes.
- Afterwards we transfer all the dimensions to our bumper. We trace along the stencil and start cutting. Once the hole is cut, it is worth finishing it with a file to even out the edge.
- If everything is done correctly, you can install “glasses” in the bumper, and if everything fits, it will not differ from stock.
Installation methods
There are several options to equip your car with a fog light system. The choice depends on your personal preferences and capabilities.
| Way | Peculiarities |
| Buying a bumper with built-in PTF | Such bumpers are bought at a tuning studio, where everything will be connected and connected for you. The disadvantage of this option is the high cost |
| Buying a bumper from a VAZ 2115 and installing it yourself | To do this, you will have to buy a bumper from an older model, which has holes for fog lights. All that remains is to find a suitable set of PTFs and install them |
| Purchase of PTF and facing elements - glasses | Today this method is in greatest demand because it allows you to do the installation yourself for little money. |
The standard PTF kit includes several elements:
- Headlights;
- Light bulbs;
- Switching relay;
- Set of wires;
- Connection diagram;
- Button to turn on/off PTF.
When choosing a set, pay attention to the fact that the headlights match the shape of the glasses, that is, the facing elements.
Standard kit
Today, for VAZ 2114 owners who want to install fog lights, it is recommended to choose rectangular kits from the Kirzhach company. It is used for factory installation of PTF on expensive versions of the model.
Xenon in PTF
Many car owners are thinking about installing xenon lamps in their fog lights. Is it good? Not really.
The thing is that when installing xenon in the PTF, focusing is disrupted. The operating principle of xenon is somewhat different compared to conventional Kirzhach type lamps.
Standard PTFs are designed for certain types of lamps, so they cannot cope with xenon. As a result, excessive reflection is observed in the reflector, rays are refracted, and the light is blurred. Where does this lead? To blind oncoming drivers.
The xenon option is not a practical or successful solution. Therefore, we recommend that you avoid it.
Another option is a combination of xenon and yellow fog lights. You will need H1 xenon bulbs, which are mounted in a bottle cap and only then placed in the headlight. This way the light beam has smoother boundaries, does not blind oncoming traffic, and better illuminates the roads in bad weather. Only after installing this combination lighting, be sure to make sure that your headlights really do not blind oncoming cars.
If oncoming cars stubbornly continue to shine their high beams on you, try adjusting the light beam. If this does not help, it is better to abandon xenon.
Checking the functionality of the PTF
After the work has been carried out to connect the fog lights on the VAZ 2114, it is worth checking their functionality. If everything is done correctly, then when you turn on the side lights and press the button, voltage will begin to flow to the relay, after which the lights should light up. If you turn off the headlights, the fog lights should also go off, regardless of the position of the button. If everything is done correctly, then the next step is to adjust the light beam so as not to blind oncoming drivers. Having done this by eye, the light from the fog lights should be 10-15 meters ahead of the car, but no more. It is best to contact a service station with special equipment to adjust the headlights, or read more detailed instructions on how to do it yourself. Useful: How to adjust headlights and PTF on a VAZ 2114? Correct adjustment is the key to safety on the road, not only for you, but also for other road users. By installing fog lights, car enthusiasts want to get not only direct functionality, but also improve the appearance of the car. Since public roads require driving with the optics always on, fog lights can take over this function. Thus, you can install high-quality lamps in them and spend less on constantly replacing burnt-out light elements in the headlights. As described earlier, at the most unexpected moment, PTF can help you out when visibility deteriorates when driving along the highway during fog.
Headlight installation
Since the standard bumper does not have seats, you will have to make them yourself. To do this you may need:
- Drill with drill;
- Jigsaw;
- File;
- Measuring tools (tape measure, ruler, etc.);
- Marker;
The installation of fog lights is carried out with the bumper removed. Markings are first made on a bumper that has been cleaned of dirt. The optimal installation location is at the level of the lower air intake, but at a certain distance to the side of it. It is advisable that PTFs be placed strictly under the headlights.
First, we determine the distance at which the fog lights will be removed from the air intake. Then we figure out what size holes need to be cut. Decorative “glasses” will help with this. They consist of two halves - the outer (which is decorative) and the inner (which secures the outer part and the headlights themselves).
The outer half of the glasses has a mounting protrusion on the inside, with which it should fit into the hole in the bumper. To determine the size of the hole, the dimensions of this mounting protrusion are measured. Then we apply markings with the appropriate dimensions on the bumper.
Having completed the markings, we proceed to cutting out the holes with a jigsaw. After this, it is advisable to correct the edges of the hole with a file. It is important to ensure that the outer part of the glasses fits tightly into the hole.
We fix the fog lights in these holes using bolted connections. All that remains is to attach the “glasses” over the headlights.
After installing the fog lights, we install the bumper on the car. This completes the first stage.
Types of fuel pumps
Serial production of the “ten” began in 1995, that is, at a time when domestic cars were still equipped with carburetor systems. Mechanical fuel pumps were installed in them to pump fuel. This pump operates directly from the car engine.
For proper operation of the carburetor, high pressure is not required, and therefore the pump has a relatively simple design, similar to water pumping systems. It is installed directly under the hood of the car, which certainly makes it easier to service or replace.
With the advent of injectors, the design of the fuel pump was also modified; it became electric. The principle of its operation has also changed. If the operation of a mechanical pump requires the starter to start rotating the crankshaft, then in the injection system the fuel pump is first energized, which, using a built-in electric motor, creates the required pressure in the line, and only after that the engine starts.
This type of fuel pump is installed directly into the fuel tank.
Thus, there are two types of fuel pumps: mechanical and electrical.
Experience of car enthusiasts
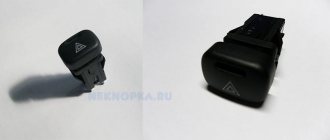
There are buttons with both lamps and diodes, there is a choice. The resistors are soldered directly into the diode, this is AvtoVAZ know-how. You can see it under a magnifying glass. And change it to a regular one, that is, a small one, they are durable. And the small diodes I bought for tuning ended up almost all flying off too.
Zbugz
https://www.lada-forum.ru/index.php?showtopic=16929
LEDs with a built-in resistor are sold in buttons for sidelights, fog lights, etc. (cost about 30 rubles). The light bulb is simply replaced with an LED. The light filter is removed from the button.
Killer Speed
https://www.autolada.ru/viewtopic.php?t=60935
Everything is very simple in fact))) I held my head until I opened it and figured it out!))) My car is 9 years old. Even these buttons have diodes or whatever they are called, instead of light bulbs. So, I sat and thought and just took a drill with a small drill and drilled the hell out of there and soldered what I needed to the antennae, that’s all))))) And the backlight for the low beam is complete garbage. Even I, a person who doesn’t understand anything about car electrics, figured it out.
MillerLight
https://www.2114.ru/forum/showthread.php?p=154984
Having decided to relight the buttons on a VAZ 2114, it is not necessary to contact the service: you can do the modifications yourself. The procedure is not complicated and requires a minimum list of tools and basic knowledge in electrical engineering. By following the step-by-step instructions, relighting the buttons will not be difficult.
Which ones are better?
Typically, standard optics have halogen elements; replacing them with the same ones, but more powerful, makes no sense. It is better to install LED lamps in fog lights; a good option is to replace the fog lamp with xenon (author of the video - Learning to drive a car. All the secrets for beginners.).
LEDs can be installed in PTF without restrictions, unlike xenon. Replacing a light bulb in a fog lamp does not require special equipment or specific knowledge, so you can replace it yourself. It is better to buy products from trusted brands, since cheap Chinese samples are often of poor quality and quickly fail.
When purchasing LEDs, you need to select a lamp with a base similar to the halogen counterpart. An important parameter for fog lights is brightness, measured in Lumens (Lm). Fog lights with xenon must have a brightness of at least 1000 lm.
Car electrical equipment
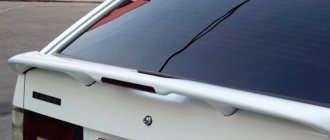
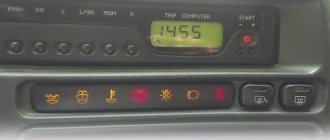
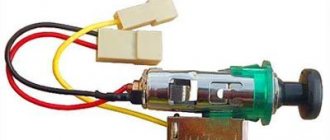
1 — headlight block; 2 — gearmotors for headlight cleaners*; 3 — fog lights*; 4 — ambient temperature sensor; 5 — sound signals; 6 — engine compartment lamp switch; 7 — electric motor of the cooling system fan; 8 — VAZ 2114 generator; 9 — low oil level indicator sensor; 10 — washer fluid level sensor; 11 — front brake pad wear sensor; 12 — wire tips connected to the common windshield washer pump**; 13 — windshield washer pump; 14 — headlight washer pump*; 15 — wire ends for connecting to the rear window washer pump on VAZ 2113 and VAZ 2114 cars; 16 — low oil pressure indicator sensor; 17 — engine compartment lighting lamp; 18 — wire lug for connection to the wiring harness of the engine management system or to the wiring harness of the ignition system on carburetor vehicles; 19 — windshield wiper gearmotor; 20 — VAZ-2114 starter; 22 — coolant temperature indicator sensor; 23 — reversing light switch; 24 — low brake fluid level indicator sensor; 25 - battery; 26 — sensor for insufficient coolant level indicator; 27 — relay for turning on fog lights; 28 — mounting block; 29 — brake light switch; 30 — plug socket for a portable lamp; 31 — lamp for illuminating the headlight hydrocorrector scale; 32 — parking brake warning lamp switch; 33 — backlight lamp connection block; 34 — switch for instrument lighting lamps; 35 — steering column switch; 36 — alarm switch; 37 — front seat heating element relay; 38 — ignition switch VAZ 2114; 39 — rear fog light circuit fuse; 40 — fuse for the front seat heating elements circuit; 41 - door lock circuit fuse; 42 — front ashtray illumination lamp; 43 — ignition relay VAZ-2114; 44 — cigarette lighter; 45 — glove box lighting lamp; 46 — glove compartment lighting switch; 47 — heater fan electric motor; 48 — additional resistor of the heater electric motor; 49 — heater fan switch; 50 — heater switch backlight; 51 — lamp for illuminating the heater levers; 52 — gear motors for electric windows of the front doors; 53 — right front door power window switch (located in the right door); 54 — gearmotors for locking front door locks; 55 — wires for connecting to the right front speaker; 56 — gearmotors for locking rear doors; 57 — wires for connecting to the right rear speaker; 58 — door lock control unit; 59 — wires for connecting to radio equipment; 60 — headlight cleaner switch; 61 — rear window heating element switch; 62 — relay for turning on rear fog lights; 63 — block for connection to the heating element of the right front seat; 64 — switch for rear fog lights: 65 — switch for the heating element of the right front seat; 66 — fog lamp switch; 67 — switch for external lighting lamps; 68 — left front seat heating element switch; 69 — block for connection to the heating element of the left front seat; 70 — wires for connecting to the left front speaker; 71 — left front door power window switch; 72 — right front door power window switch; 73 — wires for connecting to the left rear speaker; 74 — side direction indicators: 75 — lamp switch on the front door pillars; 76 — lamp switch on the rear door pillars; 77 — lampshade; 78 — canopy for individual interior lighting; 79 — block for connecting to the wiring harness of the VAZ 2114 electric fuel pump; 80 — trunk light switch; 81 — instrument cluster: 82 — trunk lighting lamp; 83 — display unit of the on-board control system; 84 — trip computer (not in all models); 85 — block for connecting the wiring harness of the engine control system; 86 — rear external lights of the VAZ-2114; 87 — rear internal lights; 88 — block for connection to the rear window heating element; 89 — license plate lights; 90 - additional brake signal located in the spoiler.
Buying what you need
You can, in principle, buy a ready-made set along with wires, but many believe that if you buy everything separately, the number of installation options increases, and it will all cost less. So, we buy:
- Set of headlights (2 pieces);
- Plastic pads;
- Headlight frames;
- A key and a yellow indicator for it;
- Relay;
- Wires. It is better to purchase ones from an electrical equipment store, so that there are two copper conductors with double insulation (ShVVP-2 is suitable). A cross section of 0.5 mm will also be normal, but if you want to install lamps of higher power, take 0.75 mm;
- Terminal for installation to ground;
- Wide as well as narrow terminals, called mother/father. When purchasing them, it is advisable not to take them complete with wires. Installation will be more convenient if these terminals are crimped with pliers already on the connections of the installed wires.
None You can, of course, vary it, but we are talking about the convenience of the location of the buttons. Regarding the power of the lamps, 55 W is enough, no more is needed. Also keep in mind that very cheap fog lights will not last long.
VAZ 2115 - new version of the 99th model
A small number of VAZ 2115 were manufactured by the AvtoVAZ plant in early 1997. The new product was a re-release of the previously existing 99 model. The changes affected the rear, as well as the front, interior, and increased trunk volume. The driving characteristics remained unchanged, a 1.5-liter engine with a carburetor system and a power of 72 hp.
Starting in 2000, the production of the model was redirected to the main conveyor. The technical characteristics were changed: fuel injection became distributed, and the number of horsepower increased to 78. Subsequently, in 2007, the engine was replaced - from a volume of 1.5 to 1.6 and the power increased to 81 hp.
