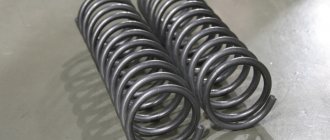
Like all car parts, Niva springs are subject to wear. A spring breaking during a trip is fraught with very unpleasant consequences - deformation of the lever, breakage of the shock absorber, failure of the ball joint and other “surprises”. In addition, when a spring breaks, you invariably create an emergency situation in which not only you yourself, but also other road users may suffer.
Therefore, it is important to periodically inspect the suspension springs for mechanical damage. You can also find out about the poor condition of the springs by indirect signs - the appearance of a knock in the wheel area when cornering and when driving on a bad road, sagging of the car body or increased stiffness of the suspension. If the springs have lost their elasticity, they need to be replaced.
To do this, you don’t have to go to a service station or car service – you can do everything yourself. In order to independently replace the springs on a Chevrolet Niva, you don’t even have to use pullers - the main thing is to carry out all the work in the right sequence and follow safety precautions.
Removing the old spring
First of all, you need to remove the wheel. After the wheel is removed and the hub is slack on the lever, you need to unscrew the nut securing the lever to the body to ensure easy movement. Then you need to unscrew and remove the lower shock absorber mounting bolt.
Then you need to remove the stabilizer bushing mounting bracket and raise the lever until the travel stop is released. Now you need to unscrew the ball joint and you can smoothly lower the jack. If the spring you are changing has retained its elasticity, then you need to do this carefully so that it does not jump out of its seat in the lever and injure someone.
After the spring has completely come out of its seat, remove it. Before installing a new spring, you need to inspect the old gaskets (upper and lower). If they have lost their elasticity, the rubber has dried out, or cracks have begun to appear on them, they must be replaced.
How to repair the Niva chassis?
In 2002, together with General Motors, he created and launched on the market a new domestic SUV, the Chevrolet Niva, which is distinguished by excellent driving performance and a high level of reliability. It was the chassis of the Chevrolet Niva that became one of its strengths, allowing this car to compete with Western counterparts in many world markets.
The Chevrolet Niva is an all-wheel drive SUV in which more than 85% of the parts are manufactured in the Russian Federation. The model has an annual circulation of 30-40,000 cars per year. Total sales for all years of sales have already amounted to more than 700,000 cars.
This popularity is due to its excellent driving performance, which allows you to drive the Shnivy both on public roads and off-road.
Diagnostics of Niva chassis
To check the technical condition of the car's suspension elements, you need to lift it on a lift or place it over a hole and go down. It is important to suspend the front wheels. The rubber elements should not show any signs of aging or mechanical damage. There should also be no cracks, signs of aging, one-sided bulging of the rubber or its separation from the reinforcement on the rubber-metal hinges. All damaged parts must be replaced.
Be sure to check the condition of the protective covers of the ball joints and supports. If they are damaged, you will have to replace the entire hinge assembly.
Take a good look at the rubber cushions of the upper hinges and check the condition of the rubber bushings of the lower hinges. Do not forget to inspect the rubber-metal bushings of the levers - lower and upper. Inspect the rubber bushings of the anti-roll bar and the quality of the attachment of the stabilizer brackets to the arms and side members.
Knock in the front axle
As with a cardan drive, the resulting noise can be caused by a malfunction of the front axle. But this check can only be carried out with special equipment, so it is necessary to first exclude possible damage to rubber bushings, seals and silent blocks, since they are the most vulnerable components of the system, subject to frequent loads.
The Chevrolet Niva suspension ensures a smooth ride and controllability of the car, regardless of the quality of the road surface.
The safety and comfort of the driver and passengers depends on its condition.
Wear of suspension elements leads to an increase in braking distance. They can cause loss of control.
Therefore, owners need to monitor the condition of the elements and replace or repair them at the first sign of malfunction.
Installing a new spring
When installing a new spring on a Niva, the gaskets, both upper and lower, must be secured to the spring using any available means - adhesive tape, electrical tape or ordinary threads. Gaskets on a Chevrolet Niva must be installed so that the last coil of the spring is completely recessed into the seat.
First we install the upper part of the spring into the seat and only after that the lower part. In order for the lower part of the spring to fully fit into the seat, it is best to tighten it with a large flat-head screwdriver or pry bar. When the spring is installed in the seats, we begin to raise the lever to the top position.
A little theory
The main task of valve springs is to ensure an unbreakable kinematic connection of the holy trinity: camshaft cam - rocker - valve. At low speeds there are almost no problems. It all starts from the moment they start turning the engine. The rocker cam presses on the rocker at high speed, giving it and the valve a large vertical downward acceleration. If the springs are weak or sagging, then the following passage occurs. The valve and rocker fly by inertia more than intended by the cam lift. At best, they will return to the fist with a blow. In the worst case, the valve “hung” at the bottom meets the piston. Both of these can lead to major engine damage.
This is important to know
Under no circumstances should the springs be replaced on just one side of the vehicle, even if one of the springs is in good condition. If the springs work differently, this will significantly reduce their service life and also lead to increased wear on other suspension parts.
The second thing you should pay attention to is the type of springs. There are two types of standard springs, which have different lengths for the same load. They can be distinguished by the color of the paint on the coils - it can be white or black. It is unacceptable to install two types of springs on a car - all springs must be of the same type so that the distribution of the car’s weight on the suspension is uniform.
Separately, we can say about reinforced or sports springs. If you decide to replace them, then change them on all four wheels at once. The length of the reinforced springs must be selected so that it matches the length of the standard springs. Only then will they work normally and give the desired effect.
The suspension of the Chevrolet Niva SUV is subjected to heavy loads when moving over rough terrain. A component of the suspension, the spring, is responsible for softening impacts and increasing comfort.
If during a trip the level of comfort begins to decrease, the car behaves worse in turns, then the elastic elements should be checked and replaced.
Key programming instructions for Lada Kalina, Priora, Granta, etc.
- Close all doors. Turn on the ignition with the training key and wait in the on state for at least 6 seconds.
- Turn off the ignition. The indicator light in the warning lamp unit should flash quickly (at a frequency of 5 times per second) while the learning procedure is being carried out correctly. If the lamp stops flashing quickly, it indicates an incorrect operation, an out-of-time interval, or a malfunction. Remove the training key from the ignition switch.
- While the warning lamp is flashing (about 6 seconds), insert the remote control and turn on the ignition. The immobilizer buzzer should emit three beeps. If the buzzer does not sound and the indicator has stopped flashing, this means: - the time interval of 6 seconds has been exceeded and it is necessary to repeat the learning procedure, starting from step 1; -immobilizer is faulty
- Wait 6 seconds for the buzzer to emit two more beeps and turn off the ignition.
- If it is necessary to train the second remote control, then you should perform steps 3...4 again, using the second learning remote control to turn on the ignition. If not, continue from step 6.
- After turning off the ignition for no more than 6 seconds, while the indicator is flashing, remove the remote control, insert the learning key and turn on the ignition. The buzzer should beep three times. Wait 6 seconds until the buzzer beeps two more times.
- Turn off the ignition without removing the training key, wait 6 seconds until the buzzer sounds a single sound signal. The indicator should flash twice as fast. If the sound signal does not sound and the flashing indicator stops, you should return to step 1 and repeat the learning procedure. If a repeated failure occurs when performing step 7, this means that the ECM was previously trained with a different key, in which case the controller should be replaced.
- After the buzzer gives a single sound signal, no later than 3 seconds, turn on the ignition for 2...3 seconds and then turn it off (after turning on the ignition, the buzzer will sound three times and the indicator will stop flashing). The hazard warning lights should flash and the car horn should beep.
- Remove the learning key. Wait with the ignition off for at least 10 seconds. Insert the working key and turn on the ignition. Wait 6 seconds, if the indicator does not flash, test start the engine, the engine should start. If the indicator flashes, turn off the ignition and wait at least 10 seconds. Turn on the ignition. The warning light should not flash and the engine should start. If, after turning on the ignition, after 6 seconds the indicator lights up with a constant light, then the learning procedure must be repeated, starting from step 1.
The remote control is equipped with a CR2032 lithium battery, the initial supply voltage of which is 3 V. If the remote control supply voltage is within normal limits, then each time you press any button on the remote control, the indicator lights up with a short flash. If, when you press any button on the remote control, the indicator lights up with two short flashes or does not light up at all, then you should replace the battery with a new one.
To do this, you need to unscrew the screw from the side of the case opposite the control buttons, separate the halves of the case, remove the board from the case, replace the battery with a new one, observing the polarity; insert the board into the case; snap the housing halves together and tighten the screw.
Purpose
Chevrolet Niva comes from the factory with springs, both front and rear. The main purpose of these devices is to absorb all the shocks of the suspension that occur when the wheels hit potholes and bumps. They are located in the gap between the wheel and the frame of the car, due to which shocks from the road are smoothed out.
For their manufacture, special high-strength steel is used. The number of turns of the device affects not only the quality of shock absorption, but also the distance of the body from the suspension.
Many Chevrolet Niva owners upgrade the rear springs by installing spacers or reinforced parts.
Used Chevrolet Niva - all problems and weaknesses
Niva is a cult. And the Chevrolet Niva, although secondary, is noticeably more spacious than the Lada 4x4 and solves the main problems: to break through the abysses to the dacha and go fishing. And spare parts are almost as cheap and are sold everywhere. What are the weaknesses of the car and how not to buy junk? Let's talk.
- Years of manufacture
— 2002–2020 - Restyling
— 2009 - Secondary prices
- from 200,000 to 500,000 rubles
We took our Chevrolet Niva to
Automama
.
This is a retail chain of used cars, where each car undergoes a thorough inspection and diagnostics. At Automama you can buy a car with guarantees and get honest information about its condition online. Prices for Shniva start at about 150 thousand rubles. But it’s not worth buying a Tolyatti all-wheel drive for less than 250–300 thousand. Such specimens are usually rolled into steep hills. This model is chosen not by year of manufacture or mileage, but by condition.
Classification
The suspension elements under consideration are divided into two types according to their rigidity:
- Standard hard ones are designated by the letter “A”. They have high stability and load capacity.
- Soft “B” is their main advantage in providing increased comfort, but at the same time they quickly become unusable - they “sag”.
Reference! From the factory, Shniva is equipped with class “A” parts, that is, rigid ones.
Reinforced rods
The appearance of cracks between the rod base and the lugs will shorten the service life of the parts. This problem can even cause an accident - the car suddenly pulls to the side when the traction breaks.
Also interesting: Replacing power steering fluid on a Chevrolet Niva
To avoid unpleasant surprises, special reinforced parts are installed in the rear suspension. They are made of alloy or cold-rolled steel and differ from conventional ones in the diamond-shaped section of the base and powerful welding seams that hold the lugs.
Reinforced rods differ from standard ones in the following characteristics:
- Reduced weight of parts.
- Improved paint coating that prevents corrosion of elements.
- High strength welded seams.
- Increased resistance to torsion, compression and tension.
Installation of reinforced rods is recommended for full use of the Chevrolet Niva off-road. They don't offer much benefit for city or highway driving. Under gentle operating conditions, the strength of standard rods is quite sufficient, so there is no point in overpaying for reinforced parts.
Compatibility of springs from Niva and Shniva
The springs on the Chevrolet Niva from the regular Niva VAZ-2123 are not suitable. The reason for this is the differences in length. Let's consider the main technical parameters of these elements.
| Parameter name | VAZ-2121 Niva | VAZ-2123 Chevrolet Niva |
| Front | ||
| Bar diameter | 15.2 mm | 15.7 mm |
| Length | 278 mm | 313 mm |
| Rigidity | 74.42 kg/cm | 75 kg/cm |
| Load | 815 kg | 815 kg |
| Rear | ||
| Bar diameter | 13 mm | 13.9 mm |
| Length | 434 mm | 410 mm |
| Rigidity | 22.44 kg/cm | 30 kg/cm |
| Load | 483 kg | 483 kg |
From the comparison table it is clear that the free length of the parts in question does not correspond, which is the reason for the impossibility of installation, since the springs from the Niva are shorter.
Which ones are better?
There are parts from several manufacturers on the market, among which the following options can be distinguished:
- Cross and Detal-Resurs are two budget brands that produce suspension parts for the Niva. Price - from 1600 rub. per set.
- Sitek - budget spare parts with rubber or polyurethane silent blocks. They are distinguished by their small wall thickness and low weight. Suitable for those whose route mainly runs on asphalt. Price - 2200 rub.
- Niva Urban - inexpensive high-quality spare parts for Niva Chevrolet. The manufacturer produces rods for the entire VAZ family. Price - 2600 rub.
- UG is another budget rod from a little-known company. Like Sitek, they are not intended for active off-road running. Price 3000 rub.
- SC is a more expensive model, characterized by a rectangular cross-section. Judging by the mass, the manufacturer did not spare the metal. The quality of the seam does not cause any complaints from car owners. Price - 3400 rub.
- Niva Extreme - reliable, durable suspension parts that are preferred by fans of extreme racing. The only drawback is the price, which is almost 5,000 rubles.
DIY replacement
Replacement of rear and front springs is carried out not only when they sag, but also when chips, cracks, and other defects are detected. At the initial stage of work, the necessary tools and materials are prepared.
Tools and materials
To carry out the replacement work, you will need the following tools and materials:
- Set of wrenches.
- Jacks and stops.
- New set of springs.
Important! It is recommended to replace them as a set or in pairs for the front and rear wheels. You cannot install parts from different manufacturers or different stiffness classes on the machine.
Work progress
Replacement of the front elements should be carried out in this order:
Training procedure:
Carrying out the training procedure leads to the following consequences:
- the engine control controller activates the anti-theft function if it has not been activated;
- the system changes its password to a new one chosen at random;
- a new system password is written into the training key;
- all remote controls that were previously trained are erased from memory;
- The codes of those remote control units that were trained in this training procedure are stored in memory.
- activating the anti-theft function in the controller (for example, in a new car or replacing a faulty controller);
- erasing old and training new remote controls if lost;
- changing the system password if the owner admits that his system password may have been read (for example, when selling a car from one owner to another)
- remote control training when replacing a faulty immobilizer with a new one.
Only new remote control units or those that were previously trained using the training key used in this training procedure can be trained. It is impossible to learn a remote control key from another car into your car.
Please note: Due to the importance of the training key, it is not recommended to use it for everyday use and should be kept in a safe place.
Before starting the training procedure, fill the car with at least 10 liters of gasoline so as not to get confused by the squeaks.
Video
We recommend watching detailed video instructions, this can save you time and effort when carrying out repairs on your own
Hello everyone) I finally got around to writing a post about how the front springs were replaced in my car. In principle, I did everything according to the experience of those who wrote their posts on the forum about the replacement, but I had to change a little and add my own, well, in general, in order... my front springs sank so much that I felt all the bumps and rode on the bump stop. It was decided to buy and replace the front springs as in the photo
and naturally pullers were needed to remove/insert the springs. there was an opportunity to buy for 350 rubles. new, but I think why buy for one time when a friend has it.
In general, I began to change it: I jacked up the car, took off the wheel, and put blocks under the lever so that I could then put the car on them. I unscrewed the ball joint, the stabilizer and... did something that none of the people I read on the forum did... I unscrewed the shock absorber. This caused the lower arm to fall completely and the springs to fly out. It was easier to insert since you held it with your hands and lifted the lever with a jack, the spring fell into place and the pullers flew off, this is what happened after replacement
Installation of adjusting bolts on a Chevrolet Niva
New hydraulic compensators, as has already become clear, are expensive, and the guarantees that they will not knock again are minimal. It is for these reasons and because of the price dispute that adjusting bolts can be installed.
The work is done the same, but you will have to adjust the valves separately and assemble the engine a little differently.
Assembly Features
- It is necessary to thoroughly clean all bolt wells.
- We mount the plates and tighten the new bushings.
- Next, tighten the bolts and install new springs with rockers.
- We install the camshaft in its place and tighten the chain. There is no need to install the oil ramp yet.
Now it is necessary to adjust the valves, and this is done in the same way as on any other car of the VAZ family.
- The valves are adjusted using a wide probe or indicator.
- When the mark on the camshaft is aligned, that is, in the fourth cylinder, we adjust valves 8 and 6, then rotate the crankshaft 180 degrees, adjust 7 and 4, then 3 and 1, and finish with 2 and 5.
Such work is inconvenient due to the fact that adjustment is required every 10-15 thousand kilometers.
Valve clearance
The valve clearance of 0.15 mm, which is set with a feeler gauge, must be carried out only on a cold engine. If this value is less, then they may simply burn out, and if it is more, they will start knocking.
When to change?
Let me refer to quotes from the forums: look at how your lower control arm is relative to the ground, measure the distance from the edge of the wheel to the arch, and the like. Of course, there is some truth in all this, BUT these are all consequences. We need to look at the reason, that is, at the spring itself. The next legitimate question is: where to look? The photo shows springs from the same car, one side before replacing the springs, the other after.
when to change springs?
For some reason I remembered the magazine “Murzilka” with pictures on the topic, find 10 differences)). Red circles indicate where to look. Why do springs in this condition need to be changed and why is this criminal? Different alloys have different physical characteristics. In particular, spring steels do not withstand shock loads at all. When the coils of the springs close to full contact, an impact occurs. Stress tends to accumulate, and at some point the spring bursts. If this happens at low speed, the face of the car will simply fall down. The fuse will be the shock absorber, which will bend, and if the swing was stronger, then the body will lie on the wheel. It is much worse if this happens at speed or somewhere on the descent from a hill. I saw a short video from the Ladoga Trophy, when a short Niva drives down a hill, bounces a little and turns over. What can be seen in the slow motion replay: when flying up, the suspension dissolves. Then, the face of the car goes down, the spring bursts, the body falls on the wheel... and the car does a somersault through this wheel, since the kinetic energy has not gone away.
Types of breakdowns and their causes
The parts are made of high-strength alloy steel, so they are practically not subject to deformation.
The jet rod can only bend as a result of hitting large stones or tree stumps off-road.
More often, car owners have to deal with other problems:
- Cracks in the welds between the rod base and the eyes. If a breakdown is not detected in time, the part may fall apart while moving.
- Corrosion of rods. A rusted base loses strength and is easily deformed or broken.
- Wear and damage to rubber bushings of silent blocks. Over time, rubber dries out and cracks. This process is enhanced by physical activity. As a result, play appears in the connection of the rod with the bridge and the body. This worsens the car's directional stability and can lead to the lugs coming off.
Suspension lifting Niva VAZ 2121 21213 21214 2131
We will tell you how to properly perform tuning modifications in this material.
Do-it-yourself elevator - drawings, diagrams, sizes, types of kits. Lifting varies in the degree of intervention in the standard structure. For some, it is enough to raise the SUV by a few centimeters, and for others by as much as 20.
Extreme tuning – maximizing cross-country ability for traveling on severe off-road conditions.
- Regular jack
- Hijack jack
- Spring puller
- Balloon wrench
- Ratchet socket set
- Set of open-end wrenches
- Mount
- Wooden deck (stump)
It is advisable to perform such work with a partner. First of all, it's safer. Secondly, some lifting work is performed with four hands. Let's take the front suspension as an example.
Raise the front end. You can safely cling to the standard bumper, only the jack is installed under the pipe securing it. By removing the wheel, we get full access to the lever and spring. The front suspension 21214 is made using a double wishbone design, which simplifies the task.
The lever travel is limited by the shock absorber. Unscrew its fastening and move it to the side. Next you need to free the suspension from the anti-roll bar. The mounting bolts may become stuck due to corrosion, so we will use a penetrating liquid (such as WD-40). The stabilizer silent block clamp can be pryed off with a pry bar.
Then disconnect the hub from the lower arm. To do this, you need to jack up the suspension and fix the steering knuckle of the wheel. You can tie it with wire. Then unscrew the 3 mounting bolts and release the ball joint.
We fix the spring with ties and lower the jack. We remove the old elastic element. In some cases, it is enough to simply lower the lever with your foot, and the spring will come out without the use of ties.
Remove the upper support rings from the old springs. With their help, the elastic element is centered in the cups.
They come together easily with a hammer and screwdriver. We install the rings on new, longer springs. We put the elastic elements in their regular places and jack up the lower arm until it is completely aligned with the lower cup. At the same time, an assistant centers the shock absorber eye and moves the steering knuckle to the mounting location of the lower ball joint. We tighten the ball “triangle” and attach the shock absorber mounting axis.
By manipulating the jack, we “catch” the mounting holes for the stabilizer bar clamp. With its bolts it should get into the normal place without distortion. After such modernization, the clearance increases by 30-50 mm. This is enough to install wheels of larger diameter, and the bottom will still rise above the ground.
The rear axle of the Niva can be lifted by installing spacer supports of increased height. When using a size of up to 50 mm (according to changes in front end height), no modifications to the rear axle are required. By lifting the rear axle, maintenance can be carried out on the axle and brake system.
The handbrake cable may need to be replaced. It is lengthened by a couple of centimeters. Otherwise, the Niva lift will lead to increased wear of the brake pads in the rear drums. Disconnect the lower shock absorber mounts and lower them until the springs stretch.
We take out the elastic elements and knock off the support rings from them. We clean the upper cup and carry out anticorrosive treatment. We install new supports of increased size and seat the springs using a jack. We fasten the shock absorbers, assemble the axle, and mount the wheels.
Such a lift will not arouse suspicion among traffic police inspectors, and the cross-country ability of your NIVA 2121 will improve. No drawings, much less homemade parts, are required. You buy new springs and about the rates, the rest is a matter of technology. Labor costs for an elevator of one NIVA are two people/one day off.
For lovers of hunting, fishing and country travel, as well as those eager to try themselves and their own “Niva” in driving a vehicle in difficult-to-pass places, we have the opportunity to offer an increase in ground clearance, which increases the cross-country ability of your car.
Niva tuning – suspension lifting.
At the moment, there are at least 6 types of suspension lifting for Niva and Sh/Niva, each is interesting in its own right and is negotiated during the preparation of the car for “off-road” at the request of the visitor, taking into account the distinctive features of the operation of his car and the sizes of wheels and tires he uses wants to put it on his car.
Also interesting: Amount of oils and fuel fluids VAZ 4×4 2121 Niva
We often use a kit from the Russian club 'Korovka' as a base. This lift kit was made at the factory and was tested at competitions in Russia. The ground clearance increases by 5 centimeters, which actually makes it possible to install R15 235/75 or R16 235/70 tires (on the right wheels). In addition, this will provide a rise of another 4 centimeters.
In total, the increase in ground clearance will be 9-10 cm! In this version, “NIVA”, without loss of comfortable qualities, has the ability to be used both on paved highways and off-road, being in no way inferior to foreign-made SUVs.
Consequently, at the lower point of the RZM the clearance is 25 cm, and at the cut of the threshold - 44.5 cm.
Front suspension lift.
The lift is performed by installing targeted washers under the lower spring pad (they create a sufficient angle for the front spring). Under the upper arm (between it and the ball) another spacer washer is placed (i.e., we unload the arm).
The levers of the steering knuckles are swapped and the tips of the control rods already go from top to bottom (since subsequently the work done before, when the rod is fully turned, they will rest against the stabilizer, although at the request of the visitor it is possible to leave it as it was by changing the fastening of the stabilizer).
During lifting work, it is often necessary to change shock absorbers, springs, and resins on request. spacers, internal CV joint boots on tuning suspensions modified for this type of lift and create adjustments. spring bumpers.
Lifting the Niva suspension at the rear.
The lift is carried out by installing new rear spring cups, which are bolted on top of the standard ones, and brackets for moving the mounting points of the rear shock absorbers up 5 centimeters (bolted).
The short upper rods of the rear axle are lengthened or made adjustable (for easy rotation of the shank, so as not to bite the crosspiece), the reaction rods of the rear axle are either reinforced with an angle or installed double; at the request of the visitor, a rear axle stabilizer “Tehnomaster” (Tolyatti) is added, although it will be needed adjust to the elevator machine, digest.
Similarly, it is preferable, on lifted cars, to use a rear CV joint. Those who begin to lift old or worn-out cars need to remember about the internal CV joints (the balls leave their place) and will need to prepare for their replacement. The solution to this difficulty is quite possible by reducing the drive angle by untying the front axle.
The outer CV joints are too little susceptible to this, it will be worse for them if the wheel becomes larger in offset, width and weight, and then they can “crunch”. Although even then the hub bearing has a hard time, especially if it had play before.
Although we have avoided this problem, since we install steering knuckles with 2 ball bearings (from the rear axle shaft), they do not need to be adjusted; they are tightened all the way, although it is much better with a torque wrench. The unit comes out maintenance-free, the hub is unloaded, rolling is easier and the dynamics of the car are much better. Steering knuckles are naturally of domestic production and with a guarantee.
When installing wide wheels after a lift, you will need to keep in mind the ball ones (when the weak ones “fly”), the pendulum will also be able to fly, and the installation of the latest gas shock absorbers results in a stiffening of the upper bracket of the lane. shock absorber (otherwise it tears, especially when the front end is heavier), the mounting of the rear shock absorbers can also be strengthened. It is preferable when lifting, replace the suspension with p/urethane instead of rubber.
Economical Niva suspension lift of 1.5-2 centimeters. In such a situation, we resort to replacing the rubber spacers for the springs with tuning ones (of greater thickness), installing washers, spacers for the upper ball joints and adjusting the spring bumpers (at the visitor’s request). In this implementation, the Niva gets wheels (correct) in size R15 215/75.
The Chevy Niva bridge is held in place using five parts. To prevent longitudinal and transverse displacement, four longitudinal rods (two each: front and rear) and one transverse rod are used. At the ends of the products there are eyes into which silent blocks are inserted to prevent knocking in the suspension. One end of the rod is attached to the bridge, the other to the car body.
The parts have the same diameter and differ only in length. The longest is the transverse thrust. The length of the elements ensures vertical mobility of the rear axle. Thanks to this, the silent blocks do not twist, even if the suspension moves by the full stroke of the shock absorber.
Front suspension lift
To increase ground clearance, you need to do the following:
- Jack up the car.
- Remove the front wheel.
- Place a second jack under the ball joint and lift it so as to load the spring.
- Install the tie rod.
Tip: tighten the part with twists of steel wire. However, this method is dangerous. The tie may unwind or burst, causing the spring to suddenly straighten out and cause injury or damage to the wing.
- Loosen the shock absorber bracket.
- Unscrew the stabilizer and ball joint mounts, then remove the parts.
- Remove the spring.
- Lower the jack under the lever.
- Move the hub to the side.
- Remove the cup.
- Install spacer washers.
- Secure the cup and spring.
- Jack up the lever.
- Secure the hub, stabilizer and ball joints.
- Screw on the shock absorber.
- Install the wheel.
- Repeat the steps on the other side of the front suspension.
This completes the first part of the procedure.
Take a ready-made lift kit, other springs, or we’ll make do with spacers
What else is left to tell about Niva springs?! We mentioned earlier that in modern conditions it is not necessary to bother with car repairs. Even such inventive guys as fishermen and hunters. There are ready-made solutions, for example, lift kits, which can easily make your car a little more reliable off-road.
One of these kits immediately increases the car’s ground clearance by 4 centimeters; it includes, among other things, 2 spacers for the spring and modified lower cups:
There is also a more solid kit - it will immediately make the Niva 5 cm taller due to enlarged springs. It is suitable for any car of the family from VAZ 2121 to VAZ 21214. This set includes 2 reinforced front and rear springs made in Russia:
However, those who wish can purchase larger rear springs separately and inexpensively:

