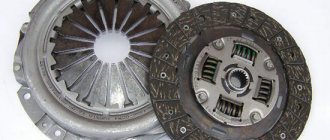
How it works and what it consists of
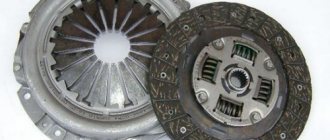
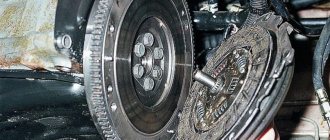
The VAZ 2110 has a single-plate clutch with a central pressure spring. The drive operates via a cable. The casing is attached simultaneously to the pressure plate and flywheel. The design also provides for a driven disk.
Device diagram
The factory clutch system for the VAZ 2110 is called VIS. Many people complain about it because it doesn’t work very effectively, although others are sure that there is no more worthy alternative for the “ten”. So opinions differ on this matter.
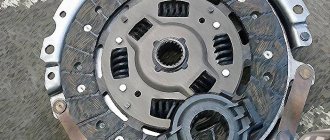
The main components of the system include:
- casing;
- Crankcase with a cover and supporting planes with which the unit is attached to the frame;
- Driven and pressure plate;
- Release bearing. It disengages the clutch;
- Flywheel;
- Shutdown plug;
- The cable wire that goes to the pedal (far left in the car interior).
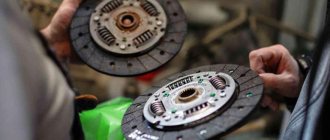
How to center the clutch disc? (solved) - 1 answer
to center the clutch disc :
- Expose it to the eye. If you take your time and look carefully and thoughtfully, everything will work out. Accuracy is quite enough.
- If the eye is deceiving, then loosen the fastening of the basket so that the driven disk dangles freely in it. And when putting on the box, first we catch the driven disk with the input shaft, and then the KV bearing. Lastly, tighten the clutch basket bolts.
- Carve the wooden mandrel. Measure the inner diameter of the bearing in HF and the inner diameter of the spline in the driven disk and make a mandrel based on these dimensions.
For example, on a Ford Focus, alignment is done this way:
A “12” head is used (50 mm long and 17/15 mm in diameter).
The driven disk is centered along its splined hole and the hole in the crankshaft flange (under the shank of the gearbox input shaft).
When installed, the “basket” is centered on three pins pressed into the flywheel.
Choice
If you plan to simply replace the disk, purchasing a completely new node does not make sense from a financial point of view. But when the old clutch leaves much to be desired due to the quality of its work, it’s worth thinking about completely replacing the unit.
Today the market is represented by an extensive list of alternatives made in Europe and China. We strongly do not recommend using Chinese spare parts, but European analogues should be considered as a replacement for VIS.
According to a study conducted among VAZ 2110 owners, the five best kits for the domestic “ten” were determined:
- Kraft Tech.
- LUK.
- Valeo.
- Sachs.
- VIS.
As we have already noted, VIS is installed as standard and works quite well. An important advantage compared to European counterparts is financial accessibility. But if your wallet allows it, replace the old clutch with a better and more expensive one.
In defense of the VIS system, we note that repairs often require simply adjusting the pedal and tightening the cable. And if you are going to completely change VIS to VIS, it will not cost you a pretty penny.
How to center a clutch disc without an input shaft
A little about clutch disc alignment. And a popular myth:
If you do not center the disc, the clutch will “beat”. Is it true.
If you do not center the disk, you will not be able to install the gearbox in place, because the centers of the holes in the basket, disk, seat on the flywheel must coincide, otherwise the shaft will not go all the way.
In general, there are 2 official methods for centering a disk.
1) Centering the disk on the seat of the input shaft.
This method is routinely used in service centers for opulent cars, incl. and Lanos. A mandrel according to the dimensions of the input shaft is used. For Lanos like this
Popular problems and their solutions
There are several characteristic faults that occur on the VAZ 2110. Let's try to understand the reasons for their occurrence, and also consider ways to solve the problem.
- The clutch drives. The reasons may be: The pedal has insufficient travel, the tension is too tight. To eliminate this, you need to adjust the drive;
- The driven disk is deformed. Only replacement will help here;
- The driven disc hub sometimes gets stuck. If so, try washing it and lubricating the input shaft splines. If the element or the shaft itself is worn out, then replace them;
- The friction linings are broken and the rivets are loose. The best solution is a complete replacement of the casing, which includes a spring and a disk;
- The pressure plate is warped or warped. Replace the linings, but first make sure that there are no deviations in the end runout of the disk;
- There were problems with the cable. Pull it up. If there is no result, replace with a new one.
- The friction linings on the driven disk often burn or wear out. There is only one solution - replacement;
- Oil has reached the surface. We have already described how to solve the problem above;
Dimensions of the VAZ 2110 input shaft for clutch centering
- To the beginning of the forum
- Forum Rules
- Old design
- FAQ
- Search
- Users
Hello, actually a question.
Are there any differences, namely the distance between the seats of the front and rear bearings on the input shafts of the front-wheel drive family? The fact is that 3 years ago the gearbox was repaired (Vaz 21102, Gearbox 2110), and the input shaft was replaced. After this, when starting off, a certain click appeared, similar to a click when the satellite axis wears out.
A month ago I disassembled the box (by myself) to change bearings and seals. During assembly I noticed this nonsense. The rear bearing of the input shaft is located below the rear bearing of the secondary shaft by approximately 3 mm. To put the retaining ring on the input shaft bearing, I had to press on the shaft (from the basket side). In this case, the inner race of the front bearing of the input shaft disengages from the rollers by the same 3 mm.
Here is a diagram of what bearing displacement looks like...
There was no time to figure it out then, I needed the car, so I assembled it as is. Now I know the reason for the clicking.
It doesn't seem like there are any washers on the input shaft. I'm going to take it apart this weekend, anyone have any advice?
A month ago I disassembled the box (by myself) to change bearings and seals. During assembly I noticed this nonsense. The rear bearing of the input shaft is located below the rear bearing of the secondary shaft by approximately 3 mm. To put the retaining ring on the input shaft bearing, I had to press on it (from the basket side).
Take a look if you don't mind. It is unlikely that the shaft is crooked; it was taken from the 8th working box, although I would not be surprised.
I noticed one more thing that the 2108 input shaft should not be confused with the 2110 input shaft, they have a visually different inclination of the 4th gear.
Look at 4th gear again.
Interesting myself
.
It is unlikely that the shaft is crooked, it was taken from the 8th working box.
In principle, if the “jamb” only fits the rear bearing, you can make a spacer under it (the bearing). It’s easy to check: with the shafts in a vertical position (so that the front bearings are seated) and the housing removed, look at how the gears are located (on the primary and secondary shafts, in the sense). Ideally, they should be strictly opposite each other, although nothing in the world is ideal
and a small (half a millimeter) discrepancy is acceptable. If this is the case, put a spacer under the rear bearing and ride safely. If not, that is, the gears are very misaligned, install spacers on both sides, i.e. under the front bearing too. Well, if the “progressive non-approach”, i.e. 1st gear gears are fine, but 4th gears are not, the shaft needs to be replaced.
Regarding the “different inclination of the teeth” - this is nonsense. All standard cans are the same. Of course, in addition to the factory, they are also made by a shitload of cooperatives and Ketais, so the shafts of different manufacturers, of course, may differ. And there are tuning shafts with other gear ratios (requiring other gears on the secondary shaft, naturally) and, accordingly, they will also have differences. So don't bother yourself with this.
Source
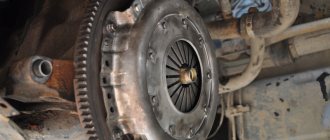
Dismantling, repair and replacement
It is possible to replace the clutch on a VAZ 2110 without removing the gearbox, but the method most often used is to dismantle it. It is not necessary to remove the box if you just want to adjust the clutch. And during repairs there is no need to drain the transmission oil.
The procedure for dismantling and repair is as follows:
- Disconnect the battery;
- Remove the air filter;
- Disconnect the wiring harness;
- Raise the car;
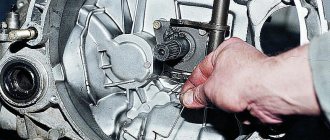
- On the right, loosen the clutch drive nut and unscrew completely on the left;
- Remove the lever from the car suspension, and also remove the ball joint;
- Unscrew the lower protection of the power unit;
- Disconnect traction from the gearbox;
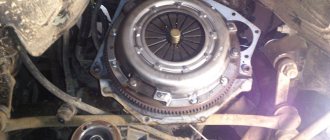
- Remove the clutch housing and inspect it. Most often, the crankcase has cracks, the threads wear out, or the “grip” of the paws holding the crankcase is lost. To correct the situation, the cracks are welded and the threads are renewed. This way the crankcase can last for many more years;
- Raise the engine with a jack, remove the gearbox, which will allow access to the clutch assembly;
- At this stage, repairs are performed or the clutch system is completely changed. It all depends on the current state of the units.
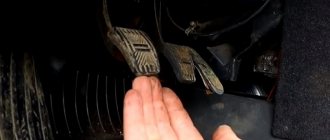
It is quite possible that after replacement or repair the clutch will be quite tight. There is no need to disassemble again, since the problem is solved by adjusting the travel pedal, but from the inside of the car.
As you can see, the clutch for the VAZ 2110 plays a vital role, and keeping it in good condition is the direct responsibility of every car owner. You can fix problems that arise with the clutch on your own, without going to a service station. But if your personal experience, skills and knowledge are not enough for such work, it is better to immediately contact specialists.
Results
If there is an overpass or lift, the operation is carried out quickly and efficiently, and when there is a reliable assistant, it is also fun. However, not everyone has such capabilities, and this is where engineering ingenuity comes into play.
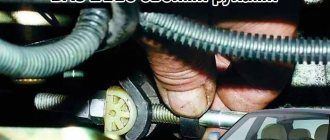
Some car enthusiasts practice repairing the clutch without removing the gearbox; for this purpose, instead of the upper standard mounting bolts, they screw in longer bolts. For this, for example, two bolts from the upper arm of the front suspension of the “VAZ classic” are suitable. By screwing them into the upper holes, the box can be moved back by 14-15 cm with a pry bar. In this case, the transverse rod should not be unscrewed, because the rear part of the gearbox will lie on it. These conditions are quite enough to replace faulty parts.
If repairs are necessary, experts recommend doing a complete replacement of the entire assembly along with the release bearing, especially since the choice of clutch kits is quite wide. This position is explained simply - an old part left behind threatens to fail at any moment. The procedure, as you yourself saw in the video, is quite labor-intensive, and repeating it over and over again is not a pleasant pleasure, except for real “homemade people.”
Source: autobann.su