Clutch cable adjustment
Before making adjustments, you need to prepare the car. For convenience, it is recommended to remove the air filter housing.
Pull out the clutch cable with force and hold it in this position.
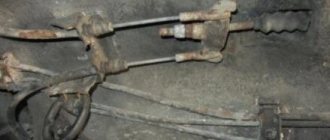
We measure the distance with a caliper or a ruler between the plastic nut of the clutch guide and the release bearing drive fork. The distance should be exactly 27 mm.
When taking measurements, there is very little space in the engine compartment and it is quite difficult to measure accurately, so it is recommended to prepare a 27 mm stick in advance and measure using it.
Adjustment is carried out by tightening or unscrewing the plastic nut of the leash, depending on the distance between the parts.
After completing the work, you must press the clutch pedal several times. This is necessary for the auto-adjustment mechanism to select the correct cable tension.
When adjusted correctly, the leash will fit snugly against the fork, and the clutch pedal will be 20 cm from the floor or at the level of the brake pedal
Source
Replacing the cable
You will need: a flat blade screwdriver, narrow jaw pliers, side cutters.
1. Remove the decorative engine cover.
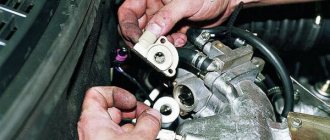
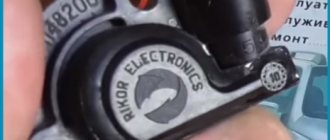
2. To replace the throttle drive cable, remove the safety bracket from the throttle assembly sector by prying it off with a screwdriver
3. Remove the cable tip from the sector groove and disconnect the cable from the throttle assembly.
4. Remove the spring stopper.
5. Remove the cable from the slots in the holders.
6. Release the cable by using side cutters to cut through the plastic clamp securing the cable to the crankcase ventilation hose.
7. Slide the cable sheath forward
8. Remove the cable sheath damper from the hole in the front panel.
9. Inside the car, under the instrument panel, remove the cable end from the pedal lever pin by sliding it with a screwdriver
10. Remove the cable into the engine compartment.
11. Install the cable in the reverse order of removal.
Do not forget to secure the cable with a new plastic clamp on the crankcase ventilation hose.
12. Adjust the throttle valve actuator.
The throttle cable (gas cable) is the connecting link between the gas pedal and the throttle; when you press the pedal, you do not act on the cable, which in turn opens/closes the throttle valve. This way you regulate the flow of fuel to the cylinders, as well as the engine speed and vehicle speed.
A poor (untimely, delayed) response to pressing the gas pedal is most often a sign of problems with the throttle cable. The problem may lie in the fact that the throttle cable is incorrectly adjusted, its tension has weakened, in addition, the throttle cable may have stretched or completely failed and requires immediate replacement. If, when pressing the gas pedal, you feel resistance similar to friction, or pressing the pedal has become hard and not smooth, you need to lubricate the cable.
Website about joints
Hi all! The other day, in a dialogue with my father, it turned out that a couple of times he had the feeling that the gas cable was getting stuck when pressing the pedal... well, without thinking for a long time, I bought a cable in the store and decided to change it, since from the very purchase of the car there was some kind of RPM freezing even though we adjusted it. Replacing the cable turned out to be a piece of cake, I thought it would be more difficult. First we remove the decorative cover, remove all the stops, but try not to let it into the engine compartment
Stopper from the throttle sector
Stopper of the cable itself.
Then we remove the cable itself from the seat, cut off the clamp that holds the cable, from the interior side we simply use a screwdriver to move the eye of the cable to the side (there are no stoppers there), pull out the damper bushing from the hood side and remove the cable from the engine compartment))
On the interior side, the cable is simply attached to the pedal. By the way, you can spray the pedal bushings with silicone, since you are nearby.
Before installing it in the partition, also spray the fungus with silicone. First we insert the fungus, then we insert the plastic part of the cable.
There was a Lyskovsky cable from the factory...
I am a supporter of the fact that everything should be lubricated, before installing the cable I poured motor oil from a syringe, it began to move even softer, I adjusted the cable, and that’s it, bye everyone!
Issue price: 210 ₽
Like 18 Share: Subscribe to car
The so-called throttle cable or gas cable is a transition element between the throttle and the gas pedal. Pressing the latter transmits an impulse to the cable, which, in turn, slightly opens and closes the throttle valve again. The system is designed to regulate the fuel supply to the fuel system, and, as a result, the speed of the vehicle.
How to change the throttle cable on a Priora?
Some car owners are wondering how to change the throttle cable on a VAZ 2114. The reason for this is the great importance of this element for the entire car. Without a cable, no mechanical unit can function in normal mode, because it is this that allows the power unit to operate in the mode desired by the driver. We are talking about increasing or decreasing speed at a certain point in time.
If the driver cannot regulate the engine speed while driving, this can lead to an accident. Also, if problems arise with the cable on the mechanical damper, the machine will also not be able to operate normally. In particular, the car will idle, and pressing the gas pedal will not lead to any effect. It is for this reason that not a single throttle valve has ever been done without a cable.
In order to replace a faulty or damaged throttle cable 2114, you need to have a whole set of tools on hand.
Among the most important tools are:
- Spanners.
- High quality pliers.
Screwdrivers.
Lubricating the throttle cable on a Priora at home
To work you will need:
- Flat screwdriver;
- Pliers;
- A syringe and a few drops of motor oil or WD-40.
1. First you need to turn off the engine and let it cool.
2. Next, you need to open the hood and remove the decorative engine cover.
3. To remove the throttle cable, you need to remove it from the plastic bracket; to do this, pull the cable casing towards you and, pushing the rubber ring up, remove the cable.
4. Now you need to disconnect the cable from the throttle valve drive. To do this, remove the U-shaped metal bracket from the throttle actuator by prying off one edge using a flathead screwdriver.
5. We remove the cable from the hook, overcoming the force of the spring.
6. Now that nothing is in the way, you can begin to lubricate the throttle valve actuator; to do this, you need to slide the transparent cap and generously lubricate the cable with a few drops of engine oil or WD-40 penetrating fluid. In the case of oil, prepare a syringe.
Try to pour oil into the housing, then move the housing to lubricate the cable along its entire length. Repeat the procedure several times until the cable is completely lubricated.
Next, put the protective cap back in place and reinstall the cable to the place of further service.
How to adjust the throttle cable of a Lada Priora?
- The adjustment is carried out using a clamping bracket, which we previously removed. This bracket is a tensioner for the casing in which the cable moves.
- Remove the bracket and tighten the throttle cable so that it sags about 1-2 mm near the throttle drive.
- Now you need to install the fixing bracket into place in the casing. Make sure that the cable is tensioned optimally and that the throttle valve is not open when the gas pedal is at zero position. A cable that is too tight will cause the idle speed to be constantly elevated. Squeeze the gas pedal several times and check how everything works.
- Start the engine and make sure the throttle cable is adjusted correctly and the idle speed is normal.
Work on adjusting the throttle cable of the Lada Priora takes place in several stages:
- First, we go to the engine compartment and remove the plastic cover covering the engine. The throttle cable itself is held in a special plastic bracket, and in order to remove it upward, you need to find the cable casing and use a rubber ring. We remove the cable quite carefully; if you feel that it is caught on something, try to find the reason. As a rule, this stage of work does not require much effort and the cable can be easily removed.
If the problem is cable tension, look at the bracket that holds it to the throttle body. It will have to be removed and returned to its place after tensioning the throttle cable. In ideal condition, it sags by about one to two millimeters directly next to the throttle valve actuator. After the correction, we check the system: when the gas pedal is not pressed, the throttle valve should be tightly closed. Otherwise, you risk high idle speed and increased fuel consumption.
Replacing the cable
You will need: a flat blade screwdriver, narrow jaw pliers, side cutters.
1. Remove the decorative engine cover.
2. To replace the throttle drive cable, remove the safety bracket from the throttle assembly sector by prying it off with a screwdriver
3. Remove the cable tip from the sector groove and disconnect the cable from the throttle assembly.
4. Remove the spring stopper.
5. Remove the cable from the slots in the holders.
6. Release the cable by using side cutters to cut through the plastic clamp securing the cable to the crankcase ventilation hose.
7. Slide the cable sheath forward
8. Remove the cable sheath damper from the hole in the front panel.
9. Inside the car, under the instrument panel, remove the cable end from the pedal lever pin by sliding it with a screwdriver
10. Remove the cable into the engine compartment.
11. Install the cable in the reverse order of removal.
Do not forget to secure the cable with a new plastic clamp on the crankcase ventilation hose.
12. Adjust the throttle valve actuator.
Replacing the throttle cable
If the throttle valve does not open fully (engine not making full power) or closes (high idle speed), first try adjusting the throttle cable.
If adjusting the throttle actuator cannot achieve full opening or closing of the throttle valve or the actuator becomes stuck, replace the actuator cable.
You will need: a flat blade screwdriver, narrow jaw pliers, side cutters.
Remove the decorative engine cover.
To replace the throttle valve drive cable, remove the safety bracket from the throttle assembly sector by prying it off with a screwdriver.
Remove the cable tip from the sector groove and disconnect the cable from the throttle assembly.
Pull the cable out of the slots in the holders.
Release the cable by using side cutters to cut through the plastic clamp securing the cable to the crankcase ventilation hose
Slide the cable sheath forward
Remove the cable sheath damper from the hole in the front panel
Inside the car, under the instrument panel, remove the cable end from the pedal lever pin by sliding it with a screwdriver.
Remove the cable into the engine compartment.
Install the cable in the reverse order of removal. Do not forget to secure the cable with a new plastic clamp on the crankcase ventilation hose.
Adjust the throttle valve actuator
Adjusting the throttle cable
Open the hood and remove the decorative engine cover.
How to replace the throttle cable on a VAZ 2170-VAZ 2172?
Removal: 1) We will first devote the first point to adjustments, this is done as follows, the cable locks the spring stopper (Indicated by the red arrow in the large photo), removing it will not be difficult, take small pliers or pliers in your hands and grab the spring stopper with the lips of the pliers or plier, pull it up and take it out, after that, make sure not to lose this stopper because without it the cable will not be tensioned, so once removed, put it aside and proceed to adjustment, to do this, grab the cable sheath with your hand (Anywhere you can grab the shell, whichever is more convenient for you, and you can also grab the cable itself if you want, for clarity, the shell is indicated by a blue arrow, and the cable is green) and move the cable along until you achieve a clear adjustment, to lock the cable again, take the same spring stopper and install it against the rubber bushing (Indicated by the red arrow in the small photo).
Note! We didn’t tell you about that precise adjustment of the cable; in fact, this adjustment is easy to set; to do this, constantly remove the spring stopper and install it until you achieve that the cable itself in the place indicated by the green arrow does not bend due to hand force (Moderately press) more than 3 mm, but still it should bend a little and we don’t recommend pulling it with a string. If you don’t understand something or just want to visually see how this cable is tensioned on a car, then in this case, watch the video that located at the end, although there is another car there, the tensioning principle of the Priora and that car is practically the same!
2) Now let's talk about replacing this cable with a new one, firstly, remove the locking bracket from the throttle valve sector by prying it up with a screwdriver (see photo 1), this bracket is only needed so that the throttle cable does not fly off if it is too loose, after removing it, disconnect the end of the damper cable from the sector (see photo 2) it goes into the hole there, you take the cable out of this hole and thereby you will have it disconnected, then remove the spring stopper using small pliers or pliers (see . photo 3) and put it aside, but just don’t lose it, otherwise you won’t tighten the cable any more, and at the end of this point, grab the cable with your hands and pull it up from all the holders that secure it (see photo 4).
3) When the upper part of the cable is finished, go down a little lower and using side cutters or scissors, cut the disposable plastic tie clamp (see photo 1) attaching the cable to the crankcase ventilation hose, after cutting, follow the cable further with your eyes and look for that place where it enters the car interior through the engine compartment of the body, as soon as you find it with your hands, move the cable sheath back (see photo 2) and move the damper immediately behind the sheath (see photo 3), then move into the car interior, namely to gas pedal and there, disconnect the tip of the cable from the pin of the pedal lever by sliding it with a screwdriver (see photo 4) and leading the cable into the engine compartment, completely remove it from the car.
Installation: All parts are installed in their places in the reverse order of removal; after installation, be sure to adjust the cable as we showed this at the beginning of the article in the first paragraph.
Additional video clip: Just below there is a video and it shows the adjustment of the cable on Renault cars, this cable on them is located at a completely different angle in a different place, but the adjustment principle with the Priora car is very similar, watch the video and read our article and thanks to them you will understand everything right away.
Source
