02/03/2022 2 324 Alarms
Author: Victor
The A6 Starline anti-theft system is no longer available today. Despite this, the security complex has advanced functionality, including two-way communication and the ability to automatically start the engine.
[Hide]
Basic requirements for implementing StarLine autorun
Before remote starting, make sure that:
- the hood is closed, the parking brake is on;
- for cars with a manual transmission - the “program neutral” procedure has been performed (preliminary preparation for starting the engine);
- for cars with automatic transmission - the control lever is in the “PARK” position.
Remote engine starting cannot be performed in the following cases:
- ignition on;
- the hood is open;
- the parking brake is turned off or the brake pedal is pressed;
- preparation for starting the engine on vehicles with manual transmission (“program neutral”) has not been completed.
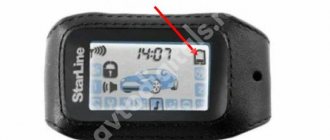
During one starting cycle, the system can make 3-4 attempts to start the engine. If after the 3-4th attempt the engine does not start, the “OST” or “” icon will be displayed on the display of the remote control with feedback (provided that it is in the reception area) and the remote control will emit 4 beeps.
For more information about StarLine errors during autostart, please follow the link.
Connection and programming
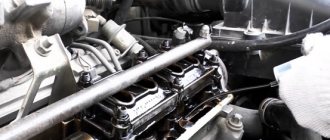
It is clear that the alarm itself will control the autostart module. Use one control output - yellow-red signal cord:
Twage A6 Kit Items
Connecting the module “02-12”
The main connector of the module in question will have six wires:
- Red – connect this wire to the 30th contact of the lock;
- Yellow - connect to the ignition line tap (see above);
- Green - in a car with two ignition lines, the cord is connected to terminal 15/2;
- Blue - if necessary, this wire is connected to the “ACC” lock contact;
- Black and yellow (thin) - connect to lock terminal 50 (discussed above);
- Black and yellow (thick) is the starter power supply (see above).
During operation, this is what happens: the “+12” potential appears at terminal 50, and the relay built into the module supplies power to the starter. That is, the built-in relay closes the 30th and 50th contacts. In general, this happens in two cases:
- When the autorun command is given;
- When the black and yellow cord (thin) receives positive potential.
The ignition switch wiring is shown below.
Standard lock, diagram
As stated in the instructions, it is impossible to connect the module without breaking the starter circuit in any case. But the module is controlled by both the alarm and the potential at terminal 50. This means that the owner will not be left without the ability to start the engine with the key.
Now let’s look at how to connect the “low-current” connector:
- Black wire – “minus” of the module’s power supply;
- Gray-black – engine operation control input (to the tachometer or to the battery charge lamp);
- Orange-violet – to the handbrake limit switch (see diagram);
- Pink – connected to the alarm control output;
- Black and red is the output to the “crawler”, which is triggered only during the autostart process;
- Orange-gray – no need to connect;
- Yellow-black – output that is triggered when the ignition is on and the starter is not working.
During “normal” operation of the car, “output 5” does not work. And the car will not be stolen by rolling the lock. The connection method discussed above is given in the basic instructions. That is, there are no contradictions here.
A device called "Starline 02"
When connecting to a Starline A2 or A4 alarm, a 3-pin connector is used. But, unfortunately, this connector is not compatible with the Starline Twage A6 model. And you have to use the control input (wire 4). What has already been discussed.
Opening the plastic cover reveals a set of switches. Each toggle switch is set to one position:
- Starter operating time: OFF – 0.8 seconds, ON – 1.8;
- Engine control method: OFF – by tachometer, ON – by contact receiving potential “+12” after starting;
- Algorithm for turning on the power at terminal 15/2: OFF – when the starter is running, the power remains, ON – the power is turned off (a common option);
- Transmission type: OFF – automatic transmission, and this option should be left;
- Ignition hold time before start: OFF – less than a second, ON – several seconds;
- A service switch that is left in the OFF position.
Usually, during operation, auto switching is not done. So, you need to configure everything correctly right away.
Let's say control by a tachometer is used. This means that the gray-black cable is connected to the high-voltage input of the tachometer, and toggle switch 2 is set to the OFF position.
Tachometer input, VAZ dashboard
Be sure to run the test:
- Switch 6 is temporarily set to ON;
- You need to press the START button located under the module cover for a second;
- The engine will start, the LED should start flashing;
- If startup does not occur or the diode does not blink, the control wire was connected incorrectly.
For further operation, do not forget to return toggle switch 6 to the OFF position.
In practice, voltage control can also be used. In this case, the gray-black cord is not connected, and selector 2 is turned to the ON position. This method is the least reliable of all.
Additional alarm setup
As mentioned above, the alarm will control the external module through programmable output 3. Using a key fob with 4 buttons, it will be possible to launch. A three-button key fob, which is equipped with a display, will allow you to do the same thing and in addition it shows the temperature.
Interior temperature display area
To display the temperature, press keys 1 and 2 simultaneously. Press for 0.5 seconds.
In the signaling itself, if we talk about the Starline A6 model, you need to correctly set three parameters:
- Function 11 – type of connection of the blocking relay (normally closed or open contacts);
- Feature 1 – set it to 2 if you want to use autorun, or set it to 1 to disable this option;
- Function 8 – setting the temperature scale (Celsius or Fahrenheit).
All these functions are indicated in the instructions:
Custom Options Table A6
Let's look at how to enter programming mode now. You will need one keychain, main or additional.
- The programming order will be as follows:
- The ignition is turned on with the key;
- The service button connected to the main module is pressed 6 times;
- The ignition is turned off, followed by 6 siren beeps and 6 headlight flashes;
- The service button is pressed 1, 8 or 11 times;
- Taking the key fob, press key 1 or 2 within 10 seconds (see table);
- Siren signals should confirm that the value has changed.
The Starline Twage A6 system switches options cyclically: after the 11th, the first will go, then the second, etc. That is, in the “seventh step” you can continue pressing the service button. To exit the setup mode, just turn on the ignition.
The Starline 02 module initiates a launch if the duration of the control signal exceeds a second. This means that by assigning function 1 the value 4, during operation you can cause a “cyclic start”. Which is unacceptable, although this warning is not given in the standard instructions.
The procedure for preparing for autostart on mechanics
Depending on the ignition support option (programmable function), to turn on the “soft neutral”, perform the following steps:
- set the parking brake;
- turn off the ignition;
- the display will show r99, if the turbo timer mode is programmed, r06 will be displayed (the LED indicator will be constantly on and the engine will continue to run);
- remove the key from the ignition switch;
- get out of the car and close all doors;
- turn on security mode.
The engine is prepared for autostart.
Advantages and disadvantages of the system
The advantages of this model:
- Possibility of implementing the automatic start function. If the additional Starline 02-12 module is correctly connected, the user will be able to control this option via a command sent from the communicator. It is also possible to implement functions for alarm clock, timer and temperature in the car interior.
- Convenience and ease of installation. If you use the service manual, the user will be able to independently install the security system.
- Affordable price. Today this model is not produced, but you can find stores that have it in stock.
- Good range of work of the communicator. The presence of long-distance communication will allow the user, being at a considerable distance from the car, to find out about the status of the alarm.
- Two power unit locks. Thanks to this, the engine will be stopped if there is an unauthorized attempt to start the internal combustion engine.
Flaws:
- High sensitivity shock controller. To prevent false alarms from the system, this parameter must first be configured correctly.
- The microprocessor module may not work correctly or fail if it overheats. High temperatures can be detrimental to the unit. Therefore, it should not be installed where it is exposed to sunlight.
- The system package does not include a siren.
- Fragile keychain. With prolonged and careless use, the key fob body may become damaged.
StarLine Twage A8 A9 A4 A6
StarLine A4 and A6 systems do not have the ability to start the engine.
Option 1 By pressing button 3 of the key fob, move the cursor to the “Start” icon and briefly press button 2 of the key fob.
Option 2 Press button 1 of the key fob for 3 seconds and release. If button 1 is unprogrammed or faulty, use the first option or program the first button.
Video “Overview of the capabilities of the Twage A6 anti-theft system”
User Yaroslav540 briefly described the main features of the Starline security system.
Do you have any questions? Specialists and readers of the AUTODVIG website will help you ask a question
Was this article helpful?
Thank you for your opinion!
The article was useful. Please share the information with your friends.
Yes (100.00%)
No
X
Please write what is wrong and leave recommendations on the article
Cancel reply
Rate this article: ( 1 vote(s), average: 5.00 out of 5)
Discuss the article:
StarLine E90 E91 E93 E60 E61 E63
Alarms E60 E61 E63 do not have the ability to start the engine.
For StarLine E90 E91 E93 systems, two options can be used depending on the firmware (if the firmware is newer, then most likely the first launch option is used).
Option 1 Press button 1 on the key fob for about 3 seconds (until two melodic signals appear), then release the button, the engine will start.
Option 2 Remote engine start is carried out by sequentially pressing buttons 1 and 3 of the key fob. press button 1 long for about 3 seconds (until a beep sounds), and then button 3 briefly.
How to install an alarm
The security system is installed in accordance with the requirements specified in the service manual.
Installation of the anti-theft system must be carried out with the battery disconnected.
This will avoid malfunctions of standard equipment. It is recommended to protect all electrical alarm circuits with safety devices.
Connection diagrams
Electrical diagrams for connecting elements are given in this section.
The first part of the connection diagram to the microprocessor
The second part of the map for connecting elements to the ECU
Activators connection diagram
Recommendations for placement and installation
Tips for installing a security system:
- The microprocessor module is installed in a hidden place in the cabin. To ensure a minimum length of electrical circuits, it is recommended to install it behind or under the control panel. The unit is installed with the connector facing down so that when exposed to moisture, liquid does not get inside the housing. The device is secured using special bolts or double-sided tape. The module must be securely fixed to prevent vibration.
- The antenna adapter is fixed on the windshield, and it must be located at least 5 cm from the metal. This will prevent interference during data transmission. The antenna adapter contains a temperature sensor, so it should not be installed near a stove or other heat sources. This may cause readings to change.
- The siren is located in the engine compartment. There should be no sources of heat or moisture nearby. The device is mounted with the horn sideways or downwards. Thanks to this, moisture will not collect in it. The siren and wires should not be accessible from under the bottom of the car.
- The sensitivity controller is mounted in the cabin. After installation, the consumer must have access to the sensor adjustment element.
- The LED status light is located on the center console. Her work should be visible from the street.
- The Anti-Robbery and Jack mode buttons are located in hidden places. But the car owner must have access to these elements from the driver’s seat.
- When installing pushbutton switches on the tailgate and hood, you must ensure that they function correctly. If the doors are locked, then the gap between the contact elements in the device should be at least 3 mm.
Laying and connecting wires
The conductors are laid away from sources of interference:
- starter mechanism;
- ignition coils;
- high-voltage cables, etc.
Do not allow power lines to come into contact with moving mechanisms and components of the vehicle. This refers to steering rods, pedals, etc. All connections and soldering of wires are made with the power source turned off. If the car has an airbag or a coded car radio, when turning off the battery, you must take into account the nuances specified in the service documentation. Permanent connections are only soldered and then reliably insulated with heat-shrinkable tubing or electrical tape.
The microprocessor module and other components are connected to the terminals after complete installation. The contacts are connected according to the diagrams included in the package.
The Do-It-Yourself Auto Repair channel talked about the general nuances of connecting an anti-theft system.
StarLine D94 B94 D64 B64
The D64 and B64 systems do not have the ability to start the engine.
For StarLine D94 and B94 systems, two options can be used depending on the firmware (if the firmware is newer, then most likely the first launch option is used).
Option 1 Press button 1 on the key fob for about 3 seconds (until two melodic signals appear), then release the button, the engine will start.
Option 2 Remote engine start is carried out by sequentially pressing buttons 1 and 3 of the key fob. press button 1 long for about 3 seconds (until a beep sounds), and then button 3 briefly.
Features of the Starline A6 alarm system
The main feature of this model is the presence of dialogue encoding used when transmitting signals. This ensures maximum reliability and difficulty in intercepting them.
Specifications
The main properties of this security system model:
- transmission of pulse data via two-way communication channels from the key fob to the microprocessor module is carried out at a frequency of 433.92 MHz;
- the maximum operating range of the communicator in command sending mode is 600 m;
- the largest radius of operation of the key fob when receiving signals is 1.2 km;
- the operating range of the spare key fob for driving a car is 15 m;
- anti-theft system with automatic engine start can operate in a temperature range from -40 to +85 degrees Celsius;
- installation and use of signaling is possible on cars whose electrical voltage is 9-18 volts;
- when the protection mode is turned on, the security complex should consume no more than 20 mA of current;
- to power the electrical circuit through which the siren is connected, 2 amperes of current will be required;
- the current consumed by the power unit blocking line varies around 40 amperes;
- The main communicator is powered by an AAA power supply rated at 1.5 volts;
- The spare key fob operates using 3 V CR2032 batteries.
Equipment
Components and devices included with Starline Twage:
- Technical manual that allows you to correctly connect and operate the security system after installation.
- Microprocessor module with a set of elements for installation and fastening.
- The main communicator for controlling and programming options is equipped with a display.
- Spare pager.
- Two-level shock sensor.
- Antenna adapter with transceiver.
- LED light bulb designed to determine the operating mode of the A5 Starline signaling system.
- Service mode button, can be used for emergency shutdown.
- Toggle switch to enable the Anti-Robbery function.
- A relay designed to configure and control the autostart function of the power unit.
- Two holding mechanisms equipped with 30 A fuses.
- Limit switch for installation on the hood or tailgate.
Photo gallery
Photos of the elements of the security complex are given in this section.
Full set of signaling
Communicator for system management
StarLine A92 A94 A62 A64
StarLine A62 and A64 systems do not have the ability to start the engine.
Option 1 Remote engine start is carried out by sequentially pressing buttons 1 and 3 of the key fob. press button 1 long for about 3 seconds (until a beep sounds), and then button 3 briefly.
Option 2 To remotely start the engine, place the cursor on the “Fan” icon; to do this, briefly press button 4 two or more times to move the cursor and briefly press button 3.
Equipment
What elements will be included in the feedback system kit:
- a user manual with which the car owner can install and connect to the on-board network;
- main control unit with elements for installation and fixation;
- remote control equipped with a screen;
- additional keychain;
- sensitivity controller, belonging to the category of two-level sensors;
- transceiver;
- diode indicator to determine the operating mode of the complex;
- key to switch to emergency or service mode;
- Anti-HighJack mode activation key;
- a special device for implementing the remote engine start function;
- two holding elements equipped with 30 ampere safety devices;
- limit switch for mounting on the tailgate or hood.
StarLine A93 A93v2 A63 A63v2 A36 A39
For StarLine A93, A93v2, A63, A63v2, A36 and A39 systems, autostart can be enabled in two ways depending on the firmware (if the firmware is newer, then most likely the first startup option is used).
Option 1 Press and hold button 1 on the key fob (until two melodic signals appear), then release the button.
Option 2 Remote engine start is carried out by sequentially pressing buttons 1 and 3 of the key fob. Press button 1 long for about 3 seconds (until a beep sounds), and then press button 3 briefly.
Does A6 perform its security functions?
The Starline A6 alarm system is quite old and has not been produced by the manufacturer for a long time. Owners of cars equipped with this system have a question: is this alarm capable of providing full protection or is it time to think about replacing it with a newer model?
Starline A6, which is in good technical condition, has feedback. It is able to warn the owner about:
- attempting to open the doors, trunk or hood;
- broken glass (the shock sensor will be activated);
- loss of connection with the central unit.
The dialog signal code resists hacking using simple code grabbers. The built-in engine lock will prevent the car from being stolen, even if someone managed to get inside. Taking all this into account, we can say that A6 in most cases is able to prevent blatant attempts by intruders.
At the same time, an outdated encryption scheme and an easily detectable blocking relay will not be able to cope with the actions of professional hijackers. The alarm will also be insensitive if the car is carefully jacked up and stolen with the help of a tow truck, since it does not have a tilt relay.
Conclusion
Based on this, we can conclude that the Starline A6 car alarm can only partially provide security, and it is advisable to replace it with a newer one at the first opportunity.
Other StarLine models
StarLine A65 A66 A67 A95 A96 A97 StarLine B95 B96 B97 B66 StarLine D95 D96 D97 StarLine E63, E65, E95, E66, E66v2, E93, E96
For these systems, two options can be used depending on the firmware (if the firmware is newer, then most likely the first launch option is used).
Option 1 Press button 1 on the key fob for about 3 seconds (until two melodic signals appear), then release the button, the engine will start.
Option 2 Remote engine start is carried out by sequentially pressing buttons 1 and 3 of the key fob. press button 1 long for about 3 seconds (until a beep sounds), and then button 3 briefly.
Systems A96, B96, E96, X96
Sixth generation security and telematics systems, which is what all of the listed models are called, are distinguished by an innovative method of identifying the owner compared to other types of alarms.
To do this, use a smartphone or smart watch and a Bluetooth Smart channel. This combination guarantees minimal energy consumption, which means the service life of the batteries in the key fob is increased.
On the key fob of any of the listed security systems you will find four keys. To start the power unit, you must press button “1” for a long time, and to stop, press button “2” for the same long time.
In this case, each time you will hear a loud, thin sound, which will indicate that the command has reached the car's head unit.
The remaining keys are used when it is necessary to put the machine into service mode. Their combination is specified in the operating instructions. We do not recommend changing the settings yourself without knowing what it will lead to.
Important to note: If your car has a manual transmission, before using the Starline alarm with remote start, make sure to put the gear in neutral and apply the handbrake.
How else can you enable Starline autorun?
- By triple pressing the security button of the standard ignition key with a pressing interval of no more than 5 seconds (the availability of this function depends on the car model.
- From a mobile application if the system has a GSM or BT module.
- From an additional keychain.
- It is also possible to configure autostart based on engine temperature, time and battery discharge.
If any option does not suit your alarm model, then you can always find out which button to turn on autostart in the instructions.
Dealing with blocking
It is known that the Starline Twage A6 signaling can block one of the following lines - the starter or ignition power circuit. The point is that the “02-12” module is connected to the break in the starter line, so you will have to get rid of the first type of blocking. It is implemented according to one scheme:
Starter blocking by signaling, diagram
The wire that comes from pin 50 must be connected to the black and yellow cord of the autostart module. Here we were talking about a “thin” cord coming out of a 6-pin connector. And the “thick” wire of the same color will go to the starter.
The relay is removed from the structure. The signal control wire shown in the diagram is disconnected.
Now let's look at blocking the ignition circuit. If we talk about the Starline A6 model, it can be implemented according to the following scheme:
Ignition circuit interlock
In this case, one thing is required - to make a T-shaped outlet from the power cable (marked in red). The tap is then connected to the yellow wire coming from the terminal block of the autostart module. Nothing complicated.
Let's consider the third case - the blocking relay is not connected to the alarm system. Then you need to implement blocking according to the second scheme. It is given in the basic instructions, and there can be no problems here. Remember that the alarm itself in this case is programmed:
- Function 11 is left at value 1 if the power wires are connected to pins 30 and 87a (as in the diagram);
- If it is decided to use normally open contacts (30 and 87), the functions are given a new value - 2, 3 or 4.
Features and Functions
Main characteristics of alarms for Starline Twage cars:
- the frequency of the channel through which control signals are transmitted is 433.92 MHz;
- The maximum range of the remote control is 600 meters;
- the maximum operating range of the transceiver in security mode is 1200 m;
- The operating radius of the spare remote control is 15 meters;
- the temperature range in which the alarm can perform all its assigned functions is from -40 to +85 degrees;
- the voltage value of the on-board network of the car in which the alarm is installed ranges from 9 to 18 volts;
- the current value that the system consumes when the security mode is activated is 25 mA.
In accordance with the technical manual, the use of a security complex allows you to implement many useful functions for the machine, including:
- activation and deactivation of the system using one key on the remote control;
- the system operates in silent mode, the procedure for arming and disarming is carried out without sound;
- the ability to temporarily or permanently turn off the siren when the security mode is activated;
- presence of panic mode;
- confirmation of activation of the security mode using a sound signal;
- warning the car owner that someone is trying to get into the car;
- the ability to unlock and close door locks;
- function to search for a car in a parking lot;
- the ability to open the luggage compartment door using the remote control;
- Anti-HighJack option, activated by remote control or using a special key.
Remote engine start
The Starline B9 alarm system offers several options for remote engine starting. For example, a car owner can perform this procedure directly from the key fob - all that is required is the manipulation of the keys, which are described below.
Also (if there is an optional GSM module), the owner has the opportunity to start the engine using a command sent from the phone or via SMS message. To do this, you will need to purchase an additional SIM card, which will be installed in the car. She must receive calls, decipher messages and issue appropriate commands to control mechanisms.
How to set up the key fob?
For proper operation, you need to configure the remote control.
The first button is programmed first. The setup is done like this:
- Key number 3 is clicked quickly several times so that the cursor on the display moves counterclockwise or clockwise. To change the direction of movement, you need to pause for one second between clicks.
- Move the cursor on the screen using key 3 to a position that will correspond to a specific command, for example, activation or deactivation of the security mode.
- Having selected a function, press key 3 for six seconds until two and then three beeps are heard.
- To activate, click on button 1.
With this setting, by pressing key 1, you can activate or disable the protective mode. When you click, an indicator will appear that corresponds to the installed option. To reconfigure the button assignment, repeat the above steps again.
Programming button number 2 is carried out as follows:
- Perform a few quick presses on button 3, this will allow the cursor to start moving around the screen.
- By pressing the same button, move the cursor to the position that will correspond to a specific function.
- When the option is selected, press key 2.
If you plan to use the autorun function, you need to set the clock to do this:
- To configure, click on key 3 and hold it down until two short beeps are heard. After this, the indicator on the watch will blink. To increase the values, press key 1; to decrease, press key 2. To quickly increase or decrease the values, keys 1 and 2 can be held down.
- When the clock parameters are configured, the minutes are set in the same way, only to go to this menu you need to click on key 3.
- To exit the clock setting menu, press button 3 until a beep sounds.
On the main remote control you can configure the alarm clock:
- To program, click on key 3 and hold it down until the key fob emits two beeps.
- Then successively click on key 3 until an alarm clock icon appears on the screen. The clock symbol will blink. To increase the readings, press button 1, to decrease the readings, press button 2.
- First, the hours are set to trigger the alarm, and then the minutes; to set the latter, you need to press key 3.
When the alarm clock is set, you need to quickly click on key 3, this will allow you to go to the menu for enabling or disabling the function. Activation is done by pressing button 1, deactivation is done by pressing key 2. To leave the alarm clock settings menu, hold down the third key. There should be one beep and the remote control will automatically exit the menu. When the alarm goes off, the remote control will emit one melodic signal. To turn off the feature, press the third key on the pager.
If the alarm option is activated, the corresponding indicator will appear on the key fob display.
Alexander Shkurevskikh spoke about the procedure for linking the Starline A6 signaling key fob.
To set the timer, click the third button on the key fob and hold it in this position until the remote control emits two beeps. Using the same button, you need to move the cursor to the position of the hourglass indicator. The procedure for setting the timer is the same as with an alarm clock. The security complex allows you to set the timer to a maximum of 19 hours 59 minutes. When the function is activated, the status will be displayed on the remote control screen and the hourglass icon will begin to blink. Once the time has been set, the countdown will begin. After the set time period has elapsed, the key fob will emit eight beeps and the hourglass icon will disappear from the screen.
Opinions of car owners about the work of Starline A6
| Positive | Negative |
| Reliable, time-tested alarm system. Working properly since 2009. There were no glitches in the process. The keychain, of course, has lost its appearance a little, but after so many years this is not surprising. | Of course, it brings some benefit, but it is unlikely to save you from serious robbers. It is very easy to intercept the signal of such a “security”; even a student can handle it. My friend’s car was recently cleaned out; Starline was also there. The Singal woman didn't even make a sound. They are not very reliable. |
| StarLine TWAGE A6 is inexpensive and good protection for a car. I installed it myself, fortunately the instructions are quite clear and made for people. The entire installation of the car alarm took half a day (my brother and I did it together). We connected the door locks so that they could be opened from the remote control as expected, and the trunk locks. It still works well to this day. It performs all functions; if something happens, it screams loudly and the remote control beeps. Very convenient and practical, I don't need anything more. | I have an A6 on Lanos. They installed it in the showroom when I bought the car. I can say that it does not always obey the key fob well, sometimes the settings get lost. If there are any obstacles nearby, it is very difficult to open the car. And recently there was a case: I locked my car with the key in the evening, I opened it in the morning, and the alarm went off. I don't understand how this can be? Based on my experience, I would not recommend the starline a6 to anyone. |
| Although old, but reliable! In 5 years of operation it has never failed. It actually has a lot of possibilities, but most people just don’t need them in everyday life. For example, I only use open-close, I reduced the sensitivity of the sensor several times when there was a construction site near my work and there was a lot of noise, so the alarm was constantly going off. With this mode of operation, it seems that the A6 can last forever. | Very old and outdated alarm system. It was initially not very successful; it is better to buy an A9 with auto start. Some functions, such as trunk release, do not work at all. After a year of use, the glass on the remote control flew out, even though no one dropped it. During severe frosts it always malfunctions, does not open or close the doors. You have to stand in the cold for several minutes to remove the security. I'm thinking about a replacement, I just need to choose a company. I definitely won’t buy Starline. |
| It has been on the Chevrolet Lacetti since its purchase in 2007. I'm pleased with the feedback function and good reception range. The alarm is excellent, works like a clock. I recommend to everyone! | There are frequent failures. This alarm has let me down several times. The screen got worn out very quickly, nothing is visible, the buttons are pressed spontaneously and change programs. False positives are also present. I recommend NOT buying this alarm! |
| Alarm with feedback. If it works, the key fob immediately starts blinking and making sounds. The connection with the machine can be checked using a special button. There are a lot of useful functions, there is even an engine lock, which can be activated from a button and from the remote control. The connection diagram is very simple, you can connect it yourself and save on installer services | There are very few functions that are needed, but there are a whole bunch of unnecessary ones. It is very difficult to control them, the key fob is extremely inconvenient. To perform one operation, you need to press many times. The A6 is generally not suitable for modern cars, as the car will be stolen at once. |
User manual
The operating instructions supplied with the Starline C9 alarm system consist of sections:
- description of the characteristics and components included in the set;
- enumeration of functions;
- description of control panels and methods for setting up devices;
- control of the complex parameters by selecting icons with the cursor;
- changing security regimes;
- automatic engine starting techniques;
- methods of emergency switching on and off.
Indicator designations
There are a number of icons on the head console screen that allow you to control the operation of the complex and change settings:
- At the bottom of the display there are 6 shortcuts that are used when activating additional functions using the cursor method.
- In the center of the screen there are icons that allow you to identify an inactive or activated security zone. Additional icons are intended to determine the operating zones of the shock sensor, as well as to indicate the engaged parking brake.
- The screen provides an indication of the siren's operating mode, and there are icons showing the battery charge level.
- When installing an additional GSM-GPS unit, a satellite icon appears on the screen. The module allows you to control functions remotely (using an application on your smartphone).
Setting up key fob functions
To adjust the time and alarm, you must hold down the key with the text Ch until a melodic signal sounds and the first clock register switches to flashing mode. The owner then scrolls through the value using keys with lock symbols (open and locked). To switch between registers, use a short press on the Ch button. After programming the alarm time, the device is activated (using a button marked in the form of a locked padlock).
The owner selects functions by selecting icons using the cursor method. To enter the on-screen menu, you need to hold down the key marked Ch; after 2 signals are given by the buzzer, the label located in the lower left corner of the display begins to flash. The user navigates through the icons by briefly pressing the Ch key; to activate the desired function, you will need to press the security button. Disabling is carried out using a similar method, but a key with an icon in the form of an open lock is used.
Setting up autorun
Automatic alarm start is performed after programming the clock and activation time. After setting the alarm, a bell icon is activated on the display of the Starline C9 remote control. The owner then moves the cursor to an icon marked with alarm icons and the text “clock start.” After turning on the mode, the alarm clock icon remains active on the screen and the programmed start time is briefly displayed. After starting and warming up the engine, the function turns off automatically.
The C 9 car alarm with automatic start is capable of repeated warming up of the power unit; the start frequency is set by programming the central unit (in steps from 2 hours to a day). To start, you need to select a shortcut with the image of a clock dial and the text “fixed start” using the cursor method. Immediately after activating the function, the initial heating of the power plant occurs.
It is also possible to warm up the engine based on signals from the temperature sensor; the response threshold is set by adjusting the head unit of the complex. The instructions for C9 contain a table that allows you to program the value (in 4 steps in the range -5...-25°C). The complex allows you to start the engine an unlimited number of times (with an interval of at least 1 hour).
Car alarm service functions
- Image
- Text
6
Operating and installation instructions
Car alarm service functions
· Silent security mode · Security mode with the engine running · Activation of the security mode without a key fob · Automatic return to the security mode in case of accidental switching off (switching on) · Automatic activation of the security mode · Delay in turning on the security mode for the time the interior light goes out · Self-diagnosis when turning the mode on/off security · Silent activation of the security mode with the shock sensor disabled · Remote shutdown / activation of the shock sensor by levels
in security mode · Silent deactivation of the security mode · Remote control of the central locking · Control of the central locking from the ignition switch · Two-step unlocking of door locks · Two-pulse unlocking of door locks · Possibility of implementing the "comfort" function · Valet service mode · Emergency disabling of the security mode with a personal code · 4 additional channels for controlling vehicle devices · Control of car interior lighting · Car search mode · Remote programming mode for new key fobs and erasing lost ones · Possibility of resetting the values of programmable functions to factory presets · Call mode from the car · Indication of temperature in the car interior · Time display, timer, alarm clock · Battery discharge control of the main key fob via LCD display · Fluorescent backlight of the main key fob display
Owner reviews
I drive a VAZ 2107. I chose the alarm based on price, as well as the presence of additional qualities. I don’t think that VAZs are being stolen from anyone now, so the main emphasis was on the convenience of the alarm. The choice fell on Starline B9, which, in addition to security functions (very good, by the way), can also boast additional autostart options and a decent price. The alarm has been on the car for a year now – no glitches and working properly, so I’m happy.
I’ll say right away - I bought it at the price of Starline B9. As for me, 4 thousand for a budget alarm system, but with good options, is quite good. It was recommended by a neighbor in the garage who uses it all the time, and especially praised the turbo timer, so I took it. It won't hurt me on diesel either. So far, the system has been working properly for six months, although I was a little afraid that I had screwed it up, because I installed it myself, and for me this was my first experience. But no complaints. The only drawback is poor sensitivity to the signal from the key fob. Already from the balcony of the 9th floor the car is not reachable, which is inconvenient. But the rest is all good.
usmailer » Mon Oct 26, 2009 01:02 pm
WHAT WAS DONE: an A6 signaling system was installed in the cabin
no problems with her
WHAT YOU WANT TO DO: install the StarLine 03 autostart module in addition to the si alarm
RESULTS: I kindly ask you to help me determine the unclear points in connecting autorun.
I did everything according to this tutorial - viewtopic.php?t=402
here are the installation results. The connection turned out to be 70-15% - we were left with wires connected to the gap. I didn’t do this because... I wasn’t entirely sure of the adequate operation of the standard electrical system in the event of any mistake on my part or lack of daylight hours. and another 15% for connecting to the ignition switch, because I still couldn’t find the pinout for the wires or the colors of the wires. that there is a pin color for IGN 1, IGN 2, ACC, etc. and now the question is, who can help me fully deal with the remains. Thanks in advance to everyone who responded:
* 13-pin connector: 1 - The black and white wire from the AZ must be connected to the tachometer line - what is the color of this wire in the standard network block that comes to the odometer. 2 - The yellow-white wire from the AZ must be connected to the standard immobilizer bypass module - I have not activated this device and do not intend to. - question: should this wire be used for its intended purpose at all, and if so, where?? (except for the main purpose) 3 - the blue wire from the AZ should be connected to the ACC contact on the lock - what color is this wire on the lock. 4 - The red-black wire from the AZ should give a positive output bypassing the ignition switch while the engine is running - so I couldn’t figure out where to connect it.. help. 5 - The green-white wire from the AZ should be connected to the turn signal wires - but how to connect it to four wires at the same time. He will alternate left and right.
Setting up autorun
To configure autostart on the Starline B9 car alarm, you will have to enter a special programming mode. To do this, you will need the Valet service button. This key is mounted in a place hidden from view, but at the same time convenient and easily accessible for the car owner. The installers definitely know the location of the button, but if it is unknown, it is worth checking:
- space under the front panel near the fuse box. You will need to remove the decorative covers;
- internal pockets of compartments for small items in door cards;
- space in the center tunnel between the front seats;
- place under the steering column or near the pedal assembly.
You will also need to have a main or spare key fob linked to this alarm. After this, you can make settings.