Any modern car needs diagnostics and repairs. The condition of the suspension, vehicle load and some other factors have a significant impact on the direction and inclination of the light flux. The VAZ 2114 headlight hydrocorrector will help correct the negative consequences associated with headlight illumination.
Hydrocorrector of headlights VAZ 2114
This is especially important on the highway, because incorrectly adjusted headlights can shine not on the road, but directly into the eyes of oncoming drivers, which can lead to an accident. In order to prevent such a scenario from happening, you should monitor the technical condition of the lighting devices and carry out all the necessary preventive procedures in a timely manner.
The importance of proper headlight installation
Proper installation and adjustment of lighting devices is no less important. For example, it is better to lower the headlights of a loaded car slightly lower than usual. In a similar way, you can direct the light flux not to the sky, but to the road. This method will avoid dazzling oncoming vehicles and ensure proper illumination of the road.
If the car is not loaded with anything, then the headlights should be raised slightly. Lighting equipment is quite sensitive and difficult to adjust, so this work is best entrusted to qualified specialists who have extensive experience in adjusting headlights.
Correct headlight settings
First adjustment method
The setup procedure follows the following principle:
- Drive the car onto the found horizontal surface that was chosen for setting up the lights.
- Stop the car directly in front of the wall.
- Using chalk, make marks on the wall that will correspond to the center point of the car and the centers of the lights.
- Mark the distance from the ground to each headlight.
- Mark the distance from the center axis of the car to each of the headlights.
- Draw a line five centimeters below.
Adjusting the headlights using the wall
- Next you need to drive away and stop at a distance of 7.5 m from the wall.
- Connect the points of the centers of the lanterns in the drawing with one straight line.
- Draw a pair of vertical lines through the same centers;
- Draw a line parallel to the ground through the center point of the machine.
- At this point, the drawing is considered complete - turn on the headlights close to you.
- The angle of inclination of the lanterns should coincide with the horizontal line, and the beginning where the border of the light will rise should be aligned with the intersection of the lines.
- Adjust the headlights by turning a pair of screws - you will find them on the rear panel in the engine compartment. The beam should be located slightly below the headlight point designation on the drawing.
How does a hydraulic corrector work?
What is this device, what is it for and what is its operating principle?
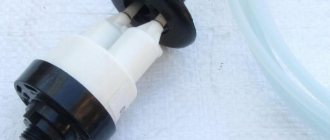
The headlight hydraulic corrector is a one-piece device designed to change the position of the light beam by reducing or increasing the pressure of the liquid located inside the pipes. The headlight range control of the VAZ 2114 has a special design. In this VAZ model, the corrector has a one-piece design, which means that it is almost impossible to repair it. If it breaks, you will have to purchase new elements and adjust the lighting devices to the standard as accurately as possible.
Eliminating headlight shake
Steering rack VAZ 2110 do-it-yourself repair and adjustment
Many owners of the VAZ 2110 find that the light flickers when the car is moving. Such a breakdown most often occurs in Kirzhach headlights, but in Bosch parts such a breakdown rarely occurs. There is only one reason: reflector rattling. To eliminate light flickering, check:
- Is the reflector in place in the latch;
- The presence of an adjusting bolt rod;
- The emphasis is on the seating recess of the hydraulic corrector rod;
- We check the sagging of the thread (swap the high beam and low beam bulbs);
- Integrity of the tube in the hydraulic corrector (it may fray).
The most successful ways to eliminate jitter:
- We replace the hydraulic corrector with an electric corrector;
- We increase the length of the hydraulic corrector rod to tighten the spring.
This method allows you to get rid of light flicker by placing a cap on the hydraulic corrector rod.
Instead of a cap, use:
- Plastic dowel, eight millimeters long;
- The cap removed from the brake fitting;
- Different plastic cap.
Here's what we do:
- We remove the hydrocorrector itself from the illuminator;
- Place the cap tightly on the corrector rod. The main thing is that the cap does not jump inward;
- Install the corrector into the mounting socket
Headlight device for VAZ 2114
The design of the hydraulic corrector on this model is as follows:
- The master cylinder is located under the instrument panel.
- Small working cylinders are mounted directly under the headlights. It is these devices that are used to raise the headlights on the VAZ 2114.
- The working fluid used in a car is resistant to both high and low temperatures.
- Another element of the hydraulic corrector design is the pipelines. They contain working fluid and are secured with special clamps.
Headlight hydraulic corrector device
Interesting to know . In its normal state, the corrector operates at high pressure. In order to direct the headlights downward, the pressure decreases. After this, the optics are lowered. This operating principle of the device means that during operation it is under extremely high pressure. If temperature changes occur, the working fluid may leak. After this, the headlight range control will also fail.
Maintenance and operation of the product
The design of the headlight hydraulic corrector is non-separable; in the event of a malfunction, it can be replaced entirely. The main thing is to remove it completely, and not cut it off, to make it easier to install a new device.
If the angle of the headlights increases, you can try to adjust the mechanism. What should be done?
- When the car is loaded, the headlights need to be turned down so that the light beam is directed at the roadway.
- If the vehicle load is minimal and the rear part of the frame is in a raised state, the headlights should be projected upward.
If the unit does not resume proper operation, then you need to check the presence of liquid in the cylinders and tubes. To do this, the products are removed and the working stroke of the rods is measured; it should be about 7 mm.
This is how the manufacturers intended that most of the time the hydraulic corrector is under pressure, as a result of which the working cylinder rod is retracted and the optics rotate downward.
Operating principle
In order to adjust the position of the headlights, the driver should turn a special handle located in the cabin. It is this that allows you to control the pressure in the pipelines of the corrector. To lower the headlights, turn the handle down. It's a simple control system, but even that can break. What to do if the corrector turns out to be faulty?
Control knob for hydraulic headlight adjustment
Repair or replacement of hydraulic corrector VAZ 2114 on your own
If the headlight hydraulic corrector fails, it is necessary to establish the cause of the malfunction as soon as possible. It may be possible to repair the device yourself.
In order to check the functionality of the headlight hydraulic corrector, you should:
- Inspect the condition of the tubes and rubber bands. There shouldn't be even small leaks.
- If no leaks were found, then you should pay attention to the condition of the working cylinders. To do this, you need to measure the stroke of each rod. Under normal conditions, it ranges from 6.5 to 7.5 mm.
- If such diagnostic measures do not help restore the functionality of the headlight hydraulic corrector, then the entire mechanism will have to be replaced. The fact is that the repair of the VAZ 2114 headlight is not provided by the manufacturer, so the easiest way to replace a broken device is with a new one.
Adjusting the headlight range control rod
Sometimes the failure of the headlight adjustment system can be caused by the disconnection of the adjustment lever from the lampshade rod. Therefore, if, for example, the trimming resistor of the VAZ-2112 does not work, do not rush to repair it by replacing it. First, make sure that the connection between the lever and the rod matches the working position.
The rod of the corrector actuator rests on a lever, which in turn acts on a similar rod rigidly fixed to the ceiling of the reflector. The lever passes through an adjustment screw, which is its fulcrum. The adjustment mechanism works on the principle of a swing. The corrector deflects the diffuser, and the adjusting screw allows you to raise or lower the fulcrum for this deflection. If the screw is turned all the way, the ball-shaped back of the lever may slide out.
Causes of hydraulic corrector malfunction
One of the most likely causes of failure lies in the ingress of liquid, which flows out of the cylinder when a crack appears in the rubber seal. In such a situation, the pistons often jam, and the angle of the headlights changes and it becomes impossible to adjust it using levers. In some cases, the whole point is a malfunction of the adjustment lever itself. In order to get rid of these problems, you will have to replace all broken parts.
Important note! If an electronic corrector is installed on the car, a possible breakdown may be associated with the contact connection. It also happens that a malfunction is associated with the fastening of the device bracket.
Malfunctions and why it breaks
- Loss of tightness in tubes, places where they are attached to the cylinders, leaks in the cuffs of the main or working cylinders;
- Jamming of working pistons
The main problem in the system of hydraulic adjustment of the reflector position is depressurization. Since it uses liquid as a working medium, its leaks lead to the fact that pressure is not transmitted from the master cylinder in the car interior to the workers on the headlights. No matter how much you turn the regulator, the position of the light beam will not change.
The second reason is souring of the pistons of the hydraulic corrector cylinders in certain positions. For example, if the piston is “stuck” in the maximally extended position, then the light will shine upward, while in a recessed position it will shine downward. When rotating the handle of the regulator, a lot of tension will be felt and when it is released, it will return to its original position and will not be fixed as necessary.
This happens because the pressure changes as the regulator rotates and the pistons cannot move. When you release the handle, the system tries to return to its initial state, equalize the pressure, the handle returns to the position from which you started turning it.
The listed types of breakdowns are prone only to the hydraulic drive of the corrector. Let the manufacturer claim that it is not repairable, but this is not so. There are examples of self-repair of a hydraulic corrector, which we will discuss in the following articles. In order not to bother with restoring it or replacing it with a new one, it is recommended to install alternative types of headlight range control units.
Installation of a new device
In order to install a new headlight hydrocorrector, there is no need to go to a service station. This is quite simple to do, so you can save time and money if you do the installation yourself. To get started, you will need a flathead screwdriver and an extension cord with a socket head.
Replacing headlight hydraulic corrector
Once these tools have been found, you should proceed to choosing a hydraulic corrector.
Today you can find a wide variety of models on the market:
- hydraulic, operating due to the pressure of the pistons and fluid;
- electrical;
- automatic, capable of independently adjusting the level of headlights.
The cheapest of them are hydrocorrectors. Their only drawback is frequent breakdowns.
So, in order to install a new hydraulic corrector, you need to remove the old one. Anyone can do this if you follow the simplest instructions, which are presented below in the text.
Instructions:
- First you need to find all the clamps securing the pipelines with liquid. They will need to be removed. To do this, you need to unscrew all the bolts.
- After this, you should return to the cabin and carefully remove the rotating handle from its seat. In this case, the rotating handle is located on the main cylinder.
- Now it's time to remove the main cylinder. This can be done using bolts. All bolts (which secure the cylinder) must be unscrewed and removed.
- When there are no more bolts left, you can start removing the cylinders from the headlights. The easiest way to pull them out is directly through the inside of the car. That's all!
Installing a new hydraulic corrector is as easy as removing the old one. To do this, all of the above steps should be carried out in reverse order, but before doing this, the O-ring must be replaced. Once the new device has been successfully installed, the entire system should be checked.
Warning! If the system is not checked for functionality in time, then while driving, light rays may be directed into the eyes of drivers of oncoming cars, and not onto the roadway. This may lead to an accident. In order to prevent such a scenario, you should check the operation of the lighting devices in advance.
Adjustment process
First of all, you need to cover the light of one of the headlights so that it does not interfere. To do this, it will be convenient to use a dark fabric or, for example, a jacket.
Next, you will need to open the hood and find the screws responsible for the position of the lighting fixtures. The upper left one is responsible for the vertical movement of the lantern, the right one is responsible for the horizontal movement, respectively.
There are three more screws located at the bottom - it is better not to touch them.
By turning the knobs manually, adjust the headlights according to the pattern previously drawn on the wall, so that the center of the light spot falls at the intersection of the upper horizontal side and vertical lines.
After this, the entire procedure is repeated with another headlight.
