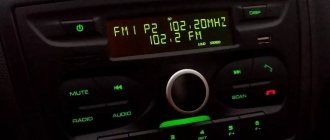
This article will look at connecting the VAZ 2109 radio from scratch, i.e. This implies the absence of any standard wiring to connect it.
Connecting the VAZ 2109 radio should begin by connecting power wires and an acoustic cable from the speaker installation sites to the installation site.
For versatility, we will use ISO connectors to connect the radio; for this you should purchase these same connectors with pieces of wires at any car audio store in your city.
We will connect the car wiring to these wires.
First, you should decide on the location of the speakers in your car and run an audio cable to the speaker installation locations. In the “high” panel and euro panel (VAZ 2113 - 2115) there are standard places for installing front speakers with a diameter of 13 cm, you can use them. More advanced car audio enthusiasts install podiums in the front doors to install speakers with a diameter of 16 cm. In this case, you will have to worry about connecting the audio cable to them in the car doors.
It is most preferable to place rear speakers in the rear parcel shelf of the car behind the rear seat. The standard shelf in the VAZ 2109 is not suitable for this purpose, since it is very thin and simply will not support the weight of the speakers. Instead of a standard one, you can make a shelf prepared for installing speakers in it yourself, or you can purchase a ready-made one, they are commercially available. The wiring for the rear speakers runs along the floor of the car under the carpet; just unscrew the plastic covers on the sills.
In order to avoid power limitation at peak loads (in this case, the backlight of the radio at high volume can wink in time with the music, the bass loses its elasticity, the highs are blurred), it is advisable to take it directly from the battery with a copper wire with a cross-section of at least 4 square meters. mm. This wire must be equipped with a fuse rated 10 - 20 A at a distance of no more than 45 cm from the “positive” terminal. It is advisable to connect the “negative” wire to ground at a minimum distance from the radio, while ensuring reliable contact.
In addition to the constant power wire (+12 V constantly), the radio has a wire on which voltage should appear after turning on the ignition (+12 V when ACC is turned on). It is connected to the corresponding terminal in the ignition switch. With this connection, when you turn off the ignition, the radio will turn off, which is not always acceptable (for example, if you plan to listen to music in the car without the key in the ignition). This wire can be connected to a constant power supply wire, but during long-term parking it is possible to significantly discharge the battery (for some radio models, the output stages of the amplifier are powered from this wire), so we connect it from constant power, but through a switch that allows you to turn off the power during long-term parking.
We connect the power wire of the active antenna.
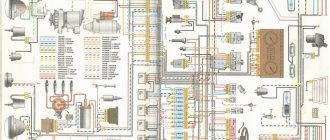
Below is a diagram of connecting ISO connectors.
Installing a car radio is a creative process, but not very complicated. An experienced car enthusiast, at least a little familiar with the basics of electrical engineering, will be able to connect the car radio with his own hands without any problems. We will tell you in this article how to properly connect a radio in a car, and in what order this should be done.
It should be remembered that an incorrectly installed and connected radio will not only sound bad, but may even lead to a short circuit or even a fire in the car.
A good video instruction for installing and connecting a car radio in a car can be seen in the video at the bottom of this page.
Incorrect connection of the car radio causes the following problems:
- When parked, the radio consumes too much electricity, as a result of which the battery is constantly discharged and if parked for a long time, there is a chance that the engine will not start.
- When listening to music at high volumes, the radio starts to “stutter” and significant distortion of the sound signal appears. Also, at high volumes, the car radio may simply turn off.
- When you turn off the power, the radio settings are lost.
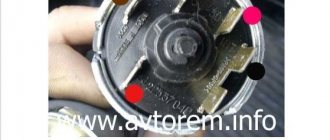
Installation of a new larva
To replace the lock core due to mechanical failure, remove it from the vehicle as described above. Then follow this algorithm:
- Insert the key into the slot and use a Phillips screwdriver to unscrew the 3 screws holding the 2 halves of the lock body together.
- Separate the housing while holding it with the key facing up. If you hold the lock in a different position during disassembly and do not insert the key, the insides will spill out and you will not understand how to put them back together. In this case, the ball with springs may get lost.
- Remove the locking mechanism, which consists of two spring-loaded parts, and pull out the spring itself.
- After removing the key, carefully remove the core so that the ball with the spring (located on the side of the cylinder) is not lost.
To disassemble the case, you need to unscrew 3 screws
Before replacing, it is necessary to remove the return spring from the old cylinder, since it is not sold complete with a new core. The spring is inside the part on the back side in a cocked state; it must be installed in the same form on the new cylinder. Also, do not forget to remove the thin spring from the hole where the ball is inserted.
The locking mechanism tongue peeks out from the bottom of the case
The larva must be pulled out so as not to lose the details
When installing the core, you need to move the spring for the ball into the hole and insert the part into the body. Then push the larva all the way, while simultaneously inserting the ball into the socket. After that, all that remains is to assemble the locking mechanism and tighten the housing with screws. When finished, check the operation of the ignition switch by turning the key to different positions.
The ejection spring from the old core needs to be moved to the new one
Installation of acoustics
The standard speaker system consists of two front speakers and two rear speakers. The optimal routing of wires to the acoustics is to run cables under the panel for the front speakers, and under the beard, near the handbrake, under the rear seat, for the rear speakers. You just have to lift the cover to run the wires under it.
Front speakers are best mounted in doors. It will be beautiful if you use podiums. The rear speakers are installed on a shelf; it is also better to install a podium between the shelf and the speaker. Try to route the wires so as not to touch them while operating the car. Connection to the wires of the block is made according to the diagram drawn on the sticker on the body of the radio, or in the instructions.
READ How to connect a video intercom to an electromechanical lock
Source
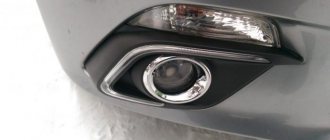
Installing the front speakers
Mark and cut out a hole for the speaker. We screw the coaxial rings to the metal part of the door, having previously drilled the holes. Place the fastening rings so that they do not subsequently interfere with the fastening of the speaker.
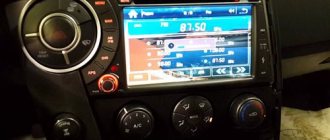
How to connect a VAZ 2110 car radio correctly
In this article we will look at how to connect a VAZ 2110 car radio. Of course, this process is not complicated, but you should know the basic rules.
For example, how to make sure that after connecting the radio does not drain the battery, or how to connect the car radio to a VAZ 2110 so that it can be used even when the ignition is turned off. Connecting the speaker head unit on this car can be done in several ways.
Connectors
How to connect a car radio to a VAZ 2110
As you know, head units use various connectors. You should be able to distinguish them:
- Simple connectors.
- International standard or ISO connectors.
The second option is more convenient, since it is easy to connect a radio through it. And even if you replace the standard car radio with a new one, it will be enough to plug the plug and that’s it.
As for individual connectors, it's a little more complicated. You will either have to buy an ISO adapter or cut the wires. The connection must take place through a special individual connector circuit.
Diagram of an individual car radio connector using the example of Audi
Note. Experts do not recommend using the second connection option
As a last resort, you will need to additionally use heat-shrinkable casings and follow maximum precautions
How to spend a plus
How to connect a car radio to a VAZ 2110
The positive wire plays an important role when connecting a car radio. It must be connected correctly and it is recommended to take the wire directly from the battery using an intermediate fuse.
Note. It is imperative to take into account that the diameter of the wiring should not be smaller than the car radio connector. Some people also connect the positive wire from the cigarette lighter, but this is done in extreme cases.
If we consider the connection in diagram form, it will look like this:
- The black wire is grounded.
- The yellow wire is pulled to the battery, creating a power supply of plus 12 volts.
- The red wire is designed to turn on the radio from the ignition switch.
- The blue wire is intended to turn on an antenna or other device.
- The use of diodes is mandatory. Any type will do, and you can even use low-current ones like KD522B.
Connection in a simple way
Car radio in VAZ 2110
To correctly connect the radio to the VAZ 2110, you should do the following:
Apply plus to the red and yellow wires.
Note. Don’t forget that the yellow wire will be responsible for powering the device’s memory, and the red wire will be responsible for turning off the radio.
In order for the radio to turn off after turning off the ignition, you need to pull the red wire through the lock.
Note. Features of the VAZ 2110 car will allow owners not to pull the wire to the ignition switch, but to connect directly to the fifth contact of the block.
But this connection also has disadvantages. In particular, you need to leave the ignition key with the passenger so that he can listen to music if the driver is not present. In addition, listening to the car radio with the ignition on significantly increases power consumption.
Complicated connection method
How to fix a VAZ car radio
This method is more correct:
- We lead the red wire of the radio through the cut to the button. Everything is clear here. A standard button with on/off switch is hung in the cut of the red wire. This connection method is good because the radio will always work. If you intend to park the car for a long time, simply turn off the power supply with a button.
- You can do this through the switch button between constant plus and after ignition. This means activating the emergency button. At the same time, if the button is pressed, a constant plus from the battery or cigarette lighter will go to the radio, but if it is not pressed, a plus from the ignition will go.
- Possible through an alarm system. This is a standard scheme that involves supplying a plus and automatically disconnecting it from the alarm. If the VAZ 2110 has a two-wire solenoid that is activated to close/open, changing the polarity for each operation, then the work will proceed as follows.
- When the doors open, the plus is supplied to the relay. It fires and goes into self-pickup mode. This ensures constant power supply from the battery through the terminals of the contacts and the second relay. In other words, the radio is automatically connected to power.
- As for turning off the radio, it will go like this. The second relay is activated and the power circuit is turned off - the first relay/radio tape recorder. Thus, the relay goes into a de-energized state.
Note. And this scheme has a drawback. This increased energy consumption is due to an additional relay that will be constantly turned on along with the radio.
The process of installing and connecting a car radio
The installation process for car radios of different types and manufacturers is not much different from each other. To do this, the container without a radio is installed in a standard socket and fixed by bending outward the metal petals along its perimeter.
- In modern cars, a special ISO standard connector is provided for connecting the car radio. The whole connection in this case comes down to the fact that you will need to insert the connecting block of the car radio into the corresponding ISO connector of your car.
- In older cars, as well as in many domestic cars, the ISO connector is not provided by design. To install a car radio in this case, you will have to purchase the appropriate connector and connect it yourself. Fortunately, the wires on such connectors are usually marked and signed.
Let's move on to connecting the car radio wires to the ISO connector. Take a look at the connection diagram below. As can be seen from the diagram, the left side of the ISO connector is responsible for powering and controlling the radio, and the right side is for connecting speakers to it.
Typical connection diagram for a car radio The main step in connecting a car radio is connecting the power. It is at this stage that most mistakes are made.
Power is connected to the car radio through a separate fuse using a flexible stranded wire with a cross-section of at least 3 mm 2. In most cases, it will be enough to use a 10 ampere fuse; it will reliably protect the power circuit from emergency situations.
The radio is powered through three wires: yellow, red and black.
+12 V (yellow) – main power wire. It powers the built-in amplifier and also serves to save car radio settings. This wire is connected through a fuse directly to the battery. It is advisable that the length of the wire from the battery to the fuse does not exceed 30 cm.
ACC (red) – control of turning on the car radio from the ignition switch. On many vehicles, the ignition switches have an ACC (accessory) position. When you turn the key to the ACC position, power is supplied to the car radio, interior heater and cigarette lighter socket, but the car's ignition system is de-energized.
GND (black) – connects to the negative terminal of the battery. But this is ideal. Due to the low power of the car radio, it is allowed to connect the black wire to the car body. You must first ensure good contact with the body by cleaning the joint from dirt and oxides. You can also use contact lubricant to protect them from oxidation.
What you need to know
Before installation, the car owner must decide on the type of radio tape recorder chosen. There are many models available on the market for the 1Din standard size (you may need an adapter frame for a 1 din car radio) at prices ranging from 1,000 rubles to 40,000 in the upper range. And for those who do not dare to install it themselves, you should contact a specialized service, where the installation cost will cost up to 5,000 rubles.
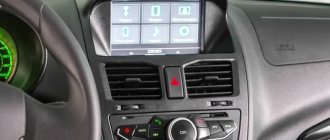
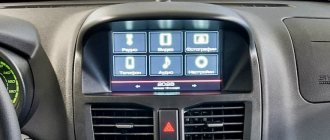
There is a special socket on the front panel of the car for installing a radio, and the manufacturer ran the audio system wires throughout the cabin. Of course, the owner can choose a different place to install the audio system and even expand it to fit a 2Din standard size, but this procedure involves many alterations in the ventilation and heating system and carries more disadvantages than advantages.
Video instructions for installing and connecting a car radio with your own hands
Connecting a radio with your own hands is not difficult, but you need to do it correctly. For example, so that the radio does not drain the battery when parked for a long time and it is possible to use the radio when the ignition is turned off. Let's consider several options for connecting a car radio.
Let's start with the connectors that are used in radios. There are car radio connectors: Of course, it is more convenient when the radio has an ISO connector. If you have to change the radio, just plug in the plug and you're done
In the case of individual radio connectors, you can buy either an adapter connector for ISO, or cut the wires and connect them to the individual connector block according to the diagram (which is not recommended; in extreme cases, you should use heat-shrinkable tubes and precautions) An important point when connecting the radio is to correctly connect the positive wire. To connect the radio, it is better to take the positive wire directly from the battery through the fuse
The diameter of the wiring must be no less than that of the radio connector.
As a last resort, connect the radio from the cigarette lighter. Example: diagram of the standard connection of a radio to reduce leakage Black Yellow - power supply +12 volts, from the battery Red - signal to turn on the radio (from the ignition switch), low-current +12 volts (logical “1”). Blue - turn on the Antenna or other devices (low-current +12 volts when the radio is on) Diodes - any, low-current type KD522B is sufficient. To connect the radio, you need to apply plus to two wires (red and yellow): Yellow Red - (power) turns off the operation of the radio .
For owners of VAZ 2110 cars, in order not to pull the wire to the ignition switch, you can connect to pin 5 of the BSK block: However, such a connection has its drawbacks, for example, you need to leave the ignition key with the passenger so that he listens to music, and even with the ignition on power consumption increases. Therefore, often these two wires (yellow and red) are twisted together and connected to the permanent positive together. Now the radio always works, regardless of the ignition. The negative aspect of connecting the radio this way is the constant current consumption (depending on the model of the radio, the current consumption is different), which leads to the battery being discharged when the car is parked for a long time. Therefore, the most correct connection of the car radio would be Through a button, into the cut of the red wire of the radio. With the first option, I think everything is clear: just hang a regular on/off button on the radio through the cut of the red wire.
Rules for choosing an audio system
Before you begin installing the radio on Kalina, you should select it at a car dealership or hardware store. The choice should be approached carefully and carefully. And before going to the store, it is better to decide on your desires and capabilities.
When choosing a radio for your car, you should decide which music media will be used as the main one. This will help you save some money. If, for example, a car owner is sure that he will not need a CD or cassette player, then why should he overpay for a radio with these functions.
For those choosing CD players, there is one minor drawback that manufacturers are trying to combat - the loss of music fragments due to shaking during a trip. But progress does not stand still, and the mechanics are improving. The presence of ISO in the car and, accordingly, in the audio device will simplify the connection. The presence of a USB adapter will allow you to play music from various media.
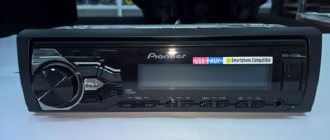
Pioneer model range
When choosing a car radio, you should pay attention to the power ratings. They have a maximum and minimum threshold
Maximum power is rarely used, except in extreme situations. The choice should be made according to the rated power, that is, the one that is used most often. Manufacturers often indicate only maximum values on packages, so when choosing, you need to carefully study the instructions (passport), and not the box.
It is also worth paying attention to the control panel. It should be extremely simple and convenient, since it will most often be used while driving
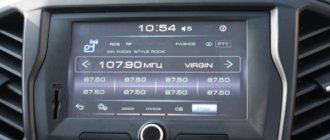
Intricate designs can distract from the road. Convenient and understandable buttons and adjustable backlight brightness will only be beneficial. It is imperative to check the range of perceived frequencies. Since radio stations mainly broadcast in the range from 80 to 110 MHz, it is better that the tuner also has this range.
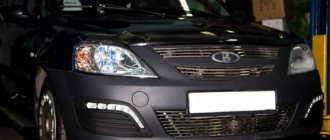
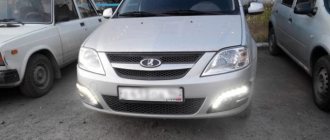
New Lada: Lada Kalina Lux6 (12.2011 - 03.2013)
Pay attention to the number of outputs to the speakers and the resonant frequency, it should be lower
In conclusion
As you can see, installing a radio is simple and for the most part requires only your desire. The main thing to note is that with any modernization not intended for the design, it is necessary to take care of the insulation of electrical connections and thermal insulation of coolants (corrugated air ducts).
The torpedo of the fourteenth, like most modern cars, is made of synthetic, flammable materials, so the issue of safety is very relevant. If you are not confident in your abilities, contact a professional workshop, because it is much cheaper than a burnt-out car.
Source
Ignition switch malfunctions
The ignition switch on a VAZ 2110 must be replaced if its operation cannot be restored in any way or the key is broken/lost. In other cases, they are usually repaired.
There are two groups of main breakdowns:
- The mechanics are faulty. The most common problem is the breakage of the larva. The keys are made of soft metal, so they are unreliable and can often simply break off. There is also a problem with the steering wheel locking or the key may simply get stuck when in the on position.
- Wear of the contact group. No matter what kind of damage you have, you will still have to dismantle the lock. If the tongue of the blocker is jammed, you will have to work hard to correct the situation. The contact group or larva is quite easy to repair.
In order to check the ignition switch on a VAZ 2110, there are many instructions and methods, we will consider some of them.
Detailed instructions for checking faults in the ignition switch:
- The first thing to do is disconnect the wire from the negative terminal of the battery.
- Remove the plastic cover of the steering column to get to the contacts of the pads, because it is with their help that power is connected to the car's electrical wiring. Next, disconnect the connector of the harness itself from the on-board network and pull it out.
Installation of radio VAZ 2107
Owners of VAZ 2107 begin acoustic tuning of their car by installing or replacing the main components - the head unit (car radio) and low-quality standard speakers. Replacing the head unit (head unit) is also practiced if the VAZ 2107 radio tape recorder stops working, which they refuse to repair as outdated.
Theft of a radio is also a common reason for installing a new PG. For professionals, installation operations are not difficult, but a novice amateur can damage the dashboard by connecting the wires incorrectly. Incorrect installation of the VAZ 2107 radio leads to short circuits and burnout of the receiver's electronic boards.
In this article we will describe how:
- replace front speakers;
- use the sound shelf correctly;
- move the radio to the place of the air ducts or to the glove compartment;
- install a 2DIN car radio;
- Connect the head unit to the speakers and power supply.
We hope that the tips will be useful to you.
Connection instructions
Connecting the radio through the ignition switch ensures that the head unit operates when the key is turned to the ACC police or the ignition activation position. After removing the key from the lock, the power to the amplifier is automatically turned off, only the voltage supply from the battery is maintained to support the radio's memory.
The radio connectors have 2 cables equipped with an insulating coating in yellow and red colors. The yellow cord leads directly to the battery or element on which positive power is not lost. A separate fuse is inserted into the circuit to protect the equipment from short circuits and fire.
The user can connect the car radio through the ignition switch on a VAZ-2107 with an injection engine according to the following scheme:
- Lay a cable from the ignition switch that connects the ACC plug and the red power cable of the radio.
- Route the yellow cable to the battery using the standard channels in the engine panel. The cable is laid parallel to the standard harnesses; it is necessary to protect the product from contact with hot elements of the exhaust system or moving parts.
- The negative power supply cable, equipped with a black protective layer, is connected to the car body or output to the battery. It is possible to use the negative output of the cigarette lighter, which is located next to the mounting socket of the head unit.
- Connect the display and button backlight cable to the positive side light outputs. When you turn on the external light, the backlight on the radio automatically turns on, the intensity is adjusted by the standard regulator.
- Check the functionality of the device. Make sure there is no leakage current when the equipment is turned off by connecting the test device to the power circuit. The permissible current in standby mode is 10 mA.
On VAZ-21011 cars, the ignition is turned on by a lock in which there is no intermediate position. A similar unit is used on “classic” VAZ cars with a carburetor power unit. To connect acoustic head equipment, it is necessary to modify the unit or replace it with an analogue from cars with an injection engine.
Algorithm for updating the lock:
- Remove the decorative plastic casing of the column.
- Disconnect the plug from the contact group.
- Remove the 2 Phillips head screws that secure the lock body to the column. To dismantle, insert the key into the hole and then move it to position O. There is a hole on the side of the body into which a thin object is inserted, pressing the latch tab.
- Remove the device from the steering column.
- Carefully remove the contact group in which you will need to change the configuration of the lower platform. It is allowed to use an element from a product that has the ACC position.
- Install the removed elements in reverse order. As a result of the modification, instead of the O position, the ACC position is obtained, which allows you to connect the head unit according to the method described above.
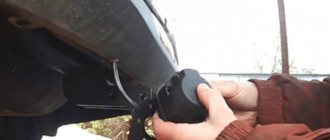
To install the equipment on VAZ vehicles with front drive wheels, terminal 15 is used, located on the ignition switch housing. A standard cable protected with blue-black insulation is suitable for the terminal. The power cord is connected by soldering or crimping with a metal tube and then protecting the junction.
On Priora-2 and Grant cars, standard wiring with ISO connectors is used, connected through a lock.
The scheme with switching equipment through a lock has a drawback - if there is no key in the well, turning on the equipment is impossible. If the user wants it to work when the ignition is off, then the yellow wire must be connected to the battery through a separate switch. To activate the equipment, you only need to press a key. The circuit ensures that the battery remains discharged; the user just needs to remember to forcefully turn off the power.
An alternative method of connecting equipment without an ignition switch is to connect to the plug of the on-board control system, which is installed on some VAZ models with front-wheel drive. To connect, use pin 5 (gray cord), located in the middle in the top row of plug wires. When the key is placed in the keyhole, positive power automatically appears on the contact. After removing the key, the radio turns off, but the memory settings are saved by connecting the yellow cord to the battery.
How to install
Model 2107 has 2 locations suitable for mounting a 1DIN head unit. The radio can be installed in a standard place on the center console; it is also possible to install equipment instead of the central vents. The first installation option requires trimming the mounting socket to the required size.
The second option reduces heating of the player body by the hot interior heater, providing comfortable control of functions. But at the same time, ventilation deteriorates and there is a risk of heating the head unit by direct sunlight.
On the VAZ-2106, the only place for installation is the center console, which needs to be cut to the standard 1DIN size. The head unit is attached using a metal shaft, which is located in the instrument panel. The shaft fixation scheme is the same for VAZ-2106 and 2107 - using bent tongues.
It is possible to install 2DIN standard equipment, which is located in the glove box.
To fix the device, a housing must be manufactured; control is carried out using a remote wired remote control or via radio. It is possible to install the head equipment in the front passenger's feet, but such a scheme is rarely used due to the risk of damaging the radio.
What extensions can there be?
If you plan to connect a professional device via the ignition switch or directly to the network, then in order to do everything correctly, you need to take into account the extensions specific to the 220 radio. Thanks to this functionality, the device is equipped with additional functionality that makes using the radio more comfortable.
For example, these could be extensions:
- ANT. This extension will be useful if the car has a retractable antenna. That is, if you need to activate it, you can simply give a command to the device and the antenna will turn on automatically.
- REMOTE. Thanks to this function, you can connect an amplifier to the system and, accordingly, achieve better sound. If your car is basically small, then this function will not be particularly useful, since in any case you will not be able to achieve the desired sound background.
- ILLUMINATION. Using this extension, you can make sure that the brightness of the device is reduced while driving and does not distract the motorist. When the car stops, the system will automatically increase the brightness of the display.
- MUTE. This extension is enabled only when the car owner needs to talk on a mobile phone. When the phone rings, the system automatically turns on this extension and the speakers are turned off.
Audio system connection and wiring diagram
Radio size for 2108-2115
Multimedia systems are divided according to the German standard DIN 75490 from 1984 according to the size of the mounting socket:
- Type 1Din. The width is the same for all cars – 178 mm, height – 50 mm. The system picks up the radio, plays tracks from discs, and supports DVD format. For the latter function, the car radio is equipped with a 3.5-inch display.
- Type 2Din. The width of the device remains the same, the height is 100 mm, which allows you to install a 7-inch touch display.
The standard does not define the depth of devices, but for audio devices with discs it is 16 cm. Both types are full-fledged multimedia systems with which they can watch movies in the car, listen to tracks, and play information from USB drives and SD cards. Most importantly, the multimedia is equipped with a GPS module.
Connection knowledge
Before starting dismantling work, you need at least a conventional pinout on paper, otherwise it will be very difficult: you will need to “trace” every wire and every connection that is on the “path” from the devices to the power button.
In fact, the pinout of the VAZ 2110 dashboard is not so difficult to understand, but there are differences between cars produced in different years and at different factories. There is an old model, there is one with a mechanical odometer, and a new (Euro) model, so there are differences in the pinout of the instrument panel, depending on the type to which it belongs.
Connecting a radio: an easy way
Connecting the VAZ 2110 radio consists of performing several simple steps. They are interrelated and must be carried out sequentially. If everything is done correctly, the device will function efficiently and reliably.
The first thing you need to start with is to submit the positives. We are talking about the red and yellow wire. At the same time, it is worth knowing which of them is responsible for what. So, red controls turning off the device, and yellow controls its memory power.
Radio wires
It is normal for the radio to turn off completely when the ignition is turned off. To ensure this, the red wire must be connected correctly. It must go through the lock. The VAZ 2110 car has its own characteristics. The main one is that there is no need to pull the wire to the lock. It can be attached to the pads, or rather to their fifth contact.
This connection has both pros and cons. The disadvantages include the fact that in order to listen to music, you need to keep the key in the ignition. This is very inconvenient if the driver gets out and the passengers remain in the car. Otherwise, the radio will stop working. In addition, keeping the ignition on constantly increases the vehicle's energy consumption.
Expanding the sound system with speakers on the rear sound shelf
The extended connection diagram for the VAZ 2107 radio provides for the installation of front speakers and rear acoustics. The front speakers create frontal sound, the speakers from the passenger compartment are responsible for the lower frequencies and surround sound. At the rear, multi-way speaker systems use woofers or oval full-range speakers.
From an acoustics point of view, the best place to install ovals or compact subwoofers in the 7's cabin is the rear parcel shelf of the car. The standard rear shelf of the VAZ 2107 for mounting equipment is not strong enough. If you simply cut holes in it for speakers, the plastic will vibrate and distort sound waves.
To reconstruct the shelf, additional fasteners (corners) are used along the sides of the body. The shelf is reinforced with an additional frame, soundproofed, and covered with carpet (a special sound-absorbing and decorative material).
The acoustic wires are pulled under the interior flooring along the sides of the car.
Ignition switch VAZ 2110 diagram, repair, replacement of ignition switch VAZ-2110 video
The VAZ 2110 ignition switch is essentially an electrical breaker that makes and breaks the contacts of electrical circuits. The main purpose of the ignition switch is to start the engine. In addition, the ignition switch protects the VAZ 2110 from theft, especially effectively if the car has an immobilizer that will not allow you to start the engine without the “original” key with a code. The VAZ 2110 ignition switch, the diagram of which is shown in the image below, is quite traditional for modern cars. Let's look at the schematic drawing.
A special plug with 8 contacts fits the ignition switch, on the right in the lock diagram. Each contact is used for its own purpose. For what purpose, look further.
- 1 – comes (12 W) for the micro switch of the inserted key
- 2 – ground arrives (zero) when the driver’s door is opened
- 3 – goes (12 W) to the starter (50 in the diagram)
- 4 - goes out (12 W) after connecting the ignition (in diagram 15)
- 5 – goes out (12 W) with the key inserted into the lock at 5 to the BSK contact
- 6 – comes (12 W) to illuminate the lock cylinder
- 7 – comes (12 W) from the battery (30 in the diagram)
- 8 – not used (reserve for connecting additional consumers)
The position of the key according to the diagram determines the operation of the ignition 2110 as follows. In position “0” the ignition is turned off (contacts 30 are energized). In position “I” the ignition is on, when you turn the key to this position you can turn on the headlights, side lights, turn signals, windshield wipers and washers, the instrument panel, cigarette lighter, electric interior heater fan, rear window heating starts working (contacts 30-15 are energized ). Turning the key to position “II” is the normal position of the key in the ignition switch when the engine is running. But in order for the starter to work and the engine to start, the key must be moved slightly until it comes into contact with pin 50. Then the current goes to the starter, it in turn starts the engine, then the key should be released and in a working ignition switch it will return to position “II”, the starter will turn off and the engine will continue to run. Perhaps the most common breakdown of the ignition switch is when the key does not automatically return to position “II”, the starter continues to work simultaneously with the engine and fails.
Next, we offer a video on this topic, repairing the ignition switch on a “ten”. For clarity, we offer a video of replacing the ignition switch of a VAZ-2110.
To remove the ignition switch of a VAZ-2110, you must unscrew the negative terminal from the battery. This is a guarantee that you will not damage the electrical circuits of your car. Then unscrew the plastic covers of the steering column from below and disconnect the steering column switches. Perhaps the most difficult thing is to remove the ignition switch itself. After all, when installing it, the edges of the fastening bolts are cut off, this is done to make life more difficult for car thieves. An ordinary chisel will come to the rescue. Let's look at the photo (for clarity, the steering wheel has been removed from the photo) -
With a chisel you only need to move the heads from their place, then everything is easily unscrewed with the help of pliers. Usually, when repairing an ignition switch, its contact group, lock cylinder or microswitch are changed. But in most cases, no one bothers with this for a long time. They just buy a new lock and install it completely. The ignition switch assembly for the “ten” has the number in the spare parts catalog 2110-3704005. You can usually find this number on the packaging of a new lock at an auto store.
When assembling the ignition switch for a VAZ-2110, a very important factor should be taken into account; this is the locking of the steering shaft by the ignition switch. Therefore, when installing a new ignition switch, you need to insert the key and turn it to the “I” position. And by turning the steering shaft, ensure that the latch snaps into place. That is, if you take out the keys and turn the steering wheel a little, it should lock at some point. And when we insert the key back into the ignition and turn it to position “I”, the steering column should unlock and rotate freely. This operation is mandatory when installing a new lock!
We also do not forget that when installing the lock on the steering column, it is necessary to cut off the edges of the bolts, as was the case. Typically, a new ignition switch comes with bolts with break-away heads, which fall off with appropriate force. This must be done for the safety of your car.