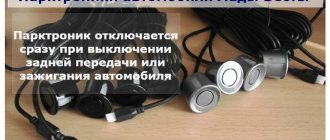
| The parking radar is an auxiliary parking system that is designed to make parking easier. AvtoVAZ awarded the Lada Kalina 2 with parking sensors, but this option is not available in all trim levels. However, you can easily retrofit your car with this option yourself. Do you know how to install parking sensors on Kalina 2? |
Purpose and characteristics of the device
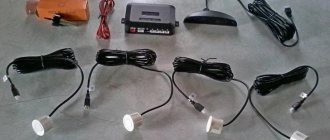
The chamber is a special technical device, the operating principle of which is based on ultrasound. Ultrasonic signals come from sensors installed on the car, propagate in space and, when they encounter an obstacle, are reflected and read by the same sensors. The control unit processes and calculates the received data, as a result, information about the current distance to the obstacle is displayed on the screen. The device has the following features (may vary in different models): - operating temperature: from - 34 to +70 degrees Celsius; — distance for measurements: up to 2.5 meters; — equipped with several sensors (from 4 pieces), wires, control unit, information display; — some models contain a nozzle for drilling holes for sensors and double-sided tape.
Installation
Due to the fact that there is no standard view of Kalina 2, the camera is positioned depending on its type so that it shows the situation behind the car without distortion. On Kalina hatchback it is most often installed instead of one of the room lamps. To do this, remove the trim from the trunk door and dismantle the saber. It is secured with 6 nuts. Then remove one of the lights, having previously disconnected the live wires.
Before installing the video device unit, it is necessary to drill out the standard mounting points for the lampshade, since the element being installed has a collar on the holes for self-tapping screws. For fastening, strips of durable plastic are placed on the inside of the saber, which will serve as the basis for screwing in the screws.
In most cases, a video camera with a pin is mounted on a lining under the trunk lock. The hole should be drilled away from the center, otherwise the pin of the device will interfere with the locking. The overhead camera can be mounted in the middle, since there is no need to drill anything. The pin of the device together with the wires is installed in the hole and secured with a nut. The video cable is passed into the trunk through the hole for the wires of the room lamps.
After this, you can install the overlay in place and begin connecting the traffic camera to the monitor or to the standard multimedia system (MMS). The video device is installed in the same way on the Kalina station wagon.
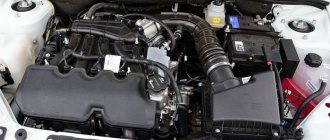
Refinement of the stove motor
This part, probably, would have been better called “Refinement of the heater motor activation mode”, since we will be talking specifically about eliminating a kind of “bug” - the operation of the interior heater when the ignition key is turned to the ACC position.
Indeed, the functionality of the interior heating system is in big question when the “stove” motor is turned on and the engine is not running - there is no circulation of coolant, and the coolant in the “stove” will quickly cool down and stop heating the interior.
The interior heating system of the Lada Largus can be modified in several ways
For Largus owners, there are two ways to change the operating mode of the heater motor. And both, unfortunately, require intervention in the electrical circuit of the car.
First
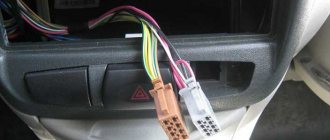
The first way to change the operating mode of the interior heater simultaneously with turning on the ignition is to move the wire that controls the heater relay from its standard location to any terminal that receives + 12V when the ignition is turned on. This could be, for example, a reverse switch or a fuel pump relay. That is, the thin yellow wire going to the “stove” motor relay is cut off and connected to any of the above locations.
For reference: all of the above actions are performed in the relay and fuse box located under the hood. The heater motor is controlled by a yellow wire, the reverse switch is controlled by a wire of a similar color, and the fuel pump has a beige marking.
Second
Almost similar to the first one, but the difference is that after all the manipulations we get a free fuse socket.
Again, we cut the thin conductor of the heater motor and connect it to the partially stripped yellow wire located nearby. After that, all damaged areas are isolated and fuse No. 39 in the interior fuse box is removed.
To remove or not to remove the bumper
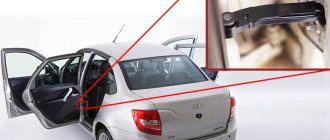
There are also two options here. Installation of parking sensors on the Kalina can be done without removing the bumper - in this case, the wires of the sensors will be pulled through using a wire. Many people consider this technology too costly in terms of effort and prefer to dismantle the bumper.
To dismantle the Kalina, unscrew the mounting bolts at the top and bottom. The mudguards are also unscrewed, and then the bumper can be easily removed. Then it is recommended to lay it on a flat surface - this will make it easier during the drilling process.
Priora parking sensors
#2 vasyan
Trusted users 2805 posts
- Tomsk city
- Gender: Man
The parking sensor unit is located in the rear of the car. I won’t tell you which side to use prior. It seems like this is written in the car's user manual. You can try to read it there. Well, or Google it again.
save baikal, save the forest save our childrens from pidarases in kremlin.
#3 vasyan
Trusted users 2805 posts
- Tomsk city
- Gender: Man
And one more question: these are factory ones. Or China?
save baikal, save the forest save our childrens from pidarases in kremlin.
Users 919 posts
#5 kassir40
APC-Users 4441 posts
- City: Bryansk
- Gender: Man
I don’t remember that the Priora was ever equipped with parking sensors at the factory, especially in 2009. Most likely a collective farm
#6 vasyan
Trusted users 2805 posts
- Tomsk city
- Gender: Man
Follow the sound, there should be someone standing there.
. Now I also doubt that it was installed from the factory.
Are there any indicators? Or just a buzzer?
save baikal, save the forest save our childrens from pidarases in kremlin.
Users 919 posts
#8 Vavan
Work is our life.
APC-Users 578 posts
- City: Stavropol
- Gender: Man
The standard parking sensor unit in the Prior is located in the rear left “pocket” inside, in the trunk! A small box screwed to the wheel arch. I'll post a photo a little later. Standard parking sensors have been installed from the factory since 2009! For “Lux” configuration cars.
x1307 likes this
#9 dock88
APC-Users 702 posts
- City: Cheboksary
- Gender: Man
The standard parking sensor unit in the Prior is located in the rear left “pocket” inside, in the trunk! A small box screwed to the wheel arch. I'll post a photo a little later. Standard parking sensors have been installed from the factory since 2009! For “Lux” configuration cars.
Lada Largus Cross with parking sensors will appear a little later
According to Kolesa.ru's own information, the Lada Largus Cross with parking sensors will go on sale around mid-summer. A source close to the production of Lada Largus family cars said that the decision to launch a new configuration for the cross-version was dictated by the desire to bring to market a high-quality product with a system that works without errors. It can be assumed that the Largus Cross required software adjustments due to the increased ground clearance of the model compared to the standard version.
In the photo: Lada Largus Cross. The ground clearance of the cross version of the station wagon is 25 mm greater than that of the regular model and is 170 mm
As AvtoVAZ told Koles, production of regular Largus cars with parking sensors began last week. It is known that the new “Lux” configuration includes: ABS system; frontal airbags; air conditioner; audio system; driver's seat with height adjustment and lumbar support; heated front seats; electric adjustment of exterior mirrors and heating; fog lights.
Top Largus are equipped with a 105-horsepower 1.6-liter engine and a five-speed manual transmission.
The starting price for Lada Largus with parking sensors was announced at the end of May. Three ultrasonic sensors are installed on the rear bumper of Lada Largus. The range of obstacle detection range is from 0.4 to 1.6 meters, the angle of operation of the system is 170 degrees.
Parktronic for Kalina hatchback
Rating of a car owner named Nord: Good off-road capability. Comfort is better than that of a traditional Niva. Excellent road holding, good visibility, the driver will not get tired on a long trip.
Posted by admin: at the request of Viggoa
Category: Detailed car maintenance guide
Original title: Polan hatchback kelshen parking sensors kelyshtaryme
Description: The dimensions are as follows: length - 3089, width - 1100, height - 1856 mm. The wheelbase is 2546 mm. Ground clearance 152 mm. The car is equipped with a hybrid power unit. The 4-cylinder engine is equipped with a system that provides engine power output. There are 4 valves per cylinder. The diameter of one cylinder is 76 mm, the piston stroke is 79 mm. The engine crankshaft accelerates to 4000 rpm. Maximum torque is maintained up to 5000 rpm.
Below you can see the technical properties of installing parking sensors for the Lada Kalina hatchback. Express your worldview about the car in the comments.
Release date: June 28, 2022
Laughter in the topic: - What a nice girl, let's get to know you! - I don't meet you on the street. - Okay, then I invite you to a cafe, we'll meet there. - I don't meet you in a cafe either. - But why? - To fuck there uncomfortable.
Before this car, I had a nine and it didn’t have parking sensors. Having bought a Kalina station wagon, I realized that I couldn’t feel the dimensions of the car, even the side mirrors didn’t help. When I park, I always get out of the car several times and look at the distance to the obstacle. I searched the forums for information on how difficult it is to install parking sensors yourself. I found how to install it on a Chevrolet Niva and Hyundai Sense, but for some reason I couldn’t find a photo report on installation on Kalina. I decided to install the cheapest parking sensors on my rear bumper myself, at my own peril and risk. I bought it on ebay for $14.5 = 464 rubles (it arrived to me in 35 days).
Parktronic, installation. — Lada Priora Sedan, 1.6 l., 2011 on DRIVE2
The Chinese parking sensor arrived.
I ordered the cheapest one with an indicator in meters. Aliexpress 11.37 usd (707 rubles). I ordered silver sensors based on the picture, but they received gray sensors.
As a result, I bargained with the seller for 5.5 usd (357 rubles) to purchase new sensors. But I’m smart, I won’t buy silver sensors, I’ll install gray ones, I won’t even paint them, and that’s fine.
The length of the sensor wire is 230cm. The length of the indicator wire is 500 cm. The length of the power cable is about 90cm.
The indicator makes too much noise with its squeaking noise. I sealed his hole with a piece of tape.
I tested the system on the table, it works fine. Be sure to install the sensors upside down!
Installation diagram: 12-15cm from the car size to the side sensor, height - 50-60cm,
The kit included a bit for drilling holes with a diameter of 22mm, but I used a stepped one. + Screwdriver.
Today (November 22) is not cold, +1. I'll go install the parking sensors.
I measured approximately 56cm from the floor, and 14cm from the visual dimension. I put a mark on the masking tape.
side mark for sensor
The distance between the side sensors was 130cm. Divide by 3 and get an interval of 43.3 cm.
Sensors through 43cm
I took off the wheels, removed the bumper. I removed the energy-absorbing beam from the bumper. I drilled 4 22mm holes from the outside. I installed the sensors and used a screwdriver to help with the silicone sensor holders on the inside of the bumper. I secured the wires with clamps. Installed the beam.
We pass the sensor wires through the rubber plug, first making a hole in it. We install the wires to power the processor unit. Here you need a terminal from the reverse sound sensor
Power wires to the sound sensor terminal
Next, we check all 4 wires from which sensor they come from and mark A, B, C or D. Having marked the wires, insert them as needed and test.
The block was stuck behind the lamp, between the body and the trunk trim.
I installed the indicator on the left side of the glass. The wire runs to the left of the torpedo, underneath under the floor trim, goes behind the rear seat, then under the trunk trim and to the block.
UPD In the end, I set the place a little high. He can only see the front bumpers of cars up close, starting from about 70 cm. It must be placed somewhere at the level of the reflectors or under them.
Issue price: 350 ₽
Parking sensor holder (parking sensors) for Lada Priora, Granta, Kalina 2
Parking sensor holder for LADA Priora, Granta, Kalina 2 cars.
Parking sensor holder for LADA Priora, Granta, Kalina 2 cars.
Original standard parking sensor holder for the rear bumper.
Installed to replace a damaged holder.
Catalog number: 2172-3826020-00
| Automobile: | Granta, Kalina 2, Priora |
Reviews
Delivery of goods is carried out throughout Russia and the CIS:
1. Russian Post (from 350 rubles and above)
Delivery to all regions of the Russian Federation and CIS countries
2. Transport Companies (from 400 rubles and above)
Delivery throughout Russia and the Republic of Kazakhstan
- TK Energy (nrg-tk.ru)
- TC Business Lines (dellin.ru)
- TC SDEK (www.cdek.ru)
- TK PEK (pecom.ru)
- TK KIT (tk-kit.ru)
3. Pickup
The order can be picked up at the office at Tolyatti, 40 Let Pobedy 38, TD “Malachite”, 1st floor.
Standard parking sensors Kalina 2
Hello everyone. I decided to share with you my experience of installing an interesting set of parking sensors on my Kalina. I have a Kalina in a luxury configuration. Yes, but this suite is not really a suite. It differs from the full luxury in the absence of standard parking sensors, a rain sensor and automatic light switching on, as well as 14″ wheels instead of 15″. This equipment is also popularly called “non-luxury”. I already had a standard multimedia system from the factory, so I installed a rear view camera almost immediately after purchase. But we’re not talking about her now. I’ve always been upset that I don’t have parking sensors on my car. In addition, I don’t like the huge “buttons” of the sensors of most parking systems on sale. See photo below.
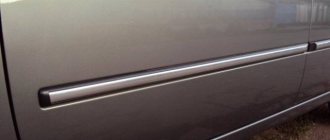
This parking sensor is interesting for two features: firstly, these are practically invisible sensors that are attached from the inside of the bumper and from the outside they visually represent only a thin ring. And secondly, this is a way to display information about the measured distance to an obstacle. This parking sensor does not have its own LED display. Instead, the parking sensor connects to the rear view camera video signal gap and superimposes its image onto the camera image. Thus, the image of the camera and parking sensors is displayed on the standard MMC display. See photo below.
Also, the parking sensors have their own beeper, which emits an intermittent signal of different frequencies depending on the distance to the obstacle. The tweeter works regardless of whether the MMS display is turned on or not. So, when I received the parcel, I found this kit:
The new generation of Lada Kalina will go on sale in less than a month. At first, the car will be offered in the “Lux” version, and by the fall, all trim levels will appear.
It became known that one configuration of the car will include a set of options that can be called “the maximum possible.” That is, all options will be applied immediately, and you won’t have to pay extra for anything.
For example, consider the functions of the multimedia center. In the standard version, you can: play files (audio, video, photo), both from USB and from an SD card or via Bluetooth. There is a connection to a telephone, radio, and amplifier control. But the 7-inch screen in the Lada Kalina 2 combines parking sensors with a camera, as well as GPS + GLONASS navigation, well. These options can be installed additionally (all of them are initially included in the “Luxury Plus”).
“Luxury+” will appear later than the first “luxury” versions. Now not much is known about the configuration, but, as you can understand, it is no different from the “Lux” with all the options installed. We are waiting for details.
Dirt plugs for the steering rod opening for Lada Priora, VAZ 2110, 2111, 2112
with 12% discount
Spoilers with diode for wipers, carbon
with 11% discount
State-of-the-art silicone gaskets number
with 9% discount
Camshaft clamp Autom-2 for 16-valve VAZ engine
with 9% discount
LED PTF in the rear bumper of Lada Granta liftback, Vesta
with 9% discount
Tinted tail lights for Lada Granta sedan
with 19% discount
Pay for goods by credit card, using QIWI, Yandex.Money or WebMoney and save on your purchase from 4%, avoiding postal and bank commissions
74 customers chose this product
The sensors send ultrasonic waves and if the wave hits an obstacle and returns back, the information is sent to the parking sensor control unit.
Weight, kg: 0.05 Dimensions, cm: 4 x 4 x 3 Volume, m3: 0.00005
Lada Kalina Universal Lux 1.6 16V › Logbook › Standard parking sensors from Kalina 2 after 2022
Good day to all!
I had parking sensors installed on my car when I bought it at the dealership. Chinese crap. Worked pretty mediocre
which was also installed earlier in its regular place
The wiring harness connector was pulled through a standard hole in the body and secured into a hole that was drilled before the body repair, so it was obviously already machined and painted.
I bought a wiring harness from Kalina 2 hatchback (the length is suitable), from a station wagon it’s 1000 rubles more expensive for some reason. 6-pin sensors.
Holder rings from Granta FL, taking into account the curvature of the bumper
20 mm cutter for cutting holes in the bumper
Next, it was necessary to understand at what distance from each other the holes are located on the bumper under the parking sensors on Kalina 1.
I express my deep gratitude to Mirolub555, who specifically measured the location of the sensors on his Lada Ellada LR.
I will give these dimensions here. Maybe it will be useful to someone. 1 — 445mm 2 — 105mm 3 — 75mm 4 — 70mm 5 — 70mm 6 — 70mm
I put tape on the bumper and made markings
To fix the wiring harness of the parking sensors, I used plastic clamps and self-adhesive pads for distribution boards
Kalina 2 does not have a bumper amplifier, so there are no problems with installing sensors. There is 1 amplifier on Kalina. And the parking sensors were also from the factory, only of a different model, the more compact sensors fell between the cells of the amplifier. I had to cut the amplifier a little
Then the dancing with the tambourine began. To trim the amplifier and adjust the position of the sensors (they saw the ground constantly), I had to remove and install the bumper about 15 times. As a result, one of the sensors died. It also turned out that the (side) clamps from Granta FL are not suitable for us. Different bumper profile. It is necessary to install the usual ones from Priora 2.
As a result, we order again, wait 2 weeks and only after 6 weeks we return to installing parking sensors.
I contacted AlekseiYsaew regarding the orientation of the parking sensor holders. It turned out that the mark (dot) on the ring should look down
I replaced the dead sensor, installed rings from Priora 2. Everything worked
The distance at which the parking sensors do not respond is approximately 130-140 cm
Continuous squeaking at a distance of 50 cm. Between them there is a gradation of squeaking frequency
Parktronic even sees an obstacle 30-40 cm to the side of the car. I'm happy. If you need more details, watch the video.
For the money Parking system sensor wiring harness assembly 21920372424810 — 678 RUR New safe parking system sensor 21720382606200 1439 RUR+692 RUR (cheaper)+657 RUR+716 RUR=3504 RUR Left parking sensor cover plate Granta FL 8450101379 — 1 33 rub. Overlay - right parking sensor lock Granta FL 8450101378 - 133 rubles Locking plate 2170 parking sensor 21720382606400 - 93 rubles + 99 rubles + 99 rubles = 291 rubles Milling cutter 200 rubles Clamps 25 rubles Platforms 190 rubles (their shit) Total this time 5154 rubles. This is the amount that will be indicated below.
Here it is worth adding the parking sensor control unit, which was previously purchased for 2,400 rubles and has already been calculated. Also, the interior wiring harness (a new one cost me 2,000 rubles, but the same new one costs 30,000 rubles). You can buy and re-crimp the connectors yourself. Then it will be about 800 rubles - 1000 rubles
In total, standard parking sensors cost about 8,000 rubles
Don’t say that you could have ordered parking sensors from Ali for 600 rubles (I already had such crap). I wanted to make it for a factory, on a regular basis and without a collective farm. Did!
Good luck to everyone, beaver and proper parking sensors!
How to connect and test
Power is supplied from the reversing light chip. If the display is installed on a dashboard or interior mirror, then the connecting harness is pulled along the floor of the car and raised along the A-pillar to the monitor. If the indicator is installed on the ceiling near the loading door or a beeper is used, there is no need to lay wires throughout the cabin.
After installation, the kit is checked for functionality. When the transmission is on, an object is brought to the sensors one by one until a signal appears. After this, measure the distance to the nearest sensor that detected the obstacle. The resulting value will be the boundary of the sensitivity zone.
To determine the minimum operating distance of the sensor, you need to install an object between the sensors (outermost and central) and put the Lada Largus in reverse mode. The distance at which the presence of an object is not determined will be the desired value. This method can also determine the “blind” zone.
If the parking sensors do not respond to the presence of objects in the work area, it is necessary to determine which element has failed. To do this, with the power on, lightly touch the sensor emitter. A working element produces clicks that can be felt by your finger. A malfunction may also appear in the connecting wires. Therefore, there is no need to rush to throw away the sensor without checking the integrity of the lines.
The functionality of the unit is checked by connecting a known-good sensor. If the kit reacts to objects, then the unit is working. Defective elements must be replaced as soon as possible, since the efficiency of the system is reduced, which can negatively affect parking results.
Connection
Next, two wires are connected to the reversing light. To do this, you need to wrap the trim in the trunk. You can use tape locks to connect the wires. The plus and minus are connected to the rear light. The control unit is connected according to the instructions and placed somewhere in the trunk. This is how parking sensors are installed (Kalina station wagon is no exception). All that remains is to assemble the interior, turn on the ignition, put the gearshift lever in reverse gear and check whether the installed device works. You also need to connect and attach a display or indicator. Then you can use parking sensors on a Lada Kalina car. Installing parking sensors, as you can see, is a really simple operation. Even novice car enthusiasts can easily handle it.
Lada Kalina
To a buyer who has money - at least borrowed money - for a car of a higher class and one and a half times more expensive, these little things may seem unacceptable. What if you compare it with other state employees? A Renault Sandero in a special series with a 102-horsepower engine and additional options that bring it up to par with our Kalina Lux will cost 496,600 rubles. A similar Hyundai Solaris is 300 rubles more expensive. But, I think, luxury versions of Kalina with fashionable multimedia and light sensors are a response to Chinese models, the bells and whistles of which make a certain category of buyers turn a blind eye to their quality. And the popular “Kalina” is an 87-horsepower 8-valve engine and the “Norma” package for 372,000 rubles. There are the same safety and comfort systems, and the owner will install the radio and CDs to his liking himself.
Installation of sensors
Next, when the holes are ready, you can begin installing the sensors. On the reverse side of each sensor there is a UP mark and an additional arrow. These marks should be used to orient the sensor in the hole. It is then secured with latches. Manufacturers equip sensors with various types. If the clamps are silicone, you will have to additionally tighten them with a screwdriver. This is how equipment is made in China.
When the sensors are installed, you need to purchase platforms for mounting the screeds - they can be found in any construction supermarket. The surface must be thoroughly cleaned and degreased - pads are attached with double-sided tape between the sensors. Next, the wires are collected into one bundle, and at the end they are corrugated and led into the trunk through the hole under the left rear light. After this, the bumper can be installed in its rightful place.
We install a parking radar on a Lada Kalina station wagon
Installing parking sensors on a Kalina station wagon can be done as follows. You can install sensors along one line in the middle of the retroreflectors. In this case, the outermost elements are installed 3-4 cm from the edges, and the rest are mounted after 40-45 cm.
Professionals advise marking the holes on masking tape - tape is glued directly to the surface of the bumper, and lines are drawn and marks are made on it. Then, using any sufficiently sharp object, marks the places on the plastic of the bumper.
Parking sensor control unit Lada Granta / VAZ 2190
Dear customers, in order to avoid errors when sending a parking security system (SPS) alarm unit, please indicate your car model and year of manufacture in the “Comment” line.
Based on the name, we can confidently conclude that parking sensors are an electronic device that helps the driver park his car. There are fewer and fewer places to park a car in cities, and if there are any, you need to have a fair amount of skill to squeeze your pet between other cars. Therefore, parking sensors become an indispensable assistant when parking a car. The parking sensors will promptly report the dangerous proximity of a parking post, which you may not see because it is in the “dead” zone, or some tree stump that you have not noticed. In general, parking sensors are designed to inform the driver about a danger and indicate the distance to it. For this purpose, the parking sensors are equipped with sound and light alarms. As you can see, parking sensors are a useful device, especially in city conditions.
The principle of operation of the parking sensors is quite simple. Sensors, their number may vary, detect an obstacle. As a rule, they are installed on the car bumper. The principle of their operation is to emit ultrasonic waves, and if there is an obstacle, part of the waves returns to the sensor, which sends a signal to the electronic control unit.
The control unit 2190-3826006 collects information from parking sensors and analyzes the distance to the obstacle. The parking sensors unit is equipped with a signaling device that notifies the driver of an obstacle. The closer the car is to the obstacle, the higher the frequency the signal operates.
The control unit calculates the distance to the obstacle and provides this information:
— One element of the parking sensors is an audible alarm. It is configured in such a way that the shorter the distance to the obstacle, the higher the signal frequency.
— The second indicator showing the distance to the obstacle may be a light indicator. There are several types of them. The first type is an indicator that changes color depending on the distance to the obstacle. For example, green indicates a safe distance, while red indicates immediate danger. The second type of indicators are indicators with divisions; the more divisions are lit, the closer the obstacle. Indicators with two scales show danger on the right and left.
Parking sensors have a different number of sensors. The price of the system, but also its effectiveness, depends on this. The dependence here is direct. The more sensors, the more space is “surveyed” by sensors and the driver receives a more reliable picture of obstacles around the car. Parking sensors with two sensors are ineffective, since “dead” zones can form and obstacles can get into them.
There are different types of sensor installations. The most widespread are mortise sensors. Holes are drilled in the bumper and sensors are inserted there.
The second type is adhesive sensors. This method is simple and easy to install. But there is a possibility that the sensor may come off when washing the car under high pressure.
The liquid crystal screen included in the parking sensors system greatly facilitates the work with the parking sensors and the parking itself, but significantly increases the cost of the entire system. Recently, parking sensors have appeared with information projected onto the windshield. This is the most expensive parking sensor option. But maybe some people will like it. As you can see, there are many types of parking sensors and choosing one of them is your choice.
Parking sensors without a screen are good as a rangefinder when driving straight, in other cases it fails. Convenient as an alarm in case of sudden appearance of a person or animal.
Allows you to “by ear” estimate the distance to an obstacle. There is no exact information about the location of the object.
Other article numbers of the product and its analogues in catalogues: 21900382600600.
VAZ 2190, VAZ 2191 / Lada Granta.
Any breakdown is not the end of the world, but a completely solvable problem!
How to independently install parking sensors, a control unit and an SBP alarm unit on a Lada Granta car.
With the online store Discounter AvtoAzbuka, repair costs will be minimal.
Just COMPARE and BE SURE.
Don't forget to share the information you find with your friends and acquaintances, as they may also need it - just click one of the social networking buttons below.
Installing parking sensors on a Lada car
The safe parking system (parking sensors) is installed by the factory on some top-end configurations of Lada cars. Simpler versions of the car (“Standard” or “Norm”) do not have this useful accessory. Let's look at the features of self-installation of parking sensors on modern Lada cars.
The instructions for installing parking sensors for Lada Granta, Priora, Kalina, Vesta, Niva and XRAY are similar. There is a separate photo report for Lada Largus. Also see the instructions for installing front parking sensors on Lada XRAY.
We study the instructions that come with the parking radar and, according to the attached diagram, mark the locations for the sensors on the bumper. We make the holes using a drill and a bit (crown), which comes with the kit. Try not to overheat the plastic of the bumper. We fix the parking sensors in the resulting holes, taking into account the top and bottom of the sensor (see markings).
You can drag the wires from the parking sensors into the trunk (in this case, Lada Granta liftback) without removing the bumper. It is enough to unscrew a couple of screws from below to gain access to the standard hole on the left side. We route the wiring through a tight rubber seal.
We place the parking sensor control unit in the trunk using double-sided tape. To connect, you will need to find the “plus” after engaging reverse gear; on Lada cars this is the green wire of the rear light. Mass - black. The parking sensor display is most often mounted above the mirror. To do this, we stretch the wires from the trunk to the front of the car under the floor lining. Then behind the panel, behind the windshield pillar trim and under the headliner (removing the sun visor).
By the way, if you fix the parking sensor screen on the ceiling in the trunk (of a hatchback, station wagon or liftback) or in the interior of a sedan, then you can monitor the distance through the interior mirror, and there is no need for additional wires throughout the cabin.
The process of installing parking sensors on the Lada Granta is also shown in the video:
https://youtu.be/HnEzxgr7Bzk
Let us remind you that you can buy inexpensive parking sensors on AliExpress.
By the way, you can more accurately determine the distance to an obstacle after installing a rear view camera.
Basic faults
Malfunctions in the operation of the parking sensors definitely cause discomfort: if the driver is accustomed to relying on the sound signal of the safe parking system, parking using the “traditional” method becomes quite difficult. Parking sensors may either not work or display data incorrectly.
The causes of malfunctions may be the following:
- Wiring problem. Wires connect the control unit with several sensors. However, their fastening is not reliable enough everywhere - for example, it can be attached to a bumper with metallized tape. One big drawback is that the sensors are often not firmly attached. While they are shaking, remaining in their position, the data is inaccurate.
- Wiring may melt or break. To prevent this, you will have to periodically inspect the wires of the safe parking system.
- Error in the control unit. This parking safety system unit is installed separately from the ECU. Inside it there is a special subsystem that detects the presence of malfunctions and reports this to the driver. Not all modern systems are equipped with such a subsystem, but it is not so difficult to suspect improper operation of the sensors.
- Dirt on sensor receivers. Dirt and dust will obscure the sensor's view. You can avoid this by regular washing. But if there is too much dirt and dust, the bumper will have to be disassembled and washed separately. Even worse, if a stone hits it at high speed, the sensor will break due to the high impact force.
- Dirt in the control unit. Circuits and boards don't like being covered in dirt - anything can lead to a short circuit. The probability of this event is extremely low, because the control unit is quite seriously closed from external sources of dust and dirt.
Camera selection
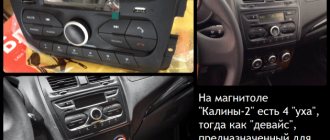
You can install any universal camera on the Lada Kalina. Due to the fact that there is no space for a standard video device on the car, most drivers select them based on their capabilities. Most often, video cameras are located in the place provided for installing the license plate light. The most suitable size is the stock camera for the Volkswagen Touareg. The device is equipped with a small lamp to illuminate the room. The difference in illumination will be visible, but there will be no reason for a traffic police officer to stop due to the lack of 1 lamp.
They install rear view cameras on cars, located in the license plate frame. With this arrangement, the device is not protected by body elements from dirt and dust. The option of placing a video camera under the trunk lining (“saber”) is more acceptable, but for installation you will have to drill a hole. The device is almost invisible; it can only be seen close up.
How to install
Before starting installation work, the trim from the door or trunk lid is removed to provide access to the camera body. A homemade spray head is made from a needle for inflating footballs, a flexible tube is put on the assembly and secured with a plastic clamp. The nozzle is installed in a hole that is drilled into a plastic or metal part. The location of the channel is selected in such a way that the flow of water from the sprayer hits the lens, but the nozzle itself does not block the view of the camera.
After installing the sprayer in the prepared hole, a camera is attached to its regular place, which is fixed with screws and prevents the sprayer from falling out of the socket. A valve is installed in the gap in the line to prevent water from escaping from the sprayer into the tank. The tube is fixed to the valve fittings with plastic clamps. The hose is then routed inside the door or body and connected through a tee to the cleaning solution supply line to the rear or windshield.
When using a time relay, power must be supplied to the device. The negative cord is connected to the ground bolt installed inside the door or in the wings. The positive wire is routed to the reverse lamp socket. An additional solenoid valve built into the solution supply channel pumps liquid only after reverse gear is engaged. The algorithm for installing and connecting parts depends on the modification of the car and the design or layout features of the trunk lid.
To install an IP-950 Aqua washer, you need to remove the trim and then get to the standard device. An alternative product is installed in the vacated slot; some vehicles will require mounting of adapter plates. Power to the electrical circuits is supplied from the reversing lights, signal cables to the radio are laid through the interior (inside the sills or under the roof lining).
Installing parking sensors on a Lada car
The safe parking system (parking sensors) is installed by the factory on some top-end configurations of Lada cars. Simpler versions of the car (“Standard” or “Norm”) do not have this useful accessory. Let's look at the features of self-installation of parking sensors on modern Lada cars.
The instructions for installing parking sensors for Lada Granta, Priora, Kalina, Vesta, Niva and XRAY are similar. There is a separate photo report for Lada Largus. Also see the instructions for installing front parking sensors on Lada XRAY.
We study the instructions that come with the parking radar and, according to the attached diagram, mark the locations for the sensors on the bumper. We make the holes using a drill and a bit (crown), which comes with the kit. Try not to overheat the plastic of the bumper. We fix the parking sensors in the resulting holes, taking into account the top and bottom of the sensor (see markings).
You can drag the wires from the parking sensors into the trunk (in this case, Lada Granta liftback) without removing the bumper. It is enough to unscrew a couple of screws from below to gain access to the standard hole on the left side. We route the wiring through a tight rubber seal.
We place the parking sensor control unit in the trunk using double-sided tape. To connect, you will need to find the “plus” after engaging reverse gear; on Lada cars this is the green wire of the rear light. Mass - black. The parking sensor display is most often mounted above the mirror. To do this, we stretch the wires from the trunk to the front of the car under the floor lining. Then behind the panel, behind the windshield pillar trim and under the headliner (removing the sun visor).
By the way, if you fix the parking sensor screen on the ceiling in the trunk (of a hatchback, station wagon or liftback) or in the interior of a sedan, then you can monitor the distance through the interior mirror, and there is no need for additional wires throughout the cabin.
The process of installing parking sensors on the Lada Granta is also shown in the video:
Let us remind you that you can buy inexpensive parking sensors on AliExpress.
By the way, you can more accurately determine the distance to an obstacle after installing a rear view camera.
Selection of parking sensors for Lada Largus
Parking sensors will warn the driver about a possible collision with an obstacle using a sound signal. The warning function is not the only one among the device’s capabilities for parking; the parking sensors are also capable of calculating the distance to an obstacle located in the car’s path.
So, parking sensors are a tool that allows you to park your car without any problems. This device includes the following components:
- the electronic unit;
- sound signal;
- parking sensors (their number, as a rule, rarely exceeds 8);
- display.
The heart and brain of the parking sensors for Lada Largus cars is the electronic unit. It is from here that the entire system is controlled. The main element of the parking device is engaged simultaneously with reverse gear. The electronic unit will definitely notify the driver if any malfunctions occur in the parking sensors.
Parking sensors are responsible for detecting obstacles in the path of a car. They are installed on the front and rear bumpers of Lada Largus. Ultrasonic waves are what the device operates on. The sensor creates a wave and a sound signal is emitted immediately after it finds an obstacle. The distance from the obstacle to the vehicle is calculated based on the wavelength. The number of parking radars can be different - 7,8 or 6.
Parktronic has proven itself well among car owners and is in good demand in the car accessories market.
How does the safe parking system work?
A special electronic unit receives information from the sensors and then notifies the driver of an obstacle. Sensors are the main devices in this system. It is thanks to these small devices, powered by ultrasonic technology, that the parking sensors are able to detect obstacles.
The radar is also equipped with a display or indicator light to alert the driver. In addition to the display, many devices have a sound notification function. Parking radars equipped with liquid crystal displays enable the driver to obtain more detailed data. Some models may be equipped with a rear view camera. Among the models, there are also those where information is projected onto the windshield of the car.
Ready solutions
Factory cleaners are installed next to the lens; there are models with a nozzle integrated into the camera body. The equipment is connected to the on-board electronic circuit and to the fluid reservoir. When reverse gear is activated, the driver applies fluid to the rear window, and at the same time the viewing element of the camera is cleaned. If the car moves forward or the gearbox lever is in neutral, then the fluid is supplied only to the rear window.
An example of a turnkey solution is the Interpower IP-950 Aqua product, which is equipped with connecting wires and components for integrating the device into the rear window cleaning line. The camera is connected to the head multimedia device; the design includes a sensor for automatic brightness adjustment (depending on the lighting conditions of the area behind the car). The housing is made of plastic, the connection lines of the parts are sealed with rubber gaskets (compliance with protection class IP68).
Completeness
So, the device has already been selected and purchased - depending on the cost and manufacturer, it can be equipped differently. Thus, manufacturers from China often pack parking radars in simple plastic bags, while more serious brands from Europe and the USA supply their products in beautiful boxes with a set of fasteners. There are also installation instructions there.
The device comes with 2 or more sensors - most often the device is offered with four. Also present is the control unit itself, a display or indicator, and connecting wires (if the parking sensors are wired). The kit also includes a cutter for drilling holes in the car bumper. Some manufacturers also include double-sided tape in the kit - this may be needed during the installation process.
DuM4uK-26stv › Blog › Installing parking sensors in Lada Kalina 2 station wagon
For my father's birthday, I ordered parking sensors from Aliexpress so that he could install them on his Kalina 2. Today it was sunny, dry weather and we decided to install them. What do we need? 1) parking sensors - one set 2) masking tape 3) tailor's meter 4) crown ( usually comes with parking sensors) 5) screwdriver. You can also use a drill, but a screwdriver has optimal speed - there is less chance of damaging the bumper. 6) wrench/head 107) screwdrivers - Phillips, flat, T15 star, if I'm not mistaken 8) two pairs of hands. You can get by with two of your own, but two are a little faster and more fun9) nylon clamps or electrical tape to secure the wires.
So, after going through the procedure for installing parking sensors, I realized that the most difficult thing in this process is marking and drilling the holes. This is what I will focus on with the photo. To do this, apply masking tape at the approximate level (usually 56 cm from the ground) where the sensors are located. This will first of all allow you to freely mark the places for drilling. Next, take a tailor's meter and start marking. The optimal distance between the sensors is 40 cm. We start marking from the middle of the bumper, for which we make an approximate mark relative to the trunk lock, which will be equal to 135 cm from one of the edges of the bumper at a level of 2 cm below the bumper stiffener .In the end we got the following
After which you need to remove the bumper. There is a nuance here - there is no need to completely remove the bumper. It is enough to decide on the location of the main parking sensor control unit. We decided to place the block in the trunk trim cavity on the driver's side. Therefore, all we had to do was disconnect the bumper on the left side and remove the left rear light. It is fixed with 3 bolts under the trim in the trunk. After removal, we free the wiring harness, among which we need the positive reverse wire, since this is the best option for automatically turning on the parking sensors when reversing. The plus in reverse in this light in our case is the green wire (most likely it’s the same in other Kalinas). We tear off the insulation and attach the red wire from the power supply to the control unit here. We attach the black minus to the ground of the same flashlight. Next, we install the sensors. We had a problem - the crown from the kit did not fit - it was 2 millimeters in diameter smaller than the base of the sensor - we had to modify it with a drill and a cutter. But everything worked out - the sensors sat down as they should. All the wires from the sensors were routed through the rubber band of the hole, which is located below the hole where the harness from the rear light goes. We connect everything according to the parking sensor instructions and check it. Everything is working? We pull the wire to the tweeter. The tweeter was located on the mirror, and the wire was thrown: - the headliner to the left pillar - then it hides in the rubber of the driver's door seal - under the trim of the middle pillar - again under the rubber, but this time of the passenger door and then into the trunk. As a result It probably took us about two hours to do everything - it took us a long time to adjust the holes for the sensors. In general, everything works. Starting tomorrow, my father will begin testing the system in urban conditions. So far everything is working.
source
Marking work
Installing parking sensors on a Kalina with your own hands is a simple task that even a beginner can do. However, there is one difficulty in this operation - it consists in marking the rear or front bumper for the holes for the sensors. Here you need to correctly calculate all the parameters.
This is the height, width and places where the outer parts will be installed. There are many opinions and different information. So, if you look at the reflective elements, the sensors at the edges of the bumper should be installed 2 cm inside the structure, above the reflectors. And in general they are installed anywhere. But you don't need to do that. The closer to the edges of the bumper the parking sensors are installed on the Kalina, the better - this approach will increase the coverage area of the sensors on the sides of the car. If you look at any foreign-made cars, these elements are installed along the entire perimeter. The maximum configurations of the Lada Kalina have standard parking sensors - it is equipped with three ultrasonic sensors. In this case, the manufacturer installed the outer controllers 10 cm towards the reflectors. It should be noted that the system will work effectively if the elements are installed parallel to the ground.
How to make holes for sensors
Manufacturers equip parking sensors with crowns, which can be used to drill neat holes using a drill or screwdriver.
Professionals recommend that those for whom installing parking sensors with their own hands (Kalina or any other car) is the first serious tuning not to work at high speeds. Rushing will not lead to anything good. The holes need to be drilled as slowly as possible - then you can achieve ideal results.
High speeds when drilling will cause the bit to heat up - the plastic of the bumper may melt. This will significantly complicate the process of pulling out the crown. The edges of the hole are also reduced. In this case, you will have to modify them with a file. On a Kalina car, the installation of parking sensors will be done carefully if you drill slowly and allow the crown to cool before the next drilling.
Painting sensors
Installing part sensors on a Kalina yourself begins with preparing the sensors - often on Lada Kalina cars the bumpers are painted in the color of the body. Parking radar sensors, regardless of price and manufacturer, are not painted or made in a different color. To avoid damaging the car’s exterior after installation, the sensors must be pre-painted.
Aerosol cans can be used for painting. The advantages of this solution are the easy selection of the desired color. The disadvantage is that with the help of a spray can, pollen gets onto other elements of the device where their presence is undesirable. It is much easier, faster and more reliable to paint with a brush to cover up chips on the body. There are no special recommendations regarding painting technology. But in order for these parts to look perfect and not stand out against the background of the bumper, they should be painted in two layers. If you use a brush, the layer will be somewhat thicker. The paint will wrinkle. To prevent this from happening, you need to try to make the layer as thin as possible. The paint is then allowed to dry and reapplied. Naturally, perfect coloring in this case is difficult to achieve. But it's better than just black holes in the bumper.