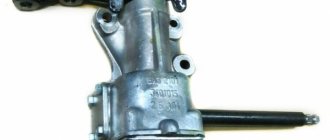
Hello! Nivovods constantly argue about the advisability of decoupling the front axle gearbox from the engine . Opinions are opposite – from “must do” to “under no circumstances.” The arguments of opponents of the operation are simple: “The factory design is the most reliable.”
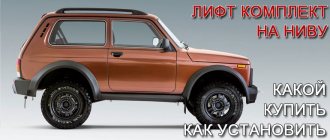
Proponents of the modification believe that decoupling the bridge reduces vibrations (and therefore extends the life of the gearbox) and makes it possible to painlessly lift the suspension for the axle shafts. In addition, on the later model the axle mount is independent. I will not convince you of the benefits of this decision, or its negative consequences. I'll tell you how to do this job correctly.
The technology has been proven. On this model, the FRM (front axle gearbox) has an independent suspension as standard. To save time, you can purchase ready-made tying kits.
Many car enthusiasts make brackets and fastenings with their own hands, providing colleagues with drawings of their own design.
General rules for revision:
1. The untethered bridge must be fastened at three or four points that do not have a rigid connection with the engine. 2. The front axle beam and anti-roll bar are used as supports. 3. When determining the new position of the RPM, it is important to prevent horizontal displacement of the axes of the propeller shaft and axle shafts. The bridge can be uncoupled using a gearbox suspension kit from Chevrolet NIVA.
Therefore, most car owners prefer steel brackets made independently or in the factory. For cars taking part in off-road competitions, a version of the RPM steel body has been developed. This gearbox is structurally equipped with lugs for independent suspension. There are also additional subframes for extreme conditions of use of the NIVA. When installing the latter, the question: “how to untie the front axle” does not arise, since the gearbox is mounted in the subframe.
Operating principle
Torque is supplied to the gearbox (Gearbox) and transfer case of an all-wheel drive vehicle. From it, the force is directed to the front and rear axles. The NIVA cardan transmission supplies torque to the axles.
VAZ Niva
Gearboxes are installed on the axles, which translate the movement of the driveshaft into rotation of the wheel axles. Both units of the front and rear Chevrolet axles have a similar design: drive and driven gears located at right angles to each other. The gearbox gears are equipped with specially shaped teeth, and their design facilitates maximum transfer of forces between the shafts.
The gearbox itself is covered with a cast aluminum housing, closed with a metal cover. The gears are placed in a sealed space filled with transmission oil, which provides lubrication to the interacting parts and also dissipates heat.
Gearboxes installed on NIVA vehicles must have markings indicating the gear ratio.
Sequence of work.
1. We purchase (make) a kit for untying. When making it yourself, we drill holes in the pan in accordance with the diameter of the studs. 2. We securely install the car on supports, preferably above the inspection hole. 3. Drain the oil from the gearbox. 4. We dismantle the CV joint drives, having first freed the steering knuckles of the wheels. 5. Disconnect the front driveshaft from the flange. 6. We remove the axle gearbox from under the car. 7. On a flat working surface, separate the bottom tray and side covers of the RPM. 8. On top of the CV joint drive covers, using elongated studs, screw the earring brackets. It is possible to replace the installation sequence of covers and brackets, depending on the kit you choose.
9. Instead of a standard pan, we attach a reinforced one, with installed clamps for attaching the anti-roll bar to the beam. In addition to the factory gasket, we use sealant. The pallet will experience additional loads, so the tightness needs to be improved. 10. We hang the RPM with the rear mount on the stabilizer beam. We center the axis of the propeller shaft and the axis of its flange in the gearbox. 11. On the bridge beam we mark the fastening eyes for the brackets for the front suspension of the gearbox housing. 12. We weld the eyes to the bridge beam and perform anti-corrosion treatment. 13. We fix the earrings in the eyes using polyurethane or rubber silent blocks. 14. Check the vertical . 15. Attach the axle shafts and driveshaft, secure the steering knuckles. 16. Fill the gearbox with oil according to the operating instructions. 17. Without starting the engine and without removing the car from its supports, check the free rotation of the wheels and the front driveshaft. 18. We make a test drive, after which we re-inspect the car in the inspection pit.
Adjustment
It will not be possible to adjust the drive gear without a torque wrench and mandrel A.70184 . You will also need:
- level;
- calipers;
- flat feelers for measuring gaps;
- adjusting rings with a pitch of 0.05 mm;
- perfectly straight metal rod.
The drive gear is adjusted as follows:
- Align the crankcase mating plane horizontally (you will need a level);
- Install a metal rod onto the bearing bed.
- Place the adjusting rings and measure the distance from the rod to the mandrel.
- Install the adjusting ring. Its thickness is calculated as the difference between the actual clearance and the deflection value indicated on the new gear.
- Install the shaft and related parts in place, secure the drive gear flange.
- Using a torque wrench, tighten the nut with a force of 12 kgf.
- Using a dynamometer, check the moment at which the drive gear shaft begins to rotate. If this value does not correspond to 7.6 to 9.5 kgf, the nut needs to be tightened.
Important: the tightening torque should not exceed 26 kgf. If it is not enough, the spacer sleeve must be replaced.
Adjusting the gap between the parts of the main pair is carried out in several stages:
- Tighten the nut located on the driven gear side to completely eliminate the gap.
- Using a caliper, measure the distance between both covers.
- Tighten the second nut.
- Check the distance between the two covers. It should grow by 0.1 mm.
- By rotating the first nut, achieve a gap between the gears in the range of 0.08-0.13.
All that remains is to turn the gear while checking the clearance. If it remains unchanged, the adjustment is complete. A decrease or increase in backlash during gear rotation indicates deformation of the differential housing. You can try to trim it on a lathe, but it is better to replace it with a new one.
Some useful tips:
• Since the engine no longer bears additional load, you can replace the standard hard cushions of the power unit with softer ones, from VAZ classics. • When attaching the lugs to the front axle beam, welding should be carried out by an experienced welder who is familiar with the technique, which allows not to “release” the metal. The beam is a load-bearing structural element of the car, and its strength should not be reduced. • The welding areas should be cleaned of scale, then the joints should be thoroughly primed and painted. • After untying, the RPM should not touch the engine and beam either in a static position or while the vehicle is moving. • If you are producing a suspension lift, you should select a decoupling kit that takes into account the increased angles of the CV joint and driveshaft. • The silent blocks of the brackets of the untethered gearbox are subject to wear in the same way as the cushions of the power unit or suspension elements. The replacement of these elements should be included in your list of operations during maintenance.
Purpose of marking
Each gearbox at NIVU has a specific marking:
- 2101, 2102 (not produced);
- 2103 with gear ratio Z=4.1, which means 10 teeth on the drive gear, 41 teeth are placed on the driven gear;
- 2106 with a gear ratio Z=3.9, i.e. 11 teeth on the drive gear, 43 teeth on the driven gear.
Marking 2103 indicates that these are higher-speed gearboxes, and 2106 are more traction ones.
Gearbox for Niva
When replacing one of the units, you need to pay attention to the meaning of the gear ratios: they must be the same for the front and rear axles. If the gear ratios are different, the wheel axles rotate at different speeds. One gearbox breaks quickly.
The markings of the front and rear components of the NIVA vehicle must match and have the same gear ratios. If units marked 2101, 2102 were previously installed, replacing it with a part with a different marking (2103, 2106), then both gearboxes must be replaced.
Video of front axle operation
Tools:
- Straight box spanner 13 mm
- Straight box spanner 17 mm
- Straight box spanner 19 mm
- Chisel
- Small hammer
- Driver for socket attachment
- Extension for socket wrench
- Knob attachment 13 mm
- Knob attachment 17 mm
- Knob attachment 19 mm
- Knob attachment 27 mm
- Syringe for filling transmission oil
- Waste oil container
- Hex key 12 mm
- Adjustable stop
- Pliers
Parts and consumables:
- Sealant
- Transmission oil
- Inner joint bearing cap gaskets
- Rags
- Aerosol lubricant type WD-40
Note:
We carry out the work on an inspection ditch or overpass. Remove the front wheels.
The front axle gearbox can be removed in two ways:
— With preliminary removal of the front wheel drives or assembled with the drives:
1. Drain the oil from the front axle gearbox as described here.
Motor scooter repair Ant
Before starting repairs, you need to buy all the necessary spare parts and tools. Of course, you first need to diagnose the device in order to understand what the real problem is.
It is also necessary to take into account a few tips on how to change certain spare parts:
- If you want to change a tube or tire, you don’t need to bead the wheel at all. It is enough just to unscrew all the bolts securing it.
- The wheel begins to spin thanks to a roller chain running through the gearbox. At the same time, the rear suspension is completely independent.
- The gearbox can be easily removed without any additional tools, because it is located in the very center of the scooter.
Repair is accompanied by the following basic actions:
- drain the oil from the engine, then remove the engine and place it on some flat surface;
- remove the cooling casings and dynastrater;
- remove the final drive sprocket;
- loosen the clutch cover from the bolts and remove it;
- remove several clutch discs;
- after this it will be possible to easily remove the basket along with the chain and sprocket, the washer and the bushing;
- to disconnect the cylinder head, you need to unscrew the four washers that secure it; if there are noticeable burrs on the cylinder mirror, then it should be sharpened;
- remove the cylinder, remove the piston pin ring using pliers;
- unscrew the crankcase tightening bolts; an impact screwdriver can help, which is very useful in such cases;
- turn the engine to the disassembled side, gently hit it with a mallet until the crankcase separates into two equal halves;
- lay the engine straight, using a mallet, carefully knock out the driveshaft;
- After this, access to the bearings and seals appears.
Changing the oil in the front axle of Niva Chevrolet
The manufacturer recommends changing the oil in the front axle gearbox every 45 thousand mileage; to change it you will need a 17 mm wrench, a 17 mm hexagon, a syringe and a container for old oil. It is best to change the oil in the Niva Chevrolet gearbox after a hot trip
Unscrew the drain plug of the front gearbox housing and drain the oil into a container, then screw the plug back
Unscrew the filler plug and fill in new transmission oil using a syringe to the level of the lower edge of the filler hole and screw in the filler plug. This completes the transmission oil change for Chevy.
Gear running-in
The final stage of assembling a spur gearbox is running in the gears. Using the procedure, contact spots are corrected, existing defects are corrected, and the contact area is increased. After running-in, the roughness of the meshing surface decreases, the noise level decreases, and the working life of the gears increases.
The running-in of surfaces in contact with the gear clutch includes grinding them with an abrasive paste. The grain size of the material is selected based on the accuracy of engagement and the hardness of the teeth. The recommended procedure for processing gearing is contained in technical documentation and instructions. General algorithm of actions during running-in:
- The teeth are coated with a thin layer of abrasive material.
- The mechanism is started for 5–10 minutes. The motor frequency is set to 20–30 rpm.
- Remove the paste from a pair of teeth and check the condition of the working surfaces. The procedure can be considered complete if there are traces of contact and there are no scuffs or other effects.
- The paste must be replaced and then the device must be started again, gradually increasing the braking torque on the output shaft.
- Every 30 minutes the mechanism is stopped, the working surfaces are checked, and the abrasive paste is changed.
- After removing the abrasive paste, you need to run-in the mechanism for 90–120 minutes. Industrial oil must be periodically applied to the teeth so that the surface becomes smooth and shiny, and the remaining abrasive material is completely removed.
If there is a multiple number of teeth in a pair, the gear tooth and the two meshing wheel teeth must be marked before the procedures. When assembling, they are brought into engagement to ensure that the previously run-in teeth match. If there is an odd number of teeth, all elements are run in, so there is no need to mark them.
Replacing the shank oil seal Niva Chevrolet front axle
The oil seal must be replaced with a new one if an oil leak is detected; to replace it you will need a 13, 24 wrench, a screwdriver, a torque wrench and a hammer. Before replacing the front gearbox shank seal on a Niva, turn off the gear and turn off the engine, drain the oil from the front axle crankcase and disconnect the Chevy front propeller shaft from the drive gear flange of the front axle gearbox. Remove the housings of the internal hinges of the front wheel drives from engagement with the gears of the front axle reducer axle shafts. Determine the moment of resistance to rotation of the drive gear flange nut and replace the oil seal. Install the removed components and parts in the reverse order of removal and fill the gearbox with oil.
Device
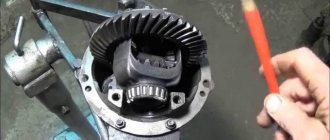
The unit parts are housed in a durable metal case that protects the mechanism from damage. Gear oil is used to lubricate rotating parts.
The force of the propeller shaft, screwed to the flange on the shank of the unit, is transmitted to the drive gear. Next, through the satellites, the torque is distributed between the axle gears (left and right).
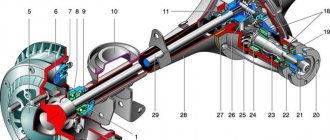
The gearbox mechanism also includes bearings, nuts, gaskets, and adjusting rings. Plugs are provided for filling oil and removing waste into the housing. The drive gear, like the axle shafts, is equipped with oil seals that prevent transmission leakage while the vehicle is moving. The figure shows the gearbox design in detail:
Replacing the bearing and oil seal of the housing of the internal joint of the front axle drive of a Chevy Niva
Before starting work, prepare a hammer, a bit, a circlip remover and sealant. To replace the bearing and oil seal of the inner joint housing, you will need to remove the front wheel drive and then
Remove the bearing retaining ring, using a hammer and a wooden spacer, knock down and remove the housing and bearing from the shaft
Using a hammer and chisel, remove the front wheel inner CV joint oil seal.
Lubricate the working edge of the oil seal with transmission oil, and apply a thin layer of sealant to the outer surface
Then, using a hammer, carefully press the oil seal into the body, install the removed parts in the reverse order of removal, and if necessary, replace the old Niva Chevrolet CV joint bearing with a new one.
Control and adjustment of gears
This stage is considered very important for the assembly of a spur gearbox. During the inspection, the error of the work performed is determined, and the gaps necessary for long-term operation of the device are established. These are the final stages of assembling a spur gearbox. They include 3 operations:
- Checking and adjusting the runout of gear wheels.
- Assessment of the contact patch of teeth in gear mesh.
- Setting lateral clearances in engagement.
Control of the contact spot of the gearing is carried out with paint. The teeth of the smaller diameter gear should be lubricated with a thin layer of paint, and then slowly turned 2-3 turns. The presence of a displacement of the contact spot indicates a change in the distance between the axes or an axial misalignment. The problems listed above can lead to premature equipment failure.
The parameters of the contact patch are determined by the degree of accuracy of the gearing. In terms of tooth height, it should be from 30 to 75%, and in length - from 30 to 95%. An increase in percentage means an increase in gearing accuracy. The side clearance is determined with a feeler gauge. After installation and adjustment, the mechanism must be checked for smooth operation and noise. Eliminate problems by re-adjusting or replacing defective components.
Removal and installation of the Chevy Niva front axle gearbox
The Niva Chevrolet front axle gearbox is removed for replacement or repair. However, disassembling, adjusting and assembling the gearbox requires the use of special equipment and requires the skills of the performer . Repairing a Chevrolet gearbox in a garage almost never leads to the desired result. Therefore, if it is necessary to repair the gearbox, use the services of a specialized workshop. In order to remove the gearbox, prepare a 13, 17, 27 wrench, a 12 hexagon, a socket wrench, a chisel, a hammer, a syringe for filling transmission oil and a container for oil.
Remove the front wheels and drain the oil from the front axle gear housing. Disconnect the front driveshaft from the front axle gearbox
Unscrew the nut and remove the bolt securing the left bearing cover of the Niva Chevrolet front axle gearbox to the cross member of the front suspension. Remove the right front wheel drive and unscrew the three nuts securing the left drive inner joint bearing cover to the front axle gearbox
Turn the steering knuckle so that it pulls the drive, disconnect the gearbox from the drive and remove it. Installation of the Niva Chevrolet front axle gearbox and the removed parts is performed in the reverse order of removal, after which fill the gearbox with oil.
Symptoms of a problem
Mechanism breakdowns most often manifest themselves in the form of extraneous noise or oil leakage. Let's look at the most common problems that arise with the front axle gearbox and how to fix them.
Increased noise while driving occurs in the following cases:
- The inner joint or differential bearings are worn.
- Gears are damaged.
- There is not enough transmission oil in the crankcase.
- The differential gears or bearings are not adjusted correctly.
To eliminate the malfunction, you need to check the transmission level and, if necessary, top it up.
You should also adjust the bearings and gears, as well as set the correct clearances and tightening torques. Worn and damaged parts must be replaced.
Noise during engine braking or acceleration occurs due to loose flange nuts or improper adjustment of bearings and gears. This problem can be eliminated by adjusting the gaps and tightening torque.
Also, noise during engine acceleration and braking appears as a result of wear of one or more bearings. Then they need to be noticed.
A knocking sound when starting to move is a consequence of wear on the holes for attaching the axles. It will disappear after replacing the differential box. Sometimes you have to change the gear axes at the same time.
Oil leakage is evidence of worn oil seal seals, loose crankcase cover or damaged seals. If a leak is observed from under the gasket, you need to replace it and tighten the threaded connections. Transmission oil leakage in the shank area is eliminated by replacing the oil seal.
