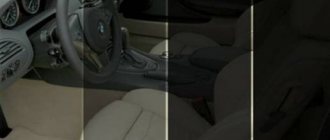
Conventional mechanical window regulators are a rarity on modern cars, but there are still a huge number of old cars on the streets that have a handle, not a button. In order to make life easier for owners of VAZ cars, I will say that the markets sell the necessary standard electric window lifters, so you can easily replace old mechanical devices with them.
Articulating electric windows are the most convenient and durable choice for VAZ owners. The only thing you will need to pay attention to when purchasing is the configuration. It happens that the kit is missing wiring, plugs and buttons, and there is no diagram of the mechanism itself.
Connecting power windows VAZ-2109
Owners of a VAZ 2109 car can replace power windows with electric windows. On 2109 cars, electric windows can be connected via standard wiring, which already has everything provided for connecting an ESP.
This circuit is used to connect ESP on more “rich” configurations of the nine and it is advisable to use it when connecting independently. Below are diagrams for connecting an ESP with fuse blocks of new and old models.
Wiring diagram for power windows on a VAZ 2109 with an old-style mounting block (17.3722):
- 1 - Mounting block
- 2 - Ignition relay
- 3 — Ignition switch
- 4 — Right door electric window motor
- 5 — Left door electric window motor
- 6 - Right door power window switch
- 7 - Left door power window switch
- K7 - Power window power relay
- A - To terminal “30” of the generator
- B - To the wiring harness block connected to the heater lever illumination display
- B - to the heater lever illumination display
- G - conventional numbering of plugs in the gear motor block
Re-equipment of the "nine"
If you were driving a car that had electric windows installed, and even more so if you spent a long time behind the wheel, then in the future it will be difficult for you to do without electric windows. You get used to good things quickly, and to good and comfortable things even faster. But since the ninth model Lada car does not initially provide for the installation of electric windows, and every self-respecting owner of an always up-to-date “nine” wants to get such control, especially for this case it will be described here how you can independently equip your swallow with electric windows.
Installing them using a circuit diagram is not that difficult because the connection is made in the same way as connecting any other electronic device in the car's circuit. Replacing a window regulator on a VAZ 2109 is not such a difficult matter. It is all the more simplified by the fact that they are produced by domestic manufacturers specifically for domestic cars, which were not originally provided with such a function. Moreover, at the time when these cars were produced, no one dared to dream about power windows: times were harsh, and only representatives of the ruling elite could use luxury and technology.
The installation of electric windows on a VAZ 2109 can be done by anyone, regardless of the level of skill and knowledge of the installer. To successfully complete this task, you just need to have a rough idea of how the car is built from the inside and how its electrical network is equipped.
The power window connection diagram will help you do everything correctly.
ESP diagram VAZ 2110, 2111, 2112
- 1 – mounting block
- 2 – ignition switch
- 3 – right front door power window switch
- 4 – right rear door power window switch
- 5 – electric window motor reducer of the right front door
- 6 – electric window motor reducer of the right rear door
- 7 – electric window motor reducer of the left rear door
- 8 – electric window motor reducer of the left front door
- 9 – left rear door power window switch
- 10 – left front door power window switch
- 11 – relay for turning on electric windows
- A – to power supplies
- B – to the instrument lighting switch
- C – conventional numbering of plugs in power window blocks
The power window relay for this car is located in the mounting block. On the left under the panel in the fuse box on the additional connector.
Types of ESP.
Window lifts can be divided into several types:
- 1. Cable ones, which are characterized by a leisurely mode of operation. Their main advantage is their low cost and the ability to replace the motor if the standard one fails.
- 2. Articulated-lever. Characteristic features are fast operation, low noise level, and high power. An indispensable option when dealing with frozen glass.
- 3.Rack and pinion. Quite weak systems that also require regular lubrication for full, trouble-free operation.
Based on the list of types of glass lifts, it is worth saying that the choice almost obviously falls on the articulated-lever version.
By purchasing this, you will receive the following parts with the kit:
- electrical wiring
- stubs
- buttons
- fastening elements
- Rubber-type cuffs in order to route the wiring inside the car doors.
Window lifter diagram for VAZ-2115, VAZ-2115
Power windows for front doors for VAZ-2115, VAZ-2114 cars (usually power windows are installed only on front doors).
1 – mounting block; 2 – power window switch for the right front door; 3 – gear motor for the electric window of the right front door; 4 – motor reducer for the electric window lifter of the left front door; 5 – power window switch for the left front door; 6 – ignition switch; K5 – relay for turning on electric windows; A - to power supplies; B - to the external lighting switch.
Removing old window regulators
- Disconnect the negative connection to the battery or use the ground disconnect button.
- Next, carefully remove the door trim. It is fastened with plastic pistons, so there should be no problems: we pry the edge near the piston and pull. As a last resort, replace the broken fasteners with new ones (they cost pennies).
- Before removing the window lifting mechanism, place the glass in a position in which there is free access to the mounting bolts through the technical hole in the door, and secure it with regular tape.
- Unscrew the bolts that secure the glass.
- At the bottom of the door, unscrew the guide nut.
- Near the window lifter handle, unscrew 3 more nuts. After this, you can remove the mechanism from the door cavity through the largest opening (pull it up).
Serial connection - diagram
We connect the output of additional button 1 in the driver's door to input 6, and output 7 to input 3 of the main button on the passenger door. We cut the wires in the block connecting contacts 5-6 and 6-3. The minus of contact 5 now goes only to the backlight, and contacts 6 and 3 now take output from additional buttons 1 and 7 of the driver's door. Installation in parallel will result in short-circuiting during lifting and lowering. Power wires are highlighted in bold.
When using trigger buttons, connect all ESP motors only through a relay. When using a conventional door closer, relays are also needed, since they are not in the long-press closer block and all the current flows through the buttons and wires from them.
Window lifter design
Drive types
Let's start with the drive mechanism, as already noted, it comes in two types - mechanical (also known as manual) and electric.
- The mechanical one is a small gear reducer. With this type of drive, a cable actuator is usually used. Therefore, such a gearbox consists of two gears that mesh with each other. The drive gear is small in size, and it is the one that the driver rotates using a handle mounted on the door. The driven one is much larger in size; it is a drum for winding the cable. Due to the different sizes of these gears, relative ease of opening and closing the glass is achieved.
- An electric drive also uses a gearbox, but of the “worm-gear” type. There is a worm on the electric motor shaft, which is engaged by a gear. The drive motor itself is of a reversible type, that is, when the polarity is changed, its direction of rotation changes, which allows the use of just one element to both lower and raise the glass. This drive is used with all types of actuators.
Parallel connection - diagram
Wires from the main button next to the driver's ESP motor go directly to pin 88 of the relay and from pin 30 directly to the engine, and long wires from the backup button go to pin 85 of the relay winding, and the relay feeds a powerful plus to the passenger's ESP motor. A parallel connection for power buttons is preferable, since there is no need for a relay on the main (passenger) button, thereby eliminating unnecessary relay clicking when the main button on the passenger door is operating.
Window lifter options
According to their design, electric windows (ESP) are divided into three main types:
- rack and pinion window lifters. The devices are not very powerful, plus they require systematic lubrication. If this is not done, their service life is significantly reduced;
- Cable window lifters. Their main advantage is their low price. In addition, changing the motor on such a window lifter will not be difficult (since it is easy to find on sale). They are inferior in power to rack and pinion lifts, which is especially noticeable when the glass freezes to the door in winter;
- finally, the windows are lever operated. Among car enthusiasts they are considered the best option: powerful, fast and almost silent during operation. These are the ones that will be discussed below.
The most popular among lever ESPs are the “Granat” lifts. Their popularity is due to two factors: a fairly affordable price and good equipment. Along with the ESP, the driver receives wiring, fasteners, cuffs and plugs.
Lever window lifters "Granat"
Scheme for any number of buttons and doors
Here you can place any number of buttons in parallel and simultaneously press them in different directions - a short circuit is impossible from the circuit design. In a situation where we press the up button on the main button, and the down button on the backup button, it will simply stop, since both power lines will have the same potential. The advantage of the circuit is that the power switching is in one place, there are no losses in the harnesses and on the buttons, there is a minimum of “pulling” of wires - 2 in total per channel + ground.
Let's start installing the new system.
To attach the new electric windows of your VAZ 21099 or 2109, you do not need to drill any additional holes for fastenings, because the standard ones are completely suitable for you, and this is a huge plus. The mechanism must be placed in the inner cavity of the door, where it is installed through a technological hole that is formed , when the glass position is at the “open” indicator. The system is secured to the studs, which in turn must be inserted into the holes that previously served to secure the guide in the middle. Combine these parts and tighten with nuts. At the moment, we are faced with the task of combining the fastening of the window regulator on the glass and the fastening on the control panel. This operation is done by supplying power to the motor contacts. After aligning the window lifting system mechanism and the strip on the window, you can secure the connections with a set of bolts. Lubricate the system if necessary.
Glass closer Pandora DWM
Connection diagram for the passenger door button in series through a duplicate button on the driver's door. Contacts 1-6 and 7-3 are always normally closed. When you press the up button, contacts 1-6 open and 1-2 close (window rises). When you press the down button, contacts 7-3 open and 7-2 closes (window down). The 30th contact of a 5-pin relay, without supplying voltage to the winding contacts, is constantly shorted to contact 88, which gives us the necessary negative contact (works like a switch). If voltage is applied to the winding, then contact 30 is disconnected from contact 88 and connected to contact 87. Contact 86 of the winding is connected to ground.
Lada 2114 › Logbook › The problem with the passenger window not working has been solved
Good day to all.
Almost immediately after I switched to 2114, I encountered the problem of the window regulator on the passenger side not working at times.
It looked something like this:
Due to the fact that this happened mainly after washing.
I began to sin because the door was somehow miraculously flooding. I start the car, the power window doesn’t work, I drive it, I press it... it’s just miracles. A Google/drive search revealed several possible reasons: 1. Wire break or short to ground at the point where the wires pass from the passenger compartment to the door, 2. Failure of the window lift motor/gear wear on the mechanism.3. Malfunction of the button The blown fuse was dismissed immediately - everything is fine on the driver’s side. Yesterday I had a free evening, I began to disassemble the trim. I examined all the possible wires in the door and was ready to look further, in the corrugation, but... There are two wires in the door connected through a white connector (the wires themselves are white and blue, the photo shows what they look like.
It was discovered that one of the wires on one side had come out of the chip, so, apparently, while jumping on bumps, the contact appeared and disappeared. Therefore, if you encounter a problem of this kind, first check all connections, this way you can get by with little damage)
__________________The 2113 had a tuned radiator grille.
It so happened that before selling it, I installed the factory one I had bought at a disassembly, but this one was left gathering dust + was not in excellent condition, with broken fasteners. I began to make a blind grille out of it (and possibly with holes, and possibly with a mesh). Stretched vertically. to give it a more even shape. I covered it with fabric and doused it with epoxy. Let's see what happens. Peace for everyone.
Installation of electric windows on a VAZ
The procedure is performed in the following sequence:
- temporarily remove the glass seal located on the inside of the door;
- remove the glass, and then dismantle the window regulator fastening mechanism;
- we install devices that will operate from an electric drive;
- connect the negative terminal to the battery and check the operation of the new window regulator;
- We install the glass in place and trim the door.
Unlike conventional mechanical devices, power windows are not equipped with traditional gear reducers, but with a special drum. The shaft of a DC electric motor is inserted into its hole located in the center. In this case, the motor is only a component of the gearmotor, on which, as we found out earlier, the speed and quality of raising and lowering the windows depends.
Installation of the lifting device is quite simple. It starts with disconnecting the battery. After this, use a curved screwdriver to unscrew 3 screws, unfasten the door trim latches and remove the door pocket. Using a thin screwdriver, pry off the handle (latch) of the window lifter - the tip of the tool is inserted into the recess between the latch and the socket.
The handle itself is removed. At the next stage, the car door opening handle is dismantled. To do this, use a screwdriver to pry the handle cover and remove it. Now use a screwdriver to remove the 2 fastening screws that were hidden by the cover plate. After this, the handle can be removed without much difficulty. Using a screwdriver, you can also remove the power window button, which serves to lock the door.
Mechanical glass lifting devices
Structurally, VAZ mechanical lifts are made simply, their parts are inexpensive, installation is simple, and they do not require power. The operating principle of such a mechanism eliminates the possibility of involuntary raising or lowering of the glass. The downside is the need to spend time and effort adjusting the glass height and the inability to close all windows at the same time - you will have to turn the handle on each one.
When raising and lowering the windows of a VAZ 2108 becomes a problem - the handle turns with difficulty, the window moves heavily, or even gets stuck in one position - you should check the condition of the window regulators. To do this, they are disassembled.
- The window is lowered all the way down, the upholstery on the doors and the rear view mirror located outside are carefully removed.
- Afterwards, the external and internal glass seals are removed from below and, after removing the holders, the protective door film is removed.
- Remove the seal from above.
- By turning the handles, the glass is positioned in such a way that you can reach the bolts securing the glass to the lift slide in the VAZ 2108.
- After unscrewing the bolts, lower the window down.
- Unscrew the fasteners of the VAZ 2108 glass lifting device guide.
- After unscrewing the nuts of the upper and lower guides, supporting the glass lift, pull it out of the door.
When purchasing a new mechanical window regulator, you should be sure to pay close attention to the markings: the bracket should be marked “2108”. Different VAZ models have different window lifting mechanisms. In the marking of the part, the sides are encrypted before the dash: 10 - installed on the right, 11 - on the left.
After repair or replacement, the window regulators are installed in place, the cable and mechanism are lubricated with a special penetrating compound. Subsequent door assembly occurs in the reverse order.
Mechanics most often break down due to worn parts or mechanical damage. These include breaking the cables or getting a foreign object into the guides. As practice and reviews from experienced VAZ 2108 car owners show, gears most often become unusable - their teeth wear out or break. Since these parts are inexpensive and sold everywhere, replacing them is quite easy.
Detailed replacement of window regulators
- From the interior side, you need to remove the handle and remove the “soap dish” located under the door handle itself.
- Carefully unscrew the mounting bolts and dismantle them. Do not damage the plastic latches.
Note! If several latches are broken, they must be replaced with new ones. Otherwise, rattling will be observed in the cabin.
- Now, one by one, remove the plugs, the handle and its lock. You should also unscrew the bolts from the handle and remove the “pipe”.
- As a rule, manual window lifters are secured with 7 nuts and a pair of bolts that secure the device to the glass. In this case, you need to remove all the bolts and remove the device from the door. Since there is a risk of glass breaking during the change process, it is recommended to secure it with a cable.
- The guide bolt of the old window lifter is removed, as well as the bolts of the bracket for raising the glass through the door hole. The same applies to the lower mounting bolt of the SP slide.
- After unscrewing all the necessary fasteners, you can safely remove the mechanical device.
- Now you need to pay attention to preparing the new window lifter, as well as installing the correct brackets.
- Temporary wiring from the battery is currently being installed to the door. It may be required to regulate the ESP in order to prevent sticking and biting of the glass when lifting and when fixing the device to the glass.
Note! You need to be extremely careful not to allow short circuits in the wires.
- To get inside the door, you first need to install it in the folded state, since there is a risk that it will not fit.
Note! At the time of purchase, the device is in an unfolded state. In this case, you need to connect it with temporary wires, only after that, changing the polarity, the rail is brought into the middle.
- The ESP is mounted in place of the old lift, the SP studs are inserted into the door holes and secured with several nuts.
Note! The studs are not driven in, but attached, since then you will need to screw the lift to the glass, which requires some adjustment.
- The lift rail is raised, so it becomes possible to align the holes with all the glass mounting holes, only then the joint is screwed into place.
- The glass is lifted and the smoothness of the work is monitored; even the smallest distortions and jams are not allowed. If this cannot be done, most likely you need to loosen the fastening of the joint venture directly to the door. Turn the fasteners left or right, re-tighten the nuts and check the operation of the installed window lifter.
Note! In some situations, such actions make the joint venture work worse, then you will need to turn the mechanism in the opposite direction.
Determining the location of control buttons
For these actions you will need a ruler, pencil, file and hand drill:
- First, drill a hole in the casing. You can’t rush in this matter, it’s better to make the hole smaller, sharpen it and try on the button. If it doesn't fit, you need to sharpen it again.
Note! The wires must not be short-circuited; it is advisable to disconnect the “-” terminal of the battery at the time of work.
- The plastic of the front pillar is dismantled and the interior trim is folded back.
- Several meters of two-core wire are passed through this stand directly into the door. It is also required to conduct a single-core wire according to this principle.
- Since the wires rot and break after a while, you need to install casings between the door and the stand. As a rule, when the ignition is turned off on the “nine”, only the cigarette lighter and side lights work.
- Once the wiring is all the way through, it's time to connect it. To do this, you need to have an appropriate diagram available.
- At the end of the work, you need to check the functionality of the entire mechanism. Place the terminal on the battery, press the button, evaluate the efficiency of the new ESP and the lighting of the backlight on the button.
Note! If the joint venture is working too slowly, you need to try switching the “+” wires.
All resulting connections are wrapped with electrical tape, while the wires themselves are hidden in a niche in the cabin. This must be done in order to prevent them from being pinched by the ESP rail. You can install a button in the door trim of a VAZ 2109, connect the block and mount the trim in place. All removed elements are installed in the opposite order of removal and the functionality of the power windows is re-checked. Of course, ESP is an important part of the machine, but it is not necessary to turn to professionals to install them, since videos and photos on the Internet reveal all the intricacies of installing the mechanism with your own hands. For a better understanding of the replacement process, detailed instructions are provided with a description of each stage. To obtain the desired result, it is important to purchase a high-quality mechanism, the price of which may vary depending on the manufacturer.
Every car owner of this car should know how to connect power windows to a VAZ 21099. Initially, you will need to dismantle the old mechanism. As for choosing a power window, auto mechanics recommend buying a Berkut brand device.
Replacing mechanics with electrical devices for glass lifting
VAZ 2108 owners often improve their car, fortunately there are many opportunities for this. In particular, mechanical basic windows are being replaced with electric ones. Electric windows are operated by a reversible electric motor. To raise/lower the glass, you need to press the button, which starts the mechanism. Their design is more complex, allowing you to simultaneously close or open all the windows in the car, which can be very convenient. But they require uninterrupted power supply, and certain types of mechanisms can be triggered by accidental pressing.
Built-in electric windows are conventionally divided into two groups:
- the first includes simpler ones, they consist of a motor with transition elements that, through electricity, drive the basic mechanism of an ordinary lift;
- The second category includes autonomous mechanisms that are installed instead of basic ones.
Depending on the types of mechanisms, the scheme of their operation may be different for different models: lever, cable or worm types are distinguished. Also, lifting mechanisms are universal (suitable for any model). Installation of the latter is recommended for inexperienced drivers to gain repair experience.
The first stage is the purchase of an electric lift for the VAZ 2108 either in a car store or at a car market. In addition, you will need brackets, adjustment buttons, plugs, and mounting material. They disassemble the door and pull out the basic mechanism, as described above. Next, the new lift is “folded” a little for convenience and brought into the door. Carefully put the mechanism in place of the previous one and begin to secure it. The bar is raised to the bracket on the glass, then the structure is connected with bolts. To do this, you can connect the lift motor to the battery.
Main characteristics
The VAZ 21099 “Berkut” window regulator is equipped with a metal mechanism with articulated levers. This design allows you to raise the windows both on the VAZ 21099 and on other domestic and European brands of cars. It should be noted that such a mechanism is equipped with a modern geared motor PT-060. Its assembly is carried out in Izhevsk using new Swiss technology. These electric windows are equipped with:
- wiring numbered according to the electrical diagram;
- switch buttons;
- decorative plugs;
- additional fasteners;
- rubber transition cuffs.
Start installation
You need to start installing window lifts by choosing the mechanism itself. Today we have three versions of this device. Everyone has their pros and cons.
For those who have already installed modifications on cars, it will be no secret that without the correct circuit it is difficult to do this. When installing any electrical device, first of all you need to correctly connect all its contacts and power supply in order to avoid possible disconnection and broken connections in the future.
Step-by-step instruction
The cable is being replaced
Let's consider the procedure in detail. Initially, turn off the power from the battery. Otherwise, it is recommended to remove the fuses for the cigarette lighter and vehicle lighting circuits. Then the door trim is dismantled. This process is easy. For beginners, it is recommended to use a universal pin remover. To remove the standard glass raising mechanism, you will need to fix the glass in a certain position.
To do this, use available materials, including tape. The next step involves removing the rubber plugs from the holes for the cable outlets and the side trims under the panel instruments. If necessary, the side upholstery cannot be removed. You can also gain access through special openings. In this case, broaching is used. It is inserted into the channel of the stand.
Then the adjustment plate is attached to the glass bracket using M6 bolts. You will first need to install it in the inclined groove. Before connecting the window regulators to the VAZ 21099, you will need to insert the folded mechanism into the upper hole. It is secured with 3 M6 nuts and lock washers. The screw is installed in the middle hole.
Then you will need to remove 2 decorative plugs located on the front panel. To do this, disconnect the wire from the cigarette lighter. The cable is pulled through the holes in the doors and their pillars. It must be taken into account that these wires and those that go to the electric motor should not come into contact with moving parts of the system. The wiring is secured with electrical tape or tape.
Before connecting the power windows to the VAZ 21099 completely, power is supplied from the battery and the side lights of the vehicle are turned on. If the backlight of the mechanism switch does not light up, then you will need to swap the sockets on the contacts and switches. Then the lights turn off.
Possible malfunctions and ways to eliminate them
In the case of mechanical joint ventures, there may not be so many faults; all of them are caused by mechanical damage to the system. For example, this could be wear of rollers, brackets, cable breakage, etc. The situation is much more complicated with electrical systems, since they are equipped with more complex elements. Signs of ESP malfunctions include either complete failure of the power windows, or their insufficient operation, as well as noise.
For what reasons can malfunctions occur:
- Damage to the connection wiring, cable break, insulation breakdown. If the wiring is damaged for some reason, then the ESP electric motor will not be able to receive a signal to open or close the glass. In the case of an insulation breakdown, current leakage is possible, so the ESP will operate too slowly or intermittently. Sometimes the cause is due to insufficient contact between the electrical circuit and the device. Damaged wires need to be replaced with new ones; if the contacts have oxidized, then they need to be cleaned or also replaced.
- Failure of the system electric motor. If the gear motor breaks down, the ESP will refuse to work at all; such a malfunction usually manifests itself after several years of intensive use of the devices. You can try to replace or repair the drive itself; the complexity of the repair depends on the malfunction.
- Problems with the operation of the control unit on which the buttons are located. If all ESPs refuse to function at once, this may indicate that the control module has failed. It is possible that the reason is a damaged contact with the vehicle’s on-board network; the circuit located inside the unit is also susceptible to malfunctions. If it happens that only one ESP or several do not work, then most likely the fault should be looked for in poor contact of the control key with the electrical network. It is necessary to check for possible presence of oxidation and remove it.
- Burnout of the safety device that is responsible for the operation of the ESP. This part can be located in the corresponding block in the engine compartment or on the power supply circuit from the power windows to the battery. If the reason lies in burnout, then the device must be replaced.
- Wear of rollers or gears. Malfunctions of this type are associated with long and intensive use of ESP. Over time, gear teeth can become damaged due to wear; usually such devices cannot be repaired, they only need to be replaced (video author - Sanya Kachan).
The final stage
Installation of electrical control system
The lever system is moved to a convenient position for fixing the glass. The mechanism is then connected to the adjustment plate and glass. The nuts are tightened. You can move the lever system to a position convenient for fixing the glass if you use an alternative power source. It is better to give preference to a double wire and a standard car battery.
It is possible to decide how to connect the power windows on a VAZ 21099 using the wiring diagram for the “nine”. In any case, the functionality of the mechanism in question is checked using the method described above. When the glass comes out of the grooves of the guides, you will need to loosen the nuts that secure the adjusting plate.
The short guide is then secured into the top hole. If the glass moves with a certain force, a cutoff occurs. In this situation, the nuts that secure the plate are loosened. To do this, attach a short guide to the hole below.
When moving glass from the lower extreme position to the upper one, you must take into account that it should not come out of the guide grooves. A similar procedure is carried out 2-3 times.
Then the fastener is fixed. The process related to how to connect a window regulator to a used VAZ 21099 involves the use of silicone spray. In this case, the glass will fit into the seals without problems.
You have a "nine". During the production of this model, the plant did not install an electric window - with rare exceptions. This publication discusses in detail the installation of electric windows on the VAZ 2109. As for which ones to take, experienced car enthusiasts are inclined to favor the products and “Granat”.
There are three types of similar parts:
- cable
- the cheapest option, therefore the worst (the windows rise and fall slowly, if the glass freezes, the cable may break and the drive will fail) - rack and pinion
- can also break if the glass freezes; you also need to constantly lubricate the mechanism so that it does not jam; - hinged-lever
- the most expensive option, but also the most optimal, because the glass moves quickly, does not make noise during operation, and will not break, even if the glass is frozen.
Also choose window regulators, the kit of which, in addition to the electric motor, also includes: wiring, buttons, a plug, the necessary fasteners and rubber cuffs. The latter will come in handy when you run wiring from the rack into the door.
Now let's get to the main topic of our story...
Possible mechanical problems
If it becomes clear that the electric current normally reaches the electric window motor, but the windows still do not move, then most likely something is blocking it. Sometimes the problem is a faulty electric motor.
Most often, the source of breakdown of the electric window motor is sticking of the brushes of the electric motor drive. This breakdown is checked quite simply - you need to turn the ignition key, press and hold the power window button and at the same time lightly hit the door with your fist. The problem will be confirmed when the glass begins to rise. To eliminate this malfunction, you need to dismantle the motor casing and the rotor of the electric motor. Then use sandpaper to remove the deposits.
It happens that the window does not go up, but when you press the button you can clearly hear a buzzing sound. Most likely, this is a jamming of the window lift mechanism. Often the cause is a worn plastic gear located in the gearbox. The problem is solved by replacing this gear.
If there is a loud noise when the windows are raised or lowered, there is a possibility that the window lift bearings have failed. It is located in the gearbox of the electric motor, and it is better to replace it.
Sometimes the window regulators do not work even if the motor is replaced. And if noise is also heard, then this indicates that the cable needs to be replaced. There is also a problem with the cable in the case when the glass opens, but cannot close (but it moves with the help of your hands). Most likely, this cable is either torn or has come out of the guide grooves.
It is possible that the glass does not rise, but jerks in an attempt to start moving. Most likely this is due to the glass being skewed. Sometimes a foreign object gets onto the rail or roller. It needs to be disassembled and removed.
It happens that there are no special problems with the design of window regulators. However, you notice that something is wrong. The movement of the glass may have slowed down. Then it is best to disassemble the system, adjust the glass and preventively lubricate all mechanical elements. A kind of regular inspection.
As already noted, the VAZ 21099 is a budget car. And almost all faults in it can be repaired with your own hands. We hope that this article will help, at a minimum, determine the direction in which to move in the event of a breakdown.
How is electric windows installed on a VAZ 2109?
1. Disconnect power from the battery. It happens that for certain reasons this is impossible to do. Then turn off the power supply to the cigarette lighter, instrument panel lights and buttons. This is where you will connect the power window wiring.
2. Remove the door trim.
3. Secure the glass (you can use tape) so that it does not fall when you remove the window lift mechanism.
4. Remove the manual window lift mechanism. This is done like this:
- the bolts securing the door glass to the window lift mechanism are unscrewed;
- find the mechanism guide - it is secured with four nuts;
- First, the lower nut is tightened, then the two in the middle and the upper one;
- now unscrew the three nuts that secure the window regulator in the place where the rotation handle is located;
- After this, the mechanism is removed - if the top fastening gets stuck, just press it with a screwdriver and pull.
5. Install a new power window. This is done like this:
- the mechanism is placed inside the door - it needs to be pushed through the largest hole;
- and is secured with two studs - they must be inserted into the holes where there used to be two nuts in the middle that secured the manual window lift guide, and secure them with nuts.
6. Align the fasteners on the power window linkage and the glass. To do this, supply power (for example, from a battery) to the contacts of the drive motor. Once the fasteners are aligned, secure them with the bolts that come with the electric drive.
7. Well lubricate all surfaces that rub during operation.
Now all you have to do is connect the power window to the electrical system of the VAZ 2109. But that's another story. And if you don’t understand anything about it, then it’s better to invite an electrician you know. He will do it in five minutes. And you will save time and save yourself from problems that could arise if you did something wrong.
Connecting power windows yourself
- Connecting power windows yourself
- 1. Let's get acquainted with the main characteristics of the standard design of a car window regulator.
- 2. What tools are needed to properly connect the power windows?
- 3. How to connect power windows without outside help: step-by-step instructions.
- 4. Power window button: connection features.
We are all accustomed to the fact that the side window in a car door can be very easily lowered and raised by simply pressing a button. However, when you simply press it, a very complex process occurs inside the door, carried out by a special device called a window lifter. For various reasons, sooner or later it may fail, so every car owner should be prepared for the fact that it will have to be replaced with a new one.
But if installing a regular mechanical window regulator is not at all difficult, then connecting an electric window regulator to the electrical network is a more difficult task. But so that you do not have any difficulties in this matter, we will tell you in detail about the features of this process. So, the most important thing is to stock up on knowledge and confidence that you will succeed.
Let's get acquainted with the main characteristics of the standard design of a car window regulator.
In general, the window lifter mechanism is no different either on domestic cars or on European brands. Also, there is not much difference between a mechanical device and an electrical one. Its basis is a metal mechanism with levers connected to each other using hinges. If we talk about the electric window lift, then most often this mechanism is equipped with:
— wiring, which must be numbered in accordance with the electrical diagram;
- buttons that act as switches;
— decorative plugs that hide the unsightly mechanism of the button from human eyes and make it convenient to use;
— transitional cuffs, which are made of rubber for convenience and safety.
Although at first glance at the electric window lifter you will not see anything complicated in it, you are unlikely to be able to figure out how to connect it without using special instructions, which must be included. True, some manufacturers offer instructions for installing and connecting a power window in the form of a technological drawing, which is also quite difficult to understand. In this case, all you have to do is either contact specialists at a service station, or read our article to the end and get to work yourself.
By the way, you should take into account that all the necessary manipulations with one door will take you about 2-2.5 hours. So immediately be patient.
What tools are needed to properly connect the power windows?
First of all, do not forget to purchase the window regulator itself, which you want to replace the old and faulty one with. We think you shouldn’t have any problems with this, since similar devices are sold in every car dealership. The main thing is not to be fooled by cheapness, since it may hide ordinary Chinese counterfeit goods. But, in addition to the main device, you need to prepare the following tools for connection:
- a set of screwdrivers, which must include a Phillips and a slotted one;
— a set of keys (most likely, you will need keys for “8” and “10”);
However, we should not forget about consumables, without which no fastening or connection can be considered reliable:
This is interesting: How to disassemble a spark plug
— special silicone grease;
— adhesive tape (wide construction tape, not stationery tape).
How to connect power windows without outside help: step-by-step instructions.
Before you start working with the car's electrical network, you need to take care of your own safety and, of course, disconnect the power from the battery. In any case, it is necessary to at least remove the fuses from the circuit that contains the cigarette lighter and all car lights. Next, we can begin directly connecting the window regulators:
1. We dismantle the door trim, the window regulator of which we are going to connect to the electrical network. If you are not familiar with this process, we recommend that you use a special puller that will help you quickly and easily remove the fastening pins.
2. Before removing the mechanism itself, which is responsible for raising the glass, the latter must be fixed in a certain position. The most practical way to do this is to use tape, which will be very easy to remove later.
3. To ensure that nothing interferes with our work, we immediately dismantle the rubber plugs. You will find them in the openings intended for cable outlets, as well as near the side trims directly under the dashboard. Unfortunately, you will not be able to remove the side panel. To gain access to the "guts" of the car that are located behind it, you will have to use a broach by inserting it into the channel of the pillar.
4. We attach the adjusting plate, which must first be installed in the inclined groove. This must be done using bolts numbered M6. It is attached directly to the glass bracket, so you should be careful when performing this process.
5. Insert the entire folded power window mechanism into the upper hole. It must be securely fixed using the same M6 nuts in the amount of 3 pieces, as well as lock washers. A screw must be installed in the middle hole.
6. We are dismantling two decorative plugs from the front panel, for which it is necessary to disconnect the wire from the cigarette lighter. After this, you can stretch the cable, which runs through the hole in the door and its pillars. It is very important to do this in such a way that neither the cable nor other wires in the car door come into contact with the moving parts of the window regulator. Therefore, the wiring must be securely secured with electrical tape (or tape).
7. Now we need to check whether we have connected the contacts to the switch correctly. To do this, you need to supply them with battery power, and also turn on the car's dimensions. If everything is done correctly, the power window switch light should come on. What to do if it doesn't light up? Just swap the sockets that are located on the contacts and on the switches. After this, the backlight should light up.
8. We are working on the lever system. It must be moved to a comfortable position that would allow any position of the glass to be fixed without any problems.
After this, you can begin to connect the mechanism with the adjusting plate and, accordingly, the glass. We tighten all the nuts firmly so that no fastening becomes loose while the car is moving.
A little advice. To quickly move the lever system to a position convenient for fixing the glass, you can use an alternative power source. The easiest way to do this is with a double wire and a standard car battery.
9. Now we begin the actual process of connecting our electric window regulator to the car's electrical network. To do everything correctly, you must use the wiring drawings of your car model and, of course, the instructions for connecting the mechanism that were sold along with it. After following all the instructions in the instructions and checking everything with the diagram, be sure to check the functionality of the mechanism.
10. If you are not entirely satisfied with the way the window regulator works, this can be corrected with a simple adjustment. For example, if the glass comes out of its guide grooves, loosening the nuts with which you secured the adjusting plate will help correct the situation. The short guide must be fixed in the upper hole. If the glass moves with a certain force, after a similar loosening of the nut, the short guide will need to be fixed in the lower hole. To finally make sure that the connection of the window regulators was done correctly, do not be too lazy to carry out this procedure 2-3 times.
11. All that remains is to securely fix the fasteners. To do this, you can use a special silicone spray. If everything is done correctly, the glass will fit into the seals without the slightest delay.
We reinstall the car door trim and again check the functionality of the mechanism we installed and connected, but only after installing the window lifter button first. We continue to talk about this further.
Power window button: connection features.
Special attention should be paid not only to the installation of the window lift mechanism and its connection to the electrical network, but also to how the window lift button is connected. It is convenient to place it directly next to the driver’s seat, so that he can open the windows for ventilation at any time, or close them when exiting the car if an inattentive passenger forgot to do this.
First of all, let's look at the necessary tools:
1. Same set of screwdrivers.
2. Keys.
3. Silicone spray.
4. Wires for connecting the power windows of each door to the button.
So, let's get started with all the necessary work, following the following instructions:
1. We put the corresponding gear on the standard axis of the new window regulator. It must be included in the kit of the mechanism you purchased.
2. On top of the gear we just installed, it is necessary to put on another one - an external one, which must correspond to it in size.
3. Now we install the last gear from the standard kit. Its peculiarity is that it comes complete with a motor. But, despite this, the second and third gears must necessarily meet. They also need to be firmly secured, which we do using a locking ring.
4. To fix the third gear and its motor, it is also necessary to use special spacers. They must be included with the entire mechanism.
5. It is very important that the glass does not collide with the guides. Therefore, as we already pointed out to you in the previous section, do not forget to treat all possible collision areas with silicone spray.
6. You need to run two wires from each car door. Now you will need the most common set of wires, which is installed on every car (especially on cars from the domestic auto industry). What kind of kit is this? It consists of a harness on one side and a special chip for the fuse box on the other. In addition to the chip, on the second side there are also two contacts for connecting the window lift motor.
7. We connect all the wires that you brought out from each door with the wires that you specifically need to unwind from the harness. After this, you can finally connect the power, but it is best not to supply it to the entire car, but connect it through a separate wire from the battery and feed it through the fuse.
8. If everything works as you planned, you can begin to directly embed the window lifter button in the place where it will be most convenient for you to use it. Typically, drivers choose a handbrake console for this, or a niche in a car ashtray.
9. Let's check how our power window and its button work.
However, when connecting the power window button, there is a very high risk of mixing up the contacts. This will lead to the fact that, when raising the glass on your window near the driver's seat, you will press it in one direction, and in order to do the same with the glass near the passenger, you will need to move the other button in the other direction. All this is very inconvenient, so you need to immediately check the operation of the power window buttons on all car doors.
We hope that connecting the power windows and the common power window button will go without complications, although in any case this process will take a lot of your time. But believe me, the result is worth it!
Subscribe to our feeds on Facebook, Vkontakte and Instagram: all the most interesting automotive events in one place.
Guide on how to disassemble a window regulator
In order to independently replace electric windows on a VAZ 2107 or carry out repairs, you first need to learn how to dismantle them. This knowledge will be useful when the lifting mechanism jams due to moisture entering through the gap between the seal and the glass. In this case, repair of the mechanism will be required.
To remove window regulators from a car, you will need the following materials and tools:
- Screwdriver Set;
- a set of wrenches or sockets;
- pliers;
- tape for fixing glass.
It is more convenient to carry out work on dismantling, repairing and installing ESP in the garage.
Removing the window regulator consists of the following steps:
- First of all, you need to use the handle to lower the glass all the way down.
- Next, the handle for lifting the glass is dismantled. To remove it, you need to disconnect the locking split washer, which is located between the facing sleeve and the handle. To do this, use a flat-head screwdriver to push the edges of the washer apart and then remove it from engagement with the handle.
Removing the glass lift handle
- Next, remove the trim from the door. We have a technological opening with access to the window lifting mechanism and cable.
- Using a “10” wrench, unscrew the tension roller mounting bolt so that you can move it and release the tension on the cable.
- We remove the weakened cable from the rollers.
- Next, unscrew the three nuts securing the mechanism for lifting the glass using an “8” wrench.
- Through the technological opening, you need to remove the window lifting mechanism, just as you removed the cable before.
- If you can’t remove the mechanism, unscrew the nut securing the glass guide with a “10” wrench and move it.
- After removing the window regulator, unscrew the 4 screws with which the glass is attached to the cable.
This completes the dismantling of the window regulator with cable. You can proceed with either repair or installation.
Door without trim and window lift mechanism
Before proceeding with the installation of electric windows, it is necessary to check all components for serviceability. If any defects are detected, they must be eliminated, repaired or replacement of faulty parts.
The ends of the cable in the places where it enters the mechanism must be secured with wire. This will help to secure the cable well when we install the new ESP.
Applicability on cars
| Brand | Automobile model | Body type | Number of doors | Years of manufacture |
| VAZ | 2109 | hatchback | 5 | 1987 — 2011 |
| VAZ | 21099 | sedan | 4 | 1990 — 2011 |
| VAZ | 2114 / LADA Samara | hatchback | 5 | 2001 — 2013 |
| VAZ | 2115 / LADA Samara | sedan | 4 | 1997 — 2013 |
The power window rack is a housing in which the glass movement mechanism is located - a toothed chain drive. An electric motor is fixedly mounted on the rack, driving the mechanism.
The fixedly located gear motor eliminates the possibility of damage to the electrical wiring in the door.
The window lift rack is absolutely rigid. Thanks to this, there is no rattling, vibration or resonance when raising and lowering the glass.
Window lifters are extremely lightweight and compact. They work almost silently.
They are installed in place of the guides of the standard window regulators and secured into the standard mounting holes using the fasteners of the replacement window regulators.
What can be useful when installing an ESP?
First of all, you need to purchase a set of various devices, including: controls and an actuator. You should decide in advance on the choice of window lifters, their quantity and price. Naturally, if you choose better and more efficient lifts, the price will be significantly higher.
Conventionally, the following types of electric windows can be distinguished:
- Slat window lifters are among the most reliable. In addition, they have high operating speed and minimal noise levels during the process of lowering and raising the glass. Their only drawback can be considered only the high cost of the kits.
- Rope devices are the lowest level in the line of window regulators, as they have lower characteristics. However, their cost and ease of installation significantly outweigh their disadvantages.
- Rack and pinion electric windows include the disadvantages and advantages of other types of devices, and therefore are a connecting link between them. That is why many drivers make their choice in favor of the rack.
Once you have decided on the type of window lifters you want, you need to decide on the manufacturer. To do this, you can use various tests and reviews, of which there are quite a lot on the Internet. Differences in design also have a big impact on the installation process, as many vehicles are already equipped with mounting hardware to install the appropriate devices, while others will need modifications to the inside of the door. However, redesigning the fastening parts does not seem difficult.
A further choice will be the number of window lifters. Typically, car enthusiasts limit themselves to two and install them only on the front doors of the car. You can also mount them on the rear doors.