Replacing the Lada Vesta fuel pump (VAZ Vesta)
The fuel pump for the Lada Granta is not a consumable item and usually does not bother car owners. Replacement is simple, but the price tag for the fuel pump is steep, but more on that below.
Replacing the fuel pump on video.
Replacing the fuel pump in detail with a description of each step
The algorithm of actions is as follows:
- Remove the negative terminal from the battery. A mandatory requirement if you carry out any work that affects the electrical system of your car.
- The fuel pump is located under the rear seat. The rear seats need to be raised, I remove them altogether. It comes off easily. You need to “pull the string” in the center of the seat and remove it.
- We lift the rug and clean out the dirt in the seat. It must be clean, as this dirt can get into the fuel tank.
Disconnect the fuel pump connector to relieve pressure in the fuel system. Next, under the hood, unscrew the cap from the fuel rail, and use a screwdriver to press the breather (nipple) - this releases the pressure. Put the cap back on. Below I will describe an alternative option for relieving pressure in the fuel frame. Unscrew the 4 bolts securing the fuel pump. Remove the fuel hoses from the fuel pump. Next, using a hammer and a drift (chisel or straight screwdriver), we “scroll” the pump counterclockwise. Next, remove the lock washer by simply pulling it up. And take out the fuel pump.
An alternative option for relieving pressure in the fuel rail
The main method is a little inconvenient and dangerous. Since gasoline can ignite, and if the muffler pants have not yet cooled down, it can cause a fire in the engine compartment. Therefore, there is an easier way.
- Disconnect the power supply from the fuel pump.
- Start the car and let it run until it stalls on its own.
This method also relieves pressure in the fuel rail. Its advantage is that if you have a 16-valve engine, you do not have to remove the cover from it to get to the nipple!
Choosing a fuel pump for the Lada Granta
There isn't much choice. There are two models on the market, and according to reviews, they do not cause problems. You can take any one.
The fuel pump on Kalina, Priora and Grant is the same!
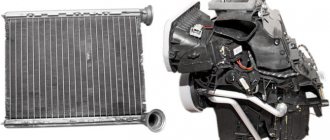
Removing and installing the fuel rail of a Lada Vesta car
We remove the ramp to check the injectors and flush the ramp itself, as well as to repair the engine and its systems.
We prepare the car for the job. We place the car on the lift.
We bleed the fuel pressure, to do this:
— Fold the rear seat cushion forward.
— remove cover 1, Figure 1, of the fuel pump hatch.
— disconnect block 3, Figure 2, of the rear wiring harness from the electric fuel pump module.
- start the engine and let it idle until it stops completely.
— turn off the ignition and disconnect the negative terminal of the battery.
After this, remove the intake module, as indicated in the article - “Removing the intake module”.
We press the spring clamps and, moving along the axis of the fitting, disconnect the tip of tube 1 (see Fig. 3) of the front fuel pipeline from the injector ramp 2.
If engine 21129 is installed, then additionally disconnect bracket 3 and move the front fuel pipe to the side.
We disconnect the connectors of the harness 1 (Figure 4), the wires from the fuel injectors 2, cut the two fastening clamps 3 and move the harness to the side.
Using a 5mm Allen key, unscrew two bolts 1 (see Fig. 6) and remove ramp 2 with the injector assembly.
Ramp installation
Before installing ramp 2 (see Fig. 6), you need to lubricate the injector O-rings with engine oil.
Install ramp 2 with injector assembly onto the engine. Screw in and tighten bolts 1.
The tightening torque of the bolts is 9 - 14 Nm (0.9 - 1.4 kgf.m) (wrench 5 for internal hexagon, nozzle for internal hexagon, torque wrench).
Attach the harness blocks 1, Figure 4, of the wires to the fuel injectors 2 and secure the harness with two new clamps 3 to the injector ramp (for vehicles with engine 21129).
Attach tube 1, Figure 3, the front of the fuel pipeline to the fitting of the ramp 2. When installing, attach the tip of the tube to the fitting until the spring clip clicks. After installation, check that the tube is securely fixed.
For vehicles with engine 21129: attach bracket 3 securing the fuel pipeline to the injector rail.
Install the intake module assembly on the cylinder head, as indicated in the article - “Removing and installing the intake module”.
Connect block 3, Figure 2, of the rear wiring harness to MEBN 1.
Install cover 1, Figure 1, of the fuel pump hatch.
Lower the rear seat cushion.
Connect the earth wire terminal to the battery.
Self-disassembly and repair of the Lada Vesta fuel module
The fuel module on the Lada Vesta must be replaced as an assembly, even if only one of the components has failed. This is the official position of AvtoVAZ, although repair of the unit in a specialized service is allowed. However, the experience of car owners has shown that everything is not so simple and some of the components of the entire module can be replaced independently by first disassembling the Lada Vesta fuel module.
Dismantling
To work you will need tools:
- Hammer;
- Screwdriver;
- Head for 10.
First of all, you need to remove the rear sofa cushion, throwing it forward, and then remove the soundproofing sheet from the floor.
Then you need to remove the fuel pump cover - you first need to pry it off from the side and then disengage it.
The next step is to disconnect the plug from the electric fuel pump itself.
Then you need to relieve the pressure directly in the fuel system. To do this, the engine starts, after which it must run at XO until it stalls. When this happens, you need to remove the key from the ignition switch and remove the “-” terminal from the battery.
After releasing the pressure, the tube is disconnected from the fuel pump - to do this, the spring fastenings of the tube tip are compressed, and then you need to pull along the axis of the fitting. In the case where the fastening is located directly under the tip, it is recommended to use a hook.
Next, the ring is removed and turned counterclockwise. Sometimes there are situations when the ring is overtightened and it is difficult to move it. In this case, you need to either arm yourself with pliers and remove the part with them, or move it by placing a stop and hitting it with a hammer.
When this is done, the fuel module is tilted and removed from the fuel pump (the main thing is not to break the fuel level indicator lever). This completes the independent dismantling of the Lada Vesta fuel module.
Replacing the fuel level sensor Lada Vesta
First of all, remove the tip from the output of the fuel pressure regulator.
Next, the plug with the wires is disconnected from the cover (which requires releasing the latches).
Then, using a screwdriver, the block mount is detached.
This makes it possible to disconnect the plug and the fuel pump.
In the end, all that remains is to unscrew a couple of fasteners and remove the fuel level sensor.
Replacing the fuel pressure regulator Lada Vesta
To replace the element, you need to disconnect the tip of the wire from the output of the regulator itself.
Next, the fuel pressure clamp (spring) is dismantled, for which it is pryed off with a screwdriver.
Finally, the fuel pressure regulator is removed from the Lada Vesta fuel module cover.
Assembly is carried out in the reverse order, but the O-ring must be lubricated with oil before installation.
Removing the coarse filter
To remove the Lada Vesta coarse fuel filter, made in the form of a fine mesh, the fuel level sensor is first removed.
First of all, using a screwdriver, disconnect the drain tube from the intake chamber.
Then the guide covers should be removed from the intake chamber, but first you need to mark the guide with the spring.
Next, by disengaging 3 latches, the fuel pump housing, which comes complete with a coarse filter, is removed from the intake chamber.
The filter element itself is held in place by a spring (retaining spring). You need to pry it up and remove the mesh.
Replacing the fuel pump yourself
To replace the Lada Vesta fuel pump with your own hands, you will need a technical hair dryer. If this is not available, you can use regular hot water.
First you need to release the fastener and remove the fuel pump from the holder.
Next, using a hairdryer or water, the tube is heated and then removed.
Assembly is carried out in reverse order.
As you can see, it is quite possible to disassemble the Lada Vesta fuel module yourself and replace some of its components.
Downloading a book
After successfully completing the payment (by any method) and returning to the KrutilVertel store from the payment system website, you will be taken to the successful payment page:
The book you purchased will be in your personal account, from where you can always download it.
Please note that after making the payment, you need to return back from the payment system website to the KrutilVertel website. If for some reason you did not return back to the site and closed the payment system tab with a message about the successful completion of the payment, please let us know - we will send you a letter indicating access to download the book
If for some reason you did not return back to the site and closed the payment system tab with a message about the successful completion of the payment, please let us know - we will send you a letter indicating access to download the book.
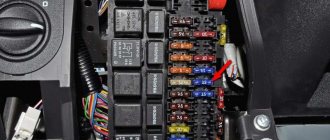
Mounting block Lada Vesta in the car interior
The location of this mounting block is quite familiar for most modern cars - near the driver’s left foot. In order to gain access to this unit, you need to unscrew the cover fastening handles, remove the lock on the upper right side of the cover and pull the cover down. The mounting block itself also has a cover that can be removed by disconnecting the upper holders.
| № | Denomination | Chain | Purpose | Type |
| 1 | 15A | K15R | Power supply for the right steering column switch (washer) | mini |
| 2 | 30A/5A | K15R | Left steering column switch (not lux/lux) | mini |
| 3 | 10A | Left high beam headlight, (not luxury) | mini | |
| 4 | 30A/5A | K30S | Left steering column switch (not lux/lux) | mini |
| 5 | 15A | K15R | Seat heating | mini |
| 6 | 7.5A | K30S | Side lights on the starboard side | mini |
| 7 | 10A | K30S | Left side marker lights | mini |
| 8 | 5A | K30S | Rear fog lights | mini |
| 9 | BEHIND | Right turn signal in the mirror | mini | |
| 10 | 5A | K15S | AMT robotic gearbox selector | mini |
| 11 | 10A | Left low beam headlight (not lux) | mini | |
| 12 | 15A | K30S | BCM controller (direction indicators) | mini |
| 13 | 10A | K30S | VSM controller (own power supply) | mini |
| 14 | 10A | K30S | Turning off the brake pedal | mini |
| 15 | 5A | VTR | Power supply for rain and light sensor, headlight range control | mini |
| 16 | 5A | VTR | Turning off the brake pedal | mini |
| 17 | 5A | VTR | Lighting for the glove compartment, trunk, sills | mini |
| 18 | BEHIND | Left turn signal in the mirror | mini | |
| 19 | 10A | Right low beam headlight (not lux) | mini | |
| 20 | 5A | Heated exterior mirrors | mini | |
| 21 | 15A | K15S | Airbag system control unit | mini |
| 22 | 5A | K15S | Instrument cluster | mini |
| 23 | 5A | K30S | Instrument cluster | mini |
| 24 | 5A | ACC | ERA GLONASS, radio | mini |
| 25 | 5A | VTR | ESP 9.1 controller | mini |
| 26 | 15A | K30S | Power supply to fuel pump module | mini |
| 27 | 5A | K15S | Power supply for parking sensors | mini |
| 28 | 5A | K15S | Electric Power Steering Controller | mini |
| 29 | 10A | K30S | Power supply for trailer lighting | mini |
| 30 | 5A | K15S | ERA GLONASS controller | mini |
| 31 | 5A | K30S | ERA GLONASS controller | mini |
| 32 | 10A | K15S | Power supply for K15M bus (engine compartment) | mini |
| 33 | 5A | VTR | Window control | mini |
| 34 | 5A | VTR | Power supply for steering angle sensor, steering wheel button block | mini |
| 35 | 5A | VTR | Driver's door switch block | mini |
| 36 | 15A | K30S | Radio, diagnostic connector | mini |
| 37 | 7.5A | K30S | Right brake light | mini |
| 38 | 7.5A | K30S | Left brake light | mini |
| 39 | 10A | K15R | Daytime running lights (not luxury) | mini |
| 40 | 10A | K15R | Right high beam headlight (not luxury) | mini |
| 41 | 20A | ACC | 12V socket (power supply for additional devices), cigarette lighter | JCase |
| 42 | 20A | K30S | VSM controller (VTR bus power supply) | JCase |
| 43 | 20A | K30S | BCM controller (door locks) | JCase |
| 44 | 30A | K30S | Window lifters | JCase |
| 45 | 30A | K30S | Interior heater fan | JCase |
| 46 | 30A | K15R | Power supply for the right steering column switch (windshield wiper) | JCase |
| 47 | 25A | K30S | EMM controller (PDS, LBS, LGO) | auto |
| 48 | 30A | K30S | EMM controller (windshield wiper) | auto |
| 49 | 25A | K30S | EMM controller (PTF, ZPTO, license plate) | auto |
| 50 | 25A | K30S | EMM controller (LDS, PBS, PGO) | auto |
| Relay | Denomination | Chain | Purpose | |
| K1 | 70/50A | K15R | Power supply for lighting and seat heating (not luxury/luxury) | |
| K2 | 30A | Free | ||
| K3 | 30A | Heated rear window | ||
| K4 | 30A | Front windows | ||
| K5 | 40A | Interior heater fan | ||
| K6 | 30A | Rear window lifter | ||
| K7 | 20A | Fuel pump module | ||
| K8 | 20A | ACC (12V socket power supply) |
Replacement
To remove and install the fuel level sensor on a Chevy Niva, it is recommended to select a well-ventilated area or carry out work outside
These are precautions to avoid being poisoned by gasoline fumes. For repairs you will need: medium-sized Phillips and flathead screwdrivers, a 10 mm open-end wrench, an 8 mm socket, pliers, rags and a vacuum cleaner
The step-by-step process looks like this:
- Lock the car with the handbrake.
- Remove the negative terminal from the battery.
- Bleed the fuel pressure in the rail through the upper bolt regulator.
- Fold down the rear row of seats.
- Vacuum the surface.
- Unscrew the screws of the protective hatch and remove it.
- Clean the fuel pump module cover from dirt.
- Disconnect the 2 fuel hoses.
- Unscrew 8 nuts (8 mm head).
- Remove the EBN module from the tank.
- Disconnect the 2 power plugs from the cap and fuel pump.
- Press the FLS latches and move it upwards to remove it from the module.
- Install a new level sensor.
- Connect power to the FLS and the pump.
- Collect everything in reverse chronology.
During operation, evaluate the condition of the tank sealing ring and the fuel inlet mesh. It is advisable to clean everything and replace it if necessary.
What analogues of a fuel pump are there for Lada Vesta
The service life of the fuel pump is 150-200 thousand km. If it fails, AvtoVAZ recommends replacing the fuel module (fuel pump, pressure regulator, fuel level sensor and strainer) assembly. You can save on repairs by replacing only the faulty electric fuel pump. Do you know which pump electric motor is suitable for Lada Vesta?
Article number of the Lada Vesta fuel module: 21800113900900 or 8450008680. Finding its components, including a separate fuel pump motor (article 81B04480) can be difficult.
Analogues of the fuel pump for Vesta:
- from Kia Rio and Hyundai Solaris, article number 31111-1R000.
- from Hyundai Elantra, Sonata, Kia Picanto, article number 311111G500 (2 cm longer).
They can be considered interchangeable only after modification. You will have to cut a little (1-2 mm) off the plastic housing into which the fuel pump motor from a foreign car is installed. Also replace the connection connector (or use other female contacts).
When looking for fuel pump analogues, keep in mind that the standard Vesta fuel pump creates a working fuel pressure in the fuel rail of 3.7-4.0 bar.
See how to disassemble the Vesta fuel module and replace the fuel pump motor. Do you know what other fuel pump is suitable for Vesta?
Dismantling
When this is done, you can begin to remove the gas tank of the Lada Vesta.
First of all, unscrew 3 screws (No. 1 in Fig. 7-4), which secure the filler neck (No. 2) of the gas tank to the body. To work, you will need a screwdriver and a Torx T20 bit.
Then you need to raise the machine to such a height that it is convenient for you to work.
Unscrew the nut (No. 1 in Fig. 7-5) securing the filling pipe (No. 2) of the gas tank to the body, for which you need a wrench, an extension and a 13 socket.
Remove the ground wire (No. 3) from the metal stud, which is located under the right rear wheel arch.
Remove the muffler (No. 1 in Fig. 7-6) add. exhaust systems.
Slightly move the muffler of the main exhaust system to the left side and fix it on the left lever (No. 4). A simple screwdriver is used.
Next, dismantling the Lada Vesta fuel tank involves removing the holders (No. 2) of the heat shield, and then the screen itself (No. 3).
You need to press on the spring fasteners of the tube tips, and then disconnect the rear steam pipe (No. 1 in Fig. 7-7), moving it along the axis of the fitting, from the tube (No. 6) of the steam line. And also the rear pipe (No. 2) of the fuel pipeline from the tube (No. 4) of the fuel pipeline.
Afterwards, you need to unscrew the 4 bolts (No. 1 in Fig. 7-8), which clamp the gas tank clamps, for which you need a wrench, an extension and a 13mm socket.
Disconnect the 4 holders (No. 4) of the gas tank clamps and remove the clamps themselves (No. 3). This is done using a flathead screwdriver.
Removing the coarse filter
To remove the Lada Vesta coarse fuel filter, made in the form of a fine mesh, the fuel level sensor is first removed.
First of all, using a screwdriver, disconnect the drain tube from the intake chamber.
Then the guide covers should be removed from the intake chamber, but first you need to mark the guide with the spring.
Next, by disengaging 3 latches, the fuel pump housing, which comes complete with a coarse filter, is removed from the intake chamber.
New Lada: LADA Vesta sedan – Operating manual – Official LADA website
The filter element itself is held in place by a spring (retaining spring). You need to pry it up and remove the mesh.
Problems when paying with bank cards
Sometimes difficulties may arise when paying with Visa/MasterCard bank cards. The most common of them:
- There is a restriction on the card for paying for online purchases
- A plastic card is not intended for making payments online.
- The plastic card is not activated for making payments online.
- There are not enough funds on the plastic card.
In order to solve these problems, you need to call or write to the technical support of the bank where you are served. Bank specialists will help you resolve them and make payments.
That's basically it. The entire process of paying for a book in PDF format on car repair on our website takes 1-2 minutes.
If you still have any questions, you can ask them using the feedback form, or write us an email at
Fuel filters and pumps for Lada Vesta. Articles, prices, original and substitutes
The original coarse mesh filter has the catalog number VS-SFB, but it is not necessary to change it at all. It is enough to wash the mesh with a carburetor or injector cleaner and it will become no worse than new. Another thing is the fine filter. Practice has shown that the LYNX LF-249M filter element is suitable for Vesta without any modifications. In the kit it has corrugated hoses, however, the length of the installation rods may be slightly higher than the original (by 5-7 mm), but this can be corrected by trimming the brackets. A fine filter from Renault Nipparts N1331054, Zekkert KF5463, Francecar FCR210141 is also suitable, and a housing without a filter element can be ordered by number n1331054.
- Asam 1147;
311111R000, Korean filter for Kia and Hyundai;
All that remains is to figure out how to replace the filters or fuel pump.
How to clean the fuel pump yourself
Let's start with the fact that the mesh filter for the fuel pump is a coarse filter and is designed to capture large particles and deposits that are in the fuel and inevitably accumulate in the fuel tank. It turns out that the fuel pump has its own additional fuel filter mesh, which prevents debris from entering the fuel system from the tank parallel to the usual fuel filter. The process of cleaning or replacing the fuel pump mesh is almost similar to the general scheme for replacing the pump itself:
- The fuel pump is installed directly into the gas tank. You can get to the pump from the passenger compartment, as it is located under the rear seat. To gain access to the fuel pump, you need to remove the rear seat cushion or fold down half of the sofa (if possible).
- The fuel pump is usually located on the right and covered with a special plastic cover. The specified cover must be removed.
- Before removing the fuel pump itself, it is necessary to relieve the fuel pressure in the system. To do this, you will need to disconnect the power connector from the fuel pump, and then turn the engine with the starter.
- The next step is to remove the negative terminal from the battery, after which the tubes from the fuel pump are disconnected. These tubes are “supply” and “return”, they are secured with clamps that need to be pressed out. You should be prepared for the fact that a certain amount of gasoline may spill after removal. For this reason, safety precautions must be observed!
- Next, you need to unscrew the special pressure ring-cover of the fuel pump. It is very difficult to unscrew this cover manually. There is a special fuel pump cover puller for removal. If there is no such puller, then you can try to carefully unscrew the ring using improvised means. We strongly recommend that you first study on specialized auto forums how to remove the fuel pump cap on a specific car model.
- After unscrewing the cap, you can remove the fuel pump. Before complete removal, the remaining gasoline should be drained from its body, and the sealing ring should be removed.
- Now you can begin disassembling the fuel pump housing. To clean, you will need to remove the bottom part. There is often dirt in the indicated lower part of the housing.
- After this, remove the fuel pump screen. To remove the mesh, just pry out the filter at the place of attachment to the pump body using a regular screwdriver. The fuel pump strainer usually becomes completely clogged, especially on cars with high mileage.
- Then the fuel pump mesh can be replaced with a new one or cleaned. It is better to wash the fuel pump mesh first with carburetor cleaner. Mechanical cleaning is done with a soft brush. Then the mesh should be dried and blown. The bottom of the pump housing and the cleaned mesh are finally washed again with gasoline.
- The final step is to reassemble the fuel pump and install the device in the gas tank. To facilitate installation, it is better to invite an assistant, as it may be necessary to ensure high-quality pressure of the pump to the tank. The fact is that many gasoline pumps have a special spring, the force of which must be overcome. At the same time, you need to make sure that the rubber seal is in place and at the same time screw in the pressure ring-cover of the fuel pump. When tightening the clamping ring with a puller or improvised means, do not exceed the tightening torque. If you tighten it too tightly, the fuel pump cap may burst; if you tighten it too weakly, the fuel pump will wobble due to poor fixation.
Please note that when installing a fuel pump on many car models, you need to be careful not to bend the fuel level sensor in the gas tank
It is also important to adhere to the position in which the pump was originally located.
In order to determine the correct position of the fuel pump, there are special indicators. Such indicators are made in the form of arrows and are located on the fuel pump, the gas tank body and the pressure ring. The correct installation of the fuel pump can be considered when all the arrows are in the same line. We would like to add that if the gasket is installed incorrectly, gasoline may leak out if you fill the tank full.
Now all that remains is to connect the fuel supply and return pipes to the fuel pump, while simultaneously checking that the clamps are securely fastened. The completion is to connect the electrical power connector to the fuel pump, after which you can start the car for testing.
Problem
This unit has an impressive service life - up to 200,000 km. However, there are cases when it failed noticeably earlier. The reasons may be different - low-quality fuel, driving with an almost empty tank, during which the wear of the element is much more intense, which is especially true for those who have installed gas equipment in their car, and others.
The fact is that in the event of a breakdown, dealers advise replacing not only the Lada Vesta fuel pump, but the entire fuel module assembly, which also includes a strainer, a fuel level sensor and a pressure regulator.
Worn Vesta fuel pump
Symptoms of a problem
Since the structure of the DUM is made up of rubbing parts, sooner or later they will wear out. The driver begins to notice that the fuel gauge needle is deceiving. For example, at a gas station, the car owner filled the tank full before the gun cut off, and the indicator only shows the presence of 1/2 or 2/3 of the amount of fuel. In other cases, the arrow freezes, since the mechanism can simply jam. Such glitches occur for the following number of reasons:
- the contact surface of the resistor is worn out;
- the plug has oxidized;
- the wire insulation is broken;
- the float is damaged;
- The slider is worn out.
What is bad about operating a Chevrolet Niva with a faulty fuel level sensor? If you drive for a long time with the light on with an empty tank, the fuel pump will overheat, especially in hot weather, and as a result will quickly fail. In addition, dirt will begin to collect at the intake, and its microparticles will penetrate the system through the filter and clog the fuel channels.
How to check
To “ring” the fuel level sensor on a Chevrolet Niva, it must be removed. It is installed in the fuel pump module, which in turn is fixed inside the tank. It’s easy to find, just fold down the back row of seats. To check, you will need a multimeter, which must be switched to ohmmeter mode.
We connect the probes to the outputs, move the lever up and down, simulating a full and empty tank. The resistance should change: in the lower position 235–335 Ohms, in the upper position 17–25 Ohms. In this case, there should be no jumps in parameters. In addition, it is recommended to carefully inspect the mechanism for damage and oxidation, as well as the contact density of the slider.
Features of the fuel system of Lada Vesta and XRAY
The fuel system of Vesta and XRAY differs from similar systems of other Lada cars (for example, Grants, Kalinas or Prioras) and is more similar to the design of the 2009 Renault Logan. For example, Vesta/XRAY does not have a remote fuel filter, which everyone is used to seeing near the gas tank. Let's consider all the features of the fuel system of the new AVTOVAZ product.
| Lada Vesta | Lada XRAY | |
| Fuel (according to GOST R 51866-2002 (survey) | "Premium Euro-95" | |
| Fuel tank capacity (real), l | 55 | 50 |
| Fuel module | 8450008680 / 21800113900900 | 17202 2047R |
| Fuel rail (VAZ-21129 and 21179/H4M engines) | 2190-11139009 | |
| Operating fuel pressure in the fuel rail, kPa (bar) | 364-400 (3,7-4,0) | |
| Fuel injectors | n.d. | |
Elements of the Vesta/XRAY power system: 1 – fuel tank filling pipe; 2 – fuel tank; 3 – rear steam pipe; 4 – rear fuel pipe; 5 – fuel pipeline tube; 6 – steam pipe; 7 – front fuel pipe tube; 8 – injector ramp; 9 – front tube of the fuel pipeline; 10 – adsorber; 11 – front steam pipe; 12 – steam pipe from the adsorber to the adsorber purge valve; 13 – adsorber purge valve; 14 – steam line pipe from the adsorber purge valve to the intake module.
The fuel tank is made of special plastic and suspended from the bottom of the car on two steel clamps. The filler neck is located on the right side of the car and is closed with a plug.
The fuel pump is installed in the gas tank. To access it, you need to lift the rear seat cushion (see how to remove the fuel module and disassemble it). A strainer is installed on the inlet pipe of the fuel pump. The fuel pump is combined with a fuel level indicator sensor and a fuel pressure regulator (installed in the cover) into a single unit - fuel module (electric fuel pump). Fuel from the pump (through the outlet pipe) enters the fuel filter. Purified gasoline is again supplied through the fuel line and through a tee to the inlet pipe of the fuel module and then fed into the fuel rail. Excess fuel is released through the pressure regulator into the tank.
The fuel pressure regulator is a bypass valve that maintains in the system the operating pressure necessary for the correct operation of the injection system (see how to remove the fuel pressure regulator).
The fuel filter on Vesta/XRAY is made of paper and installed in the fuel module (that is, the filter is not remote, as on other Lada models). To replace it, you need to remove and disassemble the fuel module. When should I change it? According to the maintenance regulations, it is designed for its entire service life.
AVTOVAZ's new products are equipped with a fuel vapor recovery system. The above-fuel space of the tank is connected to the atmosphere not directly, but through the elements of this system. The system consists of an adsorber (a container where gasoline vapors are absorbed by activated carbon), an adsorber purge valve, connecting tubes and hoses. The adsorber is mounted under the front right fender of the car.
The filler plug has two valves: one for emergency release of fuel vapor pressure from the tank (when the ambient temperature rises), and the other for the intake of air from the atmosphere when gasoline is consumed from the tank (prevents the occurrence of strong vacuum in the tank).
Lada Xray. Replacing the fuel filter
In accordance with the maintenance regulations, we replace the fuel filter every 30 thousand km.
If the car is operated in dusty conditions or with low fuel quality, the filter must be replaced more often than specified in the regulations. We carry out the work on an inspection ditch or overpass.
The fuel filter is installed at the bottom of the vehicle in a recess in the underbody above the additional muffler for the exhaust system.
The fuel in the power system (with the ignition on and for some time after it is turned off) is under pressure. Therefore, if we replace the filter immediately after a trip or after turning on the ignition, it is necessary to relieve the fuel pressure in the power system. If the ignition has not been turned on for a day or more, there is usually no fuel pressure in the system. This can be checked by unscrewing the cap of the fuel rail fitting and pressing the spool rod (see “Power system”, page 123).
When replacing the filter, you need to take into account that it is located below the fuel tank and when the filter is removed, fuel can flow out of the tank by gravity through the disconnected tube. Therefore, we place a container under the filter to collect fuel.
To relieve pressure in the system, remove the lining of the left front side panel (see “Removing the controller,” p. 115).
By pressing the two latches, we disconnect the connection block between the engine management system wiring harness and the rear wiring harness.
We start the engine and let it idle until it stops due to fuel exhaustion. Then turn on the starter for 2-3 seconds. After this, the pressure in the power system will be released.
Using a 10mm wrench, loosen the tightening of the fuel filter clamp bolt.
Holding the fuel filter housing by the hexagon with a 19mm wrench, use a 17mm wrench to unscrew the fitting of the fuel supply tube to the filter.
We remove the tip of the tube from the filter and, in order to avoid fuel leakage from the tank, put the brake bleeder cap on the tip.
Similarly, we unscrew the fitting of the tip of the fuel supply tube to the ramp...
...and remove the tube tip from the filter.
We move the filter forward and remove it from the clamp.
Drain the remaining fuel in the filter into a container.
We install the new filter in the reverse order.
The arrow on the filter housing should be oriented in the direction of fuel flow (towards the front of the car).
Before connecting the fuel pipes to the filter, we check the condition...
... sealing rubber rings located on the tips of the tubes.
If the ring is damaged (tears, cracks, jams) or loses its elastic properties, replace the ring. After installing the filter, connect the connection block between the engine management system wiring harness and the rear wiring harness. Turn on the ignition and check the tightness of the connections.
Check valve for Vesta fuel pump
if you unscrew the spool from the ramp
Screw it into place, turn the key and...
the pressure is released through the RTD.
There is no return, the RTD is in the fuel pump.
RTD does not require wires. The BN block supplies power to the electric pump and a wire for the level sensor. The rest (one or two wires) is ground.
Inside, the fact that you see this “female” terminal and the double wires in it, it’s simply attached to the regulator body and has nothing to do with electrics.
Why unscrew it? Just press it, but it’s better to measure it with a pressure gauge.
It is not convenient for one person to turn the key and press at the same time) When pressed, the essence does not change, from there at most a couple of drops will fall. When the pressure there is ok, it takes a long time to release and with large splashes. The pressure gauge will show 0 is 100%.
Screw it into place, turn the key and...
And at the same time you hear the whirring of the fuel pump again?
the pressure is released through the RTD.
That's what you think! In reality, everything may be different. 1. The most important condition is again a pressure gauge connected to the ramp
Again, I repeat, there cannot be pressure there, the pump pumps, but pumps somewhere into the void. You can twist the hose from the fuel rail, you can twist or press the spool. If you turn the key, a fountain of gasoline will flow. But the pressure in the ramp does not linger. I turned the key, listened to the pump, went to check the pressure, but it wasn’t there. The pressure gauge will show 0
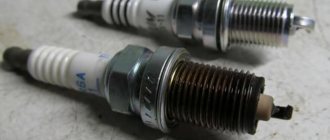
Clean fuel pump mesh
« previous entry | next entry » May. 14th, 2008 | 09:34 am
The forums recommend conducting such inspections at least once a year. Symptoms of a clogged fuel pump mesh: the car becomes dull when changing gears, the car does not pick up speed well, failures at idle, to the point where the car stalls. Careless servicemen, depending on your flight of fancy, may advise you to replace: the fuel pump (1500 rubles), clean the injector by washing (1200 rubles, and with removal 1500-1600 rubles), replace the MAF sensor (and on our little ones it’s new at existential 42000), etc. .P. By the way, clogging of the fuel pump mesh is a common disease. If you don’t want to clean it, then a mesh from a VAZ 2110 will do. Only when installing it will you need to turn it 180 degrees, otherwise the fuel pump frame will not fit into its intended position. So, it was decided - remove, look and, if necessary, clean! To do this, we throw out all the junk from the trunk, move the front row of seats all the way forward. Fold and recline the rear row of seats. Remove the floor and trunk trim. Directly under the seats, in their usual position, we see a square hatch with electrical wiring connected to it. We remove the hatch; to do this, unscrew the fastening bolts with a Phillips screwdriver. The bolts are turned out, the hatch is moved as far as the wiring allows. In front of us is the upper part of the fuel pump frame, secured with 6 bolts for a Phillips screwdriver (4x8, sort of). On top of the frame there is a male-female connector. Remove the connector. The inlet and outlet pipes are suitable for the fuel pump.
Using the existing L-shaped inlet from the old gasoline filter, we plug them (it is very important to remember that the fuel system, with a working bypass valve, is under high pressure; before starting work on removing the fuel pump, to equalize the pressure in the system, open the gas tank flap and unscrew the filler plug from the neck gas tank) Reminder! You are working in a flammable environment. Follow basic safety rules
For example, it is a very bad idea to illuminate yourself with a lighter when the fuel pump is removed. Gasoline vapors are highly volatile and explosive!
Then unscrew the 6 mounting bolts. Carefully remove the frame with the fuel pump, floats and mesh. Cover the hole with a hatch. In general, it is good to perform this work with an almost empty gas tank. Mine was full. The problem with removal may be the fuel level float. Structurally, it is located on the same frame. Therefore, when removing the fuel pump frame, we take our time and act carefully. The mesh was covered with a brown coating, similar to marsh mud. The insides were not visible. We clean everything with the same carbocleaner with a powerful jet on both sides until the mesh becomes pristine white. Let the mesh dry for a couple of minutes. We inspect the fuel pump, electrical connections, and float. Everything is in order - we install the frame in place and assemble it in the reverse order. As a result, my gas pedal became sharper. The car reacts more actively to pressure and picks up speed faster. I'm happy.
How to remove the fuel pump on a Lada Vesta with your own hands
The fuel module is removed to clean the mesh from dirt, replace the electric fuel pump, fuel level sensor or fuel pressure regulator. It is not difficult to remove it from the fuel tank yourself, but it is recommended that you read the instructions before starting work.
For reference: the fuel pump article number for Lada Vesta is 21800113900900 or 8450008680.
You will need: a 10mm wrench, a hammer, a flathead screwdriver.
Procedure:
- Fold the rear seat cushion and soundproofing pad forward.
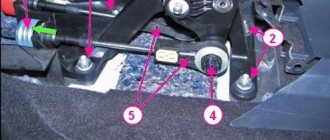
- Remove cover No. 1 of the fuel pump hatch by prying the edge, and gradually moving around the circumference, disengage the cover (photo 1).
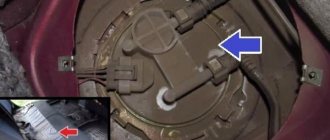
- Disconnect the block with wires No. 3 from the electric fuel pump module (photo 2).
Relieve pressure in the fuel system. To do this, start the engine and let it idle until it stops completely. Turn off the ignition and remove the negative terminal from the battery.
- Disconnect the tube from the fuel pump. Press the spring clamps of the tip of tube No. 5 and pull along the axis of the fitting (photo 2). If the retainer is under the tip, use a wire hook.
- Remove ring No. 2. Turn it counterclockwise (a tightly tightened ring can be moved from its place with light blows of a hammer, resting the drift on the upward protrusion of the ring, or moved apart with pliers)
- Remove the fuel module from the fuel pump, tilting it to the side so as not to damage the fuel gauge sensor lever.
When installing the fuel pump, replace the O-ring with a new one. The special protrusion on the module flange must fit into the corresponding slot on the fuel tank flange. After starting the engine, check for gasoline leaks.
After removing the fuel module, it can be disassembled. See also how to clean the fuel pump mesh on Vesta, XRAY and Largus.
vestashop77.ru
How to check the operation of the fuel pump?
First, you should check the fuse. To do this, check the instructions for its location. Next, you should check the voltage at the pump. Before doing this, be sure to check if everything is in order with the battery. The voltage at the fuel pump terminal must be checked using a multimeter or tester. The instruction manual always indicates the required voltage.
Using a tester, check the voltage supply to the fuse. Often this is where the electrical circuit breaks.
If the search does not yield results, then the voltage should be checked on the contacts themselves. All contacts must be in place and connected to ground. A broken contact or its oxidation leads to failure of the fuel pump system. If no broken contacts are detected, but the voltage drops by more than 1 volt, then the problem is in the wiring or oxidation of the contacts. There should be no short circuit in the wiring.
If, after checking the voltage, contacts and fuse, you do not find any problems, then the problem lies in the fuel pump itself. In this case, the fuel pump will most likely require replacement. In practice, it most often turns out that replacement is a last resort. First, you should try to restore and test the fuel pump again.
Before you check the fuel pump, you need to remember that, as mentioned above, pressure is the most important characteristic of the fuel pump, so it is worth measuring its level
How to check the pressure in the fuel rail?
You will need a pressure gauge that measures pressure in the range from 7 to 10 atmospheres. If you choose a pressure gauge with a large margin, you risk getting less accurate measurement results. Specialized stores sell a kit for measuring pressure, but you can also design your own device.
If you want to assemble the device yourself, you will also need a hose with an internal diameter of 9 millimeters. You will also need plumbing tow, with which you can seal the connection between the pressure gauge and the tube. All parts are connected and tightened using a clamp. You will also need a car spool. Next you need to perform a series of actions:
- Place the car on a level surface that is prevented from rolling, turn off the ignition and open the hood.
- Check that the injection nozzles have access to the fuel rail.
- Find the fuel pressure plug and remove it. Then you should unscrew the nipple using the spool.
- Prepare an empty container (a regular bucket will do) and a clean rag. This is necessary to collect residual fuel, which under pressure can splash out in different directions. Therefore, take care of the safety of your skin (especially your face and eyes).
- Connect the device to the fitting and begin checking the mechanism.
Checking the pressure in the fuel rail should occur in four operating modes of the power unit:
- when the ignition is on;
- at idle engine speed;
- code the fuel pressure regulator tube is reset;
- when the drain tube is compressed.
Fuel rail pressure measurement results
The results may vary slightly for different car models, but in general they should be as follows:
- when the ignition is turned on, the pressure must be at least 3 atmospheres,
- at idle engine speed - at least 2.5 atmospheres,
- when the pressure regulator tube is reset - at least 3.3 atmospheres,
- when squeezing the drain tube - at least 7 atmospheres.
Fuel rail pressure fluctuates slightly during preparation. When you press the pedal, it suddenly takes on a value of 3 atmospheres; when you release the pedal, it drops to 2.5 atmospheres. When fuel enters the fuel system, turn off the ignition and begin observing the pressure gauge. The pressure in this case should drop to 0.7 bar and remain unchanged.
If the pressure drops to zero, there may be a problem with the fuel pressure regulator. In this case, the regulator must be replaced immediately. The cause could also be the fuel pump check valve.
It is necessary to observe the behavior of the pressure gauge even at 3,000 engine speeds. A drop in pressure will indicate a faulty fuel pump. Sometimes the fuel pump cannot reach the required pressure for a long time. In this case, the problem lies in a clogged fuel filter, which needs to be replaced, or in a dirty fuel pump mesh (read more about where the fuel filter is located).
If the above methods do not reveal a malfunction of the fuel pump, you will have to diagnose other units (DPZD, IAC, mass air flow sensor, compression in the engine and some other indicators and parts).
Where can I buy?
At the same time, the price of such a module is very considerable and at the dealership they usually ask about 8,000 rubles for it! This is explained by the non-separable design of the module.
You can find a product online at a lower price, as shown in the table:
| Purchase address | vendor code | Price, rub.) |
| https://avtogrin.ru/catalog/lada_vesta/benzonasos_lada_vesta_vesta_original/ | 8450008680 | 8250 |
| https://avtoazbuka.net/lada-vesta/elektrobenzonasos-v-sbore-lada-vesta-lada-vesta-detail | 8450008680 | 5444 |
| https://avtozap63.ru/avtozap_vaz/Benzonasosy-VAZ/Elektrobenzonasos-v-sbore-Lada-Vesta.htm | 8450008680 | 5200 |
| https://timeturbo.ru/catalog/benzonasosy-vaz/elektrobenzonasos-v-sbore-lada-vesta/ | 8450008680 | 5490 |
| https://marstlt.ru/catalog/benzonasos_modul_benzonasosa_/modul_elektrobenzonasosa_lada_vesta_az/ | 8450008680 | 5599 |
But even in this case, the cost seems excessive to many. As for purchasing the fuel pump itself, without other components, there are serious problems with this, so there is no guarantee that you will be able to find only the fuel pump. Also, during the search process, pay attention to the operating pressure indicator, which should be from 3.7 to 4.0 bar.
Fuel pump repair and replacement
The technology for diagnosing, repairing and replacing a fuel pump is usually not very difficult. If you have the desire, time and a minimum set of tools, all work can be easily done independently.
Removing the fuel pump
In order to remove the fuel pump, it is proposed to perform a series of sequential actions.
- Turn off the engine.
- Open the hood.
- On the engine, locate the device connected to the fuel supply system.
- Disconnect the connector with wires from the fuel pump.
- Disconnect the fuel supply hose.
- Disconnect the collet clamp and unscrew the four mounting bolts.
- Carefully pull the fuel pump out of its socket by hooking it onto the rubber gasket.
- Clean the device from oil, dust and dirt.
Video: replacing the fuel pump on an AUDI A6
Replacing the gasket
Often the cause of problems with the fuel pump is the sealing gasket. The degree of its wear determines the tightness of the connection between the pump and the engine and, as a consequence, the amount of fuel supplied to the pump.
The sealing gasket is selected individually for each fuel pump model
The gasket replacement process is quite simple.
To replace the rubber sealing gasket on the fuel pump, you need to remove the device and clean the seat itself of adhering dust and dirt.
- Remove the fuel pump.
- Clean the pump socket from oil and dirt.
- Lubricate the new gasket with a small amount of gasoline.
- Install the gasket into the socket.
- Carefully place the fuel pump on the gasket and secure it with bolts.
Replacing the mesh
To replace faulty elements, the fuel pump must be disassembled. The algorithm for disassembling the pump and replacing the filter mesh is not very difficult.
- Remove the housing by loosening the locking latches.
- Disconnect the power connectors.
- Remove the tubes from the fittings. This can be difficult since the connections use heat shrink materials and the tubing is tightly attached to the fittings. Score the surface of the heat shrink with a knife and remove the tubes.
- Unclip the clamps according to the diameter of the pump.
- Remove the mesh.
- Clean the mesh from dirt. If mechanical damage is present, replace the mesh with a new one.
- Follow all steps in reverse order.
5 common signs of a faulty fuel pump (gasoline pump)
It is necessary to clean the fuel pump screen from dirt and, if necessary, replace it with a new one.
Complete cleaning of the fuel pump is usually carried out at a car service center. The pump is removed from the machine, disassembled, washed with special means, dried with a compressor and assembled.
Bleeding the fuel pump
Gasoline in the fuel system is constantly under high pressure. However, sometimes due to incorrect operation of the pump, the pressure may drop. In these cases, high pressure in the fuel system is created artificially. This process is called pumping the fuel pump. It is performed in several stages.
- Disconnect the hose connecting the fuel pump and engine. To avoid fuel leakage, direct the hose to an empty container.
- Turn the starter without starting the engine. If the fuel pump manages to pump 0.5 liters of fuel in half a minute, then it is in working condition.
- To restore high pressure, connect a regular pump to the hose connecting the gas pump to the gas tank and inflate the system with compressed air.
Replacing the fuel pump on a Volvo FH 12
The fuel pump of the Volvo FH 12 is installed in the gas tank and is a rather complex device. Its replacement is carried out from inside the car as follows.
- Remove the carpet on the trunk floor.
- Fold down the rear seat back and you will see a small hatch underneath.
- Using a 10mm wrench, unscrew the five nuts securing the hatch cover and remove the cover.
- Disconnect the fuel pipe connectors.
- Disconnect the two hoses from the pump, having previously marked each one.
- Remove the pump from the tank.
- Install a new pump.
Engine VAZ 2110 1.5 l. 8-valve carburetor
- Working volume - 1499 cm3
- Number of cylinders - 4
- Number of valves - 8
- Cylinder diameter - 82 mm
- Piston stroke - 71 mm
- Power - 72 hp (53 kW) at 5600 rpm
- Torque - 104 Nm at 3800 rpm
- Compression ratio - 9.9
- Power system - carburetor
- Acceleration to 100 km/h - 14 seconds
- Maximum speed - 164 kilometers per hour
- Average fuel consumption - 7.6 liters
The next engine that appeared under the hood of the VAZ-2110 was an injector. Essentially this is the same engine with a displacement of 1.5 liters, but without a carburetor. The engine received the VAZ-2111 index. All the main parts of the power unit, the connecting rod and piston group, the lubrication and cooling system, remained the same, but a distributed fuel injection system, a different air filter, and spark plugs appeared. Photo of the injection 8-valve VAZ-2110 engine below.
The use of injection added some power to the engine, making it more economical and environmentally friendly. The same belt remained in the timing drive, and if it broke, the valves did not bend. Detailed characteristics of the VAZ-2111 injection engine are below.