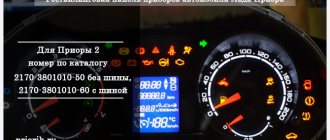
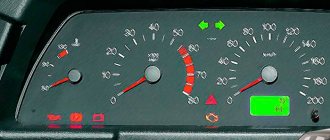
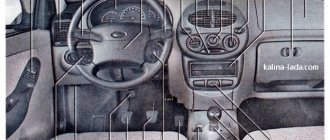
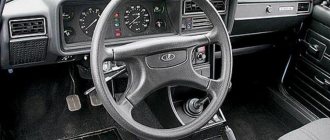
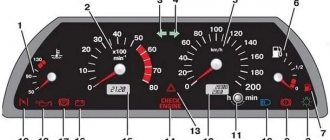
The Lada Priora/Kalina instrument cluster is designed to display driving characteristics, the current state of vehicle systems that ensure traffic safety, as well as the correct operation of the entire vehicle as a whole. If you are a novice driver, then this description of the dashboard will help you understand the readings of instruments and indicators.
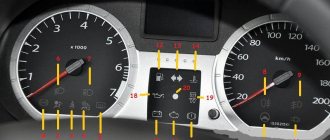
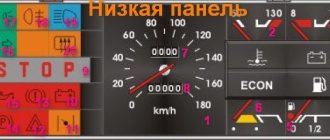
- Tachometer. Shows engine speed in real time. The red scale zone indicates a dangerous operating mode for the engine;
- Malfunction lamp of the electronic brake force distributor. To check, the lamp lights up red for a few seconds when the ignition is turned on. The burning of the lamp in other cases indicates a malfunction; when driving with a burning lamp, increased safety measures must be observed;
- Battery charge lamp. To check, the lamp lights up red when the ignition is turned on and goes out after the engine starts. If the lamp is lit in other cases, it indicates a lack of battery charge;
- Left turn signal lamp. Flashes when the turn signal or hazard lights are on;
- Speedometer. Shows at what speed the car is currently moving;
- Engine oil pressure warning lamp. To check, the lamp lights up when the ignition is turned on and goes out after the engine starts. In other cases, the lamp is lit indicating low pressure in the engine lubrication system. It is not recommended to operate the engine in such conditions;
- Right turn signal lamp. Flashes when the turn signal or hazard lights are on;
- Handbrake lamp. Lights up red when the parking brake is applied;
- Coolant temperature gauge. Engine operating temperature is 90 degrees and above to the red zone. It is prohibited to operate the vehicle if it overheats. When the arrow reaches the red zone, a buzzer will sound. To extend engine life, it is recommended not to operate the engine at high speeds until the coolant temperature reaches operating temperature;
- Gasoline level indicator in the tank. The arrow shows the fuel level. Lack of gasoline can damage the fuel pump;
- Fuel reserve lamp. Lights up with an accompanying buzzer signal when there is less than 10 liters of fuel left in the tank;
- Button for switching display modes and resetting daily mileage readings. A short press switches between daily and total mileage. When you hold the button, the daily mileage is reset, accompanied by a sound;
- Hazard warning light. Flashes red when the emergency lights are turned on simultaneously with the turn signals.
- Electric power steering (EPS) malfunction lamp. To check, the lamp lights up yellow when the ignition is turned on for a few seconds. Lighting of the lamp in other cases indicates a malfunction of the EUR;
- Headlight high beam lamp. Lights up when the high beam headlights are turned on;
- Lamp for turning on external lighting. Lights up when the headlights are turned on or the headlights are low beam;
- Airbag system malfunction lamp. To check, the lamp lights up yellow when the ignition is turned on for a few seconds. In other cases, if the lamp is illuminated, it indicates a malfunction in the airbag system. In this case, in the event of an accident, the airbags will not deploy;
- Immobilizer lamp. If the system is working properly and the engine is allowed to start, when the ignition is turned on, the lamp flashes once and goes out. If the lamp flashes constantly (accompanied by short beeps), then the system is faulty. If, after turning on the ignition, the lamp lights up for 15 seconds and goes out, then the anti-theft system is not activated;
- Liquid crystal display of the on-board computer (BC). Displays daily and total mileage, as well as information from the BC;
- Seat belt warning light (optional). The lamp lights up when the driver's seat belt is not fastened, accompanied by buzzer signals for 1.5 minutes;
- Brake system emergency lamp. To check, the lamp lights up red when the ignition is turned on for 4 seconds. In other cases, the lamp is lit indicating an insufficient level of brake fluid, or another malfunction of the brake system;
- Front passenger airbag lamp (optional). Passenger airbag deactivation lamp;
- Anti-lock braking system fault lamp (optional). To check, the lamp lights up when the ignition is turned on and goes out after a few seconds or after the engine starts. When the lamp is lit, there is a malfunction in the ABS system, but the brakes remain fully operational;
- Engine management system malfunction lamp (Check Engine). To check, it lights up when the ignition is turned on and goes out after the engine starts. In other cases, the lamp is lit indicating a malfunction in the system. See the error code.
We dismantle the device ourselves
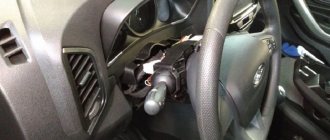
To remove the dashboard in Kalina-2, first dismantle the plastic cladding. The part is held in place by three self-tapping screws, two of which are immediately visible. Look at the tidy below and you will find them. The third screw, in turn, is located in the fuse compartment.
The fuse compartment will be covered with a cover.
In the figure, the required element is indicated by the number “3”.
In the absence of cladding, it is easy to find 4 screws holding the tidy in place. By unscrewing them, the block can be completely dismantled. But don’t rush: when dismantling, you will need to disconnect the connector. This means that even before performing all operations, the battery terminals are disconnected.
Usually only the negative terminal is disconnected. The part is held in place by one nut, and to unscrew it you need a 10mm wrench.
Difference algorithm on a car with air conditioning
"Kalina" with air conditioning has two heater radiators and differs from models without a climate control temperature regulator in the cabin. There are two radiators, because through one of them there is a freon air conditioner, and in another way. antifreeze, like in a car without air conditioning. Accordingly, the temperature controller allows air to pass through one of the radiators depending on its position. It will be more difficult to dismantle such a structure and replace the necessary elements on your own.
To understand that the oven has become unusable, it does not work immediately, because the leaking liquid quickly evaporates and only reminds of a specific smell
When replacing a radiator, you must carefully place the parts that need to be removed, do not deviate from the instructions and follow safety precautions
Replacing LEDs
Having disassembled the instrument panel unit, you will notice that the illumination of two scales and the display is provided by flat LEDs. They, in turn, can be replaced with parts of the same standard size. But remember one rule: the switching polarity cannot be violated. On a planar diode, polarity is indicated by the presence of a “bevel” on one side.
There is an example when standard elements were replaced with blue light diodes:
The next video will show how you can further improve the tidy by simply replacing the LEDs.
The operating voltage of one diode is 3-3.5 Volts. Do not install elements designed for other voltages. It is not recommended to use LEDs that are too powerful and consume significant current.
Adding a digital scale
For those who have experience working with plastic, the following tuning option is recommended.
In the instrument panel, under any of the two scales, you can cut out a window in which a standard indicator is fixed. We are talking about a digital indicator consisting of two or three separate segments.
The plane of the tidy is cut through, an indicator is attached to the window
When the modification is completed, the dashboard looks like this:
3-segment indicator installed and secured
If there are glares, use a simple solution: cover the inside of the glass with a matte tint film. Good luck.
Rework by replacement
This option seems obvious: the speedometer and tachometer can be left in place, and the computer display can be replaced. In reality, such a replacement is difficult to perform. The on-board computer in Kalina-2 is integrated into the tidy circuit, so you cannot get rid of it. The instrument cluster unit is usually replaced as an assembly, and third-party companies have been able to provide several suitable solutions.
You can install a more “complicated” dashboard than in Kalina, produced by ITELMA. This company is a supplier of electronics for all VAZ cars. We will leave the choice to the owner. Happy tuning!
How the “non-ITELMA” dashboard works, video example
Using the instrument panel, the driver can monitor the vehicle’s condition, driving characteristics and other functions and processes that affect the safety of movement. Also, with the help of indicators, the car owner will be able to operate it correctly. Next, a description of the indicators on the instrument panel will be given to make it easier for a novice driver to understand.
Appearance of the instrument panel on Lada Kalina
Dashboard for Lada Kalina
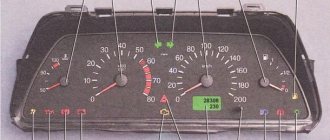
- Tachometer. Using it, the driver can find out what the crankshaft rotation speed is. The dial is divided into sectors. If the arrow is on red, this means that the engine is operating in a dangerous mode.
- Indicator of a malfunction of the system that controls the motor. This light turns orange when the ignition is turned on and goes out when the engine starts running. If it lights up while the engine is running, this means that the engine must be stopped and the cause of the malfunction eliminated. Operating the engine with the indicator on is prohibited.
- A diode that signals the activation of the left turn signal.
- Indicates low oil pressure in the system. After the motor starts running, the indicator goes out. If the light stays on for more than 5 seconds after starting the engine, this will indicate that the oil pressure in the unit is insufficient.
- ABS. Lights up when the ignition is turned on and goes out two seconds after starting the engine. If it continues to burn, this will indicate that the brake system is faulty. It is not recommended to use the car in this case. We need to find the problem and fix it.
- Immobilizer. Lights up orange. The driver can use it to determine the operation of the car’s security system.
- Coolant. The indicator displays the temperature of the coolant in the system. After starting the engine it goes out. Also, during operation of the car, the indicator may light up when the fluid temperature is above 115 degrees. When the temperature drops to 110 degrees, the light bulb will go out. It is not recommended to operate the vehicle if this indicator is constantly on. This may lead to motor failure.
- Parking brake. After starting the engine it goes out. If the indicator lights up while driving and a beep is heard, this will indicate that there is not enough fluid in the brake system. If the indicator lights up, it is prohibited to operate the vehicle.
- The light indicates that the right turn signal is on.
- Battery. Lights up red. Goes off after starting the engine. If the light comes on at full intensity while driving, this means that the battery charge is low. In this case, the alternator (or alternator belt) or voltage regulator may be faulty. It is prohibited to operate the machine with the indicator on.
- Speedometer. Shows the speed at which the car is moving.
- ESC. Lights up yellow. Goes off after starting the engine. If “ESC OFF” lights up while driving, this indicates that the system is not working. If the lamp flashes while driving, this will allow the driver to understand that the system is working. In all other cases, the lamp will indicate that the exchange rate stability system is not working.
- Shift to higher gear. Not applicable on this car.
- High beam. It indicates that the high beams are on in the car.
- Fog lights. It says the rear fog lights are on.
- Low beam. The car has low beams on. If the headlight does not light, check the fuse, then replace the low beam lamp.
- Front fog lights. Indicates that the front fog lights are on.
- Reset daily mileage. When you press the button, the counter is reset to zero.
- On-board computer display.
- Unclosed doors. Indicates that one of the doors in the car is not closed.
- Fuel. Indicates the amount of fuel in the tank. It is not recommended to allow the gasoline in the tank to run out completely. This may cause the fuel pump to fail.
- Tire pressure. Indicates insufficient tire pressure.
- Power steering indicator. Lights up orange. After starting the engine it goes out. If the lamp lights up while the engine is running, this indicates a malfunction of the amplifier. The problem needs to be fixed.
- Unfastened seat belts.
- Motor malfunction. Not used on cars.
- Airbag condition. Goes off after starting the engine. If the lamp continues to light, this indicates a malfunction. The problem needs to be fixed, because if necessary, the pillow will not open.
Electrical diagram of the rear wiring harness Kalina 2
1, 2 – rear wiring harness blocks to the instrument panel wiring harness blocks; 3 – right side direction indicator; 4 – left side direction indicator; 5 – hand brake sensor; 6 – rear wiring harness block to the tailgate wiring harness contacts; 7 – interior lighting unit; 8 – switch in the driver’s seat belt; 9 – trunk lighting; 10 – electric fuel pump module; 11 – right lamp; 12 – rear wiring harness block to the tailgate wiring harness contacts; 13 – left lamp; 14 – rear wiring harness block to rear left door wiring harness block; 15 – rear wiring harness block to rear right door wiring harness block; 16 – rear wiring harness block to the front right door wiring harness block; 17 – rear wiring harness block to the front left door wiring harness block; 18 – airbag control unit; 19 – rear wiring harness block to the front wiring harness block; 20 – block of the rear wiring harness to the block of the wiring harness of the parking system sensors; 21 – control unit and alarm unit of the safe parking system; 22 – parking system switch; 23 – speaker of the safe parking system; 24 – switch for interior lighting in the driver's door pillar; 25 – interior light switch in the right front door pillar; 26 – switch for the interior lighting in the pillar of the right rear door; 27 – interior light switch in the left rear door pillar; 28 – right seat electric heater switch; 29 – left seat electric heater switch; 30 – electric heater of the right seat; 31 – electric heater of the left seat; 32 – driver’s seat belt pretensioner; 33 – passenger seat belt pretensioner; 34 – central unit of body electronics; 35 – sensor for automatic glass cleaning system (rain sensor); 36 – rain sensor sensitivity regulator; 37 – rear wiring harness block to the instrument panel wiring harness block; 38 – right rear speed sensor; 39 – left rear speed sensor.
conclusions
After reading the information given in the article, it will be easier for you to navigate behind the wheel and control the operation of the Lada Kalina car systems.
The instrument panel serves to inform the driver about all important processes occurring in his car. It is by using the scales, indicators, symbols and lamps located on this device that the person sitting behind the wheel is able to monitor the performance of components and systems. For the shield to function correctly as a single system, it requires regular diagnostics. It consists not only of scanning by connecting electronic reading devices to the computer, but also by visually monitoring the performance of all specified components of the dashboard (lamps, etc.).
So that the owner of the Lada Kalina, namely the instrument panel of this model we will talk about today, can easily navigate this complex device, the manufacturer kindly agreed to complete the car with the appropriate instructions. It is enough to familiarize yourself with its postulates and all the secrets of the dashboard will be revealed to you, then the instrument panel will not seem like something incredibly complicated.
The manufacturer did his best when developing the design of such a thing as the instrument panel on the Lada Kalina car. It is unlikely that you will be able to find owners dissatisfied with the “interface” of the device. The dashboard is painfully informative and primitive in terms of perceiving symbols and managing some of them.
How to change the color of the instrument cluster illumination
1. Use SMD of the desired color. For example, use white LEDs to illuminate one part of the panel, and blue LEDs for the other.
2. Use a light filter (electrical tape or film of different colors) together with white LEDs. We stick it on the desired area, as a result of which we get the illumination of the desired color. To change the color, you do not need to use a soldering iron, just disassemble the instrument panel and stick a film of a different color.
It is worth noting that the hands have an orange coating. To change the illumination of the hands, wipe off the varnish with nail polish remover and, if necessary, apply a new varnish of a suitable color. Another option is to use LEDs for the arrows of the desired color.
You can change the backlight of the screen (display) not only by replacing its LEDs, but also by turning the film over. First, we tear off the film from the display, clean the remaining adhesive with a solvent and glue the film on the back side. This results in an inversion of the panel display:
3. Use RGB-SMD LEDs. If you want to change the backlight color at once. In this case, you will have to additionally output switching control.
About the main panel instruments
We offer you a description of the panel icons.
- Topping the “list” is the tachometer. This is the most important device that the dashboard contains, especially in sports cars. Its scale displays the number of revolutions of the Lada Kalina engine in a specific unit of time (per minute).
- Now about the speedometer. This component allows the owner to control the speed of movement. Traditionally, for domestic cars the scale is graduated in kilometers per hour.
- Fuel sensor. This analyzer shows the fuel level in the tank. When the arrow of the device enters the red zone, this indicates a minimum level. It is strictly not recommended to travel with such a supply of fuel, since air pockets in the line will damage the pump if it gets into the pump. If the instrument panel signals with an orange light, this indicates that the emergency fuel reserve of 5 liters has been included in the consumption, after the combustion of which the engine will stop naturally.
- Coolant temperature sensor in the engine cooling circuit. The arrow reading of this device must be monitored continuously. If disturbances occur in the system, the needle “vigorously creeps” into the red zone, terrifying the owner due to the risk of engine overheating. With this development of the situation, the temperature of the antifreeze reaches 115 degrees (Celsius). The movement cannot be continued.
- Fuel level warning device. This component produces an audible signal indicating the need to replenish the fuel tank.
- Direction indicators. Indicators in the form of arrows are directed to the right and left sides. The symbols flash green, accompanied by relay clicks.
- Reset daily mileage. The button located next to the odometer is responsible for its activation.
- Emergency Signal. In active mode, the button with the symbol present on it blinks vigorously, spreading a red glow around it. With her in the ensemble, the external marker lights blink. This mode should be turned on in emergency situations or other situations that put the driver at a dead end (got lost, got a call from an angry boss, etc.).
- Electric amplifier indicator. This orange symbol goes out more slowly the more the wheels are turned when the engine is started.
- High beam symbol. The lamp turns bright blue when the corresponding light mode is activated by the driver.
- Parking brake Lada Kalina. If you cock the handbrake, this lamp will light up red.
- Oil pressure. This symbol lights up red when the ignition is turned on and goes out 3-4 seconds after starting the engine. If it continues to glow, then the engine needs to be diagnosed (first the oil system, and then all other components).
- Dimensions. The green indicator lights up when the external side lighting is turned on.
- Airbag symbol. The orange lamp lights up when the ignition is turned on and immediately goes out when the engine starts.
- Immobilizer. This is also an orange indicator showing the status of this node in arming mode.
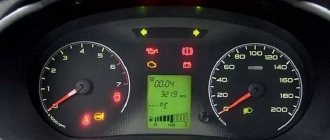
- On-board controller monitor on liquid crystals. The top line is occupied by the daily mileage indication. At the very bottom of the screen, an indication of the outside temperature, a timer and an indication of the average fuel consumption of the Lada Kalina car are displayed.
- Seat belt symbol. Those who do not fasten their seat belts will immediately be “caught” by a red indicator, which will “treacherously” light up as soon as the vehicle starts moving. In addition, the driver's ears will be shocked by an intermittent beep.
- Battery indicator. Illuminates when the ignition is activated and goes out when the engine starts. The color of the signal lamp is red.
- Symbol for minimum fluid in the brake system. Its signaling algorithm is similar to the action just indicated (for the battery).
- Brake force distributor. The indicator also lights up when the ignition system is turned on and is deactivated when the power plant starts.
- Wear of brake pads. “Welcomes” the driver when the pads reach the minimum thickness.
- ABS symbol. Lights up when there is a breakdown of components of the brake blocking system. Similar to the previous symbols, it activates and goes out. Its color is also orange.
- Motor indicator. Turning on the ignition of the LADA Kalina causes this warning lamp to “flare up” in orange, and starting the engine turns it into an inactive state.
Indicators included in the panel
The Kalina dashboard consists of 23 main elements. These include:
- rotation speed meter;
- indicator showing battery charge;
- speed meter;
- indicator displaying lubricant pressure in the engine;
- temperature indicator;
- turn signals;
- fuel level sensor in the tank;
- hand brake;
- daily mileage reset;
- reserve fuel quantity lamp;
- computer display.
The control panel is equipped with a huge number of various lamps that display the general condition of the car. There are signs indicating the daily mileage, hazard warning lights, external lighting, and the condition of the airbag.
The control panel for high beam lamps, immobilizer, seat belt indicator, emergency brake condition and ABS (anti-lock braking system) malfunction has been added.
A general understanding of the structure of the Kalina torpedo allows you to always be aware of the machine’s performance. If any malfunctions occur, thanks to the pointers, you can fix the problem in a short time.
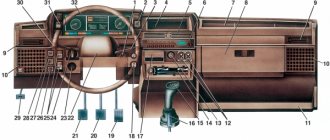
The icons on the instrument panel are arranged in a special order. Therefore, you should start getting acquainted with them by studying the detailed diagram. It lists all the main elements with assigned serial numbers.
About controls that do not touch the dashboard
The main elements include the following attributes of the driver's seat:
- clutch pedal;
- pedal drive brakes;
- accelerator pedal;
- of course, the steering wheel.
The central part of the panel also has additional “organs”:
- levers and regulators that control the heating and ventilation modes of the interior;
- climate system activation organ;
- Lada Kalina stern glass heating button;
- mechanism for opening and removing the ashtray.
Rear door wiring harness diagram Kalina 2
1 – contacts of the tailgate wiring harness to the rear wiring harness block; 2 – block of the wiring harness of the rear additional (tailgate) to the block of the wiring harness of the license plate lights; 3 – gear motor for the electric drive of the tailgate lock; 4 – rear window heating element; 5 – rear window wiper gear motor; 6 – tailgate lock; 7 – contacts of the tailgate wiring harness to the rear wiring harness block 2; 8 – additional brake signal.
