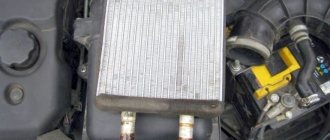
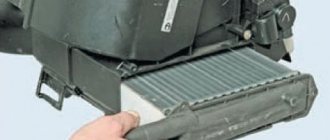
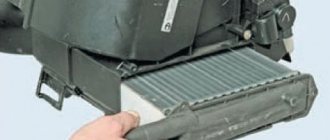
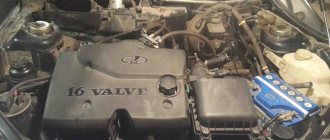
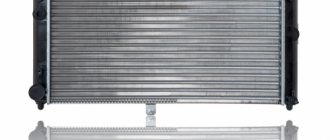
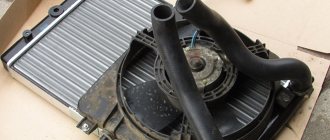
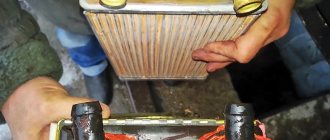
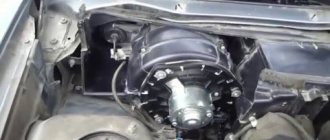
While driving, the car’s power plant necessarily heats up, therefore, to prevent overheating, cars, including the Lada Priora, have a cooling system. The main element of this system is, if anyone doesn’t know, the radiator; it is in it that the liquid is cooled to an acceptable temperature, which prevents overheating of engine parts. If there is a malfunction in the cooling system and it does not fulfill its intended purpose, the power unit will soon overheat, which will lead to its breakdown.
How to remove the heater radiator on a Priora without air conditioning
Since the beginning of production, AVTOVAZ has installed a heater from the “ten” on the Priora (catalog number: 21110-8101012). The disadvantage of this design was that the heater radiator is removed towards the vacuum brake booster, which allows this to be done. As a result, the heater assembly has to be dismantled.
The procedure is as follows:
- Remove the wipers.
- Remove the frill (wind flap).
- Remove the soundproofing of the engine shield.
- Disconnect a bunch of connectors with wires.
- Unscrew the heater mountings.
- Divide the heater into two parts (left and right).
- Remove the right side of the heater (in the direction of travel).
- Move the left side to the side to gain access to the heater radiator.
- Drain the antifreeze.
- Replace the heater radiator.
The whole procedure took several hours. This is shown in more detail in the video:
There is another way to replace it. To gain access to the heater radiator, instead of the heater housing, it is necessary to remove the vacuum brake booster along with the brake pedal. This allows access to the left side of the heater (in the direction of travel) and to the radiator itself.
Replacing the heater radiator on a Priora with air conditioning
After some time, the manufacturer began to equip its cars with air conditioning (climate control), for example, HALLA or Panasonic (article: 21703-8101012). The design of the new Priora heater from a maintenance point of view turned out to be much more convenient. Now, to replace the stove, you do not need to dismantle the frill, windshield wipers, heater or vacuum brake booster.
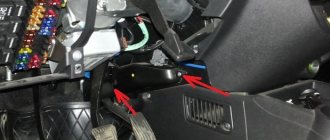
It is only necessary to: remove the sound insulation of the engine shield, remove the engine air filter hose and the seal in the area of the heater radiator hoses. All! Drain the antifreeze and remove the radiator towards you, towards the engine.
Video instructions are attached:
Thus, replacing the radiator of a Priora stove depends not only on the type of heater, but also on the chosen method of replacing it. How did you remove the heater radiator on your car? Which method suits you best? Let us remind you that solutions to other problems with the stove can be found in this article.
Share on social networks:
Found an error? Select it and press Ctrl+Enter..
A customer arrived with a complaint about leaking antifreeze. He told me that somewhere along the way, they changed the pipes going to the heater radiator, but nothing changed. Since antifreeze flows down the engine shield, it is either the return pipe or the heater radiator itself. In our case, the heater radiator leaked.
- Necessary tool
- Removing the Priora heater
- Replacing the stove radiator
- Video of replacing the heater radiator on a Priora without air conditioning
Why is antifreeze leaking?
An antifreeze leak on a Priora occurs due to a leak in the system. For example, when cracks appear in the pipes, destruction of gaskets between the water pump and thermostat, as well as due to the formation of cracks in radiators.
All breakdowns associated with antifreeze leaks are a wide-ranging problem that can take from 15 minutes to a whole day to fix.
Video of replacing the heater radiator on a Priora without air conditioning
With the onset of cold weather, the driver's interest in the operation of the heater increases sharply. The motorist checks the stove for various faults. In some cases, a radiator failure is detected. How is the radiator of a Priora stove replaced? As a rule, this component cannot be repaired and must be replaced. Having opened the dismantling manual, the driver may discover that the parts in his Priora are located differently than in the instructions. It's all about the air conditioner. The process of removing the heater radiator in older versions of Priora without this option differs from dismantling it in new cars where air conditioning is already present. We will look at both options.
Modern Priors are equipped with Halla or Panasonic air conditioners. There are differences in the operation of the two models, but the location of their installation does not differ, depending on the air conditioner brand, so the process is the same. As an example, we will consider a Priora with Halla air conditioning.
Finding a leak
The simplest and most effective way to detect a leak in a radiator is to dismantle and immerse the radiator with clogged pipes in a bath of water. Where there is a hole, water will flow in and air bubbles will begin to form.
If the leak is too small, it may not be detected naturally. Then you should connect a compressor or pump to one of the pipes to increase the internal air pressure in the radiator tubes.
A more reliable way to detect the smallest leaks is diagnostics using fluorescent components, which make it possible to detect even microscopic leaks in the seal of the radiator housing. But this is an expensive diagnostic that can only be carried out at a service station.
Symptoms of a problem
The Lada 2170 model received a liquid heater, which is connected to the engine cooling system. The radiator is a heat exchange device; due to this component, the air entering the Priora’s cabin is heated. Coolant constantly circulates through the radiator; this part of the heater is subject to wear.
It is worth checking the radiator in the following cases:
- The stove stopped heating properly.
- The coolant level drops.
Once you disassemble part of the heater system, you will see a rusty and most likely leaking radiator. There may also be leaks in hoses, pipes and the junctions of these elements. You should check the heat exchanger of the stove only after you have made sure that there are no defects in the operation of the gearmotor and damper.
Design of cooling system radiators from LUZAR
LUZAR cooling radiators can be divided into three types:
- Tubular-plate, prefabricated, aluminum. It consists of aluminum plates through which aluminum tubes pass, inside which coolant runs. The tanks on such radiators are made of plastic. Cooling radiators of this type are used for small cubic capacity engines due to limited heat transfer; have the best rigidity and light weight, as well as the lowest cost.
- Tubular-tape, non-assembled (brazed), aluminum. The corrugated aluminum tape in such a radiator is located between aluminum flat-oval tubes. Radiator tanks of this type can be made of either plastic (most common) or metal (most often used for cargo cooling radiators). The design of non-assembled (brazed) aluminum cooling radiators is the most universal, allowing the creation of heat exchangers with any given characteristics. They have low weight and relatively high rigidity, as well as an optimal price.
Tubular-tape, non-assembled (soldered), copper-brass. The design is very close to type 2 - between the copper flat-oval tubes there are copper strips folded in the form of an “accordion”. At the same time, the tanks on such cooling radiators are made of brass - in order to increase the overall rigidity of the structure. Copper cooling radiators - due to the high specific heat capacity of copper - have excellent heat transfer performance. However, due to the high softness of copper, cooling radiators made of this metal are forced to have a narrow tube and a large interval (step) between the tubes, which imposes serious limitations on maximum efficiency. Also, copper cooling radiators have the highest prices and the lowest rigidity to torsion, fracture and internal pressure. In this regard, copper cooling radiators are “outdated” and are gradually falling out of use.
Replacing the radiator of the Priora stove
To work, you will need a standard set of tools, which includes socket wrenches 10 and 13, side cutters, a Phillips screwdriver, and a wrench 8. In both cases, you will have to disconnect the heating system hoses; the remaining coolant will pour out of them, so immediately place containers under the pipes heater Then the liquid can be returned to the system.
With air conditioning
- First of all, we need to remove the rubber seal of the windshield to gain access to the parts;
As you can see, dismantling the radiator in a Priora with air conditioning does not require draining the antifreeze. Coolant will only come out of the expansion tank and the heat exchanger itself. Removing the radiator in a VAZ 2170 with Panasonic air conditioning follows the same scheme, only a few fasteners may differ. Now you can replace your worn-out heater with a new one!
Without air conditioning
- Work begins by disconnecting the negative terminal of the battery. We remove the windshield trim along with the windshield wiper arms, as these elements will interfere with operation;
- The next step is to remove the coolant supply pipes to the engine injectors;
- The windshield trim is held in place by seven screws. Unscrew it to completely remove the element;
- Now we move on to the hood seal, in its center you will find a tightening screw - unscrew it;
- The engine noise insulation closes the passage to the heater system - pry up the plugs with a flat screwdriver and unscrew the plugs;
- We unscrew the screws and dismantle the sound insulation. Remove both covers;
Clean the heat exchanger and inspect it for damage. If cracks are found on the plastic elements, then you will no longer be able to repair the part - only replacing the stove radiator on a Priora, which is done in the reverse order, will help here.
Video instructions for replacing a leaking stove:
- Priora instrument panel: indicator designations, error interpretation
- Do-it-yourself PTF Priora installation
- Signs of malfunction, replacing the speed sensor on a Priora
Enter the text of the comment: the climate control does not work, not old, not new, the heater damper opens and closes all the way to the MMR, I change it every year in the spring, the damper does not close, I have to remove the MMR in the fall, everything is new on the computer, the regulator works
I unscrewed the 4 screws that hold the plastic plate near the heater radiator pipes, but for some reason it does not come out of the heater. Priora with Panasonic. I would be grateful if you could tell me.
You definitely won’t be able to repair the radiator yourself, as this requires special tools and skills. However, you can definitely remove and install a new one. Our instructions will help you achieve your goal. By following consistency in work, you can easily dismantle and replace the radiator.
How to find an antifreeze leak
Since coolant can leak from different places in the system, you need to know where and how to look for the problem area.
Visual inspection of pipes and clamps
By visual inspection, you can identify areas of coolant leaks. The more it leaks, the easier it is to find the leak. The procedure should begin with the pipes, since on many cars they have free access. During the inspection, you need to carefully check each hose of the cooling system, especially if the elements have been changed a long time ago.
In hard-to-reach places, you can use a mirror to check. Damaged hoses must be replaced. If no leaks are found on them, they are still worth inspecting for preventive purposes. Additionally, the clamps are subjected to visual inspection. Sometimes it happens that a coolant leak is caused by a loose fastener. In this case, tightening the clamps more tightly allows you to get rid of the problem in question.
Video: antifreeze leak due to loose clamps
Using cardboard
Using a sheet of cardboard or paper, even minimal leakage can be detected. To do this, you need to place a sheet of paper under the engine compartment. After a long period of parking, drops or a puddle of antifreeze will be clearly visible on the material. Based on the identified location, you can begin to search for the area with the malfunction, which will be much easier to do.
Checking the expansion tank
Diagnosis of the expansion tank can be done in several ways:
- Wipe the body dry. After this, warm up the engine to operating temperature and see if there are any antifreeze leaks on the body.
- The container is dismantled, the coolant is drained and checked using a car pump and pressure gauge. To do this, create a pressure of about 1 atmosphere and monitor whether it will decrease or not.
Using the third method, you can diagnose the entire cooling system for leaks.
Cover diagnostics
The cover valve can be checked in a fairly simple way. To do this, on a cold engine, unscrew the plug and shake it near the ear. If you can hear the inner ball clicking in the valve, then the device is working properly. If there is no such sound, you can try to wash the lid. If this does not help, then it is better to replace it.
Video: checking the expansion tank cap
Using a fluorescent additive in antifreeze
A rather original way to diagnose a cooling system is to use a special additive in the coolant. Today, such products are presented in a large assortment. As a rule, they are added to antifreeze, and the test is performed with an ultraviolet lamp on a running engine.
With its help, the location of the leak is identified, one by one checking the elements and mechanisms of the system. This method of checking is one of the most effective, since it allows you to identify hidden leaks, as well as when the coolant leaves in minimal quantities. It is quite difficult to find such places during a visual inspection.
Video: checking the system with an ultraviolet lamp
How to replace a Priora radiator
First you need to prepare the following tools:
- head for key 10;
- Phillips screwdriver;
- pliers;
- container for liquid.
Next you need to proceed according to this scheme:
- First you need to drain the antifreeze into a prepared container. To do this, open the expansion tank and unscrew the plug.
- The fan shroud is then removed to disconnect the wires.
- The signal is removed.
- Then you need to loosen the clamps and disconnect the compression and outlet pipes.
- Unscrew the radiator mount to the body.
- Disconnect the fastening element.
- Loosen the tie clamp and remove it.
- Pull out the radiator and mounting bushings.
After this, it must be inspected for cracks and deformations in order to understand why it has ceased to function properly. Replacing the radiator follows the same procedure. You can purchase a new heater radiator at a specialized store. There are a large number of companies producing such devices, so you should trust proven ones.
For example, high-quality devices are produced by Halla and Panasonic. You must understand that without air conditioning, the car engine will overheat and eventually burn out. Replacing a motor is very expensive, so you shouldn’t allow such breakdowns. The radiator on a car with air conditioning must always work smoothly to avoid serious problems. Also, be sure to purchase high-quality grilles for this appliance.
If you understand your iron horse, try installing a new radiator yourself. But it’s better, of course, to ask for help from specialists who will do the job faster and better. Today, in every city there are service centers where craftsmen offer their services at affordable prices.
Search
replacing the cooling radiator on the previous one The cooling radiator enters the cooling system when the engine is running, the coolant moves in a circle, and most of it is in the cooling radiator; when moving at speed, the radiator is cooled by the air flow, so the liquid is cooled and the engine does not heat up much.
To change the radiator in a car, this is useful: you will need all the wrenches that you have in your arsenal, as well as screwdrivers, containers into which you will drain the coolant (or one large tank), and stock up on the last coolant as you need will drain the old one, if it is in poor condition, then it is better to pour good fresh fluid into the radiator and expansion tank after assembly!
Where is the cooling radiator?
It is located in the front part of the body, secured with nuts, they are attached to the TV (the TV is the headlights; it still connects the bumper and side elements), removing the radiator from it is not difficult. Priority, because there is enough space to crawl with your hands, but However, if you stock up on the right keys, the replacement process will be completed even faster, and the collar will be just that, and the hat goes to it.
You may also like
When do I need to change the radiator?
If it has leaked, the radiator should be replaced to make it easy in the summer, just pay attention in the winter to the coolant, and to be more precise, before its level, if it starts to drop, the entire cooling system will need to be checked and to detect the leak, so to recognize that the radiator is leaking in a certain way, you can only use the best ultraviolet light (this makes the coolant very visible) or by removing it and placing it in a huge water tank (by removing the radiator, you can very accurately determine whether there is hole), before placing it in the radiator, you will need to pump compressed air through the coolant fill hole in the radiator (this hole simply does not need to be submerged in water or plugged well than any other holes to prevent the air from passing 100% and), For more information on how to perform this test, watch the video below:
If the holes in the radiator are not huge, then you cannot change it at all, but simply solder it carefully and for a short time, but if you want to install the radiator and, as they say, forget about it, then it is better to buy a new one, as is usually the case, it is not hermetically sealed, it lasts for a long time, and if a pebble gets into this place, the soldering immediately flies away (this depends on how well the radiator is soldered)!
Radiator take off
to priority
Suite 11th year, r
air conditioning
Hull.
REPLACE COOLING RADIATOR
2171 16v Xs Panasonic After spare radiator
(Lusar).
How to replace the cooling radiator on a VAZ 2170-VAZ 2172?
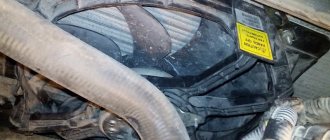
1) Before starting work, drain all the coolant from the radiator (how to drain the liquid, read "here") and start removing the electric fan (if you do not remove it, you simply will not be able to remove the radiator), first remove the negative terminal from this battery, bolt which tightens it, then remove the air filter housing, as it will interfere a lot (read "here" how to do it), well, you can go to remove the electric fan, first disconnect the wiring from each other, the electric valve wiring or goes to the side in the form of a connector and a block (see photo 1), then unscrew (it is most convenient to use a screw) two bolts that secure the electric fan with the housing to the left and four nuts, two of which are located on top and two on the bottom (see photo). photos 2 and 3 below), and then remove the electric fan by pulling it up and to the side
Removing the Lada Priora radiator
We remove the radiator to check it for leaks (if a leak is suspected) or replace it if damaged.
Remove the radiator fan (see “Removing the radiator fan”).
We disconnect the bracket for fastening the sound signal from the security alarm of the upper cross member of the radiator frame (see “Removing the sound signal of the security alarm”) and remove the sound signal from the radiator.
Using the “8” socket, we loosen the clamp securing the radiator supply hose...
...and remove the supply hose from the radiator pipe.
Using an “8” socket with an extension, we loosen the clamp securing the radiator outlet hose.
Remove the outlet hose from the radiator pipe.
Using a 10mm socket, unscrew the two nuts securing the radiator to the upper cross member of the radiator frame.
Radiator attachment points to the top cross member of the radiator frame (shown with engine removed for clarity).
Tilt the radiator towards the engine...
... use a screwdriver to loosen the ribbon clamp securing the steam exhaust hose... Remove the steam exhaust hose from the radiator pipe.
We take out the radiator, removing the pins of its lower mounting from the rubber pads. If it is necessary to replace the rubber bushings of the upper radiator mounting...
...remove the metal spacer sleeve...
...and a rubber bushing from the radiator bracket. Install the radiator in reverse order.
If the rubber cushions came out with the radiator, then when installing it, first insert the cushions into the holes in the lower cross member of the radiator frame. Cushions that are torn or have lost their elasticity should be replaced with new ones. We replace the ribbon clamp of the steam exhaust hose with a worm clamp.
Pour coolant into the cooling system and bring the fluid level in the tank to normal (see.
"Replacing the coolant").
Video on the topic “Lada Priora. Removing the radiator"
Replacing the PRIOR radiator replacing the PRIOR radiator HOW TO REMOVE ENGINE COOLING RADIATOR ON PRIOR LUX HALLA
The radiator must be replaced if a coolant leak is detected from it. In a workshop that has special equipment, the VAZ 2170 radiator can be checked and repaired. You will need: a 10" wrench (a socket head is more convenient), a screwdriver with a Phillips blade, and pliers with long thin jaws.
1. Drain the coolant (see “Replacing the coolant”). 2. Remove the electric radiator fan for the Lada Priora (see “Removing and installing the electric radiator fan with casing”). 3. Remove the horn (see “Removing, installing and adjusting the horn”).
4. Loosen the clamp securing the supply hose to the radiator.
5. . and remove the hose from the radiator pipe of the VAZ 2172.
6. Similarly, disconnect the outlet hose from the radiator.
7. Unscrew the two nuts securing the radiator to the body of the VAZ 2171.
8. Remove the steam hose holder from the hole in the upper cross member of the engine compartment.
9. Tilt the radiator towards the engine. Loosen the strap clamp of the steam exhaust hose...
10. . and remove the hose from the VAZ 2170 radiator fitting.
Helpful advice Tape clamps for fastening hoses are inconvenient to use and are difficult to re-ensure the tightness of the connection. When disconnecting the hoses for the first time, we recommend replacing the band clamps with commercially available worm-type clamps.
11. Lift the radiator up.
12. Remove the two lower mounting cushions from the radiator if they remain on the radiator mounting pins or remove them from the holes in the cross member if they remain on the body of the VAZ 2171. Replace the torn or lost elastic cushions.
13. Remove the rubber-metal bushings from the radiator brackets. Replace torn or loose rubber bushings. 14. Rinse the outside of the radiator with a stream of water and dry. If there are cracks in the plastic radiator tanks, replace the Lada Priora radiator. 15. Check the tightness of the Lada Priora radiator by plugging its pipes and lowering it into a container of water, supplying air to it at a pressure of 0.1 MPa (1 kgf/cm2). No air bubbles should appear from the radiator for at least 30 seconds. If the radiator does not fit completely into the container, check it sequentially from all sides. 16. Install the priora radiator in the reverse order of removal, first placing the lower mounting pads on the radiator pins and inserting the upper mounting bushings into the brackets.
Helpful advice To eliminate the possibility of coolant leakage in the future, before connecting hoses to the VAZ 2172 radiator, lubricate the radiator pipes with a thin layer of sealant.
17. Install the electric fan and all removed parts in the reverse order of removal. 18. Fill in coolant (see “Replacing Prior coolant”).
Radiator malfunctions and their consequences
A broken device poses a great danger to the entire cooling system, since its instability can lead to overheating of the power plant. The Lada Priora uses a standard combined cooling system, when the liquid system is supplemented by an air system. Thanks to this combination, it is possible to more effectively maintain the optimal engine temperature under various loads and operating modes.
There are not many malfunctions of this element as such. The main problem with the radiator is the occurrence of coolant leakage. This happens due to a violation of the integrity of the tubes caused by damage to the radiator. Another common problem is clogging of its inner surface. This can be determined due to the constant operation of the forced cooling fan.
The temperature drops, but rises quickly and causes the ventilation unit to turn on again, even when driving at high speed. This is due to the fact that the oncoming air flow cannot cool the coolant due to dirty plates. Contaminants can also be deposited on the inner walls of the radiator tubes, which will impede the circulation of antifreeze. And, as a result, the engine will begin to heat up excessively.
When the device is broken, the power unit overheats.
Causes of malfunctions
The main factors causing problems with the radiator are the following:
- wear of elements of a natural nature (any part sooner or later wears out and fails);
- mechanical impacts leading to damage and deformation;
- operating the engine in violation of the manufacturer's requirements and recommendations.
Breakdown can be caused, among other things, by the use of low-quality coolant, mixing antifreeze with other types of antifreeze, and the use of all kinds of sealants that can clog the pipes and affect the circulation of the coolant (coolant). At the same time, the human factor cannot be ignored when, due to incompetence in matters of radiator maintenance and repair, a part has to be replaced.
Often, simple dirt and poplar fluff that clog the plates can cause the engine to heat up. Due to systematic overheating, the fuel in the cylinders begins to detonate due to the increased temperature of the coolant. As a result, the cylinder head burns out, the block itself becomes deformed from high temperatures, and cracks appear. And ultimately, the destruction of the piston group and crank mechanism completes the picture. It's not far from a major, expensive engine overhaul.
You need to carefully monitor the condition of the cooling system and the radiator in particular.
Signs of trouble
Even a beginner can determine that there are some problems with the radiator. This does not require special knowledge. It is enough to understand in general terms the principle of operation of the cooling system of the Lada Priora.
Troubleshooting
| Symptoms | What are they related to? |
| On the instrument panel, the arrow of the coolant temperature indicator constantly approaches the red zone. | This provokes the inclusion of forced cooling and indicates engine overheating. |
| Constant overheating can also be determined by the deposit on the spark plugs. | During normal engine operation, the coating is sand-colored; when overheated, it is white. |
| It is necessary to carefully monitor the level of coolant in the expansion tank. | A sharp or gradual decrease in level will indicate the presence of a leak, which may be associated with a leak in the radiator. |
Low coolant levels will also lead to rapid overheating. It is easy to find a leak by characteristic smudges on the surface, as well as by the presence of antifreeze or antifreeze where the car is parked.
Removing the Lada Priora radiator
We remove the radiator to check it for leaks (if a leak is suspected) or replace it if damaged.
Remove the radiator fan (see “Removing the radiator fan”).
We disconnect the bracket for fastening the sound signal from the security alarm of the upper cross member of the radiator frame (see “Removing the sound signal of the security alarm”) and remove the sound signal from the radiator.
Using the “8” socket, we loosen the clamp securing the radiator supply hose...
...and remove the supply hose from the radiator pipe.
Using an “8” socket with an extension, we loosen the clamp securing the radiator outlet hose.
Remove the outlet hose from the radiator pipe.
Using a 10mm socket, unscrew the two nuts securing the radiator to the upper cross member of the radiator frame.
Radiator attachment points to the top cross member of the radiator frame (shown with engine removed for clarity).
Tilt the radiator towards the engine...
... use a screwdriver to loosen the ribbon clamp securing the steam exhaust hose... Remove the steam exhaust hose from the radiator pipe.
We take out the radiator, removing the pins of its lower mounting from the rubber pads. If it is necessary to replace the rubber bushings of the upper radiator mounting...
...remove the metal spacer sleeve...
...and a rubber bushing from the radiator bracket. Install the radiator in reverse order.
If the rubber cushions came out with the radiator, then when installing it, first insert the cushions into the holes in the lower cross member of the radiator frame. Cushions that are torn or have lost their elasticity should be replaced with new ones. We replace the ribbon clamp of the steam exhaust hose with a worm clamp.
Pour coolant into the cooling system and bring the fluid level in the tank to normal (see.
"Replacing the coolant").
The antifreeze is gone, what can I add?
Quite often, a problem with antifreeze leakage occurs on the road and takes the driver by surprise. Since you can’t drive a car without coolant, you need to top it up to the level, but where can you get it if this happens suddenly?
It is recommended to always have at least one liter of coolant in your car. If there is no coolant in the car, you can add regular water and drive to the nearest station. Subsequently, after adding water to the system, when the breakdown is eliminated, it must be washed and filled with new coolant.
