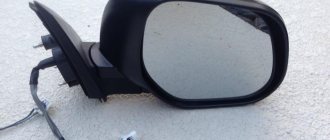
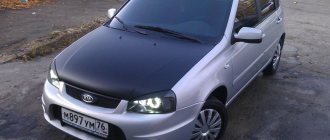
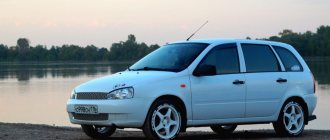
If you look at it externally, it seems that the Lada Kalina is very different from the Granta, it seems that every element is completely different and these are completely different cars, but in fact this is not the case. The doors of Kalina and Granta are the same and mirrors from Granta are suitable for Kalina, as well as for Datsun.
The second version of the viburnum even has the same mirrors as on the Grant. Similar mirrors were installed on Datsun ON-DU and MI-DO.
Required
| Name | vendor code | Price, r |
| Heated, electrically adjustable exterior mirrors with turn signals (LED) | 4 500 | |
| Joystick/control unit from Lada Kalina (with central locking) | 11180-3709810 | 850 |
| Connector - electric mirror block (female) | CB-00090291 | 150 |
| Block for power window control unit 1118 | CB-00039007 | 50 |
| Connection block to power window button | CB-00033485 | 50 |
| 10 PIN connector with contacts for mirror control | 170 | |
| Wing turn signal plug | 21700-8212104 | 150 |
| Door card blank | 83191 3K030 | 30 |
Installation
Remove the door trims and dismantle the old exterior mirrors (by removing the mounting screws). Mirrors of the new SE model are installed in place of the old ones without modifications.
To install the joystick, make a hole in the door trim using a file or a utility knife. Sample:
To stretch the wires from the interior to the doors (see connection below), you will need to drill a hole in the door rosette with a drill (or find a suitable female-male connector).
When to look in the mirrors
The need for constant monitoring of the external space when driving can be said in the words of an experienced driving instructor. “If the driver does not see the car overtaking him, then he very rarely looks in the mirrors. If the driver has not looked at the car being overtaken, then he is not looking in the mirrors at all.” In the latter case, the overtaking driver must ensure that he can safely return to the same lane.
From the above it is clear that it is necessary to constantly monitor the situation around you, even if you are driving along a straight road, without the need to change lanes. When moving left and right, viewing the mirrors is mandatory. Professional driving instructors recommend checking your mirrors every 6-9 seconds.
Reviewing the reflection of car mirrors is mandatory in the following cases:
Before performing a maneuver. When starting to move, moving from lane to lane, or overtaking, you should adhere to the following sequence of actions: review-warning-check-move. The driver must look in the interior or side mirror, turn on the turn signals, look in the side mirror (if necessary, look at the blind spot), and maneuver.
When braking. A novice driver should develop an extremely useful sequence of actions when braking: look in the interior mirror, slightly press the brake pedal to activate the brake lights, then gradually reduce the speed to a complete stop.
When moving the car in the opposite direction, you need to look at all the mirrors one by one. Before starting to move, to assess the surrounding situation, you need to turn around (in other cases, even leave the cabin), and then shift the gear to reverse, then moving at a minimum speed.
Before opening the doors, look in the side mirror to prevent an unwanted collision. Don't forget about the rear passengers facing directly onto the roadway.
Connection
Connecting the central lock
. We use a circuit of two relays so as not to go under the panel to the central locking unit:
Connecting heated mirrors
(to the wiring harness under the driver's threshold)
Connecting mirror turn signals
:
- Option 1: Pull the wire from the direction indicator on the fender.
- Option 2: To the wiring harness under the driver's threshold (blue - left turn signal; blue-white - right).
We transfer the wires from the power windows from the standard buttons to a new block with a joystick.
For Lada Kalina and Granta with heated and electric side mirrors (without direction indicators):
- The new mirror has a chip with six wires, but the old one has only five. We pull the sixth contact, which is used to operate the turn signals.
The process of installing exterior mirrors from a liftback on a Lada Granta sedan is also shown in the video:
Are you considering replacing old mirrors with new ones with turn signals?
Share on social networks:
Found an error? Select it and press Ctrl+Enter..
Source
Checking the presence of standard heating
The presence of a heated rear view mirror cannot always be detected at first glance. The fact is that there is often no separate button to turn it on, and many car owners wonder how the heated exterior mirrors are turned on. The function is activated automatically when the rear window heating is turned on. To check if the mirror heater is present:
- Start the engine;
- Turn on the rear window heating;
- Spray the mirrors with water or blow on them;
- Touch it with your hand.
When the heating is running, the water drops dry within 1-2 minutes; when you breathe, the mirror does not fog up, and it is warm to the touch. In the cold season, you can verify the presence of heating by simply observing how long it takes for the mirror to thaw after being parked overnight. If a heating element is located underneath, the defrosting process takes only a few minutes.
How to install electric mirrors on Kalina 1
Greetings to all. Here I will try to collect all the information about what is needed to install electric mirrors in the Kalina standard configuration. Perhaps there will be a second part about installing them, or perhaps there won’t be)
Article number of the left mirror: 1118.8201021-74 Article number of the right mirror: 1118.8201020-74 2500 rub.
2) ESP Control Unit: Everything here was long and complicated, having stopped at the first store I came across, I was surprised that the unit with a joystick costs less than without it (615 rubles and 720 rubles), I decided to postpone the purchase and study the information on them, it’s too painful it was all suspicious. Literally immediately I found a review about fakes on the drive, and from there the information was on the manufacturer’s official website. (I didn’t think this would even happen). It was decided to place the second order on emexe, 4 days of waiting and in my hands a fake but for 820 rubles, I immediately issued a refund. I felt a little sad, I was already thinking that I would have to sort through suppliers in eme until the original arrived. I immediately decided to go around the city’s stores in search of this wonderful block, after visiting 5 stores it became even sadder - they were either fakes or out of stock. But I didn’t give up, and decided to visit the original Lada Detail company store; the unit was fake for 1040 rubles (no comments). Frustrated, I drove towards the house to place an order at emexe, approaching the house I remembered a small store that was located nearby, and lo and behold, the original unit I was looking for was in stock for 740 rubles. (Phew)
Article number AVAR: 352.3769. LADA article number: 1118-3709810 740 rub.
3) Block in the ESP unit for the electric mirror control:
This connector cannot be found on the open market; they fit perfectly from VAGs.
Article number: AMP 1534125 + AMP 1534170 Article number: AMP 1-1534171-1 + AMP 1534125-1 Article number: 8E0 971 980 Article number of TERMINAL for them: - N 907 647 01 Actually, VAGa has a lot of such connectors, write and I’ll add it. There are also many collective farm options in the form of jtag 8 pin, usb to the mat. fee, etc... 0 rub.
4) Reciprocal block for electric mirrors: Also not available for sale.
Everything is easy here, either order on the Internet for 120 rubles per piece + delivery, or take a bite and make rolls, I chose the second path. 0 rub.
5) Terminals in the front door connectors: Difficulties do not cease to leave us, they are not in stock and have not been seen.
Article number Mom: DELPHI 12147302 Article number Male: DELPHI 12147299 Article number (mother+father with wires): Cargen AX416
In 95% of cases, people drill through the block and insert wires into it, but this is not my method. In eme I bought 5 sets from Cargen. 275 rub.
6) Internal mirror covers: Well, everything is clear here, we get rid of traces of the presence of mechanical mirror adjustments. Once again Emex comes to the rescue.
LADA article number: 11180820138410 LADA article number: 11180820138510 75 rub.
We can finish here, this kit is enough to connect electric mirrors to the heated rear window button, but I decided to hang them on a separate button.
6) Heated windshield button: I probably won’t install a heated windshield anyway, and the button has been hanging idle for a year, so I’ll use it. Again purchased through emex.
Factory article: 993.3710-10.176 LADA article: 11180371009000 148r+35r block for it.
7) Time relay: I often notice that I can drive with the heated rear window on all day, in order to protect the glass I decided to install a time relay, there are a lot of options, so I won’t list them, I’ll say right away that the pleasure is not cheap. And here emexe comes to the rescue, you might think? alas, he is powerless here, dismantling Nexia decides! So let me introduce you, a General Motors time relay
Article number: 96116223 Price for imeх 598 rubles, bought at disassembly for 100 rubles. It is necessary to change resistor R2 to 100 kOhm so that the operating time is 10 minutes. (I haven’t decided how much to do yet) 100 rubles.
 Terminals in the gray mounting block: Well, now all that remains is to somehow insert the relay and fuse into the mounting block, but again the problem is, there are no terminals, just order on the Internet. Manufacturer: Delfi mounting block.
Article No. Previous: AMP 927837-2 Article No. Previous: N 907 327 03 Article No. Previous: 8KW 863 927-003 (50251827 / 1987352121) - for wire 0.5-1.0 mm2 Article No. Previous: 8KW 863 927-013 (50251857 / 1987 352122 ) - for a wire of 1.5-2.5 mm2 Article No. Previous: 8KW 863 927-023 (50251323 / no ) - for a wire of 2.5-4.0 mm2 Article No. Relay: DELPHI 15344768 Here you can add a bunch of VAG substitutes, I I settled on choosing AMP 927837-2 + DELPHI 15344768, ordered terminal 505 on the website, delivery by multi-envelope 100 rubles. I still haven’t found the small terminal for the relay, if anyone knows, please write. 355 rub.
9) Crimper: The terminals will still need to be crimped with something, so we take:
I chose the cheapest one, its level, as they say, is about a little better than pliers)) I have already tested it on cheap terminals, with the right experience everything works out perfectly. 250 rub.
At the moment I'm waiting for a parcel from St. Petersburg and warmer weather. There is a question about purchasing wires, can anyone tell me the brand of cable used in the car?
To install mirrors you will need:
Exterior mirrors with heating, electric drive and turn signals (LEDs) 21910-8201005-20, 21910-8201004-20
Joystick/control unit from Lada Kalina (with central locking) 11180-3709810
Connector - electric mirror block (female) TsB-00090291
Block for power window control unit 1118 CB-00039007
Connection block to the power window button CB-00033485
10 PIN connector with contacts for mirror control
Wing turn repeater plug 21700-8212104
Door card plug 83191 3K030
To install the joystick, make a hole in the door trim using a file or a utility knife. Sample:
To stretch the wires from the interior to the doors (see connection below), you will need to drill a hole in the door rosette with a drill (or find a suitable female-male connector).
Connector pinout:
Connecting the central lock. We use a circuit of two relays so as not to go under the panel to the central locking unit:
- thin gray wire
- Option 1: Pull the wire from the direction indicator on the fender.
- Option 2: To the wiring harness under the driver's threshold (blue - left turn signal; blue-white - right).
We transfer the wires from the power windows from the standard buttons to a new block with a joystick.
For Lada Kalina and Granta with heated and electric side mirrors (without direction indicators):
Thermal shrinkage, rear window heating button from Viburnum (for remaking the windshield heating button, since it is not fixed), electric glass lift unit with joystick (700 rubles), double wire with a cross-section of 0.75 sq. mm. (0.5 is possible) for a total of 15 meters (it’s better to take 20), a mounted fuse block, a 10A fuse, connectors for the mirror “chip” and for a 4-pin relay and the relay itself.
Since the connector for the joystick of mirrors is simply not sold anywhere (how is that possible?), connectors from the old system unit were used as connection connectors (those that go to reset, power, etc.) - they fit perfectly.
1. Connecting heated mirrors. According to the following scheme.
You need a four-contact relay, pin 86, plus is supplied through the switch and fuse, which I took from the first contact of the rear window heating button, relay pin 86 is connected to pin 30, ground (housing) is supplied to 85. The principle of operation is that when the ignition is turned on, the plus is applied to the first contact of the rear window heating button (I used this button, and put the cap on the windshield heating, since it was not fixed). When the button is pressed, the relay closes and the plus is supplied to contact 87 of the relay, and then goes to the mirror. The mirror heating button is located next to the auto light button at the bottom of the center console.
According to the photo - white wire - button illumination, yellow (yellow-white, sort of) plus (1). Button pinout: A - ground (housing) B - button backlight (plus 12 volts) D - plus LED (for turning on the button) 1,2 - on, off.
2. Connecting turn signals. To do this, you need to remove the dashboard and find two wires - blue and blue and black.
Blue is a right turn, blue and black is a left turn. We simply connect the positive wire of the mirrors to these wires.
3. Ground We need three ground wires - the first is for the heated mirror, the second is for turns and the third is for the joystick itself. I connected all three wires to the door, like this. There is a good bolt and a good washer, and this is a good mass :))
4. Pinout of the “chip” of the mirror itself.
On the right side there are three wires for adjusting the mirror, on the left there are two wires for heating. By color - brown is a plus for mirror heating, black is a minus for heating. Blue, red, green are mirrors. The red wire is common, i.e. if you apply plus to red, and minus to blue and green, the mirror will move in one direction, and if minus to red, and plus to others, then in the other direction, in principle, this is what the joystick does... The following connectors were used on the mirror chip , by filing them with a file on both sides, I couldn’t find others to do the same...
5. Pinout of the ESP joystick.
Left mirror (blue to 1; red to 7; green to 6) Right mirror (blue to 3; red to 7; green to 8). Pin 7 is common to both mirrors. 2 contact - plus 12 volts (joystick backlight) 4 contact - plus 12 volt joystick. 5 - mass (minus). The second contact was connected to the white-black wire of the ESP unit itself (12 volts after turning on the ignition), and the backlight to the white one. Visible in the photo
6. Pull the wires... There are 5 wires coming out of the mirror - three to the right mirror, one to the turn signal, one to the heating. It seemed to me that pulling the wires through the corrugation was the most difficult and tedious thing. Drilling a hole
Be careful, when drilling, the drill caught the wires, those inside... I had to restore it. I cut the corrugation in two places, and pulled the wire through with a screwdriver, attaching the wire to it and securing it with an electrical tape. The wire didn't work...
We drag the wires along the bottom, through the bottom of the heater radiator and then under the carpet into the right door (except for the heating, the heating relay was placed next to the ashtray inside).
Similar problem. I just haven’t gotten around to buying a pulp and paper plant and a luxury control unit yet..
I have this unit as standard. (Photo attached)
I’m thinking about how to make friends with it, and whether it is necessary to replace the pulp and paper plant in this case.
| ASTs User Menu |
| View profile |
| Find more posts by ASTs |
And in your case, I think you need to install everything and hook it up.
The adjustment of the left mirror is connected to the block in the door, the heating goes through the door connector via pin 24 on the TsBKE. That is, there is only one wire out of the door for heating, but I would rather route it to a separate button.
The right mirror goes through three wires through the door connector along pins 23, 24 and 25 to the TsBKE block. That is, you will have to pull wires from the passenger door to the TsBKE. 23 and 25 contact to 6 and 7 (xp3) TsBKE.
| ASTs User Menu |
| View profile |
| Find more posts by ASTs |
| Anozognozolog user menu |
| View profile |
| Find more posts by Anozognozolog |
counter question - what is the difference between grant and viburnum doors?
| oapv user menu |
| View profile |
| Find more posts by oapv |
| Read the diary |
| View downloads |
But the mirrors remain the same, and I can connect them to the block, in accordance with the pinout of this block, and they will work?
Yes, the doors are no different! My joint
Heating, as I understand it, must be done through a relay (which is in the diagram with a new button or with a button for heating the rear window), but the mirrors are connected directly without using a relay, do I understand correctly? The only thing I need to do is hang a fuse (10A?) on the wire from which I will take the plus (I plan in the area of the mounting block)
| Anozognozolog user menu |
| View profile |
| Find more posts by Anozognozolog |
| oapv user menu |
| View profile |
| Find more posts by oapv |
| Read the diary |
| View downloads |
| Anozognozolog user menu |
| View profile |
| Find more posts by Anozognozolog |
| oapv user menu |
| View profile |
| Find more posts by oapv |
| Read the diary |
| View downloads |
For everyone who wants electric mirrors to be “normal” on Kalina2.
My equipment is standard+ (CBKE, climate control, etc.). This module comes from the factory (It has fake mirror adjustment buttons).
In my case, cramming in a separate control module is wildly collective farm. Therefore, after reading the documentation and looking at the electrical diagrams for KALINA 2 2192/2194, I found out.
To operate electric mirrors you need:
1. Replacement of CBKE. Needed from a suite (Cat number: 2190-3840080-60 IU)
2. Wiring to the front doors from the suite. (Cat numbers: 21902-3724545-00 21902-3724544-00)
3. The corresponding module in the driver’s door. (I chose 1118-3763080-30 IU from Datsun 2197. Similar to mine. But it has active mirror adjustment buttons.)
4. The wiring harness under the dashboard needs a little addition.
For the right mirror adjustment to work, it is necessary to stretch wires from the front right door to the TsBKE. From 23 and 25 door contacts to 6 and 7 (xp3) TsBKE. (Computer contacts fit perfectly into the xp3 connector) And also for the heating to work on the right and left sides, you need: from 24 contacts of each door, stretch the wire into the mounting block, to the rear window heating relay.
It took a lot of time to purchase all the components. Everything was not taken from the first place that came across. In addition, the original TsBKE passed away, so its replacement was extremely important.
The complete installation took about 9 hours. The most difficult thing is replacing the CBKE. And don’t forget to register the immobilizer keys after everything. This requires a second key (with a red tag).
AvtoVAZ first began installing side mirrors of the new SE model (with heating, electric drive and turn signal indicators) on the Lada Granta liftback. Then they began to be equipped with Luxe trim levels of the sedan. The following describes how to install and connect standard liftback mirrors with your own hands to simpler versions of the Lada Granta sedan, as well as to the Lada Kalina station wagon and hatchback.
Lada Kalina Station Wagon Riesling › Logbook › Repair of electric window Lada Kalina
In this blog I will describe my method for repairing a power window. I was inspired to do the repairs myself by the high price of components. When my lift failed, I decided to buy a new one and change it, but when I arrived at the store and found out the cost of a new electric window lift, I decided to try to repair my lift with my own hands (the price of an assembled lift in my city is 1,800 rubles, and the price of an engine with a gearbox is 1,000 rubles). First I needed to determine the cause of the lift failure. Let's consider the main reasons for the failure of cable power windows: 1. The fuse has failed (detected by visual inspection). 2. The relay has failed (to check, remove the relay and place a jumper on pins 30 and 87). 3. Damage to the lift control buttons (detected by visual inspection and testing the lift on and off buttons with a tester). 4. Wire break with loss of power (detected by step-by-step power check with a tester at the nodes and connections of the lift). 5. Breakage of the cable guide rollers (detected by visual inspection; during operation, the engine will be heard, but the lift will not work). 6. Breakage of the lift gear gear (detected by visual inspection; during operation, a characteristic cracking sound will be heard and at this moment the glass stops lowering or rising). 7. Failure of the lift motor armature (with such a defect, power comes to the lift, but it does not react in any way and there is a characteristic smell of burning wiring). 8. Wear of the graphite brushes of the lift motor (at the first stage of the lift’s operation, the glass goes down but does not rise to the top. At the second stage, feedback is heard when the button is pressed, but nothing happens; this is complete wear of the brushes). In my case, after examining and identifying the cause, I concluded that my brushes had failed! And in this post I will describe how to cure this problem with minimal cost. I was faced with the question of where and what brushes to buy? After reading a little on the Internet, I found a post that said that brushes from a VAZ 2106 generator are ideal.
What are mirror caps used for?
- The aerodynamic capabilities of the Lada Kalina are improving. At speeds above 80 km/h, the mirrors “whistle” noticeably less, since they have a more streamlined shape.
- The car acquires an attractive appearance. Different overlays make it possible to experiment with the appearance of the car without damaging the paintwork and the car owner’s wallet. Kalina, unlike most domestic passenger cars, has large exterior mirrors. This not only provides a good overview. Such linings give the car a certain charm.
- Lada mirror covers can be purchased complete with LED turn signal repeaters. This plays an important role in ensuring safe driving. When viewed from the front, the side turn indicators are poorly visible when driving, which can lead to an emergency. Installing overlays with signal repeaters will help avoid this problem.
You can purchase chrome, black, white and other trims. They can take the form of ordinary stripes, be placed on the corners of mirrors, or completely repeat their shape. Corners that cover only part of the mirrors look like part of the styling. Their choice depends on the character and taste preferences of the owner.
Most popular options
Panoramic (spherical) mirrors
Instead of the usual interior element, you can install a panoramic one. They require a trial period that lasts approximately 2 weeks. Panoramic accessories provide a better view, but “move away” objects. If during this time the driver gets used to distortions and constant recalculation of the distance to objects, the accessory can be left.
The advantages of such models are:
- no blind spots;
- free movement along the rows;
- focus on a panoramic view, rather than on the side elements, and a holistic perception of the road situation at the rear;
- control over the behavior of rear passengers.
The models consist of reflective surfaces of various types. This virtually eliminates blind spots.
Anti-glare
When choosing which mirrors to put on a VAZ 2114, if you often have to drive in poor visibility conditions, pay attention to options with anti-dazzle
Wedge cover
The surfaces of the reflective layers are placed at an angle to each other. Two layer positions, for day and night operation, can be switched manually or electrically. During the day, images are reflected from the mirror surface, and at night from the outer glass surface.
Liquid crystal reflective layer
A layer of liquid crystals is located between two glasses and normally reflects objects with normal brightness. In blinding light, the crystals change their characteristics and reduce the brightness of the image. The transparency of the crystals is determined by an electronic control system.
Tinting
Tinting with special films weakens the light that blinds the driver. But the effectiveness of tinting depends on the individual qualities of the driver.
Installation
Remove the door trims and dismantle the old exterior mirrors (by removing the mounting screws). Mirrors of the new SE model are installed in place of the old ones without modifications.
To install the joystick, make a hole in the door trim using a file or a utility knife. Sample:
To stretch the wires from the interior to the doors (see connection below), you will need to drill a hole in the door rosette with a drill (or find a suitable female-male connector).
Cost of covers for Kalina mirrors
They cost on average from 500 to 1000 rubles, depending on the shape, color and method of attachment. Unpainted overlays can be purchased for only 200 rubles. Chinese cheap analogues cost very little (100-300 rubles), but are significantly inferior in quality. They are more fragile, brittle and inelastic.
Mirror covers for the Lada Kalina are the simplest but most noticeable tuning element!
The VAZ service station provides complete diagnostics and repairs of the Lada Kalina (1118) sedan.
Our car service specialists have extensive experience in maintaining and repairing VAZ vehicles, and thanks to our own auto parts store, we always have the necessary parts in stock.
View the price list for basic VAZ repair work
Prices for our car service services are significantly lower than the market average, which allows you to carry out high-quality repairs at an affordable price.
STO VAZ provides the following types of services:
- Car repair Lada Kalina (1118) sedan;
- Full diagnostics of VAZ 1118: diagnostics of the engine, brake system, suspension, compression measurement;
- Maintenance of Lada Kalina 1118 sedan: changing engine and transmission oil, replacing filters, replacing technical fluids, replacing the brake system and timing belt;
- Repair of the chassis: suspension, clutch, steering, brake system;
- Tire fitting and storage;
- Car wash;
VAZ-1118 is a new model of AVTOVAZ LLC, the production of which began in 2004. This is a five-seater passenger car with front-wheel drive, a front engine and an all-metal welded body. Lada Kalina is distinguished by a reinforced structure of the roof, sills and central pillar. Additionally, safety is ensured by bumpers made of impact-resistant polypropylene. The engine is four-cylinder, four-stroke, in-line, eight-valve, with a displacement of 1.6 liters.
What is a hydraulic corrector and how does it work?
The hydraulic headlight corrector is installed on the Grant from the factory. This device adjusts the headlights higher or lower depending on the vehicle's load.
You need to adjust it yourself - there is no automatic setting.
The corrector control is located under the light switch handle. Position 0 corresponds to a car with one person - the driver.
The more the machine is loaded, the higher the hydraulic corrector value should be.
Principle of operation:
- the handle controls the hydraulic corrector cylinder;
- the cylinder regulates the pressure in the flexible tubes that go to the pushers;
- pushers are installed in the headlights - the higher the pressure in the tubes, the stronger the liquid inside the pusher presses on the rod;
- the position of the rod deeper/further is responsible for adjusting the headlight higher/lower.
What to do if the hydraulic corrector is broken
Have both or one headlight stopped responding to the hydraulic corrector? Most likely your pusher is broken.
According to the regulations, the entire hydraulic corrector mechanism is replaced as an assembly and cannot be repaired. Price from 400 to 1000 rubles. Order number: 21903718010.
If you want to fix the pushrod, there are two ways.
Table 1. Options for repairing the headlight range control pusher.
| Option 1 is barbaric. No further adjustment. |
|
| Option 2 is humane. We return the corrector to full working condition. |
|
A corrector kit costs about 700 rubles - it may be easier to replace it
How to replace a hydraulic corrector with an electromechanical one
Do you want to replace the hydro with an electric corrector (EMKF)? The process is simple, as there are ready-made solutions from the factory.
Article: EMKF-41. Price 2000-3000 rubles.
To replace, you only need straight hands - depending on the manufacturer of the EMKF:
- dismantle the old hydraulic corrector;
- We install a new corrector control unit in place of the cylinder - we run the wiring according to the instructions;
- we pull the wires through the elastic band along which the hydro pipes went;
- We put the regulators in their standard places in the headlights.
Connection
. We use a circuit of two relays so as not to go under the panel to the central locking unit:
Connecting heated mirrors
(to the wiring harness under the driver's threshold)
Connecting mirror turn signals
- Option 1: Pull the wire from the direction indicator on the fender.
- Option 2: To the wiring harness under the driver's threshold (blue - left turn signal; blue-white - right).
We transfer the wires from the power windows from the standard buttons to a new block with a joystick.
For Lada Kalina and Granta with heated and electric side mirrors (without direction indicators):
- The new mirror has a chip with six wires, but the old one has only five. We pull the sixth contact, which is used to operate the turn signals.
The process of installing exterior mirrors from a liftback on a Lada Granta sedan is also shown in the video:
Are you considering replacing old mirrors with new ones with turn signals?
Let us remind you that we previously talked about how to make lights in the rear-view mirrors on a LADA.
Keywords: side mirrors Lada Kalina | side mirrors of Lada Granta | Lada Granta accessories | Lada Kalina accessories | turn signals Lada Kalina | turn signals Lada Granta | heating for Lada Granta | heating Lada Kalina
Found an error? Select it and press Ctrl+Enter..
- AvtoVAZ continues to hire specialists for its engineering service in 2022
- Video review of the new Lada Granta and its configurations
- Video review of how the standard Lada Vesta audio system works
- Diagnostics, checking the rear suspension of Lada XRAY
Electronic means of combating “dead” spots
As you know, technology always serves people.
Parktronic
A very useful device - parking sensors - warns the driver of possible obstacles when parking or maneuvering in a confined space. The electronic system, in addition to giving a sound signal, displays information about the distance to the existing obstacle. A parking radar is indispensable when maneuvering an inexperienced motorist, in poor lighting or in limited urban conditions.
In recent years, in mass production (including domestic production), cars have been equipped with parking sensors in the factory workshops. On earlier car models, parking radars are installed additionally. Today their cost is comparable to the price of painting one bumper. And it costs much less than repeatedly eliminating the consequences of a careless collision with an obstacle.
Video cameras
Side and rear view video cameras, panoramic cameras, and radars for monitoring “dead” spots are also very popular among drivers. The variety of models and their capabilities allows you to objectively assess the space surrounding the car. The image is displayed on the screen of an on-board computer, car monitor, TV, or even on the display of a multimedia system or navigator. In addition, recording is made on digital media.
The view from video cameras significantly helps when driving, maneuvering, and parking. Currently, the installation of video cameras is carried out at the request of the buyer at the manufacturing plant, including on budget car models.
General characteristics of the car
Kalina in the cheapest configuration differs only in mirrors and door handles, which are not painted in body color. In order not to overpay when purchasing another package, and not to lose the appearance of the car, you can buy covers for mirrors and handles. These elements are sold in pairs; if one is lost or broken, you will have to purchase a new pair.
For Kalina, both in the old and in the new body, new mirror caps will not hurt. These elements will help change not only the color of the mirrors, but also their shape and function. Nowadays, the market offers a large assortment of linings, allowing you to select parts in accordance with the taste preferences and financial capabilities of the buyer. These can be standard attachments for Kalina mirrors or painted in body color or equipped with additional options. Variations of forms are also very diverse. Stylish embossed mirror caps give the car sporty features. With them the car looks faster and more energetic.
Lada Kalina Sedan › Logbook › Installation of electric mirrors. Part 1.
For a long time I wanted to install heated mirrors, but I kept putting it off and didn’t dare... And finally I got around to it, but just installing heating was too easy, plus on the second viburnum, someone folded the mirror and in any case, in addition to heated mirrors, I would have to buy mirrors to the second car. Therefore, I decided to install luxury mirrors for myself, and transfer my manually adjusted ones to car 2. I ordered a set of old-style mirrors (I don’t like mugs) with a drive on the solina-avto website (2600 rubles + 350 delivery). The kit includes all bolts and gasket. The parcel was sent by ZhelDor for 5 days, the mirrors were packaged 5+, so there were no defects from transportation. For interest, while the parcel was in transit, I found out in the service the cost of a full connection: from 3000 to 5000 + in addition to have all the relays, wire fuses, etc. .d., in general, the prices are not adequate, to put it mildly, I decided to install everything myself. Heated mirrors through a separate button, because their operation is required less frequently than the heated rear window.
I bought everything I needed: the ESP unit 352.3769 has been with me for a long time; its cost is about 500 rubles. Rear window heating button 2115 - 82 RUR. 7-pin block for the heating button - 35 RUR. flat fuse holder - 30 RUR. fuse 15A - 5 relay 98.3777-10 - 45 RUR relay block - 25 RUR heat-shrinkable tubes - 63 RUR wires 35 m - 391 RUR. (I took 2 pieces of 10 meters and 3 pieces of 5 meters. It would be nice if they were all different colors, I found only 3 color options, you can have one color, you just have to label each wire so as not to get confused) 5-pin block assembly for mirrors 2 pcs -66r. round terminals 3 pcs. — 36 RUR. upholstery pistons 10 pcs — 30 RUR.
I have minimal experience working with electricians, so I began to study the electrical system. The search for information on installation took quite a long time, because... not on the drive, not on the Kalina forum, it’s almost not there. It’s described more less informatively by local users: Stale-VARevgen56rusStavrr
Well, then there are photos of the process and a minimum of letters, it may be useful to someone... In my case, I couldn’t find connectors for connecting mirrors in stores or at disassembly sites. so I cut it off.
Next you need to find a connector for the ESP unit, it is sold in the Kalino forum, it is not expensive, but delivery by a transport company or by mail increases the price by 200-350 rubles. Therefore, I went the proven route and disassembled the old computer. A suitable connector was in the form of dual USB connectors connecting into one connector on the motherboard. There are also the same single connectors in the area of the power supply, and 4-wire connectors in the place where the floppy disk is connected.
Video - how to make heated mirrors
Going to the store: so, we will need:
1. Heated mirror elements – 2 pcs. 2. 4-pin relay – 1 pc. 3. Button – 1 pc. 4. Relay connector – 1 pc. 5. Button connector – 1 pc. 6. “Crocodiles” - 6 pcs. 7. Small connectors (like on speakers) – 15 pcs. 8. Power cable – 8 m. 9. Heat-shrinkable tubes – (small set). 10. Electrical tape. 11. Nylon ties – 30 pcs. 12. Pistons (if they break when removing the door cards). - 5 pieces.
1. Phillips screwdriver. 2. Slotted screwdriver – thin, long (for disassembling mirrors). 3. Small pliers (for crimping connectors). 4. Wire cutters. 5. Scissors. 6. Knife. 7. WD-40 lubricant. 8. Rags. 9. A piece of rigid copper wire (to pull the wires through).
Let's start installing heated mirror elements:
1. Remove the mirrors from the doors. Yes, it's better to take it off. It will turn out more accurately, faster. In one thing, you can restore the flexion function (my mirrors turned sour and did not fold). To remove the mirror, we need to remove the decorative plastic cover from which the lever for controlling the mirror element sticks out (the cover has latches, just pull it towards you). Then remove the retaining ring and unscrew the 3 bolts. Attention! Unscrew the last bolt while holding the mirror with your hand, otherwise bang. 2. To dismantle the old mirror elements, turn the mirror element as much as possible in any direction so that there is a gap where you can insert a screwdriver. Our task is to pry off the latches of the mirror element. We unclip all the latches and separate the old mirror element.
3. Take the cable and divide it in half. We attach connectors to the wires for connection to the new mirror element. Be sure to use heat shrink tubing. 4. We insert the wire into the technological holes of the mirror housing. We apply the mirror element “at home”. Press lightly until you hear a click. We make sure that the element is in place. 5. We do the same procedure with the second mirror. Attention! I strongly recommend that you try to connect all the wires according to the diagram “on your knees”, make sure that you understand the diagram and understand what to connect and where! Let's make sure the mirrors are warm!
Let's move on. 6. We screw the mirrors to the doors in the reverse order of dismantling. We cut one wire and press it with a bolt to the exposed part of the door. This will give us mass.
7. Remove the door cards (trimming). Look for articles on the Internet or in books. There is nothing complicated. 8. We pass the wire through the technological holes in the door. Disconnect the wiring block between the door and the body (turn the ring and pull it towards you). Our task is to insert the wire into the rubber corrugation. If you do it wisely, you need to prepare small connectors, install them in the block, connect the wires, etc., but I was too lazy... I pulled the wire out from the side of the block and stuck it into the corrugation using solid copper wire. It is better to separate the corrugation from the body, it will be more convenient. Yes, we also unscrew one screw in the plastic cover next to the hole in the body (inside the cabin, you’ll understand...). I cut the edge of the corrugation that goes into the interior and pulled it out through the wire cut. It should be immediately noted that we will have 2 wires coming out of the driver’s door, and one from the passenger door. The fact is that I brought the mass to the relay from the door, in theory it can be done from any place, if desired.
How to adjust mirrors yourself
The mirrors can be adjusted only after the driver's seat has been adjusted.
Salon. Thanks to the flat mirror surface, space is reflected without distortion, allowing you to objectively assess the distance to the object behind you.
When adjusting the mirror in the cabin, it is necessary to cover the rear window as completely as possible, including its lower edge. If the left side of the reflection covers the headrest or part of the face, then with a high seat position this is considered normal.
Mirror covers Kalina: characteristics, installation
Owners of a Lada Kalina car often think about possible improvements to their vehicle. Changes may concern the functional properties of the car or its appearance. Lada Kalina in the first body version has a discreet but stylish design. As for the restyled model, the exterior of the car has a little more aggression, which, by the way, suits it very well.
General characteristics of the car
Lada of the latest generation
You can change the appearance of your car in different ways. What tricks do Lada owners go to in order for their vehicle to stand out from the gray mass of cars. Tuning can change the appearance of a car beyond recognition. New bumpers, airbrushing throughout the body, eyelashes on the headlights, engine and interior tuning - this is just a small list of possible changes. More modest car owners try to only slightly emphasize the individuality of the Lada.
Kalina in the cheapest configuration differs only in mirrors and door handles, which are not painted in body color. In order not to overpay when purchasing another package, and not to lose the appearance of the car, you can buy covers for mirrors and handles. These elements are sold in pairs; if one is lost or broken, you will have to purchase a new pair.
Adjusting the mirror in the cabin
This element is also important when driving a vehicle, as it allows the driver to obtain complete information about the situation occurring behind the vehicle. To adjust it you need:
- Sit comfortably in a chair.
- Position the mirror so that the rear window can be seen completely.
- Adjust the tilt angles so that the axes coincide with the axes of the rear window.
In fact, in this mirror the driver should only see the rear window of the car, nothing more. Many drivers mistakenly believe that it is used so that passengers can be seen. Therefore, when adjusting it, they try to grab the passenger seats, but this should not be done. This is one of the important tips for the driver on how to properly adjust the mirrors in a car, because many people do the opposite. As a result, visibility in the interior mirror is limited, and this should not be the case.
Malfunctions of standard heating
Possible malfunctions and repairs of standard mirror heating are in the table below:
| Possible malfunction | How to repair heating |
| Heating element burnt out | Disassemble the mirror and replace the part |
| The integrity of the wiring is broken | Check the wiring with a multitester, clean, connect and insulate the wires at the damage site |
| The power button combined with the rear window heating is faulty | Check if the rear window heating works. If not, replace the button |
| Heating relay is faulty | “Ring” and replace the faulty relay |
| Fuse burned out | Replace fuse, check wiring for short circuit |
» alt=»»> It’s not difficult to make heated mirrors with your own hands today. Heating components are sold in stores, so all the work comes down to assembling a simple structure and connecting it to the car's electrical network. An assembled and well-functioning device will significantly increase driving comfort in winter and make life easier for owners of any type of car.
Rearview mirror
Absolutely avoid using spherical mirrors. Even if they are large enough and supposedly allow for better viewing.
Such constructions greatly distort reality. Using them, it is impossible to determine the distance to the car behind, which often leads to accidents, accidents and other unpleasant consequences on the road.
Setting up this mirror is quite easy. You need to do the following:
- sit in the driver’s seat in your usual position;
- adjust the seat position in advance so that you are comfortable;
- Having received a comfortable fit, look in the mirror;
- it should show the entire rear window of the car;
- if you can see most of the ceiling, it should be lowered;
- it is also important that a small part of the face or your ear is visible in the reflection;
- if there is a small section of the headrest, this is also good;
- To see what is happening behind, the driver should not seem to rise.
Procedure
Now you can begin installing the heater. First, remove the holder with the mirror from the case. On most cars, it is enough to pry it with a screwdriver or something flat from below and pull it towards you.
Based on the characteristics of the holder, we choose the method of fastening the wire. If the inner surface of the holder is smooth (as in the photo), then stick double-sided tape on it.
Then we lay a piece of wire on this surface. This can be done arbitrarily, for example, in a zigzag or something else. The main thing is to place it so that the thread covers as much of the surface of the holder as possible. In this case, the wire should not intersect anywhere. Scotch tape will hold the nichrome thread well.
If the inner surface of the holder has any protrusions or fastening elements, then it will not be possible to stick the tape. In this case, a soldering iron will help to secure the wire. Everything is simple here - we apply a nichrome thread to the surface and press it with a heated soldering iron. The plastic will begin to melt and the wire will sink into it. Once cooled, the plastic will become hard and will hold the thread. But here it is important not to overdo it with heating the plastic, so as not to “push” it to the mirror. It is enough just to “drown” the wire in it a little and that’s it.
In this way, we fasten the wire along the accessible surface of the holder without touching the fasteners.
When laying the wire, its ends should be placed towards the side of the holder that is closer to the door, and so that they do not touch each other. To these ends we solder terminals for connecting to the wiring or simply the ends of prepared wires. Then the resulting connections need to be insulated.
What exactly will have to be regulated?
Most cars have three mirror reflectors that allow the driver to assess the road situation:
- The interior mirror is most often installed on the windshield of the car and allows you to see the interior and the situation behind the car.
- The left and right mirrors most often have a variable radius, which allows them to cover a larger area. With them, the driver accurately assesses the situation to the left or right of the car.
All three reflective surfaces must be positioned in such a way that they complement each other and allow the driver to get a holistic picture of what is happening behind the car. However, you still need to remember that the area closest to the car remains invisible in any case.
Instructions for installing ready-made components
Installing commercial heated mirrors is a relatively simple operation. To carry it out, it is necessary to remove the part from the car and disassemble it. Glued products are heated with a hair dryer or by soaking in boiling water, after which the reflective overlay is easily removed. » alt=»»> Products fastened with bolts are disassembled using the appropriate tool. Do-it-yourself installation of heated rear-view mirrors purchased in a store is permissible only on clean and dry surfaces.
Before starting the procedure, it is necessary to evaluate the dimensions of the heating element and housing. If printed circuit boards are used, it is possible to remove the stiffeners. The film is cut to size while retaining the heating strips.
The boards are glued to the inside of the case with glue, the films are fixed directly to the reverse side. In both cases, wires are soldered to the contacts of the thermoelement, which go to the power source.
Source
Checking the settings
Now you know how to properly adjust your car's side mirrors, and you can do it yourself. After this, it is advisable to check whether they are adjusted correctly. It is advisable to do this with an assistant, who should walk around the car in a circle at a distance of two meters from the car. The driver must monitor him through the mirrors. Ideally, the assistant’s reflection should disappear from the side mirror and immediately appear in the cabin mirror. If there is a long delay between the disappearance of the reflection in one mirror and its appearance in the other, then this indicates that the adjustment was made poorly, although in some cars this cannot be corrected.
Unfortunately, such blind spots do exist and are worth remembering when driving. Although in this case it is better to install parabolic reflective elements that will eliminate blind spots.
