| Tuning Lada Priora headlights, on the one hand, can be like decorating a car, on the other hand, it can improve the headlights. The most correct way to improve lighting is to install bi-xenon lenses in the Priora. |
Fifth generation lenses (G5) are excellent for VAZ 2170 headlights. The price of such pleasure starts from 3000 rubles.
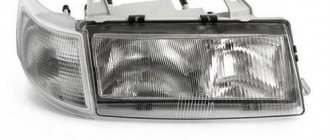
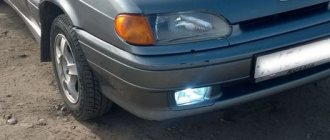
Installing lensed headlights
Installing lenses will change the illumination - after the modification, there will be no standard optics left inside the unit. First of all, a reflector will appear that will redirect the light rays forward into the space in front of the car. Instead of standard light bulbs, optics with lenses are installed, which creates a spectacular glow.
This option is considered the most expensive, and the effect will be noticeable. Separately, you can change the color of the substrates if you can’t spend money on optics.
We refresh the appearance of Lada Priora in the shortest possible time. Methods, methods and means
The desire to improve appearance pushes car enthusiasts to the path of improvement on their own. New improved headlights for Priora or tuning
existing ones can increase the status of the car in the eyes of passers-by and add elements of elegance and uniqueness. And all this with minimal investment of time and money!
Existing methods for upgrading optics can be divided into the following categories:
- painting the internal reflector black;
- installation of “angel eyes”;
- glass tinting;
- sticker of “eyelashes” on the surface of the headlight.
In just a few minutes you can slightly transform the look by gluing an “eyelash” to the outer surface to match the body color or completely tinting the glass
The last operation should be carried out carefully, since the throughput of the structure is reduced
Optics tuning options
Most of the methods listed below can be done by yourself. You will need a minimum number of tools and specific upgrade kits. Today Lada Priora owners prefer:
- Install more powerful optics or headlights with a different shade of light.
- Carry out tuning by tinting reflectors. The rear and front lights can also be dimmed.
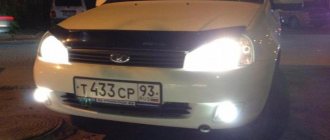
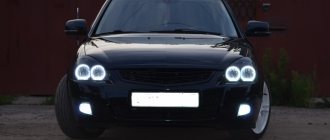
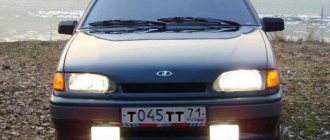
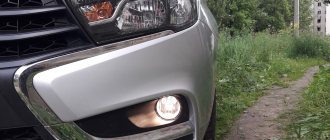
- Install additional lighting (angel eyes) - LED strips significantly transform the appearance of the car.
- Linings - among motorists they are better known as “eyelashes”.
We decided to pay attention to the overlay of additional elements and angel eyes. They do not violate the rules, and even a novice driver can install LED strips independently
Installing eyelashes
Issue price: 300-600 rubles.
You will find ready-made eyelashes in automotive stores. But if you don’t want to spend money on tuning, you can make LED eyelashes with your own hands. To do this, you need plastic tubes or a solid piece and use a utility knife to cut the material into thin strips; as an alternative, you can use vinyl film.
Eyelash curling is done using a soap solution and an industrial solution. You can attach eyelashes to the car body in different ways: some people choose sealant, others prefer to use glue or double-sided tape. Use your imagination when creating eyelashes, here is a Lada Priora with purchased components in the form of a drop:
Angel eyes
Issue price: 2500-3500 rubles.
This is not only stylish, but also useful Lada tuning, as LED strips improve visibility on our roads. You can attach strips to the rear or front lights. As with the previous option, you can purchase angel eyes or try to make them yourself.
We'll tell you how to do this tuning yourself. To work, you will need the following materials and tools: LEDs, dichloroethane, a drill that matches the diameter of the diodes. The number of diodes is calculated for one “eye”. You can take plexiglass as the main material. For example, from blinds.
The process goes according to the following scheme:
- We know that headlights have different diameters, so angel eyes should also differ in size;
- Pour boiling water into a suitable container and place a plexiglass rod there. He should lie there until he softens. You need to bend the ring quickly before they harden. The easiest way to do this is to use jars. Small circles can be made using a jar lid, and large circles can be made with a coffee can;
- We take a drill and make holes in the ends for the diodes. As a result, you should get something like this:
- Now we make notches on the circles. The distance between them should be 2.5 mm. We put on gloves and take dichloroethane. One drop should be placed into each niche and carefully distributed along the wall of the workpiece;
- Let's move on to the main step - installing LEDs and connecting elements using wires;
- We dismantle the necessary headlights and disassemble them. Apply masking tape to the outer part of the glass, and then bend the holders. You can remove the glass using a hair dryer; it should come off quickly;
- Install LED strips. For example, “eyes” can be installed instead of dimensions, since new components will fulfill their role. Check that there are gaps between the lenses. We assemble the front or rear lights of the Lada Priora. Tuning is complete.
Cilia
Tuning Priora headlights, for many, ends precisely at the “eyelashes”. These are ordinary covers that follow the shape of the top of the headlight and are painted in body color. They are sold ready-made in auto parts stores, but eyelashes can be made. They can be made from a piece of vinyl film, the shape of which will have to be changed in order to be applied to the headlight - this is done with a soap solution (in the same way as with applying tint). The trims from the store are attached to the body either with sealant or double-sided tape. Remember that eyelashes limit the height of the illuminated space. In addition to them, there are other worthy ideas for tuning the Lada Priora.
Optics tuning options
Most of the methods listed below can be done by yourself. You will need a minimum number of tools and specific upgrade kits. Today Lada Priora owners prefer:
- Install more powerful optics or headlights with a different shade of light.
- Carry out tuning by tinting reflectors. The rear and front lights can also be dimmed.
- Install additional lighting (angel eyes) - LED strips significantly transform the appearance of the car.
- Linings - among motorists they are better known as “eyelashes”.
We decided to pay attention to the overlay of additional elements and angel eyes. They do not violate the rules, and even a novice driver can install LED strips independently
Installing eyelashes
Issue price: 300-600 rubles.
You will find ready-made eyelashes in automotive stores. But if you don’t want to spend money on tuning, you can make LED eyelashes with your own hands. To do this, you need plastic tubes or a solid piece and use a utility knife to cut the material into thin strips; as an alternative, you can use vinyl film.
Eyelash curling is done using a soap solution and an industrial solution. You can attach eyelashes to the car body in different ways: some people choose sealant, others prefer to use glue or double-sided tape. Use your imagination when creating eyelashes, here is a Lada Priora with purchased components in the form of a drop:
Angel eyes
Issue price: 2500-3500 rubles.
This is not only stylish, but also useful Lada tuning, as LED strips improve visibility on our roads. You can attach strips to the rear or front lights. As with the previous option, you can purchase angel eyes or try to make them yourself.
We'll tell you how to do this tuning yourself. To work, you will need the following materials and tools: LEDs, dichloroethane, a drill that matches the diameter of the diodes. The number of diodes is calculated for one “eye”. You can take plexiglass as the main material. For example, from blinds.
The process goes according to the following scheme:
- We know that headlights have different diameters, so angel eyes should also differ in size;
- Pour boiling water into a suitable container and place a plexiglass rod there. He should lie there until he softens. You need to bend the ring quickly before they harden. The easiest way to do this is to use jars. Small circles can be made using a jar lid, and large circles can be made with a coffee can;
Manipulations with the insides of Lada Priora headlights: we do everything at once
If the design of the lighting system has already been completely disassembled into its components, it is recommended to carry out a comprehensive modification. It consists of painting the interior inserts black and installing luminous rings.
Anyone can paint blenders black. All you need is a can of appropriate paint. Having degreased the surface, carefully apply several thin layers at intervals of 10-15 minutes.
Installation of angel eyes
Installing angel eyesTuning headlights on a Priora in the spirit of BMW
installing them will help. There are already ready-made designs on the market that only require installation.
Don’t be surprised if, when purchasing a “peephole”, an ignition unit is included in the kit. Branded models use a sealed ring with a discharged gas that must be ignited. The use of a special operating mechanism is due to the low temperature of the structure during operation.
Hardworking VAZ 2170 owners can create a work of art with their own hands, having in stock:
- plexiglass tubes;
- LEDs with selected resistances;
- thermal insulating tubes;
- glue;
- drill or hacksaw.
Tubes made of deformable plastic easily take the shape of a ring as a result of heating. Using a tool, notches are made on the surface along the entire length to diffuse light. One LED of any color is inserted into both ends. Afterwards it is attached to the blender and connected to the wiring.
Existing methods for modifying headlights will make the car individual and noticeable in city traffic. By installing a completely new structure, it will not only improve the appearance of the exterior, but also increase safety.
Painting headlights
Tuning the front and rear lights on a Priora is not limited to increasing the aperture ratio. They can be tinted. But this does not mean that you need to paint the glass - the light will simply become cloudy. The tinting effect is obtained due to a change in the color of the substrate. This is done using high temperature paint.
This is done in the following order:
- The entire block is removed and the backing is removed;
- Wipe off the chrome from the substrate (zero polish will help). Cover the substrate with two or three layers of primer and wait about an hour;
- Apply 4-5 layers of paint over the primer, wait for each layer to dry;
- Assemble the block lights, close all the cracks to prevent fogging;
- After painting, all that remains is to adjust them. The main thing is that the light is not too dim and does not cause inconvenience when driving.
Adjustment after any modification of the optics is performed as follows:
- Place the car at a distance of 5 m from a flat wall (for example, opposite the garage);
- Set the adjusting screws under the hood to “0”. Put a person of similar height behind the wheel;
- The headlights are adjusted one by one; while one is being adjusted, the second one is closed;
- The clear edge of the light should be 10 mm below the top edge of the headlight.
Adjustment is not a useless requirement of technical inspection standards. This must be done for comfortable driving at night - you won’t need to peer and look for obstacles on the road, they will be illuminated if adjusted correctly.
How to install angel eyes
Angel eyes on the Priora are LEDs that are installed inside the front unit, along the perimeter of the lenses and in the rear light. To do this you need to purchase:
- Electric wire of moon-white color. Type SH; diameter 2.6 mm;
- Receiver (Operating voltage – 12 Volts).
After everything is ready, you can begin active actions:
- Raise the hood, remove the battery (this will make it easier to work).
- Dismantle the block, remove the substrates.
- First secure the wires in place with tape (lightly) or clothespins - this is done to fix their position. Then fix them with epoxy resin.
- Wait for the resin to dry, secure the substrates and seal all the gaps with sealant so that the glass does not fog up. We carry out the installation.