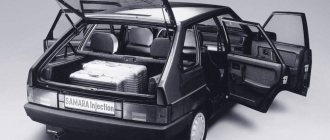
How to remove the starter Niva 21214
It won’t be difficult to remove the starter on a VAZ 21214 (Niva) with your own hands. To get to it, you first need to remove the engine air filter box. And then unscrew the 3 bolts securing the car starter (two starter bolts from under the hood and one from under the car), although craftsmen often do not screw in the third bolt to make it easier to dismantle the starter, because access to the lower mounting bolt is from under the car.
Tools needed for removal:
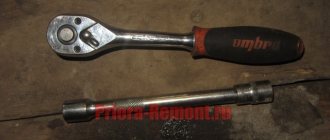
- The key is "13".
- Ratchet with small extension.
- Head at "10".
Briefly, you learned how to remove the starter on 21214, and now let’s begin the removal in order:
- disconnect the terminal from the battery;
- disconnect the flow meter connector;
- disconnect the clamp of the air filter housing pipe, dismantle the box itself (by unscrewing the 4 fastening bolts) and put it aside;
- remove the front support bracket securing the intake pipe to the engine support bracket;
- disconnect the starter heat shield from the exhaust manifold and from the engine support bracket;
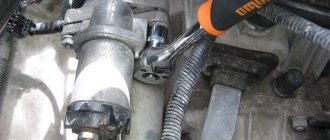
- using a key set to “13”, you need to unscrew the bolt of the upper fastening of the starter to the clutch housing (this bolt also secures the rear support bracket of the intake pipe to the clutch housing);
- in the same way, unscrew the bolt of the middle and lower fastening of the starter, then move the starter forward;
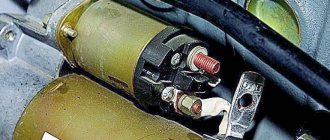
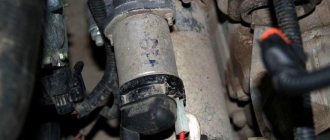
- disconnect the traction relay control wire;
- Using the head at “13”, unscrew the nut of the “positive” wire and remove the starter from Niva 21214;
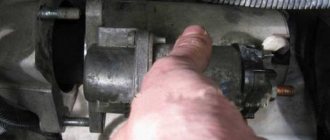
- move the starter along the cylinder block to the side and remove it;
- removing the starter from a carburetor engine is quite easy due to the lack of support brackets for the intake pipe;
- We install the starter in the reverse order.
You can clearly see the entire process of removing the VAZ 21214 starter in the video.
Source
Removal and installation of Chevrolet Niva starter
Tools:
- 13 mm straight box spanner
- Ratchet wrench
- Extension
- 8 mm head
- 10 mm head
- 13 mm head
1. Disconnect the wire from the negative terminal of the battery.
2. Remove the oil pan guard and engine splash guard as described here.
3. Remove the lower mounting bolt for the rear intake pipe strut and move the strut to the side.
4. Using a 13 mm socket with an extension, unscrew the lower bolt securing the starter to the clutch housing.
Possible breakdowns and malfunctions
It is worth thinking about replacing the starter if the car owner notices that:
- The plastic on the plastic cover of the relay began to melt; the power contacts easily turn inside the cover.
- Relay coils are damaged.
- When the control wire was removed, the power contacts were not turned off or were turned on in a free order, which resulted in breakage of the spring. Since most solenoid relays cannot be disassembled, it is not possible to inspect the spring.
- The starter does not start spinning the first time, it jams.
- The power contacts are burnt. The voltage at the contacts of the solenoid relay is less than 0.5 Volts.
If severe external defects appear, you cannot do without purchasing a new starter.
Specific problems and methods for solving them
If it is difficult to turn on the VAZ 21214 engine, there is a possibility that the problem lies in the starter. The most common breakdown is that the starter may not turn, even when the ignition is started. Note that the starter relay is located very close to the ignition relay, under the additional. fuse block.
Let's get acquainted with the typical malfunctions of the Niva starter:
| Complete replacement of the part (retractor relay). | ||
| The battery is low. | Despite the click, the starter does not move. When consumers are turned on, the voltage at the battery terminals does not exceed 12V. | Replace/charge the battery. |
| The starter armature winding is damaged and a short circuit has occurred. | To check the serviceability of the mechanism, use an ohmmeter. Also pay attention to places where the insulation has changed color. Darkening indicates problems. | Complete replacement of components (starter). |
| The battery terminals are oxidized and poorly connected. | Even though the starter clicks, it does not turn over. If you turn it on, the voltage at the starter/battery terminals varies greatly. | The contact connections must be thoroughly cleaned, coated with Vaseline or other lubricant, and then tightened tightly. |
| The ground contact is broken, the relay contacts are oxidized. | The starter does not turn even after a click. The car won't start. For diagnostics, it is necessary to measure the resistance in the circuit, as well as the performance of the relay as a whole. | 1) Completely replace the solenoid relay with a new one. 2) Clean the contacts well, lubricate them with a protective compound and tighten tightly. |
| Flywheel ring teeth/drive gear are damaged. | It is enough to conduct a visual inspection of the components to notice a malfunction. | Flywheel replacement, starter replacement or repair. |
| The freewheel slips. | The starter continues to move, but the flywheel remains in place. | Complete replacement of starter/clutch. |
| Rotating the ring gear on the flywheel. | The starter turns, but the flywheel/crankshaft does not. The clutch housing makes unnatural sounds. | Buying a new flywheel and replacing it completely. |
| The starter commutator is burnt, the brushes are very worn/stuck. | Remove the starter and make sure how tightly the commutator is pressed against the brushes. Determine commutator wear and remaining brush height. | If the commutator is worn out as much as possible, the starter will have to be replaced. The damage is minor - just have it repaired or go to a salon. |
| The ignition contacts (50 and 30) cannot close and the solenoid relay wiring is inoperative. | The relay does not operate when the key is turned. The car owner must measure the voltage at the relay control contact. | Replacing the ignition switch, cleaning contacts. |
| Attachments/engine jams. | Visual check of the coolant pump, as well as the crankshaft and power steering pump. | If problems are detected, the attachments/engine itself will need to be repaired. |
Possible malfunctions if the starter does not turn
| Possible malfunction | Diagnostics | Solution |
| Battery is discharged | The starter clicks but does not turn. The voltage at the battery terminals with consumers turned on is less than 12 V | Charge or replace the battery |
| Oxidation of battery terminals or poor connection | The starter clicks but does not turn. When the starter is turned on, the voltage at its terminals drops much more than at the battery terminals | Clean the contacts, lubricate with Vaseline and tighten well |
| There are problems in the wiring of the starter traction (retractor) relay, ignition contacts 30 and 50 do not close. | When turning the key there is no click under the hood (the relay does not work). Check the presence of voltage at the control contact of the solenoid relay | Clean the contacts, lubricate with Vaseline and tighten well. Replace the ignition switch |
| The starter solenoid relay is faulty. | When you turn the key, there is no click under the hood (the relay does not work), but there is +12 V at the control contact of the solenoid relay. The starter spins when closed with a screwdriver. The starter does not turn only when it is hot (when the engine is warm) | Replace starter relay |
| Solenoid relay contacts are oxidized, poor ground contact | When you turn the key there is a click under the hood, but the starter does not turn. Using an ohmmeter, check the resistance of the “battery - starter” circuit, as well as the ground wire. If the circuits are OK, remove the starter and check the operation of its relay | Clean the contacts, lubricate with Vaseline and tighten well. Replace the solenoid relay |
| Open or short circuit in the holding coil of the solenoid relay | When the starter is turned on, a cracking noise is heard from under the hood. The battery voltage is within normal limits. The relay is checked with an ohmmeter or by its excessive heating | Replace starter relay |
| Burnt starter commutator, stuck brushes or severe wear | The starter does not turn or turns slowly. With the starter removed, check the pressing force of the brushes to the commutator, their residual height, and wear of the commutator | Repair the starter. If the commutator is very worn, replace the starter. |
| Open or short circuit in the starter armature winding | The starter does not turn or turns slowly. The serviceability of the winding is checked with an ohmmeter or by darkening of the insulation | Replace starter |
| Freewheel slipping | The starter spins, but the flywheel is stationary | Replace clutch or starter |
| The ring gear rotates on the flywheel | The starter spins, but the flywheel and crankshaft are stationary. There is a squeal, a howl from the clutch housing | Replace flywheel |
| The engine or attachments are jammed | Check the rotation of the crankshaft, alternator pulleys, coolant pump and power steering pump | Repair the engine or its attachments |
| The starter drive gear or flywheel ring teeth are damaged | Visual inspection after removing the starter | Repair or replace starter, replace flywheel |
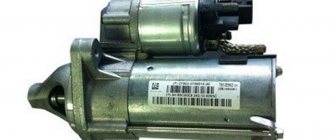
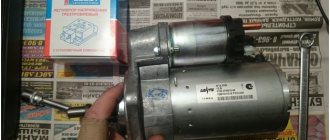
VAZ car starter
Have you encountered the problem of starting the engine when the starter does not turn? What was the cause of your problem? Let us remind you that other instructions for repair and operation of Lada 4×4 can be found in this category or by content.
Keywords: 4x4 starter | 4x4 engine | 4x4 ignition system | 4x4 power system | ECM 4x4
15
7
Found an error? Select it and press Ctrl+Enter..
Selection of components
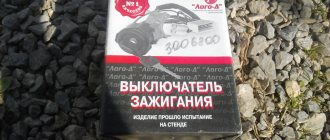
The original starter is produced by LADA and comes in the original blue packaging. It is marked with article number 21214-3708010-01. The cost of this part is from four to five thousand rubles, depending on the store.
To avoid stumbling upon a fake, carefully examine the box. The presence of extraneous logos, absence of an article number on the box, or color mismatch is unacceptable. The low price should alert you.
Alternative options are produced by companies such as Fenox, Krauf, Valeo. The listed brands are distinguished by high quality products and fairly affordable prices. The price for starters varies from 2200 to 4700 rubles.
What original or analogue can I supply?
If the starter does not turn, you can simply replace it. Typically, in a store, the buyer has a choice between two options:
They differ not only in their quality, but also in their durability. The easiest way to study visual differences is in the photo. Original starter:
| Model | Manufacturer | Catalog number | vendor code | Price, rubles |
| 21213 | KATEK | 21213-3708010-00 | 5722.3708 | From 3 300 |
But the cost of the original starter is usually at least 3.5 thousand rubles. That’s why many people opt for analogues. There are many other manufacturers on the Russian market that are not certified by AvtoVAZ. If possible, you should choose well-established brands. The optimal solution would be:
| Model | Manufacturer | Catalog number | Price, rubles |
| 21213 | TRACKMAN | 21013708 | 2900 |
| GANZ | GRP14005 65 (Similar to 5722.3708) | From 2,000 | |
| FENOX | AN 5722.3708 NM 1.55 KW | From 4 3000 |
It is important to remember: all starters have different resources and may differ in size. It is advisable to arm yourself with a ruler and tape measure before going to the store.
This will allow you to avoid purchasing a device that is not suitable in size. Some manufacturers produce equipment that can be installed on various vehicle models. The price depends significantly on the manufacturer.
Before purchasing an analogue, you need to familiarize yourself with the brand. For example, Bosch has proven itself to be good. The equipment he produces is durable and does not cause difficulties in repair. There is a list of manufacturing companies recommended by AvtoVAZ itself. It is advisable to familiarize yourself with all the nuances and subtleties of installation in advance. This will allow you to select it at the start and install it later yourself.
Replacing the starter on a VAZ 21214
The process of replacing the starter is quite simple and can be done at home. You will need a key “13”, as well as a new replacement part:
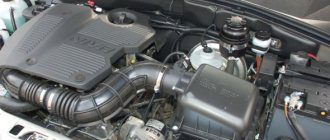
- If you have an injection engine, remove the generator in advance. The receiver and intake pipe are located close, which can significantly hinder the removal of the starter. Accordingly, the starter can be removed through the lower part of the mechanism.
- The air filter housing must be removed. Then we get rid of the front support bracket connecting the engine mount and the intake pipe. Disconnect the starter heat shield from the engine support bracket and exhaust manifold.
- You can get rid of the upper starter mount using a 13mm wrench. To move the starter forward, you also need to remove the bolts of the lower and middle mountings. Carefully disconnect the traction relay control wire.
- We take the head “13” and get rid of the positive wire of the starter. (See photo). By unscrewing the nut, you can remove the wire and remove the starter. We move it strictly back, along the cylinder block.
- We remove the starter. We take a new part and install all the elements of the mechanism in the reverse order.
If you are not confident in your abilities, we recommend contacting a car dealership.
Source
Main block with fuses and relays
This block is located to the left of the steering column and is closed from below with a lid.
To get to it, you need to tighten 2 screws, then press the top edge of the cover and gradually free it from all fasteners. The block that appears will be held on a special bracket. The fuse diagram itself and the number of elements on it may vary depending on the configuration and year of manufacture.
photo of the fuse box in a Chevrolet Niva
Scheme - option 1
Scheme - option 2
- Explanation of fuses
- F1 (5 A) - license plate lamps, instrument panel lamps, indicator light on the dashboard, engine compartment lamp, additional brake light lamp, left side marker lamps.
- If any of the listed lamps do not work, check this fuse and the lamps themselves, their connectors and wiring.
F2 (7.5 A) - low beam in the left headlight. Similar to relay K4.
F3 (10 A) - high beam in the left headlight, indicator lamp for turning on the high beam headlights on the dashboard. Similar to relay K5.
F4 (10 A) - backup fuse.
F5 (30 A) - front door electric windows and their relays. If, when operating the power window, the window goes down but not up (or vice versa), check the button on the door.
When lowering and raising, the polarity and direction of rotation of the motor are different. It could also be a problem with the window lift mechanism. To get to it, you need to remove the door trim. Check that the mechanism does not bite anywhere and that the gears are intact, without broken teeth.
If there are problems, you can replace the entire power window drive with a new one.
F6 (15 A) - door lock control unit. If one or more doors stop opening, check this fuse. The issue may be in the central locking, control unit, as well as the mechanisms themselves, rods and door locks. If you have no experience, it is better to contact a car service.
F7 (20 A) - sound signal and its relay, cigarette lighter. If the horn does not work, check this fuse, the steering column contacts and the wiring; the contacts may have oxidized and the wiring may have become frayed.
Description of problems with the starter and ways to solve them on the VAZ 21213
On Niva, most of the components are quite reliable and do not require frequent repairs. But there are a number of standard breakdowns characteristic of the vehicle in question. Most often, the starter does not turn for the following reasons:
- turn-to-turn short circuit in the solenoid winding - the relay needs to be replaced;
- open circuit of the power supply - it is necessary to check the connections between connections No. 50 and No. 86 (the most common places of oxidation);
- the relay armature is stuck - it is necessary to replace the armature.
If the solenoid relay is activated, but the starter does not rotate or rotates very slowly, then you must:
- poor contact on the tips and terminals of the battery - it is necessary to stretch it and clean it from deposits;
- the commutator contacts are burnt, the brushes are stuck - you need to clean the commutator and replace the carbon brushes;
- there is a short circuit in the brush holder - it is necessary to replace the cover on the commutator side.
Sometimes it happens that the starter rotates. But the engine flywheel remains motionless. Perhaps the reason lies in clutch slipping. To determine the exact cause and repair, you will need to remove the starter and check it on the stand. The problem can only be solved by replacing the coupling. Sometimes extraneous noise occurs when the starter rotates. The reasons for this may be the following:
- The bearing bushings and armature shaft journals are worn out – the starter needs to be replaced;
- The starter is loose.
To solve most problems that arise during operation, you will need to remove the starter. This procedure may require dismantling the injector. Testing at the stand will not take much time. But it will allow you to determine the exact cause of the malfunction. There is a wide range of breakdowns. They usually occur on cars with mileage of more than several tens of thousands of kilometers.
Instructions for a complete diagnosis of the starter
The starter does not transmit torque to the crankshaft
| Diagnostics | Possible reasons | Remedy |
| When trying to start, a constant noise is heard, the starter clicks, the voltage at the battery terminals is less than 12V | The battery is low | Charging the battery |
| The voltage readings at the battery terminals are normal; when starting the starter, a crackling sound is heard with the voltage dropping twice | Decrease in battery capacity | Slow charging of the battery with a current of no more than 1A |
| During startup, a crackling sound is heard; when measuring the wiring from the battery to the starter with a voltmeter, a voltage drop of more than 1V was detected | Oxidation of battery terminals or starter terminals | Cleaning terminals, treating with anti-corrosion compound |
| Inspection of flywheel gears, drive shaft, bendix on a dismantled starter | Worn or broken teeth on the flywheel or shaft drive gears | Replacing the flywheel or a new starter |
| Failure to operate the solenoid relay when the 12V wiring is running at its contacts | Breakdown of the solenoid relay, damage to the wiring on the contacts, oxidation of the relay terminals | Replacing the relay with a new one, or cleaning the contacts and eliminating broken wiring |
| When 12V is supplied to the relay, no click is heard, the starter turns off | The relay is faulty, breaks in the armature winding, contamination or moisture ingress into the commutator, short circuit | Replacing the relay, cleaning the internal components of the starter |
| The starter drive rotates slowly when the relay is operating, the starter is turned off | Wear of the brush assembly, burnout of the commutator winding or armature | Replacing brushes, cleaning the commutator, or replacing the starter |
| When the starter starts, the drive armature rotates, but the flywheel remains stationary | Drive coupling wear | Replacing the clutch or starter with a new one |
| When the ignition is turned on, a grinding noise is heard, the drive shaft rotates, but the flywheel and crankshaft remain in place | Worn gear on flywheel | Flywheel replacement |
| The starter armature does not rotate when the relay is running | Breakage or burnout of the armature winding | Replacing the starter with a new one |
Activation of torque on the starter without starting the engine
| Diagnostics | Possible reasons | Remedy |
| Visual inspection of the starter at the mounting points | The starter mounting bolts on the engine are loose | Tighten the threaded connections, replacing the bolts with new ones if necessary. |
| The starter is inspected in disassembled form | Loose terminal contacts on the armature | Tighten the nuts on the terminal contacts, having previously cleaned them |
| The starter is inspected in disassembled form | Worn bushings, damaged drive bearings | Starter replacement |
| When starting, the bendix rotates, the flywheel rotates slowly, the engine does not start, a loud noise is heard | Breakage of teeth, wear of flywheel gears | Flywheel replacement |
| The starter continues to operate after turning the key back in the ignition switch | Malfunction of the ignition switch, weakening of the reverse buffer spring, malfunction of the traction relay | Replacing the contact ignition unit, replacing the relay or spring on the reverse clutch |
| Slow rotation of the starter without starting the engine with extraneous noise and good wiring | Malfunction of the crankshaft, oil thickening at low temperatures, failure of the piston group system, generator failure | Diagnostics and maintenance of cylinder-piston mechanisms |
| The starter operates at increased loads without starting the engine | Insulation in high-voltage wires is broken, voltage surges in the circuit, short circuits | Diagnostics and repair of electrical wiring |
How to replace the starter on a Niva Chevrolet
It may happen that the Chevrolet Niva does not start, or starts, but with periodic interruptions. This may be due to a failure, for example, of the electrical or fuel system. The most common failure is when the starter fails. But in order to correctly and fully carry out diagnostics, it is necessary to remove the starter; the Chevrolet Niva is no exception.
This device is an electric motor with direct current, which is activated by a permanent magnet, which is combined with a planetary gearbox, plus a two-winding electromagnetic relay. Therefore, before dismantling, you should understand whether this is the reason that the engine does not want to start. This can be determined both visually and by replacing the battery.
Preliminary diagnostics
A number of actions need to be taken:
- We check all the existing electrical connections that connect the starter and the battery, since it happens that poor contact between ground and positive leads to poor operation of the device, and the click of the retractor relay is heard, thereby not enough power to crank the crankshaft in the engine. This problem is eliminated by cleaning the contacts of the starter, battery, and various groups of contacts.
- We check the battery itself; it is necessary to replace the load plug itself with a proven one that is working. If there is no result, then it is necessary to remove the unit and replace it.
Replacing and removing the starter on a Chevrolet Niva
To make a replacement you must:
- We disconnect the terminals from the battery; if this is not done, a short circuit may occur, which will lead to a complete replacement of the electrical wiring
- Using a ratchet wrench, remove the crankcase protection
- Loosen the three bolts that secure the starter.
- We dismantle thermal protection
- Together with the wires, carefully pull out the unit; after pulling it out, carefully pull the wires toward you and disconnect them from the device.
- The power wires that are connected can be cleaned; perhaps the reason that the engine starts unstably lies in poor contact.
After it has been removed, diagnostics and subsequent repairs can be made.
How to make repairs yourself
When the starter is removed, you can try to repair it yourself or take it to a specialized service center. If you have experience and an idea of how everything works and you, for example, are sure that the cause of the breakdown, for example, lies in a malfunction of the solenoid relay, then you can start repairing it yourself. But in any case, to be sure that this is the problem, it should be checked on a special stand where there is a load, since at idle it can work as it should, but not under load.
Another reason for poor ignition may be a malfunction of the planetary mechanism, which has plastic parts. You can understand what condition they are in by unscrewing the unit and disassembling it in half; to do this, simply unscrew a couple of nuts in its rear part.
As the experts say, the Chevrolet Niva starter is unsuitable for repair, since spare parts for it are not sold, but time does not stand still and you can do everything yourself. After the repair is completed, everything is assembled and put back in place in the reverse order.
Modification: heat protection casing
As a rule, the starting device on the Niva and other domestic cars begins to deteriorate like this. At first it is difficult to start the engine, then a whistle appears. When parked for a long time, the car does not start at all, and the battery quickly runs out. If the device is not diagnosed in such a situation, the problem will get worse. There are usually two reasons why the starter is not checked immediately:
- battery - if replaced, the battery will withstand a faulty starter for some time, and the engine will start properly;
- wires and terminals are cleaned of rust, which improves the current supply and plant, but also for a short time.
The real fault is hidden inside the starter. It is noteworthy that at this time the engine starts easily, as soon as it cools down. When hot, it is impossible or extremely difficult to spin the crankshaft. Hitting the front starter cover with something heavy helps, but for how long? Sooner or later, the starter is disassembled, and the cause of all troubles is determined.
One of the factors for the early failure of the starter on the VAZ-21213 is a coolant leak. Most car owners do not even notice how antifreeze drips onto the electrical contacts of the starter. This will undoubtedly cause over time:
- damage to brushes and bendix;
- interturn closure;
- oxidation of terminals and other unpleasant things.
Replacing brushes is easy. It’s good that Russian starters are easy to dismantle, disassemble and damage. The brush assembly is located directly in the rear cover of the starter along with the bushing - it is also worth checking at the same time. Bendix is located under the front cover. To remove it, you must first release the adjusting and thrust washers, then pull out the restrictor ring from the drive.
Now about a small modification that will protect the starter not only from aggressive liquids, but also from overheating. We are talking about installing a heat shield - like the generator on the VAZ-21213. It is best to use plastic for these purposes - a regular, unnecessary 5-liter canister will do. A piece measuring 20x15 cm is cut out of it. Then it is cut with scissors according to a pre-designed shape and a protective cover is obtained, the side overhangs of which reliably protect the starter. Can be mounted with one bolt.
Do-it-yourself VAZ 21213 starter repair video
05/28/2018 admin Comments No comments
The Niva 21213 and 21214 cars have a starter with mixed-type excitation, with an electromagnetic-type traction relay and two independent windings. Four poles are fixed in the housing, one of which is connected in parallel, and the rest in series. The casing and cover are tightened using a pair of bolts. Inside there is an armature with a collector (the latter is of the end type). The armature rotates on metal-ceramic bushings pressed into the covers.
Despite the apparent design complexity, starter repair is accessible even to beginners. The main thing is to have the necessary tools on hand, diagnose the problem in a timely manner and follow the manufacturer’s instructions. Below we will look at what starter malfunctions exist and how to fix the problems.
During operation, the following problems are possible: 1. After turning the key in the ignition switch, the Niva car does not start, the starter does not turn. Causes of the problem:
In the cases described above, the faulty element is replaced or repaired, and the contacts are cleaned.
2. When the key is turned in the ignition switch, the relay works, but the starter does not turn (hot or cold). Causes:
- The battery is discharged or damaged.
- The fastening of the lugs of the wire connecting the engine with the body part has been loosened.
- The “plus” and (or) “minus” on the power source is oxidized, poor traction.
- The commutator was burnt and the brushes were worn out.
- The positive terminal of the brush holder was at ground.
- There is a break in the armature and (or) stator windings.
Broken bendix teeth or flywheel ring
This problem usually appears on cars with high mileage, especially after a recent flywheel replacement or repair of the starting mechanism. When you turn the key, the starter makes strenuous attempts to start the engine: it clicks, buzzes (sometimes with a squeal), but the internal combustion engine does not start. The problem here is the engagement.
Broken bendix teeth
The flywheel teeth (on most cars) are beveled to help the Bendix gear engage more smoothly. If there is significant wear, jamming of the traction relay fork, wedging or wear of the gear itself, it does not reach the point of reliable contact and does not fit along the relief of the teeth. Slipping leads to more wear and, since the part is not repaired, to unscheduled replacement.
If, when starting the internal combustion engine of a car, any extraneous sounds arise from the starter, this is a reason to check it as soon as possible. Otherwise, he will “remind himself” on the road.
What kind of starter can be installed
- Motorherz STB0373RB. This company is a large supplier of auto parts that has its own production. It sells hydraulic power steering pumps, turbochargers, starters, generators, steering racks, repair kits, etc. The cost of a starter unit for a VAZ 2131 is 3,940 rubles.
- ATE is a plant located in the Moscow region, engaged in the creation of electrical equipment for domestic cars. The ATE-1 starter unit is an inexpensive product that fully justifies its cost. The price of a starter for a VAZ 2131 car is 3250 rubles.
- The production of a starter for this vehicle is also carried out by the Stary Oskol Automotive Equipment Plant. The history of the enterprise goes back more than 55 years. The cost of a starter unit for a VAZ 2131 is 3,400 rubles.
In some cases, the car will not start because there is a malfunction in the power plant. The main reasons may be: thick oil that does not match the season, as well as jamming of the power unit shafts. In most cases, the starter relay fails.
The solenoid relay is replaced if:
- There is a break in the relay winding. It is worth considering that the solenoid relay is equipped with two windings: a starting winding (from the control contact to the output power terminal) and a holding winding (from the control contact to the relay body). It is also possible that an interturn short circuit may occur in the windings. The main symptom of this malfunction is the appearance of a strong smell of burnt insulation. The windings are checked on the table by applying voltage from the battery: the “negative” contact is connected to the housing and the output power terminal, and the “positive” contact to the control contact.
- If the voltage drop across the solenoid relay is more than 0.3-0.5 volts. This phenomenon indicates that the power contacts have burnt out.
- If an external inspection indicates the presence of burnt areas on the plastic cover, near the power contacts.
How to remove the heat shield without removing the starter?
How to remove the heat shield without removing the starter?
Post by Niva867 » 08 Jun 2012, 16:52
There is a problem. You need to get to the wires to the starter, remove them, and clean the contacts in order for it to start. I don't need to remove the starter at all, I just need to remove the heat shield. The heat shield is secured with 3 bolts, 2 at the top, 1 at the bottom. I unscrewed them. But the heat shield cannot be pulled out. I tried it in front, and back, and up and down. Then he turned it around and went to drink beer.
Re: How to remove the starter heat shield?
Post by Anton » Jun 08, 2012, 04:57 pm
Recommendations for using the starter
To make your starter last longer, you need to follow a few simple recommendations:
- If you turn on the engine, then this should be done no longer than 15-20 seconds, and repeated no earlier than after 25-30 seconds. If after three times the engine does not start, you need to check the ignition and power system. If such faults are detected, they must be corrected.
- Do not use the starter to move the vehicle. This puts a lot of stress on the trigger mechanism.
- If you have successfully started the engine, turn off the starter, as the overrunning clutch may jam due to frequent rotation of the starter drive gear by the flywheel.
Anyone who has already removed and installed the starter at least once is unlikely to want to do it a second time. Although this work is not difficult, it requires a lot of effort and sometimes money. Follow these simple rules to avoid such breakdowns.
There is a special offer on our website. You can get a free consultation with our corporate lawyer by simply submitting your question in the form below.
Please note the following points:
Blow the Niva casing and brush holder with air. Lubricate the underwater ring with a lubricating compound (Litol will do). Treat the shaft splines and bushings with engine oil. Proper repair of the starter is a guarantee of a smooth start of the engine both hot and cold. The main thing is to diagnose the malfunction in a timely manner and correct it correctly.
The starter on a Niva rarely has to be changed, but if you have a need for this, the instructions below will be very useful. First, it’s worth considering the necessary list of tools with which doing all this will be very simple and will not take much time.
- Key for 13
- Ratchet with small extension
- Head for 10
Required Tools
In order to remove or install the starter on a VAZ 2121, you need tools, the list of which is presented in the table below. Table - Tools required to replace the front strut
| Name | Note |
| open-end wrench | "at 13" |
| Head | "at 15" |
| Ratchet | With extension |
| Penetrating lubricant | For example, WD-40 |
| Metal brush and rags | For cleaning fasteners |
How to remove the Niva 21214 starter in 10 minutes. The cause of the malfunction of the removed starter NIVA VAZ 21214
Published on August 29, 2016
Preparation for quick removal of the starter in extreme conditions. Quickly remove the starter and eliminate the cause of a possible malfunction. How to remove an acoustic pipe from a Niva receiver Why is an acoustic pipe needed? As you noticed, the lower bolt of the starter was never intentionally screwed in again, after the first removal of the starter during the initial period of operation of the car. Also, the heat shield of the starter, whose lower mounting bolt quickly sticks when driving through mud, was not put in place. Because of this, in order to remove the screen, you have to cut off the lower attachment point or tear the screen itself. I don't want to go through this procedure a second time. The fact that there is no lower mounting bolt for the starter and a heat shield has its advantage for field drivers who often operate their vehicles, for example, in the conditions of Siberian swamps, river fords and frosts. Very often the cause of a starter malfunction is simple. For example, as in this video, or even funnier - the red wire (also shown in the video) from the solenoid relay has simply oxidized or weakened. It is enough to MOVE it and the starter will spin. You can make the starter spin if the nickels in the solenoid relay are burned by closing (carefully, with something not large in size, but massive and iron, without touching the mass of the engine body) the power wires on the solenoid relay. It's easy to do all this without a screen. And if necessary, the starter can be easily removed. It happens, for example, that the starter breaks down, and the car is parked at the entrance, and it’s -30 outside! Yes, even in the summer! You still need to remove the starter. Negotiate with your neighbor about a garage? Or take it to service? But you can remove it EASILY AND QUICKLY yourself, right at the entrance. Buy a new starter or solenoid relay from your local store. And an hour later the car drove off. And if the car is parked in a puddle or mud, then crawl under the car and turn the bottom bolt? In short, there are many life situations where the absence of a bolt and a heat shield will greatly simplify your life. The author of the video does not pretend that others will perceive his opinion and his proposed method of solving the problem as the only correct one. Decide this for yourself. The author simply suggested the option: “How to remove the Niva 21214 starter in 10 minutes and determine the cause of the malfunction of the removed Niva 21214 starter.” There will also be solutions to problems encountered in the Niva on the channel. If you are interested, subscribe.
It's better to put up protection. Otherwise, in the heat, the starter will overheat and catch the wedge.
For + Stanislav G. I don’t argue. But according to my experience of operating several fields, in the difficult mountain conditions of Altai in the summer, in the hottest months. Constantly reduced, etc. And from morning to evening we move through the mountains and swamps. All this summer, having come on vacation from Siberia on a field, I exploited a field in the Krasnodar region, stood in traffic jams in the heat for 2-3 hours, getting to the sea and from the sea back to friends in Krasnodar. The engine was not turned off. And so the whole vacation. So in the Krasnodar region, in the heat and in traffic jams, without a screen on the starter, there have been no problems yet. I have been using Niva for 25 years in both Siberian frosts and heat. The starter never caught a wedge. The statistics of my use so far are as follows: the absence of a screen did not affect the operation of the starter. The downside may be this: without a screen, the lubricant inside the starter dries out faster. But usually the starter fails due to something other than dry lubricant. In some fields, starters worked for 5-10 years without problems, without a screen. Then the car was sold. It is difficult to judge further statistics. I initially received all the Nivas (mostly) with good mileage. In addition to the first one bought back in the USSR and another one, which he himself drove from Tolyatti to Siberia. Again, I don't insist. Decide for yourself.
Diagnostics and replacement
Among other causes of breakdown and failure, the main one is slipping of the Bendix during free movement. This occurs because a certain amount of dirt gets into the grooves and rollers. The first sign is the noise of the armature when the starter is turned on, while the crankshaft is stationary. In such a situation, repairs cannot be avoided.
In order to diagnose the Bendix itself directly, you can do this in a car. You need to do this as follows:
- We turn on the transmission;
- Release the brake;
- Start the starter.
Now you need to listen. If you hear a sound that characterizes the rotation of the armature, then this is a sign that the starter bendix is slipping. This means that it immediately needs to be repaired or replaced with a new bendix.
Minor Bendix repairs:
- The starter is removed from the car;
- It is immersed in a prepared container with gasoline and remains there for several hours. This is done in order to wash and clean it from dirt;
- Without removing the product from the container, rotate the clutch gear several times, this will help to better clean the grooves;
- After that, it is taken out and washed.
If, as a result of such cleaning, you have not achieved the desired result, then you will have to remove the overrunning clutch and disassemble it.
Let's look at the disassembly and repair of the Bendix step by step:
- First of all, I advise you to disconnect the car's starter. But before this, you must disconnect the negative terminal from the battery. After this, you need to disconnect one wiring from the solenoid relay, and unscrew the other using a wrench on the starter itself. The key set to “13” is most often used;
- Now you need to unscrew all the fasteners that hold the starter. Each machine has its own fastening system. So be prepared for the fact that when dismantling the starter you will have to dismantle some more elements along the way;
- Already at this stage it is easy to determine the condition of the flywheel;
- In the event that you decide to change the bendix, you need to disassemble the starter. First of all, remove the cover fasteners, and then disconnect the fastening of the winding output to the solenoid relay. You can get a washer-bracket;
- Then you need to remove the last fasteners and disassemble the starter in half. If we find a ball inside it, it is necessary to save it;
- Advice: if you have already disassembled the starter, look at all its components, which also sometimes fail. Outdated parts can also be replaced;
- If necessary, remove the solenoid relay, rubber insert and washer. Then we take out all the remaining small parts;
- Next, using a screwdriver, we remove the ears of our Bendix;
- In order to free yourself from the stopper, you need to lower the washer down, while using the same screwdriver. It happens that instead of a washer there is a locking ring. In this case, for convenience, you can use a hammer and wrench. Place the key on the stopper and knock it down with a hammer;
- The retaining ring that remains can be pulled off the shaft by prying it off with a small screwdriver or a special puller;
- Now all that remains is to remove the bendix and install a new part in its place;
- To put everything back together, you need to do all the steps in reverse order.