The exhaust manifold is a component of the exhaust system that carries out the process of removing exhaust gases from the cylinders of the power unit into the exhaust pipe.
If the collector malfunctions, the culprit may be either the element itself or its gasket. Replacing the exhaust manifold (exhaust manifold) gasket is a common procedure when repairing a VAZ 2109.
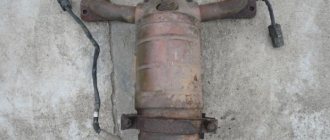
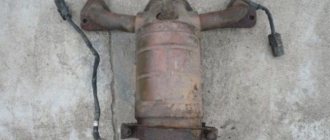
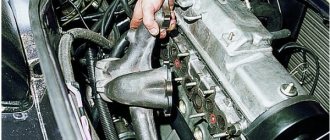
Appearance of the unit
Causes of malfunctions
The key factor that causes 90% of exhaust manifold malfunctions on VAZ 2114 cars is high temperature and poor quality materials from which the parts are made. During operation, the steel repeatedly heats up and cools down, which leads to the appearance of cracks in the body. This is a common occurrence for VAZ cars older than 7-8 years.
Auto repair shops offer crack welding services using argon welding. However, for a number of reasons, this activity is useless for cars older than 7 years.
1) Just removing and installing the exhaust manifold will cost about 2.5 thousand rubles. Taking into account the work of the welder and other actions, the cost of repairs can be 4-5 thousand rubles. If you do the work yourself, buying a new part will cost less.
2) Welding, even argon welding, disrupts the structure of “tired” metal. A boiled part rarely lasts longer than a year, after which new holes appear. The older the car, the faster the problem returns, and the collector has to be removed again.
If the car is older than 8 years and there are problems with cracks in the manifold, it is better to remove the part and replace it with a new one.
The main signs and causes of failure of the VAZ 2114 intake manifold
- The main symptom of a failed intake manifold is a sudden loss of car engine power.
- at the same time, there is an increase in fuel consumption , with a deterioration in traction and a drop in engine performance.
It is important to determine the cause of the breakdown and eliminate it in time.
- Often a problem is indicated by a missing stud in one of the manifold flanges. It simply comes off when the collector goes “screw”, that is, due to temperature changes, for example in winter, or over time (average service life is 7 years), the collector begins to bend along the plane, and the pin simply “spits out”, pulls out .
- Due to the fact that the manifold has “leaded,” a crack may form and, as a result, exhaust gases from the engine escape, and the manifold must be replaced. Before changing the gasket, make sure that all the studs are in place. When you remove the manifold, you also need to check the flatness of the exhaust manifold, because often these areas require grinding or replacing the entire part.
- Manifold flaps often fail. This happens for several reasons: low-quality material used to make these dampers, too high a temperature, the presence of oil condensate. A sign that oil consistency has entered the intake manifold is its increased consumption.
- The control valve for these dampers may also fail.
Preparation stages
To replace the manifold or its gasket, in any case you will have to dismantle the VK. But before you get to the element you are looking for, you will first need to go through some preparatory steps. Namely, tighten the fasteners, and then remove the air filter and carburetor if the first stage does not help.
We recommend: Changing the timing belt on a Hyundai Accent yourself
| Stage of work | Your actions |
| Tightening the fastenings | Often, loose manifold fastenings caused the entry of contaminants, which disrupted the performance of the exhaust system. If the tightening did not give any result, then the gasket is definitely burned out or the collector itself is damaged, which is less likely |
| Removing the air filter |
|
| Removing the carburetor | Removing the carburetor is carried out in the following sequence:
|
Dismantling the unit
All dismantling work must be carried out only on a cold engine. To make it easy to unscrew all fasteners, you can pre-treat them with WD40, several hours or even a day before the repair begins.
Features of the neutralizer
Now let's look at the work and functions performed by the catalyst in VAZ cars. It is also called a catalytic converter. This device is one of the most basic parts of the exhaust system of these cars. It is designed to reduce as much as possible the toxicity of exhaust gases that will be released into the atmosphere.
The design of the device consists of a housing, a heat-insulating block and the block itself with the carrier. Special mention should be made of the block carrier. It is this component of the catalyst on the VAZ, and on many other cars, that is equipped with ceramic carriers that are not subject to deformation when operating at high temperatures and with increased vibrations.
The design of this element consists of several longitudinal honeycombs, which are designed to increase the area of work with exhaust gases. Special substances are used to reduce the toxicity of exhaust gases in cars. Platinum, palladium or rhodium are mainly used for these purposes.
These chemicals are designed to significantly speed up the reactions that take place in the neutralizer. These substances work in the oxidation of hydrocarbons. The reaction produces ordinary water vapor. Rhodium acts as a catalyst in reduction reactions.
Its main role is to reduce nitrogen oxides into as harmless substances as possible. The block in which these substances are located is placed in a special oblong-shaped housing, and a heat-insulating layer is located between it. Also located in this housing is an oxygen sensor.
Practice has shown that at the operating temperature of the exhaust gases, the catalyst can reliably retain more than 90% of all toxic gases. So, this part has significant efficiency.
Required tool for replacement
Before you begin the process itself, you need to decide on the necessary tools. So, what will you need: a ratchet and sockets for 17, 19; screwdrivers with flat and Phillips tips; a set of keys and the gasket itself.
We recommend: Dashboard VAZ 2107
Now that everything is prepared, you can start working directly. In order for the manifold to be removed without any problems and rusted bolts not to create trouble, everything must be lubricated with WD-40 before performing the operation. It is advisable to do this several times. Before performing the operation, you need to think again, weigh everything and calculate your strength.
Step-by-step instructions (algorithm with photo)
If, nevertheless, the car enthusiast makes up his mind, then we will consider step-by-step instructions for replacing the gasket:
- Remove the negative terminal from the battery.
Remove the terminal from the battery
- We remove the accelerator cable.
Removing the throttle cable - We are dismantling the fuel pipes. More precisely, they need to be disconnected and taken to the side.
Remove the fuel pipes shown in the photo
- Disconnect the throttle position sensor connector.
We disable the TPS
- Disconnect the idle air control wire connector.
Disable the IAC sensor
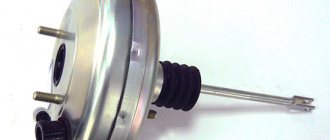
- Unscrew the crankcase ventilation pipes and brake booster.
Unscrew the pipes shown in the photo
- We are dismantling the receiver.
Dismantling the receiver
- Remove the wires of the injection control unit (injectors).
- We dismantle the fuel rail without dismantling the injectors.
Removing the fuel rail
- Remove the thermal shield from the manifold.
Removing the heat shield
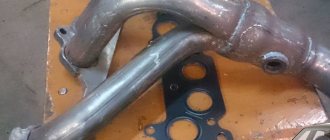
- Disconnect the exhaust pipe.
Dismantling the exhaust pipe
- Remove the intake manifold.
Removing the intake manifold
- After unscrewing the fastening nuts, remove the exhaust manifold.
Unscrew the fastening nuts and remove the exhaust manifold
- We are replacing the gasket.
We are replacing the gasket
- We carry out the assembly in the reverse order.
As you can see, the replacement of the intake and exhaust manifold gaskets takes place simultaneously and, by and large, is the same gasket material.
Part selection
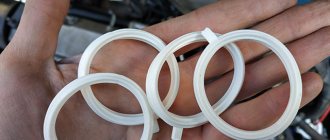
21083-1008081 – original catalog number of the gasket for the intake and exhaust manifold. It consists of two parts or, on newer models, one. This part is produced at the AvtoVAZ plant. The average cost is 250 rubles per piece (if there are two of them) or 450 rubles (for a whole one).
One-piece manifold gasket
Gasket, which consists of two parts
In addition to the fact that there is an original part, you can also find a number of analogues that are recommended for installation. Let's consider which gaskets can be installed under the VAZ-2114 manifolds:
- Trialli GZ 102 0013 is a well-known Russian manufacturer that produces a wide range of analog parts for domestically produced cars. The cost of the gasket is 200 rubles per piece.
- AJUSA 13065200 is another domestic manufacturer that has won consumers over the quality of its products. The cost of the product is 450 rubles.
- Ukrainian also produces and supplies this gasket. But, if you look at it, the quality of the product leaves much to be desired, since the resource is designed for only 20,000 km.
We recommend: Do-it-yourself replacement of front brake pads on a Renault Duster
Causes of malfunction
Bent valves due to incorrect valve timing
When all processes have been considered, you can proceed directly to determining the reasons for the failure of the manifold gasket. So, let's look at the main ones:
- Wear . During operation, the car emits hot gases that destroy the surface of the gasket, as a result of which it can tear or delaminate.
- Since there is only one gasket for the intake and exhaust manifolds, gasoline entering through the first channel can get on the gasket, which also affects the integrity and structure of the material from which it is made.
- The quality of the part is not always high, even original, so when choosing, you should pay special attention to this.
Exhaust manifold removal procedure
Before removing the exhaust manifold yourself, think 7 times. Having this work done by a service center is not cheap, but the inaccessibility and difficulty of unscrewing some nuts can be a serious problem.
Unscrew the bolt securing the intake pipe
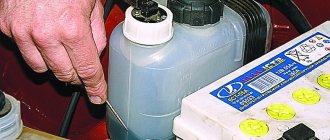
It is important to drain the coolant before removal, as antifreeze may enter the cylinders during the process. The sequence of actions for cars with an injector is as follows:
- Disconnect the battery, release the throttle cable from the throttle valve.
- Disconnect the fuel line pipes.
- Disconnect the wires from the TPS and idle speed control.
- Release the crankcase ventilation, vacuum, and brake booster hoses.
- Remove the receiver, remove the injector block wires and remove the injector fuel rail.
- Remove the bracket and thermal shield.
- After this, you can disconnect the exhaust pipe, exhaust and intake manifolds from the manifold.
After disassembly, all gaskets are replaced with new ones. Please note when purchasing that the exhaust manifold for 8-valve and 16-valve VAZ 2114 are different. Select the parts carefully and you can avoid wasting time and money.
Exhaust system
The main elements of the exhaust system on these cars are the exhaust pipe, additional and main mufflers, as well as a converter. The exhaust pipe on the VAZ 2114 is connected to the converter using a special hinge. A similar design was already used on the VAZ 2109.
To ensure a more reliable and tight connection, there is a graphite ring between the flanges. In order to prevent the car body from heating up, engineers provided a special gasket above the neutralizer. It plays the role of a heat sink element.
VAZ developers installed a special oxygen sensor at the inlet part of the neutralizer. Car enthusiasts know it as a lambda probe. What functions does it perform? Everything is quite simple here. This part is needed in order to determine as accurately as possible the amount of oxygen in the exhaust gases.
So, the information received from this sensor is fed to the ECU and is then used to quickly adjust the amount of fuel that will then flow into the cylinder block. As in many other VAZ models, the mufflers are securely fixed to the underbody of the car. For this, engineers used special suspensions.
The vibration that accompanies the release of gases is significantly reduced with the help of these suspensions. This ensures silence in the car interior.