To install any alarm system yourself, you should study its instructions in detail.
In our example, we will look at the installation of an alarm model Starline A91.
Alarm systems from this company are perfect for installation on VAZ -2114 and VAZ -2115 cars
Before installing an alarm on a VAZ - 2115,2114 car, you need to have a good understanding of the car's structure, and also decide what to connect to the alarm.
Connecting the central lock
First you need to study in detail the connection diagram for the central locking on a VAZ car - 2115,2114. Finding it is not a problem by searching on the Internet.
The central locking control module is located on the left under the dashboard. Looking there, you will find six wires coming out of the module housing. To install the alarm, you must disconnect the blue and brown cords. As a result, we get a connection corresponding to the following diagram:
Before connecting the alarm, you should make sure that it is not a toggle switch installed on the driver's door, but a standard actuator with five outputs. Otherwise, you will need to install an actuator, which is quite problematic.
On VAZ -2115,2114 cars, the white wire, which is connected to the seventh terminal, is usually responsible for unlocking. If there are no connections at terminals 7 and 5, then the eighth terminal is connected to the brown cord. It is this cord that is responsible for unlocking in this case.
Terminals number five and six are responsible for locking the lock. This arrangement of contacts is typical for almost all blocks of the “ninth” series.
For some reason, none of the instructions for alarms ever indicate that installation requires the purchase of additional elements.
We will definitely need:
- Two to three 1N4001 diodes per Ampere
- One 1N5401 3 Ampere diode
- Two 4 or 5 Ampere diodes if there are no separate outputs for turn signals.
When installing a Starline alarm system, the task is greatly simplified, since significantly fewer additional parts are needed.
Engine blocking with car alarm
If there are installed anti-theft systems, electrical equipment is responsible for blocking the engine start. Immobilizers or car alarms may be faulty and cause constant or occasional failures during operation.
It should be added that the severity of the problem will depend not on the specific model or brand of car, but on the complexity of the installed anti-theft security system.
Accidental activation of the engine lock function
First of all, carefully study the displayed icons on the alarm key fob. A common cause of blocking is accidental activation of additional functions. It is also necessary to monitor the readings of the LED indicator light (if equipped) in the vehicle interior, which serves as a light indicator of the alarm status. Flashing LED lamps in most cases indicate that the anti-theft function of the immobilizer is activated in the menu.
If, after turning the key in the lock and turning on the ignition, the warning lamp blinks frequently (for example, the StarLine car alarm) before starting the engine, and a pictogram with the inscription “immo” is displayed on the key fob itself:
- One way to solve the problem is to remove the key from the lock, after which you just need to press the button to open the central door lock on the key fob.
- You can also get out of the car, set the alarm to security mode, then disarm it and then start the engine.
In other words, you need to make sure that the alarm operates in the normal mode that is familiar to the owner. Up to 30% of cases of engine start blocking by alarms occur due to accidental changes in program settings. The driver’s task is to disable all unnecessary functions in the settings.
Using the StarLine alarm as an example, let us note that this system has the option of “two-stage” unlocking. Activation of the function may occur accidentally; a separate icon will light up on the key fob screen
To turn it off, you must hold down button 3 on the key fob. The key fob will emit two beeps, after which button 3 is pressed once again. Then button 1 is pressed for a few seconds, then the security functions are removed;
Connection diagram
After carefully studying the alarm installation instructions, you can find the following connection diagram:
In this diagram, the designation X2 indicates a six-pin connector. It must be connected according to the diagram above. If you need to install an additional actuator, then it is better to use the diagram given in the instructions.
Now let's figure out how to connect the door sensors. For this purpose, there is a special wire in the connector marked X3.
Tapping into wires
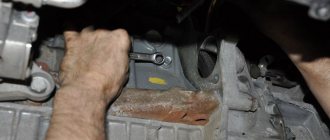
Next to the driver's door, there are two wire harnesses running right along the floor. One of them has a cable coming from the parking brake and two wires to the turn signals. The second harness contains the door switch cable. This is where you need to start connecting. To do this, remove the sill trim along with the side panel. They are attached using self-tapping screws that must be unscrewed. Having done this, you can see the wiring harness shown in the photo:
This harness goes to the dashboard. We are interested in the door switch cable. If a 1N5401 diode is inserted into the wire break, the current should flow towards the limit switches. And the second diode 1N4001 is connected as shown in the figure.
The following figure shows the second harness:
At the same time, taps are made from the blue cables and the cords are pulled to the place where the alarm will be installed. And the handbrake wire is cut, and a 1N4001 diode is soldered into the cut with the cathode towards the switch.
Features of standard electrical wiring
First you need to clarify what exactly needs to be connected if the installation is performed without autorun:
- Ignition control;
- Power supply for the alarm itself;
- Door switches;
- Handbrake switch;
- Signal lamps (2 wires).
As you can see, the number of elements here is kept to a minimum. But even using this, that is, a minimum set of points, will allow you to quickly connect a turbo timer. Simply, in cars of the 2107 family, the ignition support relay is installed as standard. And you need to use this.
Look at the diagram and you will understand what we are talking about:
Elements of standard car wiring
In general, the figure shows all the important elements:
- Ignition support relay.
- Outputs for light signaling (blue and black-blue). The 8-pin connector is located in the steering column.
- Door control wire. It is located in the side tunnel near the clutch pedal.
Make T-branches and connect any signaling. By the way, the power supply to the lamps (second photo) is connected through fuses. Which is true for any car, not just the VAZ-2107.
Connecting autorun
The VAZ-2114 models use an ignition switch with three terminals - 15 (blue wire), 30 (lilac) and 50 (red). Terminal 30 is connected to the battery. When you turn the key, blue wire 15 is connected to this terminal. The third terminal is responsible for the starter.
As it is written in the instructions, it is quite possible to power the alarm from contact 30, from which the lead is made. And the cable from connector X1, yellow, is connected to connector 15.
After all the actions taken, the connection of the tachometer remains. In this case, a loop antenna and a reading device are combined. Connector X3 has a gray-black outgoing wire. It is connected to the tachometer as shown in the VAZ dashboard diagram:
This will allow the alarm to control the speed. And at the very end we connect the ground from the main unit. This is a black cord from connector X3.
Settings
Only autorun functions can be configured. To activate programming mode:
- Disable security
- The ignition key is set to position 0.
- Then press the Valet key six times in the main block.
- Turn on the ignition
- After six beeps, use the same key to select the desired function, and use the key on the key fob to select the desired value.
The optimal settings for VAZ - 2115.2114 will be the following: function 12 - set to value 3, function 11 - value 4, function 9 - value 3. To select value 4, press and hold the third button until the melody is played. After playing, press it again.
To check the correct connections, perform the following steps:
- Disconnect the yellow cord from block A91 to terminal 15 for a while.
- The engine is started using the ignition key
At the same time, the alarm indicator should blink.
Connection diagram for Starline a91 alarm system on VAZ 2114
Hi all! I have long wanted to try to install an alarm on our car, and I succeeded and so I’m telling you how I did it. To connect the alarm, I drew an approximate diagram (based on the Starline A91 diagram) (Since I don’t have an immobilizer on my car, I erased it from the diagram)
I soldered all the contacts in this way. I removed the protective braid on the wire where we will solder. I wound the alarm wire into this place. I applied soldering acid to this place and with a Soviet soldering iron I tinned the wires with solder and then wrapped everything with good sticky black electrical tape. We connect all the sensors, sirens, limit switches, and we begin to tinker. wiring))
Connecting connector x1 Remove the ignition switch from the car for convenience Solder the red alarm wire to the pink wire of the ignition switch (+ alarm) (Or connect to the battery) Solder the yellow wire to the blue wire with a black stripe Cut the red starter wire Solder the black and yellow thin wire to the running wire to the ignition switch Solder the thick black and yellow one to the wire going towards the starter Blue and Green we cut off, we don’t need them
Connecting connector x2 Since from the AvtoVAZ factory, on vases they saved on activators (usually after 2005), there is such a switch
We remove it from the door lock; it is attached with two bolts. We cut off the wires from it. And we run to the store for a 5-pin activator (it cost 200 rubles), I had a Sky DL-5 company. We hook up the wires to the activator, solder it, wrap it up and install the activator in its regular place ( how to install the activator doors, look on the Internet) We extend the blue and green wires of the activator and run them through the door and connect them to the blue and green ones, respectively. We connect the cut wire red to white, black to black, white to brown. The red-black wire has a small wire, we throw it at + in In our case, we connect the red small wire in connector X1, blue-black and green-black, connect them together and throw them to ground, this is what the connected activator will look like in the photo (I checked if everything is working correctly)
Lada 2114 in stock › Logbook › Installation of an alarm system with auto start Tomahawk Z5 on 2114
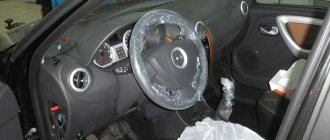
Good day, dear readers! Today I will tell you about the successful experience of installing an alarm system with auto start Tomahawk Z5 on my VAZ 2114 car. The previous alarm system installed in the car (Superbarricado SQ7500a) was more advanced, but due to some features of connecting to the electrical wiring, namely the presence of a data transmission interface in it CAN bus, made it a practically useless opener - a shouter without autostart, without blocking the starter and engine. This alarm was given to me by a neighbor as not working, the electricians at the auto repair shop were unable to “fix” it, and it later turned out that the battery in the key fob was dead and all I had to do was “push” it for it to start charging again. Dismantling the old alarm system turned out to be much easier than installing a new one (do not break it, don’t build it), and after 10 minutes all the wires were disconnected. It was also not difficult to determine which wire came from where, there were only four wires left - two for the central locks, more precisely for the electric drives of the locks, and two for the hood and trunk switches. The new alarm system has a lot more wires, so it took almost 4 hours to install it. First of all, the front panel of the dashboard was disassembled, I don’t think it’s worth explaining how this is done, this has already been written about many times and you can easily find instructions in the Internet. To simplify connections to the vehicle's electrical wiring, guillotine-type clamps (Scotch lock) were purchased.
In order not to cut the power wires to the starter, and not to solder to the power wires of the ignition switch, it was decided to make an adapter that is inserted into the plug and connector between the ignition switch and the car wiring.
The price of all adapters and clamps is around 200 rubles on the radio market.
The central alarm unit was secured behind the instrument panel with two self-tapping screws to the air duct.
Gray-black alarm wire
the engine control input was connected to the tachometer input, pin 2 of the white block of the instrument panel, brown with a red stripe
.
The orange-violet alarm wire for
controlling the operation of the handbrake is connected to
the brown one with a blue stripe
, pin 11 of the white block of the instrument panel.
Green with black stripe and green with yellow stripe
the output to the parking lights is connected to blue and blue with a black stripe
red block of the instrument panel, contacts 5 and 6.
Blue with black stripe
control of open doors is connected to the output of the interior lighting, white with a black stripe
, 6 pin BSK connector.
The negative alarm wire is screwed to a metal rail above the steering column.
Grey
the wire output to the siren is routed under the hood for connection to the siren. Orange with gray stripe
brought into the engine compartment, where it was connected in parallel to the temperature sensor and the hood limit switch.
The orange one with a white stripe
is respectively connected to the trunk limit switch. The antenna module was led through the left pillar under the plastic into the upper left corner of the windshield and secured with double-sided tape. The shock sensor was secured to the metal part under the front panel using a plastic clamp. After all the connections, I installed a homemade adapter into the ignition switch connectors.
Step-by-step instructions for installing the Starline A93 alarm system with your own hands
The cost of installing a car alarm at a specialized service station is usually about half the price of the purchased security system kit. This is approximately 5,000 - 8,000 rubles.
Many car enthusiasts, trying to save money, install the Starline A93 alarm system with their own hands. There are certain advantages to this:
- By installing the alarm yourself, you don’t have to spend money on its maintenance in the future: all possible nuances are known;
- during self-installation, you can enter original blocking algorithms known only to the installer;
- low cost of work, or rather, the purchase of consumables.
The main disadvantage of installing an alarm system yourself is that the warranty on the vehicle is lost if you independently interfere with the electrical circuit of the car. Warranties are also void if installed at a service station that is not certified for this work. This must be remembered.
Before installing an alarm yourself, you need to weigh your knowledge and skills in the field:
- electrical installation work;
- reading electrical diagrams;
- electrical measurements;
- programming at the level of setting a timer or electronic alarm clock.
It is equally important for an alarm installer to be a careful person. The slightest inaccuracies, inaccuracy during installation, haste, or clumsy work can lead to serious problems.
Preparatory work
At the preparatory stage, it is important to provide for all the nuances, otherwise, if the need for some small detail or tool suddenly arises, this may stop the work for some time. The car will be motionless at this time.
What is required to complete the work.
First, tools and equipment:
- electrician's kit (side cutters, set of screwdrivers, knife, soldering iron);
- mechanic's kit (it is better to immediately familiarize yourself with which panels will have to be dismantled, their fasteners; usually a set of bits and heads up to 13 is sufficient);
- measuring device (multimeter);
- an industrial hair dryer (if not, you can get by with a lighter);
- drill and drills for self-tapping screws 3*12 mm and 4*12 mm;
- magnifying glass, 12 volt lamp (safer LED).
It is equally important to prepare consumables, especially since when installing the Starline A93 alarm system, many professional auto electricians complain about the insufficient length of the conductors included in the delivery kit.
- heat shrinkage (special cambrics that shrink in cross-section when heated with an industrial hairdryer or lighter, they are better than electrical tape) with a cross-section of 3, 5 and 8 mm, each 1 meter long;
- a set of multi-colored copper stranded conductors in polyvinyl chloride insulation (PVC) with a cross-section of 2, 4 and 6 sq. mm, 1 linear meter each (it’s better to have some left over than not to have enough during the work process);
- solder POS-40 or POS-60, active non-acid flux;
- a set of self-tapping screws 3*12 mm and 4*12 mm for attaching blocks, 6 pieces are enough;
- insulating tape;
- a set of plastic clamps for fastening conductors and harnesses.
It is better to choose a heated garage with good access to the interior from the driver’s side and bright lighting as the location for installing the alarm.
The next stage of work is tracing (laying the path of conductors) the wiring diagram for installing a car alarm.
Wire routing
To draw up a wiring diagram, you must first determine the installation location of the main alarm units. Starline offers the following optimal installation locations for blocks:
Central unit 1 is usually installed under the dashboard in such a way that maximum concealment and the ability to connect to the power supply and engine control circuits, and ignition switch conductors are ensured. The central block must be secured with self-tapping screws. Installation using clamps is allowed, but this is not the best option.
The block is located with the connectors facing down. In this case, if rainwater accidentally leaks into the car interior, moisture will not get inside the structure.
Transceiver module 2 must be installed away from other electronic equipment in an electromagnetic visibility zone not obscured by metal body parts. The transceiver must not be installed under the sun strip of the windshield. If it is metalized, this can significantly reduce the range.
LED indicator 3 is installed within visibility distance of the conductors. Siren 4 is located in the engine compartment away from heat sources. Engine temperature sensor 5 is installed using ties on the cooling system pipe. It is better to do this with a threaded connection on existing elements of the engine block.
Do not mount the engine temperature sensor in close proximity to the exhaust manifold.
Next, the conductors are routed to the main block. It is better to place the places for laying conductors along the cables, harnesses, and rigid structural elements existing in the car.
After tracing, they should be secured to standard conductors, harnesses, and body elements with plastic bundles. This will increase the secrecy of the alarm and the reliability of its electrical wiring.
In no case should the conductors be located next to elements or moving structures that heat up during engine operation.
Location of connectors on the central unit
The Starline A93 central unit has a line of connectors.
Car alarms for Lada VAZ 2115
On a VAZ 2115 it will be enough to install a reliable, cheap Tomahawk or Sherkhan car alarm. And if you need additional options that can be implemented in the car, then most likely it’s Starline.
Inexpensive alarms Sherkhan and Tomahawk
Below are time-tested car alarms with auto start (and without), integrated CAN-LIN, GSM and bluetooth interfaces, as well as expensive satellite alarms with GPS-GLONASS monitoring.
Stores where you can buy car alarms in your city. Services where you can install an alarm in your city.
AVERAGE PRICES WITH INSTALLATION
Car alarms without auto start
StarLine A63 2CAN+2LIN ECO
One of the most reliable budget alarms without auto start for a modern car with a CAN-LIN bus. Provides the necessary security, there is a durable key fob with two-way feedback and the ability to connect additional options.
Rating: 4.8 ★ Reviews: 84 ❤
Pandora DX 6x
Two-way alarm without an autostart module, which distinguishes it from the DX 9x system. It has collected the most current and time-tested solutions to become a convenient product. This is a budget alarm system that is suitable for almost any car with a CAN bus.
Rating: 4.6 ★ Reviews: 25 ❤
Alarms with auto start and feedback
Pandora DX 40 S
The most budget-friendly alarm system of 2022 with intelligent auto-start and multi-system 2CAN, LIN interfaces solves the main problems of most car owners: a reliable system with a dynamic dialog code and warming up the car in the cold season through auto-start.
Rating: 4.6 ★ Reviews: 16 ❤
StarLine A93 2CAN+2LIN
One of the most reliable budget alarms for a modern car with a CAN-LIN bus. Provides the necessary security, automatic engine start based on temperature, at a given time, based on low battery or days of the week, a durable key fob with feedback.
Rating: 4.8 ★ Reviews: 104 ❤
StarLine A96 2CAN LIN
Reliable car security and telematics complex with intelligent autostart, non-scannable dialog control code, integrated 2CAN+2LIN, shock-resistant control key fob, invisible engine lock.
Rating: 4.6 ★ Reviews: 17 ❤
Pandora DX 90B
Two-way alarm system with advanced engine start and feedback capabilities for modern cars. This is a lightweight version of the Pandora DX-90BT. CAN-LIN, control via phone via Bluetooth, dynamic dialog code, immobilizer bypass with key cloning.
Rating: 4.6 ★ Reviews: 16 ❤
Pandora DX 4G
Alarm 2022. On board: 4G/LTE/3G/2G GSM modem, integrated Bluetooth 4.2 interface, integrated 2xCAN, LIN, IMMO-KEY, keyless entry technology CLONE. Essentially, this is the platform of the Pandora DX 90BT system, but without an 868MHz radio interface and with a budget GSM modem.
Rating: 4.8 ★ Reviews: 32 ❤
GSM/Bluetooth - alarms (control from smartphone)
Pandora DX 9x
A two-way alarm system with smart auto-start, which combines the most current and time-tested solutions to become a convenient product that everyone loves. This is a budget car alarm that is suitable for almost any modern car with a CAN bus.
Rating: 4.9 ★ Reviews: 53 ❤
Pandora DX 91
Smart automatic engine start using 7 parameters, control from any modern smartphone via Bluetooth, security and service functions that expand the vehicle’s capabilities, savings on additional equipment, and a significant discount on CASCO.
Rating: 4.7 ★ Reviews: 18 ❤
Pandora DX 90 LoRa
Top-end two-way security and service system for 2022 with a radio path of record range (up to 1 km in urban conditions) with LoRa modulation. Works with most Bluetooth 5.0 protocols and has low power consumption. Security management is possible from a smartphone.
Rating: 4.7 ★ Reviews: 43 ❤
Pandora DX 4GL
Telemetric security and service system 2022 with intelligent automatic and remote engine start and feedback - Pandora DX 4GL - an affordable version of the product in the Pandora line of telemetry complexes with 4G communications. Control: tag and smartphone.
Do-it-yourself installation and connection of an alarm system to the VAZ-2114 central locking system
- Where to install
- How to connect
- Scheme
- Connecting the central lock
- Tapping into wires
- Autostart
- Checking the correct connection
After purchasing a VAZ-2114 car, the owner is faced with the problem of how to protect his car from unauthorized entry and theft. The most popular method of protection is installing an alarm on the VAZ-2114, which will create difficulties for burglars and notify the owner of the vehicle.
Major alarm manufacturers
Model of a security complex from the StarLine company There are several companies on the market that have proven themselves well and their products are in demand.
- StarLine. The company is one of the leaders in the production of security systems. It produces not only budget models, but also fifth-generation models. The cost varies from 7,000 to 14,000 rubles.
- Pandora. Popular Russian manufacturer of security systems. Wide range of models. Prices range from 5,000 to 48,000 for new advanced models.
- "Scher-Khan". Manufacturer – South Korea, developer – Russia. The cost is in the range of 7-8 thousand rubles. Connection via mobile phone and Bluetooth is possible.
- "Alligator" American security system. Cost up to 11 thousand rubles. Diverse model range.
- "Sherriff". Manufacturer – Taiwan. Budget models are presented, costing 7-9 thousand rubles.
- "Black Bug" Russian manufacturer. The lineup includes both budget and premium models.
- "Ghost" Russian manufacturer of alarm systems with a wide range of models. Prices range from 6,000 to 27,000 thousand rubles.
A car alarm helps protect your car from theft and burglary. Modern security systems provide a fairly high degree of protection. The driver also has many other useful features. An alarm system is a necessary and mandatory thing for every car.
How to connect
Installation of the VAZ-2114 alarm system begins with disconnecting the battery and determining the location of the elements. The control unit is placed under the instrument panel or behind the glove box, the siren is placed in the engine compartment. Guided by the instructions and diagram, all elements are connected.
The control unit is connected through connectors to system elements, components and vehicle parts. Installation and installation begin from the farthest point of installation of the security system element, using 9 connectors (X) for connection.
Checking the correct connection
Having installed all the elements of the alarm system, they configure the functions after activating the registration mode. To do this, you need to turn off the ignition, press the Valet button six times, and turn on the ignition. The sound of the signal six times will confirm the system’s transition to registration mode.
The selection of functions is made by pressing the buttons on the alarm key fob. The correct connection is checked by performing the following operations:
- Disconnect the wire (yellow) going from the A91 alarm control unit to the ignition switch to the terminal with the blue wire.
- The ignition key is used to start the engine
- The intermittent light of the alarm indicator confirms that the system elements are connected correctly.
In order to increase the level of protection of your car, you won’t need a lot of material costs. But only on the condition that the installation of the alarm system is done independently, with your own hands.
Car alarm installation
Before purchasing, study all kinds of models, select the ones that are suitable for the VAZ-2109.
Check for these features:
- turning on the engine from the key fob;
- remote engine stop;
- mechanical impact indicator;
- communication and communication signaling device;
- turning on the alarm whenever the car is opened;
- possibility of canceling the program.
Instructions are included with each device. If you install it yourself, you need to familiarize yourself with it carefully. Even after a high-quality self-installation, there may still be some nuances. For example, a monolithic alarm system is easier to install, mobile, it will not be difficult to install it anywhere on the car, but it is easier to hack if it is stolen.
To install this device, you will need the following devices and tools: a voltage meter with limit data up to 12 V, insulation, Phillips and regular screwdrivers, a wire stripper, a soldering iron, single-core and stranded wires (length up to 10 meters).
Starline A93 Connection Diagrams
Siren 4 is located in the engine compartment away from heat sources.
At the same time, having some knowledge in the field of electrical engineering and the ability to hold a soldering iron, you can install the alarm yourself, saving a little. The locking relay is installed in the ignition switch. After this, you can begin the battery charging process. How to connect an alarm The block is securely secured with self-tapping screws or plastic clamps and additionally wrapped in foam rubber. This greatly simplifies electrical installation. After this, you can begin the battery charging process. It is better to install transceiver 2 in the upper part of the cabin at a distance of at least 5 centimeters from other electronic devices and metal body elements. The required section is selected in the main menu; to do this, the service key is pressed several times in accordance with the subsection number. Once again, make sure that the ignition is turned off while disconnecting the terminals.
In the document containing the diagram, a table of settings is always provided. The central block must be secured with self-tapping screws. Therefore, for the correct car model, connection diagrams must be found in the user manual and instructions for connecting and installing the security system. Engine blocking via CAN Bus - Immobilizer Starline i96 CAN LUX - Review and Installation
Selecting a security alarm for installation on a domestic car
The function of remotely closing and unlocking all car doors is mandatory for all types of modern anti-theft alarms. It is impossible to install an alarm without a central lock, so car owners are forced to install a central lock before purchasing a security system.
The trade offers motorists hundreds of models of anti-theft alarms in a wide price and functional range.
When choosing a car alarm for installation on domestic cars, the main selection criteria for car owners are:
- Affordable security system price. Experienced car enthusiasts do not buy the cheapest anti-theft alarms, doubting their durability and quality of work. Most Russian drivers prefer to buy car alarms from the middle price range.
- System functionality. Ordinary owners of VAZ models consider the car alarm to include a remote key fob, two or three sensors, a siren, and connection cables as a sufficient set of options.
- Possibility of self-installation. To implement this requirement at the purchase stage, you need to be interested in the complexity of the electronic control unit for the security system, detailed diagrams and instructions for connecting the anti-theft alarm. When installing it yourself, minimal disruption to the standard electrical wiring is desirable; it is not recommended to interfere with the operation of existing mechanisms.
Owners of VAZ-made models do not need to worry about the difficulties of flashing factory protections or bypassing standard immobilizers. However, experts do not recommend that novice car tuning enthusiasts begin work by independently installing security systems equipped with:
- remote engine start (remote engine start based on temperature, timer);
- coded dialogue communication system, GSM modules;
- numerous additional options (starting from a smartphone, turning on heaters, air conditioners).
The easiest way to install a simple car alarm with a minimum set of functions on your own.
Step-by-step instructions for installing the Starline A93 alarm system
Exits the settings menu. The manufacturer recommends installing diode shunts in parallel with additional control relays, as shown below. Placement of alarm elements The recommended placement of devices is shown in the figure.
Then the car thieves will definitely have to tinker, and most likely leave the car alone. Advantages and disadvantages If you study the reviews of owners and specialists about Starline, they will include both positive and negative aspects. It should be taken into account that there is a cabin temperature sensor inside the unit, so if it is installed in close proximity to the cabin heater pipes, the temperature data will be incorrect. Let me make a small clarification.
The year of manufacture and model of the car also influence the diagrams. They are connected using blue-black and blue-red wires to the corresponding connectors. Feedback support, which provides the driver with full control over the state of his vehicle, signaling and engine. Complete INSTALLATION of the StarLine A93 2CAN 2LIN alarm system with AUTO START on the 2022 Hyundai Solaris
Typical faults B9
1. Damage to the control panel. The most common complaint from Starline b9 owners is the breakdown of the key fob buttons, without which operation of the system becomes impossible. You can solve the problem by disassembling the remote control and wiping the contacts with alcohol. If the keys have fallen inward, they can be replaced at a service center.
Related link:
Starline B series alarms - ideal protection in big city conditions
2. Alarm malfunctions, poor communication signal. The B9 alarm system does not cope well with radio interference, which is especially abundant in a big city. Unfortunately, it is impossible to correct this shortcoming. The car owner can only ensure that the vehicle is in the area of strong radio interference as little as possible.
Please read carefully!
It is better to choose a heated garage with good access to the interior from the driver’s side and bright lighting as the location for installing the alarm. If such fastening points are not found, you can independently make mass fasteners to the metal body parts of the car under the dashboard.
It turns out that the following connection option is suitable for the Haval brand: in the additional circuit and in the accessory power line, the current should not be interrupted during starter operation. By the way, the hood switch is paralleled with the trunk limit switch. Thus, you can choose the functionality and, accordingly, the cost yourself. Installation of wiring connections according to the connection card must be carried out with the battery disconnected. The author of the video is Auto Electrician Sergey Zaitsev. The Starline A93 security complex provides four ways to control the central lock: low-current control;
Advantages and disadvantages If you study the reviews of owners and specialists about Starline, they will include both positive and negative aspects. Flexible self-diagnosis. Siren 4 is installed in the engine compartment away from the heating elements of the engine. To do this, it is better to perform computer diagnostics. The communicator should emit a melodic signal. Then try turning it off. It is better not to install this element in the engine compartment, since it contains many sensors and electronic devices that will interfere with the digital signal.
Preparing for installation
The installation consists of two stages.
| Stages | Actions | Additional work |
| The first involves preparing the car for installation of locks. | At this stage, you need to check all the doors and pillars for all the necessary holes and channels where the wiring will be laid. | If the conditions necessary for installation do not exist, they will need to be created: make holes and install fasteners. |
| The second stage is the installation of locks. | The mechanisms are installed on the already prepared car and the wiring is laid. If the preparation for this was carried out in compliance with all the necessary conditions, then problems should not arise. | But if you forgot to make a hole or forgot about the fastening, then you will have to postpone the task you started and finish the previous one. |
After you remove the trim and pull out all the interfering insides of the door, you will need to make holes for the wiring. This is an important installation element, and usually only the front doors have them, and not on all models of that car. The rear doors do not have such holes at all, so you will need to make them yourself.
Now let’s start designing the StarLine A93 alarm system with the necessary requirements.
The central block must be secured with self-tapping screws.
Connecting the immobilizer crawler and GSM module Autostart mode to warm up the engine, provided by the VR crawler from the apartment Easy setup and maintenance. Service mode key.
All connections must be properly insulated. Communication interface monitoring.
And the antenna is hidden inside the shock-proof case. It is better to lay all conductors in close proximity to the standard electrical wiring harnesses.
Step-by-step instructions for installing the Starline A93 alarm system
Therefore, Starline A93 has low-current blocking channels. Important to know Information about the second relay is added in a similar way.
Using the second and third keys, you select the required level of sensor sensitivity. This is a labor-intensive job, but if someone breaks into the machine, it will take them time to gain access. Upon successful entry into the recording menu, the radio relay siren will emit seven beeps. You can configure it at your own discretion.
The manufacturer recommends bridging additionally installed blocking relays with diodes. Connecting power circuits When performing the Starline A connection procedure, you must follow the connector diagram. The Starline security system is installed on vehicles with an on-board voltage of 12 V.
In the second case, the sensor must be securely fastened so that it is not washed away by the flow. Eco alarms use service channels that regulate parameters or carry out maintenance of the security complex. Connection points for Starline a93 alarm system on Mazda MPV
Additional alarm functions
In addition to the main security function, some useful additions can be implemented in car alarms. For example, such as:
- Remote engine start. The engine warm-up function is especially convenient in winter. You can start the engine remotely and prepare it for the trip in time.
- Remote control of power windows. The windows are automatically raised when the car is armed with an alarm system. No need to remember if all the windows are closed.
- Car protection when the engine is running. This function is useful when leaving the car for a short time.
- Satellite tracking (GPS/GLONASS). Many anti-theft systems are equipped with active tracking systems via GPS or GLONASS satellite systems. This is an additional level of protection for the car.
- Engine blocking. Advanced versions of security systems can be equipped with a remote engine stop system. Additional vehicle security against theft.
- Control the alarm and other functions from your smartphone. Modern systems allow you to control all functions from your mobile phone. The availability of this option depends on the configuration and model of the alarm. Management occurs through a special application.