Brake pads are an extremely important element of the car’s braking system, and the safety of both the car and road users largely depends on their serviceability. Therefore, you need to constantly monitor the condition of the brake pads and replace them in a timely manner. This operation is not very complicated, so it is easy to carry out yourself if you have all the necessary tools, without going to an expensive service station. As an example, consider the process of replacing pads on a VAZ 2110.
- 2 Which ones to choose for replacement
- 3 How to remove
- 4 How to change the front pads
4.1 Video instructions
When to change pads
The brake pads of the VAZ 2110, if you don’t delve into their design, consist of a friction lining and a special frame. Friction linings perform braking and, precisely by the material from which they are made, these linings are distinguished. This material (for the friction lining) is based on a special reinforcing component, which determines such design parameters as strength, stability, heat resistance and reliability of the braking qualities of the system.
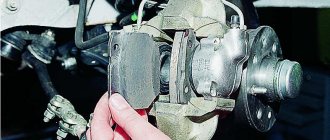
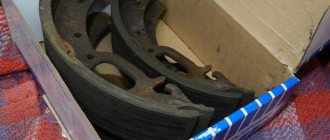
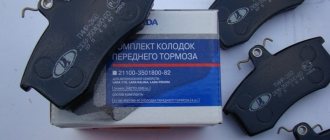
New brake pads for VAZ 2110
Like any part, VAZ 2110 brake pads have their own service life, which is usually 30,000–50,000 km of vehicle mileage or the friction lining reaches a thickness of 1.5 mm. (that is, they practically grind down to zero, but most often when braking, piercing unpleasant sounds arise from under the wheels). When the thickness of the brake linings is less than 1.5 mm. Excessive stroke of the brake cylinder pistons occurs, which leads to its leakage.
Brake pads should also be replaced if:
- the friction linings are covered with an oily substance (oiled);
- mobility of the linings on the base was detected;
- Deep chips, grooves or cracks have appeared on the surface of the friction linings.
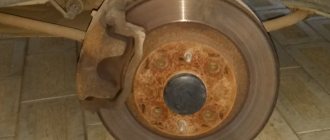
It is also necessary to monitor the wear of the brake discs, which should be replaced when they reach a thickness of 17.8 mm. (for ventilated discs) or 10.8 mm. (for non-ventilated ones).
Briefly about the process of replacing brake pads on a VAZ-2110
On average, the pads need to be changed every 30 thousand mileage.
First, let's look at the simple technology of replacing pads on a ten. Anyone can change them, spending at most half an hour. For our work, we will need a standard set of tools, a pry bar or a powerful screwdriver, and a rag. WD-40 penetrating lubricant and guide block lubricant may also . And, of course, new pads. We change them only as a set on the right and left wheels.
Which ones to choose for replacement?
The quality of braking and comfort when slowing down the car (no whistling or grinding noise) also depend on the quality of the brake pads. It is also necessary to consider the following when choosing a consumable:
- Poor quality pad material can be the main cause of squeaking, as well as accelerated pad failure;
- When purchasing, choose front brake pads with manufacturer catalog number 21100-3501080-00;
- The same brake pads can behave differently with different brake discs, which significantly complicates the choice;
- To make the right choice when buying brake pads, you need to read reviews in magazines about cars, directly at points of sale, among friends.
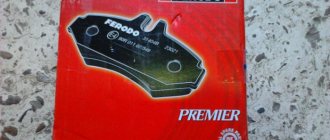
Recently, Ferodo, ATE, Allied Nippon and Lucas brake discs have become very popular for the VAZ 2110..
Symptoms of wear
The middle pads will last about 30 thousand mileage and they wear out three times faster than the rear ones, since the main load during braking falls on them. Under no circumstances should you use pads from different sets or different degrees of wear; we install only a new set, from only one manufacturer.
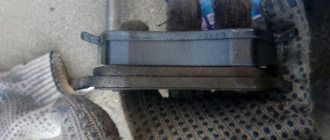
Difference in thickness of old and new pads.
Regardless of the mileage, if these symptoms appear, we at least check the condition of the pads and discs:
- Creaks and clanks when braking.
- Vibration during braking.
- Increased braking distance.
- Large brake pedal travel.
- Uniform impacts when braking.
- Traces of dust and chips on the brake mechanisms.
It is these symptoms that will tell us that the service life of the brake pads has been exhausted. We can say with almost 100% confidence that the block has worn down to an acceptable thickness of 1.5–2 mm .
Let's start replacing.
Required spare parts
Just 10 years ago, old pads were not replaced; they were glued on, linings were changed, or they were riveted. Today on the market you can easily purchase the entire mechanism. To replace, you need to prepare new pads. Experts believe that it is better to install replacement factory parts, article number 2110-3501080-60 (TIIR-260), 21100350180082 or 2110-3501080. There are other opinions. Some motorists believe that pads from well-known brands provide the best braking parameters on the VAZ 2110, 2111, 2112. These are parts from brands such as Brembo, ABS, Ferodo, TRW, Bosch, Optimal or Delphi.
pros
Let's look at why disc brakes are better than drum brakes:
Braking becomes more reliable, braking distance is reduced; Braking forces are distributed more evenly, given that the VAZ 2110 is a front-wheel drive car; There is an effect of faster response after pressing the pedal; Unsprung masses are reduced; Heat dissipation occurs better, which is especially important when driving on a mountain road or during active acceleration/braking. For this reason, the brake system is cooled better; Disk ones are much easier to dismantle and replace; There is no need to adjust the handbrake after each repair of the rear brakes, although this will have to be done the first time; They do not freeze in winter after washing, like drum ones; Rear disc brakes installed on the VAZ 2110 are much more convenient to control and promptly notice pad wear.
Work progress
Replacement of front brake pads.
- 1. Work must begin by removing the brake hose (on this model it is attached to the bracket using a rubber ring).
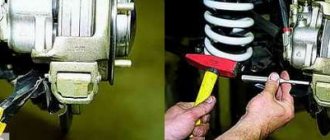
- 2. After removing the hose, push the piston into the cylinder. This is not difficult to implement, thanks to a special tool or clamp.
- 3. Under the bolt securing the guide pin, there is a lock washer - carefully bend its edge.
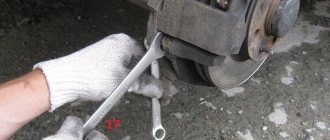
- 4. Using a 13 by 17 wrench, unscrew the mounting bolt.
- 5. Now you can lift the caliper cover and remove the brake pads.
IMPORTANT NOTE: to press out the piston of the brake system cylinder, you can use either a clamp or an adjustable wrench. But remember that it is forbidden to lean on the disk (it can easily be damaged).
Rear wheels.
The same tools can be used to replace the brake pads on the rear wheel.
In this case, the sequence of work will be as follows:
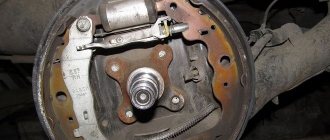
- Unscrew the two drum bolts and carefully pull it off the shoes. If it gets stuck, don’t be nervous - you can take a mallet and tap it around the circumference of the drum. This will allow you to gradually pull him away from his “home” place.
- Now, using a screwdriver, remove the spring that holds the pads together and disconnect it.
- Remove the block that is located closer to the front of the car. To do this, grab the product and slightly pull it to the side.
- Loosen the top spring slightly (rotate the shoe at an angle of 50-60 degrees) and remove the other spring.
- Remove the spacer bar.
- Disconnect the parking brake rod (here try to carefully remember the sequence of actions).
- Remove the guide spring and remove the cotter pin.
In fact, this is a kind of “equator” for the progress of work. Now you can proceed to the installation process itself.
Other malfunctions affecting the illumination of the rear lights
The reversing lights may not light due to a faulty switch. To troubleshoot, you need to do the following:
- disconnect the connector;
- unscrew the switch with a 21 key;
- remove the switch and replace it with a new one.
Note. The operation should be carried out quickly so that there is no large leakage of engine oil from the gearbox.
A malfunction of the car's lights may be caused by problems with the hydraulic corrector. With its help, you can change the angle at which the headlights are tilted (this is due to the different load levels of the car). The hydraulic corrector consists of a master cylinder, which is mounted on the dashboard, actuator cylinders of the headlights and connection tubes. It cannot be disassembled and cannot be repaired. The assembly part should be replaced. Removal and installation of the main cylinder of the headlight hydraulic corrector occurs in stages:
- remove the handle and cylinder lining by prying it off with a screwdriver;
- unscrew the nut with a 22" head;
- remove the hydraulic corrector.
The trunk light may also need replacing. In this case you need:
- Disconnect the cable and terminal of the negative battery;
- disconnect the rear light from the block with wires by opening the trunk lid;
- press the fastener parts and remove the holder with lamps from the flashlight body;
- unfasten the lamp by unscrewing two nuts;
- loosen the three nuts that secure the decorative trim of the luggage lid and unscrew the nut closest to the lamp;
- lift the cover and remove the lamp;
- The new lamp is installed in the opposite order to that described above.
Note. When installing the flashlight, first place the flange of its body under the decorative trim, and then tighten the nuts securing the trim.
Many cars of the VAZ family, including the VAZ 2110, have a problem that affects safety and also causes a lot of trouble for drivers. The rear light board is a thin strip with conductive tracks. You have to change this tape quite often, and with it the burnt out light bulbs. You can use the option of inserting iron cartridges from the VAZ 2101. So, to do this, you need to:
- remove and disassemble the rear lights, removing the board and the tape from them;
- buy single cartridges for stops and dimensions;
- purchase copper wire with a cross-section of 2.5 mm, connectors, M3 bolts;
- mark the places for the cartridges and drill them, finishing the holes with a file;
- to modify the cartridges for clearance and brake lights, turn the tip terminals 180 degrees;
- completely cut out the cartridges from the turn signals;
- secure the cartridges to the plastic with bolts and nuts;
- connect all the cartridges, laying the pluses on the turn signal, stops and dimensions;
- extend the connector block and install everything on the car.
Note. Before installation, you should check everything to ensure there is no short circuit.
