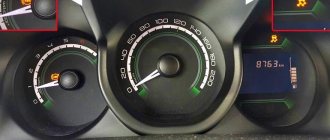
The abs sensor of a Priora car is placed near the wheels. It comes in front and back. The ABS unit is placed near the engine on the right, if you open the hood and stand in front of the car. When AbS (ABC) lights up on the panel, it means there is a problem with the system. Why do cars need this system?
Abs affects the braking of the car, Priora with this system brakes 2 times faster than without it. The wheels brake in small portions, measured by a computer. Initially in 2008 there were cars without it. Read the article to the end and find out what the error is, what it is responsible for and why the ABS lights up and does not work. Priora has sensors and an ABS unit. Failure of any spare part leads to problems. On the Prior, there are 18 errors belonging to the braking system.
The appearance of an icon on the dashboard indicates an error occurring in the operation of the vehicle. There are serious errors on the Priora, if they occur, you should not tempt fate and move on, but there are errors that can be postponed. For example, the ABS system is considered very valuable for a modern driver in a car.
The Priora's ABS system saves you during unexpected and sudden braking and makes the process itself more efficient, reducing the braking distance. Therefore, when the ABS light is on on the Priora’s dashboard, strange feelings of uncertainty arise - knowing that the road situation can be so unpredictable that you will have to brake sharply, you involuntarily have to look for the reason why the icon appeared on the dashboard.
As in many systems, this behavior of the car's control unit may result in the ABS sensor on the Priora having to be replaced. A large system with a fairly simple device is worth checking - for your own safety.
What to do if the ABS light is on?
It is worth noting that the system works normally if the ABS icon lights up when the ignition is turned on and goes out after a couple of seconds. The first thing to do if the ABS light is constantly on is to check the fuse for this system, and also inspect the wheel sensors.
Quite often, the sensor connector on the hub either oxidizes or the wires fray. And if the ABS icon is on after replacing the pads or hub, then the first logical thought is that you forgot to connect the sensor connector. The presence of dirt on the sensor also causes the indicator to light up.
Quite often, car owners may be frightened by the appearance of an orange ABS icon after a good slip. In this case, you shouldn’t bother at all: brake sharply a couple of times and everything will go away on its own - the control unit’s normal reaction to such a situation. When the ABS light does not light up constantly, but periodically, then you need to inspect all the contacts, and most likely, the cause of the warning light can be quickly found and eliminated.
Checking the quality of work performed
After replacing the sensor, its functionality is checked. To do this, it is enough to accelerate to a speed of 40 km/h on a flat, safe section of the road and perform sharp braking. If the car stops without pulling to the side, vibration is transmitted to the pedal and a specific sound of brake pads being activated is heard - the ABS system is operating normally.
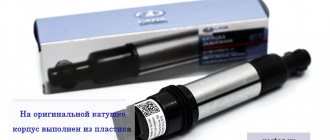
Today you can easily find and buy any ABS sensors - from expensive original devices to analog parts at an affordable price. Remember that proper selection of system elements plays an important role in its uninterrupted operation. When choosing a sensor, study the manufacturer's instructions and make sure that it fits the car, and this review will help you replace the device yourself.
ABS fault detection
The serviceability of the ABS system in the Priora, like in any car, is a very important issue. It is very convenient that the slightest malfunction in its operation will immediately be reflected on the dashboard. The ABS warning light will come on or it will not go out after the required time after turning on the ignition.
There's no need to think twice about it. You urgently need to go for computer diagnostics to a decent service station. Modern Priora ABS ECUs have access to a diagnostic connector. They are perfectly diagnosed by both portable portable scanners and stationary motor testers. Since all ABS electronics are very closely connected with the mechanical part, most breakdowns in this area can be determined by an experienced diagnostician by scanning the ECU.
For example, the operating valve is jammed in one of the directions. What happens: the coil, figuratively speaking, tries to influence him, but he doesn’t move. The computer, noticing a load violation in the circuit, will immediately give a signal. The “ABS sensor” will light up. When connected, the technician will see the direction that needs to be looked at and quickly fix the problem.
Features of diagnostics of ABS Priora
Some scanners that read faults recorded in the ECU produce only alphanumeric codes, so for particularly meticulous car enthusiasts it makes sense to have on hand the decoding of these codes for the VAZ Priora:
- C0035 - malfunction of the left front sensor;
- C0040 – the same for the front right;
- C0045 – rear left malfunction;
- C0050 – the same for the right rear;
- C0060 – failure of the left front exhaust valve;
- C0065 – front left intake valve failure;
- C0070 – malfunction of the front right exhaust valve;
- C0075 – malfunction of the front right intake valve;
- C0080 – rear left exhaust;
- C0085 – rear left inlet;
- C0090 – rear right exhaust;
- C0095 – rear right intake valve;
- C0110 – return pump circuit malfunction;
- C0121 – failure in the relay circuit for turning on the supply voltage of the valves;
- C0161 – malfunction in the brake light circuit;
- C0245 – incorrect reading of rotation speed;
- C0550 - ECU malfunction;
- C0800 - voltage mismatch in the ABS network.
This list allows you to find a fault, even if a simple scanner for a Priora produces only codes, and find out why the “ABS sensor came on.” Still, it is worth remembering that it will be more pleasant for the technician to hear the correct wording - the anti-lock system malfunction lamp is on.
DIY ABS diagnostics
The very first sign of a malfunctioning ABS system is a light on the dashboard
After it lights up, it is important to immediately make a diagnosis. Let's consider the actions that need to be taken if the ABS malfunctions:
- Check the fuses and relays of the anti-lock braking system control unit.
- Compare the tire pressure - it should be the same everywhere.
- Examine the rotor of each sensor for contamination.
- Use a tester to measure the resistance in each of the sensors with the ignition on. Lift the wheel on a jack and rotate it and observe the changes.
- Check the integrity of the wires coming from the sensors to the control unit.
- Check the integrity of the wires going to the ABS hydraulic unit.
Reasons for ABS system failure and what to do
Water getting into the contacts of the ABS control unit
We find the system control unit under the hood. It usually looks like a rectangular iron box with several metal tubes. There may be five or four of them. This is the anti-lock braking system unit. The power and control connector is connected to it - a large plug, it only fits the case, you won’t get it mixed up.
Disconnect the negative terminal of the battery and disconnect this connector from the ABS control unit. We check its contacts for moisture or mechanical damage. There were cases when they rotted and were destroyed by age and water, despite the moisture-proof casing of the connector. It may be damaged, allowing water to penetrate inside.
What to do
If you find moisture inside, blow and dry the plug and contacts both on it and on the control unit. If there is visible damage to the contacts of the plug, only replace it; if there is visible damage to the contacts of the ABS computer, then contact specialists who can replace the connector.
Fuse box
This is the simplest thing that a simple driver can check on his own if the ABS light comes on. It is advisable to check them first - this is the easiest way. We wipe our hands and climb under the hood, looking for a mounting block - a plastic box with fuses and relays.
Open it and turn over the top cover. It usually says where and what fuses are located in the block. We find the inscription “ABS” and according to the diagram we look for the fuse that is responsible for this system.
What to do
Checking the fuse. Usually there should be spare fuses in the mounting block if the machine is completely new. If there are none, then you can use the adjacent fuse. For example, remove a fan, horn, or other less important systems that were definitely working from the power socket. And insert in place of the old ABS fuse.
If the light goes out, then it's time to change it. Do not forget to return the “neighbor” to its place, otherwise the fan or other equipment from which the fuse was removed will not work.
Mud and snow
Further verification becomes a little more complicated. The sensors are located on the wheel hubs. Snow or dirt may stick between them and the gear, also called the ABS ring. They stop reading the rotation speed, and the ABS error light comes on.
Sometimes water gets into this gap between the sensor and the ring. The readings will no longer be sent to the control unit, and an error will appear on the instrument panel.
What to do
Cleaning it yourself will be problematic, but it is possible. We remove the sensor and inspect the ring teeth and its seat for frequency. Clean if necessary. If there is snow or water, then after a long trip the light should go out. If it continues to burn, then proceed to the next stage of testing.
Sensor wires
They are often rubbed by wheels or turning mechanisms. Because they are located next to the rotating elements of the chassis. The fasteners on them may break, the wiring will dangle, touching everything.
Over time, the insulation of wires and connectors may dry out. A short circuit occurs to the vehicle body. This also causes an ABS error.
What to do
Since we have already jacked up the car, let's inspect these wires. As I said, the sensors are screwed into or attached to the hubs of each wheel. Therefore, you need to inspect all four separately.
Wires can reach one meter. Your task is to examine them entirely. They may have abrasions, microcracks and other damage. The contact caps may also be torn. If you find any wiring defects, replace them; the ABS light should go out.
ABS sensors
They may get damaged. Chips stick to them - “work-out” from the gear rings. The contacts on the connector connecting the wire to the sensor may become oxidized. This will result in a poor connection. The control unit does not “see” the sensor in the system and will display an error on the dashboard.
What to do
If it is possible to unscrew the sensors from the hubs yourself, visually check their condition. We clear away any shavings, if any. If there is damage, we replace the sensor.
Remove the caps for connecting the wiring to the sensors. We check for oxidation and contact integrity. If they are green, we clean them from oxides; if they are destroyed, we change the wire with the connector or the sensor.
Ways to check functionality
To determine the condition of a part, we will perform a series of steps to diagnose it, moving from simple to complex:
- Let's check the fuses by opening the unit (inside the passenger compartment or in the engine compartment) and inspecting the corresponding elements (indicated in the repair/operation instructions). If a burnt component is found, we will replace it with a new one.
- Let's inspect and check:
- integrity of connectors;
- wiring for abrasions that increase the risk of a short circuit;
- contamination of the part, possible external mechanical damage;
- fixation and connection to ground of the sensor itself.
If the listed measures do not help to identify a device malfunction, it will have to be checked using instruments - a tester (multimeter) or an oscilloscope.
Tester (multimeter)
This method of diagnosing the sensor will require a tester (multimeter), instructions for operating and repairing the car, as well as PIN - wiring with special connectors.
The device combines the functions of an ohmmeter, ammeter and voltmeter
To obtain complete information about the performance of the ABS sensor, you need to measure the resistance in the device circuit:
- We lift the car with a jack or hang it on a lift.
- Remove the wheel if it prevents access to the device.
- Remove the cover of the system control unit and disconnect the controller connectors.
- We connect the PIN to the multimeter and the contact socket of the sensor (the connectors for the rear wheel sensors are located inside the cabin, under the seats).
We connect the PIN to the tester and the contact socket of the sensor
The device readings must correspond to the data specified in the repair and operation manual for a particular vehicle. If the device resistance:
- below the minimum threshold - the sensor is faulty;
- approaches zero - short circuit;
- unstable (jumping) at the moment of twitching of the wire - a violation of contact inside the wiring;
- infinity or no readings - wire break.
Video “Diagnostics of the ABS sensor”
In addition to self-diagnosis of the sensor with a tester (multimeter), it can be checked using a more complex device - an oscilloscope.
ABS device on Priora
Like most modern car systems, ABS is computer controlled. But in addition to the electronic control unit, it also includes several sensors and actuators. The entire system consists of several elements.
- Electronic control unit (ECU).
- Sensors on wheel hubs 4 pcs.
- Brake fluid pressure valves in the system 4 pcs.
- EVN (Electric Return Pump).
- Warning light on the instrument panel.
Despite all its apparent simplicity, this is a rather complex, high-tech system. Each sensor transmits data on the rotation speed of the Priora wheel to the electronic control unit. Based on the data received, the control unit sends a signal to the brake system valve, which, when you press the brake pedal, releasing pressure, prevents the wheels from completely locking and starting an uncontrolled skid of the car.
Anti-lock brake control unit in hydraulic unit
Structurally, on the Priora, the ABS ECU is mounted together with the EWH and valves that regulate the pressure into a single unit - the hydraulic unit. It is located on the front left side member of the vehicle. The hydraulic unit is connected to the entire system by a common wiring harness. It includes pipes for supplying brake fluid to the working cylinders. An EWH is also installed here, increasing the pressure in the system.
Attention! This unit does not understand handicraft conditions. Usually replaced entirely with a new one.
Wheel hub sensor
The sensors that supply wheel speed data to the control unit are made on the principle of a Hall sensor. By the way, most rotation sensors use exactly this principle: changing the voltage on the semiconductor of the sensor, depending on the passage of a control point on the rotating disk near it. It is in correlation with the signals from the ABS sensors that the control unit manipulates the valves.
ABS malfunction warning lamp on the Priora instrument panel
What Priora drivers talk about – “the ABS sensor has come on” – is in fact a warning lamp for the serviceability of the anti-lock system. When the ignition is turned on, the orange “ABS” inscription will light up on the dashboard for about three seconds. If the system is working properly, then after three to four seconds the light will go out. In general, the principle of signaling from the “ABS sensor” is the same as from the warning lamp of the main ECU of the car, the well-known “check anger”.
How ABC works
The anti-lock braking system was developed when it became clear that when the wheels suddenly jam, the car loses stability and is difficult to control. Moreover, the quality of braking did not improve, and the car was pretty much carried off the road. Therefore, a system was developed that, by regulating the pressure in the brake system pipes, allows the wheels to turn slightly. This significantly improves vehicle dynamics, allowing the driver to control the vehicle more confidently. But despite its apparent simplicity, this is a rather complex process that requires the coordinated operation of many mechanisms included in the anti-lock braking system. If any of the components fails, a warning lamp lights up on the instrument panel.
You can often hear the question from drivers: “Why is the ABS sensor on?” It is important to know that when the warning light comes on, it does not necessarily indicate a faulty wheel sensor.
Behavior of a car with and without ABS
As you can see in the pictures, how a car behaves with a working ABS and a non-working one or without ABS. During a slide, ABS helps leave control of the car in the hands of the driver; without ABS, the car behaves in the direction the inertial force pushes it.
The need to replace the device
Malfunctions in the ABS system are indicated by a warning lamp located on the dashboard of the car. In normal mode, the indicator lights up when the engine starts and goes out after 3–5 seconds. If the controller behaves incorrectly - it turns on while the engine is running or blinks chaotically when the car is moving - this is the first sign of a sensor failure.
The ABS indicator should go out 3-5 seconds after starting the engine
Also, a possible device malfunction is indicated by:
- an error code appears on the on-board computer display;
- continuous wheel locking during heavy braking;
- absence of characteristic vibration on the brake pedal when it is pressed;
- the parking brake indicator lamp has been activated when the handbrake is off.
If any of these problems occur, the device should be fully diagnosed. It is not at all necessary to trust this question to highly paid car service technicians - checking the ABS sensor yourself takes little time and is done without expensive equipment. If diagnostics reveal that the device is broken, it will have to be replaced with a new one.
About the most common causes of breakdowns
The ABS light comes on on the dashboard, extraneous noise is heard in the brake unit, the brake pedal has become too soft, which means there is a high probability of a serious malfunction. Initially, the car owner will have to make sure that there is no air in the brake system, that there is no oil leakage, and that the brake fluid level is normal. What “diseases” do you encounter at a service station?
- Wheel sensors don't want to work.
- Elements are damaged mechanically.
- The ABS pump has gone out of operating mode.
- The control unit has failed.
- This last difficulty raises many nuances.
Despite the difficulties, it is worth thinking carefully about whether disabling ABS is justified specifically for the car owner. When deciding to take such a step, you need to weigh the pros and cons and take a closer look at the driving conditions. The criteria are largely predetermined by the intricacies of the particular road along which the “steel horse” is often forced to travel.
Replacing the ABS block
For repair you need to prepare:
- key "13";
- ratchet;
- head "10".
The procedure for working with Priora is as follows:
- Stop the car and raise it. Disconnect the minus from the battery.
- Drain the brake fluid from the cylinder brake hose.
- Unscrew the brake pipes connected to the block. There are 6 of them in total.
- Unhook the power lock and disconnect the wires.
- Unscrew the nuts fastening to the car body.
- Slowly pull the block and remove it.
- Install the unit by connecting everything in reverse order. Don't forget to bleed the brake system.
Why pneumatic
Communities Lada Priora Lada Priora Club Blog Ignition switch wires
Braking requires quite a lot of effort from the driver. Making such an “injection” and bleeding the brakes on four wheels at once is not an easy task. Therefore, a solution was found: due to the vacuum in the intake system, a special mechanism, a vacuum, greatly facilitates this process. And the pedal is quite easy to press.
Important! It is the system, operating on the “syringe” principle, with many rubber seals, that requires the complete absence of air in the system, since its presence reduces the efficiency of the brakes to zero.
Simply put, due to the difference in the density of air and brake fluid, instead of uniform pressure on the piston of the working cylinder, there will be a chaotic movement of air bubbles inside the system. Because of this, they sometimes need to be pumped.
Replacing the ABS sensor
To replace the anti-lock braking system sensor on a Priora, do the following:
- Raise the car. Hang up the wheel. The ideal position is on a car lift. First remove the negative terminal from the battery.
- The wheel behind which the faulty sensor “hides” is removed. To do this, working in a circle, smoothly, one by one, unscrew all the bolts and pull the wheel towards you.
- Behind the hub you will see the DSC mount: unscrew the screw that secures it using Torx T30.
- Disconnect the wiring harness.
- Replace the ABS sensor and reassemble everything in reverse order.
Some nuances
Replacing sensors that are installed on the steering knuckles of the front wheels is much faster, since access to these parts is more convenient:
- The car is jacked up and the required wheel is removed.
- The bolts that secure the sensor are unscrewed, and the device is removed from the seat.
- The wiring fastening is released and the connector plug is disconnected.
- Installation of a new sensor is carried out in the reverse order.
Before replacing the sensor, reasons that could cause it to malfunction should be eliminated.
Particular attention should be paid to specific problem areas found in each car model. For example, all FORD cars produced before 2005 suffer from interruptions in the operation of electrical equipment that occur as a result of frequent short circuits, and the pain point of the ABS system of these cars is considered to be the quality of wiring insulation
In this case, it will be possible to repair the sensor instead of completely replacing it.
How the sensor works
Different manufacturers install different versions and implementations of anti-lock braking systems on their cars. There are several types of sensors. Some of them operate on the principle of the magnetoresistive effect, while others operate on the basis of the Hall effect. There are passive and active sensors.
Passive sensors are inductive speed sensors. The design and operating principle are extremely simple. It is based on an ordinary inductor coil wound using thin copper wire. A powerful magnet and an iron core are installed inside the coil - also magnetic. The end part of the coil with the core is installed opposite the magnetic ring mounted on the hub.
The sensor operates on the principle of electromagnetic induction. While the coil is at rest, there is no signal at the sensor outputs. When the car begins to move, a toothed ring rotor will move near the sensor core. This will change the magnetic field passing through the coil.
Due to the alternating magnetic field, an alternating current is generated in the coils, which is transmitted to the control unit. Such a system is not subject to interference and dirt, but begins to work only when the speed reaches 5-7 km/h.
An active analogue appeared in the 90s. The sensors operate on the principle of a semiconductor diode - the direction of the electric current changes under the influence of magnetic fields. Such sensors are called magnetoresistive. There is also a Hall effect sensor, where a current is generated in a resistor placed in a magnetic field.
The magnetic field is created by means of a special ring, which is attached to the car hub and rotates with the hub. In the case of passive sensors, any changes in the magnetic field lead to changes in the direction of the electrons - resulting in a change in resistance. These changes in resistance are recorded by the electronic module or ECU.
ABS turns on randomly, the light blinks or lights up periodically
One of the most difficult forms of breakdowns is the constant blinking of the ABS light. This means that the anti-lock braking system sensors send incorrect signals to the computer, which, in turn, issues other incorrect commands to the vehicle's systems and modules. In such cases, many people prefer to simply turn off the anti-lock system, since unpleasant incidents may occur. For example, turning on ABS at a speed of 90 kilometers per hour with light braking can damage the chassis of the car and contribute to a complete loss of control over control. It's better to do this:
- bring the car to a service center for diagnostics, find out the reason for the chaotic operation of the equipment;
- for domestic cars equipped with a primitive anti-blocking device, it is better to immediately disable the system;
- complex designs and on-board electronic systems of foreign cars will have to be reflashed for repair;
- on some machines it will be easier to find the problem and fix it than to disable the anti-lock;
- you need to keep in mind that this particular system is not always the cause of the ABS light coming on; the problems can be different;
- During the diagnostic process, it is better to check the entire on-board electrical system and equipment.
By paying a certain amount for a car inspection, you can get the right answers to important questions. Sometimes a light that comes on on the panel can develop into a full-fledged repair of important units and components of the car, so you will have to spend a lot. But in most cases, this problem is not so expensive to solve. The cost of repair work depends, of course, on the make and model of the car, and on the price of spare parts. If an ABS sensor for a domestic car costs from 600 rubles, then a Japanese SUV will cost more than 10,000 rubles to replace one such sensor.
Lada Priora relay and fuse diagram
- January 15, 2015 Lada.Online 1 990 623 The relay and fuse block is also called a mounting block or a black box. In the event of a car breakdown related to electrical equipment, the fuses and relays are first checked. If a fuse is blown, you must first determine the cause of its blown before replacing it.
Where are the fuses on the Priora?
- The main mounting block of the Priora is closed with a lid and located at the driver’s left foot. To open it, you need to turn three latches 90° and unclip the lid.
- The fuse box is under the hood, which is located near the expansion tank.
- Another mounting block, which is located near the left foot of the front passenger. To gain access to the fuses and relays, unscrew several screws with a Phillips screwdriver.
Below is a description of each fuse and relay block in order.
Priora fuse box diagram
Fuse No. Current, A “Standard” and “Norma” “Norma” with air conditioning and “luxury”
| F1 | 25 | Engine cooling radiator fan | Reserve |
| F2 | 25 | Heated rear window | Mounting block, rear window heating relay (contacts). Electrical package controller, contact “10” of XP2 block. Rear window heating element. |
| F3 | 10 | Right headlight, high beam | Right headlight, high beam lamp. Instrument cluster, headlight high beam indicator. |
| F4 | 10 | Left headlight, high beam | |
| F5 | 10 | Sound signal | Mounting block, horn relay. Sound signal. |
| F6 | 7.5 | Left headlight, low beam | |
| F7 | 7.5 | Right headlight, low beam | |
| F8 | 10 | Alarm signal | Mounting block, alarm relay. Alarm sound. |
| F9 | 25 | Priora heater fuse | Reserve |
| F10 | 7.5/10* | Interior lighting, instrument panels, brake light | Instrument cluster, pin “20”. Brake light switch. Brake light bulbs. Interior lighting unit. Interior lighting. The door sill light on the right front door. Additional brake signal. |
| F11 | 10/20* | Wiper | Mounting block, high speed windshield wiper relay. Switch for cleaners and washers, contact “53a”. Wiper and washer switch, contact “53ah”. Heated rear window switch. Mounting block, rear window heating relay (winding). Windshield wiper motor. Rear window wiper motor (2171,2172). Windshield washer motor. Rear window washer motor (2171,2172). Airbag control unit, pin “25”. |
| F12 | 20/10* | Terminal 15 devices | Instrument cluster, pin “21”. Electrical package controller, contact “9” of block X2. Electromechanical power steering control unit, contact “1” of block X2. Reversing light switch. Reversing lamps. Parking system control unit, contacts “11” and “14”. |
| F13 | 15 | Cigarette lighter fuse Priora | |
| F14 | 5 | Left headlight, parking light, license plate light, trunk light | Side light lamps (left side) Instrument cluster, main light indicator License plate lights Trunk light Electrical package controller, pin “12” of block X2 |
| F15 | 5 | Right headlight, parking light | Side light lamps (right side) Glove compartment lamp |
| F16 | 10 | Terminal 15 ABS | Hydraulic unit, contact "18" |
| F17 | 10 | Left fog lamp | |
| F18 | 10 | Right fog lamp | |
| F19 | 15 | Seat heating | Seat heating switch, contact "1" Front seat heaters |
| F20 | 5/10* | Immobilizer control unit | Recirculation switch (switch on) Mounting block, relay for low beam headlights and parking lights (automatic lighting control system) Heater electric fan relay Automatic lighting control switch Windshield wiper and external lighting control unit, contacts “3”, “11” Automatic climate control system controller installation, pin “1” Automatic window cleaning system sensor (rain sensor), pin “1” |
| F21 | 7.5/5* | Rear fog lights | Light switch, contact "30" Diagnostic block, contact "16" Clock Automatic climate control system controller, contact "14" |
| F22 | -/20* | Reserve | Windshield wiper motor (automatic) Mounting block, windshield wiper relay and windshield wiper high speed relay, (contacts) |
| F23 | -/7.5* | Reserve | Windshield wipers and external lighting control unit, pin “20” |
| F24-F30 | Reserve | ||
| F31 | 30 | Electrical package control unit | Electrical package controller, terminal “2” of block X1 Electrical package controller, terminal “3” of block X1 Driver’s door module, pin “6” Threshold light of the left front door |
| F32 | Reserve |
* - for the “Norma” configuration with air conditioning and “luxury”
Relay “Norma” “Norma” with air conditioning “Lux”
| K1 | relay for turning on the electric radiator fan of the engine cooling system | Reserve | Relay for turning on the low beam and side lights of the headlights (automatic lighting control system) |
| K2 | rear window heating relay | ||
| K3 | starter activation relay Priora | ||
| K4 | additional relay (ignition relay) | ||
| K5 | space for backup relay | ||
| K6 | windshield washer and wiper relay | ||
| K7 | headlight high beam relay | ||
| K8 | horn relay | ||
| K9 | alarm relay | ||
| K10 | Reserve | Fog light relay | |
| K11 | Reserve | Front seat heating relay | |
| K12 | Reserve |
Location of Priora fuses under the hood
- F1 (30 A) – power supply fuse for the electronic engine control system (ECM);
- F2 (60 A) – fuse for the power supply circuit of the engine cooling system fan (power circuit), additional relay (ignition relay), rear window heating, electrical package controller;
- F3 (60 A) – fuse for the power supply circuit of the electric fan of the engine cooling system (relay control circuit), sound signal, alarm signal, ignition switch, instrument cluster, interior lighting, brake light, cigarette lighter;
- F4, F6 (60 A) – generator power circuit fuses;
- F5 (50 A) – fuse for the power supply circuit of the electromechanical power steering
Relay and fuse box for Halla air conditioner
- right electric fan power supply fuse (30 A);
- fuse for the power supply circuit of the left electric fan (30 A).
- right electric fan relay;
- additional relay (sequential activation of left and right electric fans);
- left electric fan relay;
- heater fan power supply fuse (40 A);
- compressor power supply fuse (15 A);
- heater fan relay;
- compressor relay.
Panasonic air conditioner relay and fuse box
- Heater fan maximum speed
- Right fan
- Fan sequential relay (low speed)
- Left fan
- Left fan fuse (low speed)
- Right fan
- Heater fan
- Compressor
- Heater fan
- Compressor
Additional mounting block Priora
- F1 (15 A) – main relay and starter interlock circuit fuse;
- F2 (7.5 A) – fuse for the power supply circuit of the ECU (controller);
- F3 (15 A) – Priora fuel pump fuse;
- K1 – main relay;
- K2 is the place where the Priora fuel pump relay is located.
Attention!
The relay and fuse diagram may differ depending on the configuration and production date of the vehicle. Current diagrams of the mounting block are presented in the operating manual for the date of manufacture of the vehicle (download from the official website).
Let us remind you that on our website you can find detailed instructions for repairing the Lada Priora with your own hands.
Keywords: Lada Priora mounting block | Lada Priora torpedo
96 5
Found an error? Select it and press Ctrl+Enter..
Source: https://lada.online/do-my-self/repair/repair-lada-priora/218-shema-rele-i-predohraniteley-priory.html
What to do if the ABS system starts to work incorrectly and the indicator blinks?
This situation is one of the most complex system failures. The thing is that the sensors read incorrect information and transmit it to the control device, which for this reason gives incorrect commands to the actuators. Unfortunately, most vehicle owners, when detecting this malfunction, simply turn off the ABS system, since this is an effective measure to prevent serious consequences while driving. For example, spontaneous activation of the system while driving at a speed of more than 90 km/h can lead to serious damage to the suspension, which will provoke an emergency situation as a result of loss of control over the car. In this case, you need to do this:
- perform system diagnostics at a car service center;
- if the ABS system is installed on a domestic car, it must be disabled;
- it is quite possible that after repairing the ABS, the ECU will need to be reflashed, but this measure is applicable mainly for foreign cars;
- disabling the anti-lock system is not a solution to the problem, since on most vehicles its presence is simply necessary and is determined by the design features of their chassis, body and frame;
- You should not completely rule out the presence of faults in other components of the car that cause interruptions in the operation of the ABS.
It is necessary to remember that only diagnostics using special equipment will help to establish the real reason for the incorrect operation of the anti-lock system, which may lie in the malfunction of its components or other components of the vehicle. Therefore, you should be prepared for anything. But in many cases the problem can be solved quite simply. The cost of restoring the ABS system will depend only on its design and the make of the car. But the need to carry out this work is dictated by the safe operation of automotive equipment, the design of which includes such a system.
Problems caused by the ABS system cannot be called difficult to solve, but in any case they require immediate elimination. As you can see, the banal shutdown of the system, which most car owners consider a panacea in the event of a malfunction, is not always this magic remedy. All that needs to be done is to correctly identify the malfunction and eliminate it, because in most cases, it is not related to the functioning of the anti-lock system.
The abs sensor of a Priora car is placed near the wheels. It comes in front and back. The ABS unit is placed near the engine on the right, if you open the hood and stand in front of the car. When AbS (ABC) lights up on the panel, it means there is a problem with the system. Why do cars need this system? Abs affects the braking of the car, Priora with this system brakes 2 times faster than without it. The wheels brake in small portions, measured by a computer. Initially in 2008 there were cars without it. Read the article to the end and find out what the error is, what it is responsible for and why the ABS lights up and does not work. Priora has sensors and an ABS unit. Failure of any spare part leads to problems. On the Prior, there are 18 errors belonging to the braking system.
The appearance of an icon on the dashboard indicates an error occurring in the operation of the vehicle. There are serious errors on the Priora, if they occur, you should not tempt fate and move on, but there are errors that can be postponed. For example, the ABS system is considered very valuable for a modern driver in a car.
The Priora's ABS system saves you during unexpected and sudden braking and makes the process itself more efficient, reducing the braking distance. Therefore, when the ABS light is on on the Priora’s dashboard, strange feelings of uncertainty arise - knowing that the road situation can be so unpredictable that you will have to brake sharply, you involuntarily have to look for the reason why the icon appeared on the dashboard.
As in many systems, this behavior of the car's control unit may result in the ABS sensor on the Priora having to be replaced. A large system with a fairly simple device is worth checking - for your own safety.
practical guide
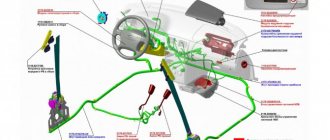
Working brake system of a Lada Priora with ABS:
1 — brake mechanism of the left front wheel; 2, 5, 13, 18 — brake hoses; 3, 8, 12, 19 — brake hoses; 4 — main brake cylinder; 6 — brake mechanism of the right front wheel; 7 — right front wheel speed sensor; 9 — reservoir of the main brake cylinder; 10 - vacuum booster; 11 — brake pedal; 14 — right rear wheel rotation sensor; 15 — brake mechanism of the right rear wheel; 16 — main disk of the left rear wheel speed sensor; 17 — brake mechanism of the rear left wheel; 20 — Hydraulic ABS modulator
Note. The left brakes are also equipped with wheel speed sensors, which are not visible in the picture. On a vehicle not equipped with an anti-lock brake system, the fluid pressure regulator is built into the rear brake hydraulic system.
The car is equipped with two braking systems - working and parking.
The service braking system is designed to reduce the vehicle's speed to a complete stop and to hold the vehicle stationary for a short time.
The service brake system is a dual-circuit, diagonal, hydraulically driven, consisting of a brake pump with a vacuum brake booster, four-wheel brakes and a fluid pressure regulator in the rear brakes. The front wheel brakes are non-ventilated disc brakes, the rear wheels are drum brakes.
Each of the car's chains includes the brakes of two wheels (one front and one rear), located diagonally on the car. One circuit includes the brakes of the front right and rear left wheels, and the second circuit controls the brakes of the front left and rear right wheels. If one of the circuits fails, the second circuit, although less effective, will stop the car.
The fluid pressure regulator restricts the flow of fluid to the rear brakes when there is insufficient load on the rear axle, thereby preventing the rear wheels from locking and skidding on the rear axle of the vehicle during heavy braking. The regulator body has a control hole closed with a plastic plug. Fluid leaking from this hole indicates a leak in the regulator rings.
To reduce the force applied by the driver to the brake pedal, a brake booster is installed in the brake system transmission, which operates due to the vacuum created in the intake manifold of a running engine.
Do not stop the engine until the vehicle is completely stopped.
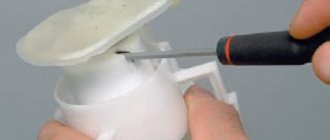
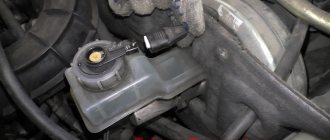
The brake fluid reservoir is installed on the brake master cylinder body. The brake fluid level sensor is built into the reservoir cap. In the event of a dangerous drop in the liquid level in the tank, the sensor turns on a warning light on the instrument panel.
Some vehicles are equipped with an ABS (anti-lock braking system) braking system. A four-channel system from Bosch is used. Channels are connected diagonally. The drive of the anti-lock braking system is a hydraulic modulator. This is a complex complex with a built-in hydraulic pump and solenoid valves. It is installed in the engine compartment on the left side. The operation of the hydraulic modulator is controlled by an electronic unit installed on the hydraulic modulator; the control unit also monitors the serviceability of all elements of the ABS system.
The front and rear brakes are equipped with front wheel speed sensors. Inductive sensors. To operate the sensors installed in the front brakes, sprockets are made on the housings of the outer hinges of the front drive wheels. To operate the sensors installed in the rear mechanisms, the main discs are installed under the brake drums. Pulse signals from the sensors are sent to the control unit. When one of the wheels is blocked, the hydraulic modulator, at the command of the control unit, limits the pressure in the corresponding channel. If a malfunction is detected, the control unit informs the driver using a warning light on the instrument panel. You can determine the problem using error codes at a specialized service station equipped with diagnostic equipment. On vehicles with ABS, an additional second relay fuse box is installed in the engine compartment. The block contains all fuses and relays for the ABS system.
Add a comment Cancel reply
You must be logged in to leave a comment.
Currently, all LADA models without exception (Lada XRAY, Vesta, Largus, Granta, Kalina, Priora, Niva 4×4) are equipped with ABS (anti-lock braking system). While operating the car, many owners notice that the ABS and ESC warning lamps (if this system is present) light up on the instrument cluster. Let's find out how to solve this problem and refine the design.
Why does the ABS light even come on?
In a normally running vehicle, this indicator shows you that the wheels have been unlocked. In this case, everything works fine, the sensors sensed the need to turn on the safety system, initiated its operation and demonstrated to the driver that some assistance was provided when braking. When you see the ABS light on while braking, it is better to release the brake pedal a little and take over control of the car. If you have an expensive, high-tech car, you can trust the well-thought-out systems and let ABS+EBD do the job. In other cases, the light may be on for the following reasons:
- the sensors are clogged, the on-board computer indicates that the diagnostic error code should be read;
- Dirt or rust got on the sensors, which caused the anti-lock braking system to turn on incorrectly;
- there is a problem in the on-board electrical system, which is demonstrated by random lights coming on;
- the wheel bearing has failed, which forces the sensors to constantly turn on the anti-lock braking system by mistake;
- the fuses in the unit responsible for the ABS system have failed and are passing the signal directly;
- There was an error in the computer that caused the ABS light to come on.
Also, sometimes troubles occur with the generator and other elements of the machine’s electrical circuit, which can result in the lighting of the diagnostic system light or warning lights of any type. For example, on a Volkswagen car produced in the 2000s, the anti-lock braking system light comes on even if there is an error in completely different components. Therefore, self-diagnosis is only a partially acceptable method of solving the problem, because often the driver does not have special tools at hand for a good investigation.
Is it possible to disconnect without consequences?
When thinking about how to disable ABS on a Grant, it is important to remember: “arbitrariness” will lead to some questions during maintenance, which will be visible to the on-board computer technicians. When contacting service during the warranty period, the fact that ABS is turned off alone is the reason for refusal of free repair
How to carry out the procedure correctly?
First, open the mounting block where the fuses are located. It is located near the battery
Sometimes you have to remove the 15-amp fuse, but the car's instructions will help clarify this issue. Then the ignition is turned on briefly, and it is important that the brake system and ABS lights do not go out. After the sound signal, the ignition must be turned off. Then comes the removal of the block with the bottom cover
The electrical wire from the fuse is cut lengthwise and its ends are stripped to about 2 cm.
The problem of how to disable ABS can be easily solved: you will need a five-pin relay, which can be purchased at any auto store. A thorough study of the contact pattern will help carry out the procedure without negative results.
Work begins with winding contacts 86 and 85. It is necessary to connect the wire going to ground to them. The second wiring is responsible for supplying the signal. The contact marked “30” should connect to the wire coming from the fuse, while 88 should connect to the ABS. The shutdown button can be placed anywhere in the cabin.
Why does the indicator on the instrument panel light up?
If the ABS light comes on on the dashboard, the reasons for this may be the following:
- It lights up every time the car engine starts - this is how the system signals that it is in working condition. If the system is fully operational, the light should go out after some time. If the ABS light does not light up when you start the engine, the indicator is most likely faulty.
- If the light does not go out for a long time, this means that there are problems in the ABS system. The on-board computer, detecting errors, generates a failure code, saves it and turns on the warning indicator.
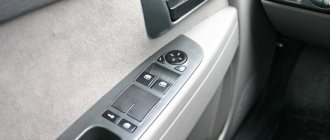
How to modify the design
The d-shape can be used to protect the wiring from the environment. We put wires on it and wrap it with electrical tape. Let's put everything in a corrugation. We seal the cover covering the ABS sensor connector around the perimeter with the same sealant. This will prevent moisture and dirt from getting into the sensor and connector area.
Attention! If the ABS fails, the brakes remain functional, but braking performance decreases, which is especially dangerous as the coverage area increases. Understand why.
Like any modern car, Priora is equipped with many devices that make driving more comfortable and safe. These devices include ABS (anti-lock braking system). Like all modern devices, it has its own electronic control unit and a warning light on the instrument panel. And then this lamp came on. What to do if the ABS fault indicator on a Priora comes on? Where to see? Who should I contact?
Why does the ABS light come on?
Based on how the anti-lock braking system is designed, we can easily conclude that the lamp can be on for the following reasons:
- This could be a malfunction of ABS sensors installed near the wheels, damage to the electronic unit, or wiring. Problems with the crowns on the wheel hubs cannot be ruled out. Often, parts of the chassis may shift or change their position, as a result of which the position of the sensors is disrupted. The malfunction may also be caused by a blown fuse.
- On some models from VAG, which were produced in the late nineties, there is one feature that is associated with the inclusion of an ABS error signal, and the fault itself is located in another unit.
All of the above can lead to the ABS light coming on when the car is moving. For example, vibrations caused by an uneven road very often lead to a break in the wiring. When driving on bad roads or where there are no roads at all, the sensors may become covered with dirt and sand.
This will not allow them to transmit the correct information to the electronic unit and will cause the light to remain on.
Bringing the control unit to life
Communities DRIVE2 Audi Club Blog Which S tronic is installed on which models
Failure to operate the unit is a consequence of contact burnout, which is caused by increased voltage. The second reason that there is no contact is mechanical or chemical influence. With a thoughtful approach, repairing the ABS unit is simple. Having conveniently positioned the part on the workbench, you need to carefully open the body using a construction knife. You shouldn’t run it too deep, otherwise you can damage the electrical wires.
Having identified the break point, using a pulse soldering iron, the damaged wires are resoldered. You can use a Weller soldering station. It is not recommended to overheat the ceramic base to avoid damaging the board. A damaged board will require replacement. After this, all that remains is to assemble the block and install it back.
The problem is not always the block. Sometimes you have to change the sensors located on the rims. If you want to restore the functionality of the old device yourself, without resorting to installing a new one, it becomes necessary to rewind the coil built inside the sensor. The work of restoring the system is thankless, so it is recommended to contact service centers. This will save a lot of effort, nerves and money.
ABS sensor on the hub
The sensors that supply wheel speed data to the control unit are made on the principle of a Hall sensor. By the way, most rotation sensors use exactly this principle: changing the voltage on the semiconductor of the sensor, depending on the passage of a control point on the rotating disk near it. It is in correlation with the signals from the ABS sensors that the control unit manipulates the valves.
How to repair wiring
We treat it with a special means for cleaning electrical contacts (for example, graphite grease) and clean the contacts from oxides. We clean the wheel speed sensor and the surface around the sensor from dirt.
Attention! Keep ABS sensors away from magnets as this may cause damage.
What to do in this case, how to measure the resistance?
As can be seen from the breakdown options discussed above, most of the problems are related specifically to the ABS sensor. In this case, information about the malfunction immediately manifests itself in the form of a warning lamp glowing.
ABS light came on
The question is how to check the ABS sensor without spending additional money and calling for service. All that is required to solve the problem is a combination device or multimeter, a car manual and wires with PIN connectors. If possible, use an assistant.
To check the resistance, switch the multimeter to ohmmeter mode, then proceed as follows:
- Use a lifting device (jack) to lift the machine.
- Remove the wheel if it restricts access to the sensor.
- Remove the screw that holds the device in place (it's easy to find at the back of the hub).
- Remove the housing that protects the control unit, and then remove the connectors through which power is supplied to the controllers.
- Insert wires with PIN connectors into the circuit, and then connect them with the sensor and multimeter.
- Measure the resistance and check the resulting parameter with what the car manufacturer recommends.
- Check the wires for continuity and short circuit.
Have a helper spin the wheel several times. At the same time, monitor and record resistance parameters. If the sensor is working properly, then during rotation the resistance indicator will change. The normal parameters are as follows (measurements are made in relation to the sensor):
- Leg device - 5-26 Ohm.
- Ground device - from 20 kOhm or more.
What to do if a breakdown is detected
What to do with the ABS sensor if a malfunction is detected? If the problem point is the device itself, it will have to be replaced, but in the case of electrical wiring, you can fix the defect yourself. To restore its integrity, we use the “soldering” method, carefully wrapping the joints with insulating tape.
If the ABS indicator on the dashboard lights up, this is a clear sign of a sensor failure. The described steps will help identify the cause of the breakdown, but if you lack knowledge and experience, it is better to contact a car service center. Otherwise, illiterate diagnostics of the condition, coupled with improper repair of the device, will reduce the effectiveness of the anti-lock braking system and can provoke an accident.
The ABS light is on on the instrument panel - there is apparently a fault with the ABS sensor or something else. Can you tell me how to check the anti-lock braking system sensor?
- Lights came on after replacing front bearings - 2 answers
- The engine does not start, the ABS fault comes on - 4 answers
- Electrical equipment fails after a long period of parking in a Volkswagen Passat – 2 answers
- What main sensors are responsible for starting the engine when cold? – 2 answers
- ABS and airbag malfunctions are on, Volkswagen Passat - 2 answers
You can only measure the resistance and voltage and check the wiring with your own hands. The best way to check the performance of the ABS sensor is naturally to connect it with an oscilloscope and by turning the wheel we will see a sine wave (measuring the frequency and level of oscillation of the pulses transmitted by the sensor), you can use a pointer gauge (we will see the deviation of the needle), a digital gauge will show an increase in voltage.
This number will not work on new machines, there is no sector, the bearing is magnetized and the sensor is a hall sensor.
To check the serviceability, you can make a “probe” consisting of an ordinary resistance of 900 - 1200 with wires ending in separate pins that “fit” into the connector. — Turning the wheels in one direction or the other, alternately connect the “probe” to the connectors, turn on the ignition and look at the behavior of the ABS light on the instrument panel. If, when connecting the “probe” to one of the connectors, the light goes out, the malfunction lies in this sensor.