Checking the coolant temperature sensor (CTS) is a work aimed at determining the performance of the unit and its ability to respond to changes in temperature conditions.
To complete the work, you can go in two ways: immediately dismantle the device or first carry out a check without removal.
When choosing the first option, you will need a regular wrench of the required size (usually “19”), but on some foreign cars - a 20, 21 or 22 socket.
First make sure that the DTOZh receives a voltage of 5V (from 5 to 12 on some models). If it fits, you can proceed with the rest of the test.
Below we will consider in detail all the diagnostic methods, the causes of sensor failure, features of its location and other features using the example of VAZ cars with 8 and 16 valves, Kalina, Gazelle, 2115, 2114, Renault Logan, Lada Priora and Chevrolet Niva. The methods described below are also suitable for most other brands of cars.
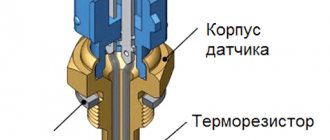
Design and principle of operation
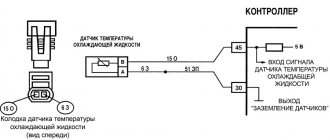
The DTOZh temperature sensor is a resistor (thermistor) that reacts to the temperature of the antifreeze in the engine cooling system. Information about the resistance of this element is transmitted to the ECU, which decides to change the settings in the engine operation.
The information obtained is used by the ECU to determine the steps of the idle speed regulator to optimally adjust the required volume of the fuel mixture.
The peculiarity of DTOZH is that in the cold its resistance increases, and when heated, on the contrary, it decreases.
So, when reaching 130 degrees Celsius, the resistance parameter is 70 Ohms, and at minus 40 degrees - 100.7 kOhms.
The thermistor is controlled by applying +5 V voltage to it from the controller.
The potential passes through a classical resistor with constant resistance (R).
The antifreeze heating level is calculated based on the voltage drop across the DTOZh with variable R (Ohm). In this case, the drop will be large on a cold engine, and low on a warm engine.
Crankshaft position sensor
DPKV is responsible for providing the control system with information about the frequency with which the crankshaft rotates and its angular position. Based on this data, the ECU calculates the phase and duration of the pulses responsible for controlling the injectors and controlling the ignition coil. When reading information, the element sends the received data to the controller, whose task is to process it and issue the necessary pulses to the injectors.
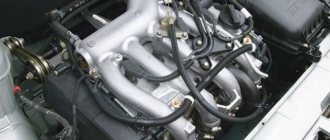
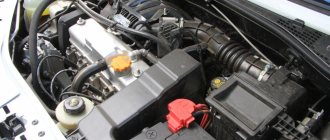
The crankshaft position sensor is located near the oil filter.
The unit is highly reliable in operation and durable, and therefore its breakdowns occur infrequently. This is also due to the fact that the DPKV contains no mechanical moving parts.
The most common cause of its malfunction is corroded wiring. Failure of a part entails significant problems for the normal functioning of the engine; if repairs cannot be made, the unit will need to be replaced.
A breakdown of the crankshaft position sensor prevents the engine from starting. We list the main signs of its malfunction:
- problems starting the engine;
- unstable operation of the engine;
- loss of power, etc.
Where is
To check the DTOZH, you need to know its location. Please note that the location of the sensor may vary depending on the make/model of the machine.
Most often, the thermistor is mounted between the cylinder head and the thermostat or on the coolant outlet pipe.
But on some cars it is installed on the radiator pipe.
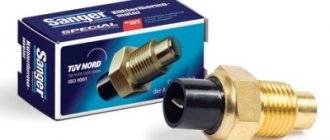
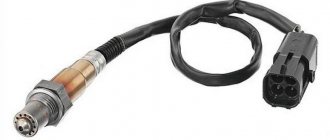
Externally, the device looks like a small element with a thread, with which the DTOZH is screwed into a special hole. In this case, the regulating element itself is located in the antifreeze and controls its temperature.
In certain cars, for example, the BMW E39, there may be two DTOZH. One controls the heating of the antifreeze and is installed at the outlet of the engine, and the second is located behind the radiator. To remove you will need a 22 key.
This type of installation allows you to control the temperature in different areas and thereby take action faster.
Note that two sensors are installed on powerful / expensive cars, where the temperature parameter is of key importance.
In this case, the control unit must have appropriate programs. For more information, please refer to your vehicle's manual.
Functionally, the sensor is very reliable and breaks down in rare cases. Most often it shows false information. Sometimes other damage is possible, for example, chafing of wires or poor contact quality.
As for the features of the location of the DTOZH on different models, we will dwell on this issue below.
Detection of sensor inoperability and possible failures
Many systems rely on the readings of a temperature sensor, so its faulty operation entails a chain of erroneous automatic actions and incorrect operation of the motor. Such problems can quickly damage individual parts and entire units.
You need to know that most problems, as experience shows, are not related to the breakdown of the DTOZh or its internal problems, but to troubles with wiring or a rusted or leaky connection in the system.
One of the impact factors from the operation of a thermostat is the thermostat. Running the refrigerant constantly in a large circle, even on a cold engine, will not allow the engine to reach operating temperature for a long time. This will lead to additional fuel consumption, intensive wear of power plant parts, increased emissions and other problems.
You should worry about the following signs:
- presence of damage to the temperature sensor housing (cracks, chips, etc.);
- refrigerant leak (visible drips, presence of drops around the connection, dried drips sprinkled with dust);
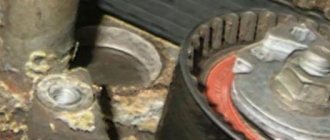
- oxidation around the threaded connection (problems with unscrewing the sensor even a partial turn).
However, even with such defects, the electrical appliance may be in working condition. The reason may be a mismatch in its electrical output parameters.
You can check using a multimeter. The readings must be checked against the reference values for each car model. If a short circuit, incorrect output data or faulty contacts are detected, the device must be replaced.
When the test reveals the functionality of the sensor, the correct response to temperature fluctuations, but the motor continues to operate with an open circuit, not paying attention to signals from the DTOZH, then it is necessary to identify problems in the electronic control unit.
Symptoms of a problem
To take measures to control the coolant temperature sensor, it is necessary to identify problems in this unit in time.
But it is worth considering that the signs discussed below may indicate other malfunctions of the power unit.
This is why additional diagnostics may be required to obtain an accurate result.
It is also important to understand what part the DTOZH takes in the operation of the engine:
- Informs the driver in real time about the coolant temperature.
- When the engine reaches a threshold temperature value, the ECU, having received information from the coolant sensor, turns on the forced cooling fan, as a rule, this is about 100 0C.
- Participates in the process of increasing idle speed by enriching the fuel-air mixture on a cold engine.
- When the car is moving, the ECU generates general information about the operation of all systems based on the data received from the sensors and, based on this data, forms the correct fuel-air mixture. The coolant temperature sensor also takes part in this process.
Primary symptoms of failure:
- The Check Engine light on the dashboard comes on. To obtain more accurate information, it is better to scan the ECU and look for errors, for example, through an ELM327 auto scanner connected to a smartphone. See error codes below.
- The engine starts and immediately stalls.
- Malfunction of the fan in the radiator. The malfunction may manifest itself as a refusal to turn on when it heats up or operation even after the motor has cooled down. When the DTOZ is turned off, the electronic control unit of the machine perceives the problem as a break and turns on the fan.
- The appearance of dark or gray-black smoke from the exhaust pipe.
- Increased "gluttony" of the car. This is due to the fact that incorrect information is supplied to the ECU. Accordingly, the “brains” of the machine cannot determine the volume of displacement required to maintain optimal temperature conditions.
- Antifreeze leaking from under the DTOZh housing. This problem can be determined by visual inspection.
- A hot engine stalls. The problem may occur when the maximum temperature is reached. In this case, the type of coolant filled does not matter.
- The power unit heating indicator on the dashboard does not work.
- Engine malfunctions. The problem may manifest itself as stopping at low speeds, difficulties starting in winter, hesitation when operating at idle, etc.
- The coolant boils, but the instrument panel displays the temperature within normal limits.
- Increased engine heating time, etc.
The problems discussed above can occur one at a time or in combination, but in most cases they indicate a malfunction of the power unit. However, the antifreeze temperature sensor is not always the main cause of the malfunction.
Causes of failure of the coolant temperature sensor
Structurally, the coolant sensor is quite simple, and accordingly, it rarely fails. Usually this happens simply due to its old age or mechanical damage. For example, corrosion of contacts and metal parts of the case may occur due to the fact that instead of antifreeze or antifreeze, ordinary water was poured into the cooling system (and even more so if this water is “hard”, that is, with a high content of metal salts). Also, the reasons for the failure of this device may be:
- Hull damage . This can be expressed in various aspects. Often, leaks of coolant are visible, which flows from the threads of the sensor or its housing. Also, the electrical contacts and/or the thermistor itself may be damaged, which will produce an incorrect signal.
- Oxidation of contacts . Sometimes situations arise when, under the influence of fumes or simply from old age, the contacts on the sensor oxidize, so the electrical signal does not pass through them.
- Damage to the chip . In some cases, due to mechanical damage, the so-called “chip” may fail, that is, a group of contacts that is connected to the coolant temperature sensor. Simply put, the wires at the base of the connector fray. According to statistics from reviews found on the Internet, this is one of the most common malfunctions that occurs with the sensor and the corresponding system.
- Lost electrical contact inside the sensor . In this case, unfortunately, repair is hardly possible, since usually its body is sealed and does not allow access to the insides of the DTOZH. Accordingly, in this case the sensor only needs to be replaced with a new one.
- Violation of wire insulation . In particular, we are talking about the power and signal wires that go to the sensor from the electronic control unit and back. The insulation can be damaged due to mechanical stress, abrasion, or even simply from old age, when it “peeles” in pieces. This is especially true for those machines that are operated in conditions of high humidity and sudden changes in ambient temperature.
If it is possible to simply clean the body/threads/contacts of the sensor, then to restore its normal operation it is enough to carry out the appropriate measures. However, if the housing is damaged and/or the internal thermistor is damaged, then repair is hardly possible. In this case, you just need to replace the sensor with a new one. Its price is low, and the replacement process is simple and will not take much time and effort even for novice car owners.
How to check without removing it from the car
If you suspect a faulty DTOZH, it is not necessary to remove it from the car. All manipulations can be done without dismantling using a tester or diagnostic device. Let's consider each of the methods in more detail.
Pre-check
To check the temperature meter, start the car and let the engine warm up at idle to 90 - 95 0C.
Disconnect the connector from the sensor and notice how the arrow on the instrument panel behaves:
- if the arrow remains in place, then you need to check the meter itself or the electrical circuit going to the device (more on this later);
- if the arrow goes down, then check the fuse. If it is intact, and when the contact is shorted to ground, the arrow jumps, then the sensor is faulty.
Multimeter
The simplest method to check the coolant temperature sensor is to use a tester.
First, we check the voltage; for this, set the multimeter to the “Measure constant voltage up to 20V” mode.
- Disconnect the connector from the meter.
- Turn on the ignition.
- Connect the positive wire of the device to the “+” connector, and short the second contact of the tester to the motor. The device should show between 4.8 and 5.2 V.
When working on a hot engine, be careful not to touch the metal surface, so as not to burn yourself and damage the measuring device.
The algorithm of actions is as follows:
- Discard the contacts from the sensor.
- Set the resistance measurement mode on the multimeter.
- Measure the parameter between the terminals.
- Compare them with the tabular data that can be found in your vehicle's repair and maintenance manual.
On some car models, it is very difficult to get to the sensor connectors and you will have to remove it.
To minimize antifreeze losses, unscrew the expansion tank cap to relieve pressure in the system. Then tighten the plug again.
Exact resistance specifications may vary depending on model.
As an example, we give several resistance parameters for a VAZ 2110 car.
Table 1.
| Temperature 0C | Ohm resistance |
| +100 | 177 |
| +80 | 332 |
| +60 | 677 |
| +40 | 1459 |
| +20 | 3520 |
| +10 | 5670 |
| +5 | 7280 |
If the DTOZH produces erroneous information, it may need to be removed for a more detailed check, and subsequently replaced.
Diagnostic tool
If an engine error appears on the dashboard, it is worth checking the ECU for errors related to the temperature sensor.
The most convenient option is to use an ODB2 scanner. To avoid high costs, you can use a simple model of Scan Tool Pro Black Edition or ELM327, which we wrote about above.
The general algorithm of actions is as follows:
- Inspect the DTOZH for damage to the wires or the appearance of rust.
- Connect the device and read the errors (see the link above for how to do this).
- Codes P0115, P0117. P0116 or P0118 indicate the presence of malfunctions in the functioning of the sensor.
The capabilities of the model discussed above allow you to look at the operation of the sensor online, as well as look at the functioning of other components: gearbox, transmission, ESP, ABS and others.
The device works with all diagnostic software and works without loss of communication. Bluetooth and Wi-Fi are used for communication.
Where to buy car accessories
Spare parts and other products for the car are easily available for purchase at auto stores in your city. But there is another option that has recently received significant improvements. You no longer need to wait a long time for a parcel from China: the AliExpress online store now offers the opportunity to ship from transshipment warehouses located in various countries. For example, when ordering, you can specify the “Delivery from the Russian Federation” option.
Follow the links and choose:
| 12V car alarm, engine start/stop button, anti-theft system | Universal 10mm Oil Temperature Gauge for Cars | Automotive Electric Throttle Actuator Controller |
| Backlit Tire Pressure Gauge, High Precision Digital Meter | Set of screwdrivers for removing seals | 20 pcs crimp clamps with pliers |
Checking the removed DTOZH
For a more accurate check, it is recommended to remove the device from the vehicle. To do this, you need to let the engine cool, and then drain the coolant from the system.
To remove it, you only need a key “19” (20, 21, 22), with which you can unscrew the sensor and remove it together with the ring.
At the same stage, it is worth assessing the condition of the device itself, its threads, cleaning and lubricating it.
The same operations can be done with respect to the sensor itself. After dismantling is completed, you can proceed directly to work.
Checking with a thermometer
After dismantling, you can check with a thermometer. This option provides the most accurate information, so it is recommended for most cases.
The algorithm of actions is as follows:
- Prepare a vessel and pour water into it.
- Use a boiler to heat water.
- Prepare your multimeter for measurements.
- Immerse the sensor element in the liquid.
- Provide the ability to connect a multimeter to the contacts.
- Place a thermometer in the water to monitor the temperature. It is better to use the electronic version, which provides greater accuracy.
- Heat the water and take measurements for different temperatures, for example, from +5 degrees Celsius and above in steps of “5”.
- Fill out the table containing the resistance parameters in relation to the set temperature.
- Check with the information provided in the vehicle manual.
Of course, inaccuracies may occur during the measurement process. The error depends on several factors: operating conditions and the characteristics of a particular DTOZH. In particular, even in devices of the same model, the resistance parameter may differ.
Without thermometer
If desired, checks can be made without using a water temperature meter.
In this method, you can act according to the principle discussed above, but with minor restrictions.
The general algorithm is:
- Boil the water.
- Install the DTOZh sensitive element into it.
- Measure the resistance at the terminals.
At a temperature of about 100 degrees Celsius, the resistance should be about 177 ohms. But here you need to take into account possible errors.
In particular, at the time of measurements, the temperature may change downward.
The disadvantage of the method is that the test is performed only at one temperature point.
Performance test
To check the thermal sensor, it will have to be removed from the car. To do this, follow these steps:
- Allow the engine to cool to 40-50 °C to avoid burning your hands during operation. Partially or completely drain the antifreeze from the cooling system.
- Disconnect the battery from the on-board power supply by removing the negative cable.
- Disconnect the block with wires from the thermoelement.
- Unscrew the part using a wrench of the appropriate size.
If the device is installed at the top point of the system, then it is not necessary to empty it entirely; it is enough to drain a third of the liquid into the container. All antifreeze must be drained when the thermocouple is located at the bottom of the radiator.
To carry out the tests you will need:
- a multimeter or other device capable of measuring circuit resistance;
- a small container for water (you can use a regular glass);
- thermometer with a scale up to 100 °C.
A thermometer is essential if you want to make accurate resistance measurements by referring to the reference chart for your vehicle. When there is no table, the serviceability of the part is checked without a thermometer according to its operating principle: the hotter the water in the glass, the lower the resistance at the contacts should be.
If the multimeter shows a certain resistance, then immerse the thermocouple in a glass of cold water and record the readings. Then add hot water and watch the resistance change, it should decrease. If there are no changes, purchase and install a new temperature sensor.
If the tests were successful and the device changes resistance when heating the water, then it is worth checking the connecting wires and cleaning the contacts. Little things like this often cause major problems.
Features of checking for VAZ 2110
The “tens” configuration includes two types of engines – 8 and 16 valves. But the features of the DTOZH, location and replacement are identical.
On these VAZ 2110 you can use the Lusar LS 0101 temperature sensor. The car has two coolant temperature meters installed, one near the thermostat and it interacts with the computer, the second on the radiator and transmits data to the instrument panel.
The procedure for checking is the same; resistances at different temperatures are shown in Table 1.
CO functions
The cooling system is responsible for removing excess heat that is generated during operation of the power unit. If the engine overheats, the consequences can be catastrophic.
Cooling system diagram
In addition to heat removal, CO additionally performs several other functions:
- Helps accelerate engine warming up to optimal operating temperature;
- Warms the air inside the cabin;
- Cools the lubrication system;
- Cools exhaust gases.
In total, three types of cooling systems can be used on cars:
- Air. The cooling process is carried out by blowing air over the units;
- Liquid. The coolant is a special liquid - water, antifreeze or antifreeze;
- Combined. Both types of cooling are mixed in one system.
antifreeze or antifreeze acts as a cooler .
VAZ 2114, VAZ 2115
On these cars, GM 2112-3851010-01 can be used as a DTOZH. The location of the device is between the cylinder head and the thermostat.
To check, it is recommended to dismantle the element (open-end wrench size 19). To do this, you need to wait until the engine cools down, reset the negative voltage on the battery and drain the antifreeze.
After this, you need to dismantle the device and check it by heating the liquid, a thermometer and a multimeter.
The following parameters must be present.
Table 2.
| Temperature, 0C | Resistance, Ohm | Voltage, V |
| +30 | 1350-1880 | 8 |
| +50 | 585-820 | 7,6 |
| +70 | 280-390 | 6,85 |
| +90 | 155-196 | 5,6 |
| +110 | 87-109 | 4,7 |
If there is a discrepancy in the readings, the device must be replaced.
Possible malfunctions and ways to eliminate them
The following symptoms may inform the car owner about the failure of the DVT:
- The quality of the exhaust gases is too low, which is associated with a violation of the combustible mixture in the cylinders.
- Fuel consumption has increased, and noticeably.
- Problems have arisen in the operation of the power unit. The dynamics of the vehicle may decrease, and the engine power as a whole will also deteriorate.
- Combinations of errors may appear on the dashboard, and the ECU may also send a signal to the dashboard about the need to check the performance of the motor.
- The power unit has become more difficult to start.
When they detect the first signs of problems, many motorists immediately drive their car into a garage or service station to change the controller. In practice, symptoms of DTOZ malfunctions are often associated with damage to the electrical circuit and poor contact of the device with the vehicle’s on-board network. Therefore, if you encounter a similar problem, we first recommend checking the condition of the wiring.
Photo gallery “Diagnostics of DTOZH”
1. DTOZH connected to a multimeter in a container with antifreeze
2. Dependence of temperature (left), resistance (right)
Gazelle (engines ZMZ 406, 405, 409)
Installation location - on the power unit in the area of the thermostat or on the body of the latter.
To remove it, it is necessary to partially drain the coolant from the engine, disconnect the spring clamp of the harness block and discard the block from the sensor.
Next, using a key set to “19” you need to loosen the broach and unscrew the device.
When choosing a device, you need to focus on the engine and ECU.
406 engine and ECU Mikas 7.1, 5.4, SOATE, VS5.6
In such cases, a DTOZH is used, operating at a voltage of 5 to 12 Volts through a resistance of 9.1 kOhm.
Several types of devices are suitable for replacement: Kaluga 19.3828, Luzar LS 0306, Rikor 40.5226 or Autotrade 42.3828.
When checking, you will also need water with a boiler and variable temperature, as well as a multimeter.
To work, you need to assemble a circuit and apply 1 to 1.5 mA to it. In this case, it is necessary to measure not resistance, but voltage.
When checking, the following parameters must be present:
- -60 0С - 2.13 V;
- -40 0C - 2.33 V;
- -20 0C - 2.53 V;
- 0 0C - 2.73 V;
- +40 0С - 3.13 V;
- +80 0С - 3.53 V;
- 105 0C - 3.83 V;
- 125 0C - 3.98 V.
When the engine is running, the voltage will be 5 V.
Engine 405, 409, UMZ 4216E3, 4213 control unit Mikas 11 / 10.3, VS8, SOATE
DTOZH with catalog numbers 234.3828, 40.5215 or 421.3828 are used here.
Unlike the method discussed above, here it is necessary to measure resistance.
In this case, the dependence should be as follows:
- 128 0C - 80.8 Ohm;
- 100 0С - 177 Ohm;
- 80 0С - 332 Ohm;
- 60 0С - 667 Ohm;
- 40 0С - 1459 Ohm;
- 20 0С - 3520 Ohm;
- 0 0С - 9420 Ohm;
- -20 0С - 28680 Ohm;
- -40 0С - 100707 Ohm.
In case of significant deviations from these parameters, the device must be replaced.
Mass air flow sensor
If everything is clear with the coolant sensor, then let's move on to the mass air flow device. Unlike the fluid regulator, this sensor is designed to analyze the volume of air that the motor consumes during normal operation. It is this indicator that directly affects the fuel consumption of the VAZ 2110 engine.
MAF for VAZ 2110
The engine air flow sensor itself is a device in the form of a film on which the regulator itself, as well as a heating resistor, are located. In the middle of the element there is a special section, the heating level of which is monitored by the regulator. On the back of the film surface there are several more thermal sensors. In the event that there is no air flow, these regulators, including the air flow sensor, will display the same parameters using the signal indicator.
When there is air flow, the first device will be cooled, but as for the second, its performance will be the same, since the air will heat up in any case when the engine is running. The signal level from both regulators will be proportional to the mass of the air flow, and the electrical circuit, in turn, will convert this parameter into voltage. The engine air flow sensor must always be clean, otherwise the readings that the device will produce will be incorrect. Accordingly, problems may arise in the operation of certain machine engine mechanisms, so it is necessary to periodically check and monitor the cleanliness of the film itself. The author of the video on how to diagnose a faulty mass air flow sensor regulator at home is in Sandro’s garage.
Niva Chevrolet
For installation, you can use DTOZH 2112-3851010 Kaluga (23.3828). It is difficult to visually determine the location of the device, because it is covered by other parts.
After removing them, you can see that the device is located in the upper part of the thermostat in the hole in the front pipe of the water jacket (the one that goes into the cylinder block). After unscrewing it (snap on 19), antifreeze does not flow.
The check is carried out according to the same schemes as discussed above. In this case, you need to have before your eyes a table with the parameters of temperature and resistance of the DTOZH.
Table 3.
| Temperature, 0C | Resistance, Ohm |
| +100 | 177 |
| +90 | 241 |
| +80 | 332 |
| +70 | 467 |
| +60 | 667 |
| +50 | 973 |
| +45 | 1188 |
| +40 | 1459 |
| +35 | 1802 |
| +30 | 2238 |
| +25 | 2796 |
| +20 | 3520 |
| +15 | 4450 |
| +10 | 5670 |
| +5 | 7280 |
| 0 | 9420 |
| -4 | 12300 |
| -10 | 16180 |
| -15 | 21450 |
| -20 | 28680 |
| -30 | 52700 |
| -40 | 100700 |
Also on the Chevrolet Niva, in the area of the 4th spark plug, there is a DUTOZH (coolant temperature indicating sensor), which displays data on the instrument panel; it does not transmit information to the ECU and does not affect the operation of the engine.
But it can provide incorrect data to the instrument panel and mislead the driver.
You can unscrew it without draining the coolant, but before doing this, relieve the pressure in the system by unscrewing the cap of the expansion tank.
It is also checked by comparing the temperature with the readings of the multimeter.
See table below.
Which sensor to choose
Independent automotive industry experts and service workshop specialists are of the opinion that it is better to buy original spare parts or branded analogues. The latter are selected according to codes in special combination programs. The coolant temperature sensor, VAZ 2110–2112 family, has serial number 21120–3851010–00. Sometimes at the end, instead of 00, you can see: 01, 02, 03. This indicates that the device was made at one of the related AvtoVAZ enterprises.
Table 2. Price of the original DTOZH and its foreign analogues
| Manufacturer | Number | Amount, rub. |
| GM AvtoVAZ | 21120–3851010–00 | 250 |
| AvtoVAZ | 21120–3851010–82 | 165 |
| Magneti marelli | 1719 16011 150 | 355 |
| Hella | 6PT 009 107–271 | 735 |
| Eps | 1.830.098 | 1080 |
Sources: autopiter.ru, exist.ru.
Interesting fact. Some owners buy exclusively foreign spare parts for their “tens”. The same shock absorbers, struts, springs, timing belts, electrical equipment and other parts “from there” last much longer.
Kalina
The official version of the DTOZH for the VAZ 2112 is 2112-3851010. But you can use analogues, for example, ERA (33026), Luzar (LS 0112), Fenox (TSN 2211207).
The location of the sensor on a car with an 8- and 16-valve engine is near the thermostat. In this case, the device is slightly closed by the filter housing.
In this case, on the Lada Kalina 1 you will have to remove the air filter to access the temperature meter.
To unscrew, use a 19 key. There is no need to drain the antifreeze.
Check, as in the previous case, after removing the device with the key to “19”.
For temperature and resistance readings, see Table 3.
Checking the presence of operating voltage is carried out with a multimeter with the ignition on without removing the sensor between the block terminal “B” and ground (there are two terminals on the blocks “A” and “B”), standard readings are within 4.8-5.2 V.
Replacement
Before repairs, it is necessary to carry out a number of preparatory measures. First, you should choose a level area for the machine. It can be in the garage, it can be outdoors. Secondly, prepare the tool: open-end and ring wrenches (19 mm, 13 mm, 10 mm, 8 mm). You will also need a capacious medical syringe of 100–250 ml, a 15–20 cm dropper tube and a 0.5–1 liter jar (so as not to drain the antifreeze/antifreeze). The sequence of actions is as follows:
- We wait until the engine cools down completely.
- Use a syringe to pump out the coolant from the expansion tank (100–200 ml).
- Unscrew the negative terminal of the battery (10–13 mm wrench).
- Unscrew the air filter housing fasteners (8 mm wrench).
- Carefully tilt the “pan” to the right.
- Disconnect the power supply from the DTOZH.
- We unscrew the sensor (19 mm wrench).
- We clean the landing area from dirt.
- We screw in the new DTOZH.
The assembly must be done in reverse chronology. There is no need to use sealant, since the copper O-ring fits perfectly and seals the connection. Let's start the engine. We check its operation and inspect the repair area for antifreeze leaks. The entire event takes 15–20 minutes.
Renault Logan
On Renault Logan you can use many types of DTOZH, for example, MEAT & DORIA 82187, JP GROUP 1293102400, Vernet WS2602 and others.
Originals:
- 12-RENAULT-7700101968 (triangle contacts) - installed on 8 valve engines until 2012.
- 12-RENAULT-226307034R – after 2012 (contacts in a row).
All of them are suitable for K4M and K7M motors, their locations vary.
So on the K4M (8 valves), the temperature meter is installed in the water distributor housing (in the cylinder block). He is alone, transmits information to the instrument panel and works in conjunction with the ECU.
On the K7M engine at the rear end of the cylinder head.
On the body of the block there are markings for the three terminals “A”, “B1” and “B2”. The operating voltage is measured, as in the case above, with the ignition on between terminal “B1” and ground. The norm is from 4.8 to 5.2 V.
If voltage is not supplied to the block, disconnect the wiring harness from the ECU and use a tester to check the wiring for an open circuit. We take measurements between “B1” and pin “13” of the ECU.
If the circuit is working, then the control unit has failed.
We switch the tester to the “Resistance measurement” mode and check for an open circuit in the “ground” circuit of the sensor between terminal “B2” and the body of the machine (engine).
Readings of less than 1 ohm indicate a healthy circuit. If the device shows infinity, then there is a break between terminals “73” of the ECU and “B2” of the block.
Next, if you don’t want to remove the coolant temperature sensor from the engine, use a tester to measure the resistance readings on a warm and cold engine between the sensor terminals “B1” and “B2”.
Normative data are shown in Table 4.
| Temperature, 0C | Resistance, Ohm |
| 120 | 105 |
| 110 | 135 |
| 90 | 240 (+/ — 30) |
| 80 | 335 (+/ — 35) |
| 50 | 810 |
| 25 | 2050 |
| 20 | 3500 (+/ — 500) |
| 4 | 7500 (+/ — 500) |
To further check the device, you can use one of the methods discussed above.
For greater reliability, it is advisable to dismantle the device; use a 21 head.
Mass air flow sensor
This device analyzes the amount of air that the engine consumes during operation. Fuel consumption directly depends on its readings. The device is a sensitive element in the form of a thin film. It contains temperature sensors and a heating resistor.
In the middle part of this film there is a special area, the heating level of which is controlled by a temperature sensor. On the film on the side where the device controls the air flow, there are two more thermal sensors. If there are no air flows, they produce the same temperature.
If there is air flow, then the first sensor will cool, and the second will not change its indicators, since the air heats up. The signal from both devices will be equal to the proportional mass of air that passes through them. The electrical circuit converts this indicator into voltage.
It is very important to keep this element clean, otherwise the indicators may be distorted and, as a result, errors or malfunction of some parts of the car may occur. It is also necessary to monitor the cleanliness of the air that passes through the film.
How to replace it yourself
Preparatory stage:
- Open-end wrench set to “19”;
- Rags;
- Additional lighting as needed;
- New "measuring device".
Replacement algorithm:
- We install the VAZ 2114 in the perimeter of the repair area;
- We turn off the engine, open the hood;
- We provide priority safety measures: block the rear row of wheels with wheel chocks, squeeze the parking brake;
- Remove the terminals from the DTOZH, unscrew the sensor with a key;
- We replace the device with a new one, screw it in, and put on the power terminals again.
We turn the key in the ignition, activate it, and check the functionality of the equipment. Add the missing amount of antifreeze as needed.
We recommend: Repair and assembly of VAZ 2105 engine
Recommendations for care and maintenance of sensors
- Strictly follow the manufacturer's recommendations regarding vehicle maintenance schedules;
- Buy parts with original catalog numbers. The exact data is indicated in the instruction manual for your technical device;
- When the first signs of engine malfunction appear, contact a service station;
- Do not buy a temperature sensor from other technical means, since the full functionality of the equipment is not guaranteed;
- Carefully compare the catalog numbers on parts and spare parts with the actual markings indicated in the instruction manual.
Location of temperature sensors
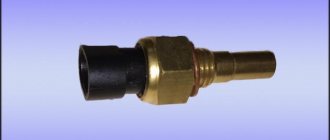
- One of them, DTOZH, is located on the cooling system pipe running from the block head to the thermostat. It sends signals to the computer's electronic control unit so that additional cooling (fan) is turned on in a timely manner. Don't look for it on the radiator; it was located there in previous models. Has two terminals. The DTOZh removed from the car looks like this:
Appearance of DTOZH
- The second sensor is called DTUOZH, it has one terminal and sends a signal to the dashboard in the cabin, where the driver sees the temperature of the coolant (not the engine, as many people mistakenly think). It is located, as can be seen from the first figure, on the engine block under the cooling system pipe. It may have a rubber cap that protects the terminal from moisture. DTUOZH looks like this:
Appearance of DTUOZH