Failure of the timing belt (timing belt) (break or cut of teeth) will lead to valve impact on the pistons due to mismatch of the rotation angles of the crankshaft and camshaft and, as a result, to expensive engine repairs.
Therefore, in accordance with the vehicle maintenance regulations, we replace the belt every 120 thousand kilometers or after 6 years (whichever comes first), regardless of its condition.
At each maintenance we recommend checking the condition of the belt.
The surface of the toothed part of the belt should not have folds, cracks, undercuts of teeth and separation of fabric from rubber.
The reverse side of the belt should not have wear, exposing the cord threads, or signs of burning.
There should be no delamination on the end surfaces of the belt. The belt must be replaced if traces of oil are found on it.
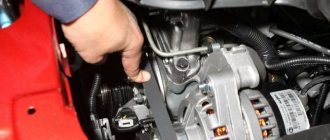
To assess the condition and replace the timing belt, remove the right power unit support and the right mudguard of the engine compartment.
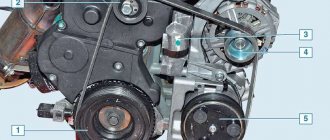
We unscrew the six bolts securing the top drive cover with a 16mm head
- two bolts 1, a head of 13 - three bolts 2 and a head of 8 - bolt 3.
2. Remove the upper timing cover
3. Using a 18mm head, turn the crankshaft clockwise and visually inspect the condition of the belt.
4. Without a device, you can determine the belt tension.
If, with the force of the thumb and forefinger, it is possible to twist the drive branch of the belt (at a point located between the toothed pulleys of the camshaft and the coolant pump) by more than 60°-70°, then the belt is weakly tensioned and needs to be tightened.
5. To adjust the belt tension, remove the bottom cover.
Using a 8-mm socket with a ratchet, unscrew the two bolts securing the lower timing cover.
6. Remove the lower timing cover.
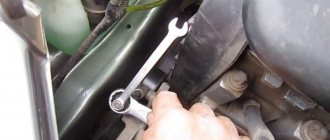
7. Having loosened the tightening of the tension roller fastening nut with a 16 wrench, use a special wrench (a wrench is suitable for tensioning the timing belt of front-wheel drive VAZ cars) and turn the roller counterclockwise, tensioning the belt.
In this position of the roller, tighten the nut securing it.
8. Having turned the crankshaft clockwise by the bolt securing its pulley two turns, again check the belt tension and, if necessary, repeat the adjustment.
Install the removed parts in reverse order.
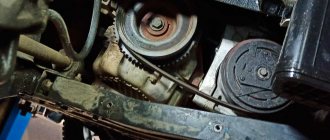
To replace the timing belt, remove the accessory drive belt and the upper and lower timing covers.
When unscrewing the crankshaft pulley mounting bolt, it is necessary to block the shaft from turning.
To do this, you can use the window in the clutch housing, located on top under the thermostat housing.
While turning the crankshaft (an assistant will be required), we observe in the window the movement of the clutch housing.
We make sure that one of the six bolts securing the casing to the flywheel appears in the window.
A timing belt is a part whose service life is no more than 60,000 km (according to regulations!) , and it can be earlier if you handle the engine carelessly. The replacement frequency is affected by driving style and the serviceability of other engine components and assemblies.
In the video, replacing the timing belt on a 16-valve K4M Largus engine (similar to Sandero, Logan, Duster):
When to change the timing belt on Largus?
A belt drive connects the shafts of the motor system. The manufacturer promises that the belt will last 60,000 km. It is quite possible that this is actually the case, but the need for an unscheduled belt replacement also cannot be ruled out. And the belt may well wear out before its due date, which may be due to a number of reasons. The main one is an aggressive driving style, which, unfortunately, is practiced by some drivers. Increased loads also wear out the belt ahead of time. One cannot help but mention the incorrect installation of the belt. This may also well affect its early wear. The belt has arrows indicating the direction of movement. It is in this direction that it needs to be installed, otherwise the teeth located on the inside will wear out very quickly. But not all belts have such indicators.
When should a fluid pump be replaced?
When replacing the timing belt on a Lada-Largus, be sure to take into account the fact that the liquid pump has a service life of no more than 100 thousand km. Antifreeze of any brand has a similar service life. During this mileage, all the additives contained in it evaporate, which leads to a decrease in the efficiency of the entire engine cooling system.
Therefore, if the service life of the liquid pump has already expired, then it is advisable to fill in fresh antifreeze and install a new pump. And if the car is operated in a gentle mode, a mileage of 60 thousand km is achieved in several years, then the elements of the gas distribution system, pump and antifreeze must be changed at least once every two years. Replacing the timing belt on the Largus (16 valves) must be treated with great attention, since the system is complex and the slightest desynchronization of the shafts will lead to a disastrous outcome.
What happens if you do not replace the timing belt Largus 16 valves
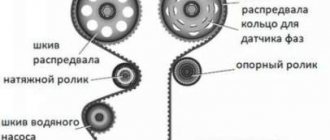
The gas distribution mechanism is a complex system in which the crankshaft, pistons, valves, intake and exhaust camshafts interact. The valves must open and close strictly at certain angles of the crankshaft and piston. The synchronicity and accuracy of the interaction of all parts is extremely important here. The timing belt serves to drive the camshafts and cooling system pump from the engine crankshaft.
Any belt has its own service life. Over time, cracks appear on it, and one or more teeth may be cut off. If the belt is tensioned somewhat looser than necessary, then it can turn by this number of teeth and the synchronicity of the interaction of the mechanism will be disrupted. This will lead to disruption of valve timing, deterioration of the fuel combustion process, reduced engine power, increased fuel consumption and increased emissions of harmful substances into the air.
If the belt breaks completely, the pistons will begin to hit the valves, which did not have time to return to their original position. As a rule, this leads to bending of the valves and destruction of the pistons. After a timing belt breaks, the engine will have to be overhauled and all damaged parts replaced.
Engines
The designers have provided three power units for installation on this car, these are two eight-valve VAZ 11189 and K7M from Renault, as well as a 16-valve French engine K4M. The working volume of these engines is 1600 cm3, which is considered optimal for this class of cars. The power of the VAZ engine is 87 horses, the French engine can produce up to 90 hp. With. Both power units have an injection power system and comply with Euro-5 environmental standards.
K7M
This French engine began to be installed on domestic cars after Renault acquired shares in an automobile plant in Tolyatti.
This engine became the next in a series of modifications to the K7 series engines; its piston stroke was increased, rocker arms were added to the valve mechanism, and the diameter of the clutch and flywheel was increased. Average fuel consumption is approximately 7.2 liters per hundred kilometers.
Manufacturers declare a service life of 400 thousand km, but repairs often occur at 350 thousand km. The motor is combined with a manual gearbox having 5 stages.
VAZ 11189
This is a higher quality and modified VAZ 11186, which is installed on other VAZ passenger cars. It also has an injection power system and can deliver up to 87 hp. With. Its cost is lower than that of a French engine, which is why it is installed on most cars.
The average fuel consumption of the VAZ 11189 is slightly higher, it is equal to 8.2 l/100 km. As a disadvantage, experts note the shorter service life compared to the French engine, it is equal to 200 thousand km. Both engines bend the valves when the timing belt in the timing drive breaks.
How to understand that it is time to change the timing belt Largus 8 valves
Periodically you should look under the hood and check the condition and tension of the drive belts. If you notice signs of wear, abrasion, delamination or cracks on the belts, this is a reason to contact a technical center as soon as possible and replace the suspicious belt, even if there are still many thousands of km until the scheduled replacement. Replacing bent valves, broken pistons and valve seats will definitely cost more.
You should also replace the timing belt if you find traces of oil or other technical fluids on it. They very quickly destroy the structure of the belt material and lead to its failure.
Diagnostics of the mechanism
But before replacing the timing belt on the Lada-Largus (16 valves), you need to make sure that it has already exhausted its service life or is damaged. It is advisable to carry out inspection every 10 thousand km.
No special tools are required for repairs; a visual inspection is sufficient:
- Pay attention to whether there are any cracks on the surface of the belt. If they are present, they may increase during operation, which will lead to belt breakage.
- If there is excessive wear on the outer or inner surfaces, the belt must be replaced.
- Pay attention to whether there are delaminations.
- Assess the condition of the teeth.
- There should be no signs of wear or abrasions on the side surfaces.
- The tension should be normal. Check it out using the signs on the video.
- If there are oil stains on the elements of the gas distribution mechanism, this indicates the presence of breakdowns.
Preparatory stage
The initial stage of work is the same for both methods and boils down to providing access to the drive belt.
For this:
- We place the car on the inspection hole, immobilize and de-energize the on-board network by removing the “negative” terminal from the battery;
- For the convenience of work, remove the right front wheel from the car (in the direction of travel), dismantle the protective elements of the engine compartment - the lower one and the mudguard;
- Remove the accessory drive belt. To do this, using a spanner wrench, press the belt tension roller, remove the drive element, and then completely remove it from the equipment pulleys;
- We unscrew the spark plugs and cover their mounting holes with a rag;
- We remove the load from the upper right support of the power plant. To do this, install a pry bar between the subframe and the pan, squeeze the motor up a little and fix it in this position with a block;
- Let's move on to the engine compartment. There, first we pull out the fuel lines from the holders located on the support and take them to the side;
- We disconnect the support bracket from the top cover of the timing drive, for which we unscrew the three fastening bolts (these fasteners are different in length, so you should mark which one was located);
- We unscrew the two bolts that secure the support to the car body and remove it;
- We unscrew all the fasteners of the top drive cover (3 bolts and 2 nuts), after which we remove the cover. Please note that if you check the condition and tension of the belt, there is no need to disassemble anything further. After removing the cover, the belt will be clearly visible, so to assess its condition, all that remains is to turn the crankshaft a few turns and inspect the drive element. To adjust the tension, there is a special hatch on the bottom cover through which access to the tension roller is provided. If the belt is replaced, then we continue to disassemble the power plant further;
- We unscrew the bolt securing the auxiliary units pulley. To do this, ask an assistant to engage 5th gear in the gearbox and depress the brake pedal to block the crankshaft. If this is not enough to remove the bolt, then proceed as follows: remove the crankshaft position sensor from the flywheel housing. We insert the pry bar into the resulting hole so that it fits between the teeth of the flywheel ring (starter ring). The teeth that are used by the crankshaft position sensor (they are larger) must not be used as a stop; they must not be damaged under any circumstances. Thus, resting the pry bar against the flywheel housing, stop the crankshaft from turning and unscrew the bolt, and then remove the pulley;
- We install the pulley bolt back, but first you should put a small bushing (a piece of pipe) or a pair of larger nuts on it;
- We dismantle the bottom cover of the drive by unscrewing its 4 fasteners.
Prices and articles, originals and analogues of belts for Lada Largus
For 8-valve versions of Lada Largus, manufacturers offer a wide range of options. The article number of the original timing belt kit from Renault for the 8-valve K7M engine is 130C17480R. The kit includes a tension roller. The price tag starts from 2,500 rubles.
Gates has long been the official supplier of components for VAZ cars. As analogues, you can also choose belts from the brands Bosch, Dayco, SKF, etc.
If a Largus with a 16-valve engine is still under warranty, then the most correct solution would be to install a timing belt kit with catalog number - 117206842R GATES 6 RK 1822. The price for it starts from 4,300 rubles, which is significantly higher than the cost of the belt used in Timing belt variations Largus with an internal combustion engine with 8 valves.
The cost of the timing belt itself, manufactured by Renault, for both the K7M and K4M engines starts from 800 rubles. Price lists for taxes can be found below.
What should you choose? The only thing that can be recommended is to purchase a belt as a set, the original one - Renault, or from Gates.
Replacing the timing belt is absolutely not a complicated procedure, so you should not skimp on such an important consumable component for the engine. A couple of thousand rubles are completely incommensurate with the financial losses in the event of a timing belt drive breakage.
Let's consider other suitable oils for Lada Largus:
- Castrol Syntrans Transaxle 75W-90 is a synthetic oil, the best analogue among competitors. In terms of quality and resistance to temperatures, this oil can be compared with the original. After filling with such oil, the gearbox will engage more smoothly and clearly. Owners also note the absence of a crunch when engaging reverse.
- Motul Gear 300 75 W90 is another synthetic oil that gives the gearbox maximum operating efficiency. The properties of this oil have a positive effect on the smoothness and clarity of gear shifting. Crunching and noise are also eliminated
- Shell Getriebeoil EP 75W90 GL4 is frankly not the most suitable oil for Lada Largus. This lubricant is a clear example of the fact that expensive oil is not always the best. There is no doubt about the quality of Shell products, but this product has incompatible parameters with the Lada Largus gearbox, or is simply not adapted for the Russian climate. Largus owners who have tried this oil often complain about hum, noise, vibration and crunching of the synchronizers.
DSC_9570
This way we fixed the position of the crankshaft.
Next, without touching either the camshafts or the crankshaft, carefully remove the old belt using the technology shown in the first method.
This is where some difficulty awaits us. The fact is that the camshafts, as soon as they are no longer connected by a belt, spontaneously rotate at small angles under the action of the valve springs. For now, we leave them in the positions in which they themselves stopped. Under no circumstances do we change the position of the crankshaft. We replace the rollers and, having first put the belt on the camshaft pulleys, ask an assistant to tighten the camshafts until the marks on them are exactly aligned.
We remind you that the shafts turned spontaneously only at very small angles.
Moreover, the pulley, which, overcoming the resistance of the springs, must be rotated clockwise (exhaust valve shaft), can be turned with a spanner “18” by the pulley mounting nut. (The nut will work in the direction of tightening, which is not scary.) The other pulley often does not require adjustment, and if any is needed in the direction of unscrewing the nut, then the pulley can be turned with a simple device made from a piece of pipe with holes drilled in both walls of one of the ends at a distance of 55–65 mm. M8 bolts of sufficient length should be inserted into the holes. To increase rigidity, you can secure them with nuts. Having hooked the bolts onto the spokes of the pulley, use a piece of pipe, like a lever, to turn it to the desired angle. So, the assistant holds both pulleys in the desired position (according to the marks). The belt is already on the camshaft pulleys. We put the belt on the crankshaft pulleys, pumps and rollers. We check whether the crankshaft has turned by checking the mark in the clutch housing window. First, tighten the tension roller and once again check the marks on the camshaft pulleys and the crankshaft flywheel. A very small discrepancy is acceptable, a tooth error is very noticeable, in which case the belt will have to be installed again
Only if we have found the alignment of all the marks and tightened the tensioner fastening in a sufficiently tightened position, can we very carefully, by hand, turn the engine two revolutions of the crankshaft. If after two revolutions of the crankshaft all the marks coincide again, then you can begin to finely adjust the belt tension, as described above
A combination of the two methods is also possible. In this case, we still fix the crankshaft with a threaded pin, as described in the first method.
Timing belt + pulley kit for Lada Largus and Renault Logan. Renault originals. For 8 valve engines, timing belt + roller, article number: 130C17480R. For 16 valve engines, timing belt + rollers, article number 130C17529R.
For 16 valve K4M engines timing belt + rollers, Gates analogue K035671XS
It is recommended to change to TO-4: Lada Largus 60,000 km
Our assortment includes original timing belts in original packaging from Renault-Russia JSC, which guarantees the reliability of the sets. Therefore, the price for these kits is not the lowest. We would also like to warn you against purchasing non-original and counterfeit spare parts. “Pirate” fakes, as a rule, only look like the original, but in fact their technical characteristics are completely different. The consequences of using such Renault spare parts can be terrible - in addition to the failure of the fake itself, problems also appear with other components of the car, especially you should not skimp on timing belts, if it breaks, the consequences will be very depressing, especially since it is only changed once at 60 thousand.
FakeHeader
Comments 22
For the French, the arrows on the pistons should point to the flywheel, while yours should point to the timing belt.
What mileage should the car have? What do pistons change?
With a lot to overhaul the engine or with a timing belt break at any mileage.
It’s easier to change the timing belt, but it’s also easier to end up with a fake, even if you pay a million, you’ll be fooled. And these pistons are just a panacea for counterfeits, so as not to end up with capital money (and that’s oh, how expensive).
It’s easier to change the timing belt on time. And not to go and wait for it to break and then rejoice that my valve is not bent.
That’s not the point, sometimes I get a defect or even the left parts are so bent after 1500 km
Well, the Internet is full of information on how to distinguish a fake from the original. This usually falls to those who do not want to pay for the original and buy it “cheaper” in order to save money. I'm not saying this about you. no, not at all. But that's basically what happens. Those who save on spare parts then invest in repairs.
I bought the original, but alas)
then yes, sadness((
That's why these damn manufacturers don't put these pistons in the first place.
Modern mechanical engineering makes it possible to produce cars that can pass without caps. repair 1 million km. Why don’t they still make things like this, I think you can guess...
Yes, this is not only in the automotive industry. Recently there was a buzz about new iPhones, because... the manufacturer specifically killed them after the warranty (they started to malfunction), but this is happening all over the world (all household appliances are disposable). But once upon a time, foreign products were considered the standard of quality. Yes, the world is heading into the abyss.
Features of timing belt rupture for 8- and 16-valve vehicles
Despite the number of valves in the Lada Largus engine, damage to the timing belt is considered one of the worst causes of repair. The consequences for the engine can be the most irreversible: the camshaft remains in one position, and the crankshaft continues to work hard. As a result, the piston hits the open valves, simply bending them.
If we talk about the design features of the engine, the more complex it is, the more serious the consequences of a belt break or abrasion. For example, in 8-valve engines you can simply replace the belt, but in 16-valve engines you will have to completely restore the damage to all elements. But, despite these differences, the car owner must know exactly when to change the timing belt so that the engine subsequently functions normally.
In the first option, attention should be paid to the condition of the shaft seals, and in the second, to the serviceability of the tension rollers. Of course, there is no point in saying that driving a Lada Largus with a 16-valve engine is dangerous
If you regularly monitor its timing belt, then it will definitely not be in danger of breaking or abrasion.
In addition to the belt, you also need to check the condition of the tension rollers
It is worth noting that the difference between such engines is only in piston systems. Due to the use of its lightweight version, motors become more powerful and more economical, but this requires expensive repairs. At the same time, the use of automatically tensioning rollers and modified tooth profiles only reduces the possible mileage.
What else should I do when replacing the timing belt?
If you decide to replace the timing belt on a 16-valve engine, it is advisable to check the condition of all system components to ensure they are in good condition. If there are extraneous sounds when the engine is running, this is clearly a symptom that the timing belt and rollers need to be replaced. These components are changed in any case, but the pump and pulleys have a slightly longer service life. In particular, pulleys can last at least 120 thousand km, and this is a considerable mileage. But usually they “walk” much longer.
Removal
Before work, the car should be placed on a lift (possibly on an overpass).
- We disconnect the on-board network by removing the terminals from the battery terminals.
- Now we achieve the position of the piston located inside the first cylinder at top dead center. To do this, we rotate (as the clock progresses) the crankshaft, grasping the bolt of its pulley with a suitable wrench. Reaching TDC is checked by matching the marks present both on the surface of the shaft pulley itself and on the back side of the timing cover.
- Now both shafts (camshaft with crankshaft) should be fixed so that the achieved position of the piston is not disturbed.
- Removing the protective cover of this unit is carried out using a “10” key.
- We also dismantle the generator belt drive pulley.
- We move on to the tension roller and loosen its nut using a wrench set to “17”.
- The timing belt can be removed along with the indicated pulley. Let's do it.
Replacing the timing belt in the 16-valve version of Lada Largus
The preparatory process for replacing a belt drive on a 16-valve internal combustion engine is almost similar to the previously discussed procedure with an 8-valve “four”.
- After hanging and de-energizing the car, we dismantle the engine crankcase protection.
- We install a suitable support under the engine and dismantle the right support using a key set to “19”.
- Next, you need to remove both timing protection covers and then block the crankshaft.
- Afterwards, using a key set to “18”, remove the auxiliary drive pulley.
- Before removing the belt itself, it is necessary to set the piston of the first cylinder to the TDC position. To do this, rotate the crankshaft by its pulley bolt.
Attention! The K4M engine, like the K7M unit, has cylinder numbering from the flywheel, and not from the timing drive unit.
- Before removing the old belt, it is necessary to determine the position in which the camshafts are located.
- Afterwards, remove the intake resonator and remove the plugs from the openings on the left end of the cylinder head.
- By rotating the crankshaft, it is necessary to reach the position of the camshafts when their marks on the ends of the gears coincide with the upper plane of the head surface, after which the marked shafts should be immobilized.
- To check the correct position of the crankshaft, we resort to using the hole under the oil pressure sensor.
- After unscrewing the plug, screw an M10 control bolt with a thread length of 75 mm into the hole. If the crankshaft is in the correct position, the bolt is screwed in completely.
- Now we loosen the belt tension and the tension roller mounting nut using a “13” wrench. Mechanical tension in the belt is relieved by turning the roller counterclockwise.
Installation of a new belt drive is carried out using the reverse removal algorithm. The roller paired with the tension mechanism is replaced with new analogues. When attaching a belt, you should use the hints in the form of arrows marked on the product.
The correct position of the shaft must be checked by screwing in the control bolt. If everything is correct, do not forget to close the hole with a plug.
Leaks and problems
The longer the mileage of the Lada Largus becomes, the more problems appear, as in principle with any car. Most often this is due to natural wear and tear of the engine, causing oil to burn. Although the manufacturer allows for a small consumption.
If, when inspecting the engine for leaks, they are found, then eliminating the leak, and with it the burns, is not difficult
But if there are no signs of leakage, then you should pay attention to the following nuances. Increased oil consumption can be affected by driving at high speeds, as well as frequent idling of the engine.
By the way, oil burns on 1.6 engines are quite rare. But there is one problem that is quite widespread when car owners notice oil in spark plug wells. If the car is under warranty, then we simply go to the dealer to have it fixed.
If there is no longer a guarantee, then we do the following. We take the solvent and thoroughly wipe the spark plug well. Inside the wells themselves you can find 2 small grooves; they need to be sealed with sealant. Apply the sealant to your finger and try to rub it into the grooves; remove the residue with a rag. This is a simple way to eliminate this leakage.
How to install a new belt?
But the replacement of the timing belt on the Largus (16 valves) is not completed; new parts still need to be installed:
- Be sure to replace the rollers; you just need to unscrew the bolts that secure them. New parts need to be put in their place.
- Please note that there is a small protrusion on the tension roller housing. It must be aligned with the groove on the car engine block.
- Carefully install the new drive belt, first putting it on the crankshaft pulley, then on the pump. And lastly, it needs to be put on the camshafts. Pay attention to the arrows that are painted on the outside of the drive belt.
- Adjust the tension using a special wrench.
After this, you can safely remove the clamps installed on the crankshaft and camshaft.
This completes the replacement of the timing belt. Be sure to install new plugs in the cylinder head cover instead of the old ones. Don't forget about them, otherwise oil leakage will occur.
Video of the condition of the timing belt with mileage (120,000 km)
Since spark plugs need to be changed during routine maintenance, it is better to combine these operations, because it will be easier to turn the crankshaft when checking the belt. The surface of the toothed part of the belt must be free of folds, cracks, undercuts of teeth and separation of fabric from rubber. The reverse side of the belt should not have wear, exposing the cord threads, or signs of burning. There should be no delamination or fraying on the end surfaces of the belt. The belt must be replaced if traces of oil are found on it.
We remove the power unit protection and the right mudguard of the engine compartment.
Using the “18” head, we turn the crankshaft clockwise by the bolt securing the auxiliary drive pulley and visually assess the condition of the timing belt.
If the moving pointer is offset relative to the fixed one:
- clockwise - the belt will be tightened.
Pull up and remove the hatch cover.
To replace the timing belt, remove the accessory drive belt.
Attention! Be careful not to damage the surface of the teeth needed to operate the crankshaft position sensor (they are much larger). Remove the top (see
above) and lower timing cover
Remove the upper (see above) and lower timing drive covers.
In order not to disturb the valve timing, before removing the timing belt, it is necessary to set the crankshaft and camshafts to the TDC (top dead center) position of the compression stroke of the 1st cylinder.
Attention! Starting from this stage, work can be done in two ways. The second method is the “folk” one, which allows the work to be carried out with minimal labor costs, but requires the obligatory presence of an assistant and high thoroughness of the work, followed by a careful check of the result
A prerequisite for carrying out work in this way is your confidence that no one has disassembled the engine before you, even to a small extent. Then all parts will be installed in factory positions
The second method is the “folk” one, which allows the work to be carried out with minimal labor costs, but requires the obligatory presence of an assistant and high thoroughness of the work, followed by a careful check of the result. A prerequisite for carrying out work in this way is your confidence that no one has disassembled the engine before you, even to a small extent. Then all parts will be installed in factory positions.
To determine the position of the camshafts, it is necessary to remove two rubber-metal plugs from the holes in the left end of the cylinder head.
Similarly, remove the other plug.
To fix the camshafts when replacing the belt, a device should be made from a metal plate 5 mm thick (see sketch).
A bolt with an M10 thread and a length of about 100 mm can be used as an installation pin.
In this case, it will be impossible to turn the crankshaft clockwise.
When replacing the belt, you also need to replace the tensioner assembly and support roller.
When installing a new timing belt with arrows on it, we orient it so that the arrows coincide with the direction of movement of the belt (clockwise).
Then at the same time we put the belt on the tensioner roller and install the device on the stud of the coolant pump housing.
We turn the crankshaft two turns clockwise by the bolt securing the auxiliary drive pulley until the grooves on the ends of the camshafts coincide.
We unscrew the installation pin from the hole in the cylinder block and install the screw plug in place. We install the removed parts in reverse order.
The second method of replacing the timing belt of a 16-valve Lada Largus engine
Using a bolt with washers or a bushing, which is screwed into the end of the crankshaft, in the same way as in the first method, we turn the engine crankshaft and, accordingly, the camshafts to the position shown in the photo below.
We no longer turn the crankshaft. Let's move on to marking the flywheel.
Next, without touching either the camshafts or the crankshaft, carefully remove the old belt using the technology shown in the first method.
We remind you that the shafts turned spontaneously only at very small angles.
A combination of the two methods is also possible. In this case, we still fix the crankshaft with a threaded pin, as described in the first method.
If you rely on a strict maintenance sequence, then the Lada Largus timing belt is replaced every 60,000 km. Although this period may be temporary - 6 years, even despite his condition.
Belt selection
Many car owners, in order to save money, are wondering how to do the replacement themselves and which belt to choose?
Choosing a timing belt for the 16-valve Lada Largus engine is quite simple, since you can buy a timing belt repair kit, which includes the belt itself and 2 rollers. This will cost the owner much less than buying separately.
Let's look at the kit and separately the parts.
Original repair kit (two rollers and a timing belt)
A repair kit for the Lada Largus gas distribution mechanism costs an average of 3,000 rubles. It includes two rollers and the belt itself. The catalog number looks like this - 130C17529R .
Original timing belt
Now let's look at a belt made by Renault (cat. number - 8201069699 ). It is of excellent quality and lasts all 60 thousand kilometers.
Belt analogues
Also, there are analogues of the standard Lada Largus belt. Let's take a closer look:
| Manufacturer's name | vendor code | Average price in rubles in the Russian Federation |
| Dayco | 94997 | 1200 |
| Master-sport | 1126-SD-PCS-MS | 1200 |
| Contitech | CT 1179 | 1250 |
| Bosch | 1 987 949 686 | 1400 |
| LYNXauto | 132FL27 | 1500 |
| Gates | 5671 XS | 1650 |
| Febi | 19836 | 2000 |
All the manufacturers indicated in the table have proven themselves quite well and have high quality characteristics, and therefore are recommended for installation on the Lada Largus.
Original bypass roller
82 01 058 069 — deflection roller
Now, let’s look separately at the cost and article number of the Lada Largus timing tensioner pulley:
The original catalog number looks like this - 82 01 058 069 . The average cost of a Lada Largus timing pulley for 16 valves is 6,000 rubles.
Analogues of the video
There are a number of substitutes that can be installed instead of the original part:
| Manufacturer's name | vendor code | Average price in rubles in the Russian Federation |
| Dello | 30770001070150 | 700 |
| Pilenga | PT-P 7150 | 800 |
| Optimal | 0-N262 | 1500 |
| Ruville | 55640 | 1500 |
| Ina | 532 0221 10 | 1500 |
| SNR | GE355.38 | 1800 |
| Gates | T41237 | 2200 |
As can be seen from the table, the cost of analogues of the Lada Largus 16 valve timing pulley is more than half that of the original. But, at the same time, they are in no way inferior in quality.
Timing belt tensioner roller
Timing belt tensioner 8200061345
8200061345 — original number of the timing belt tensioner roller
Reasons for replacement
The main reasons for replacing the timing belt:
- Wear . The most frequent and inexorable factor. The process of using a part wears it out and over time the spare part has to be replaced.
Porepins can develop into a torn belt and engine “capital”
Engine capital
The timing belt is broken, the valves are bent (K4M Largus engine)
When to change and why
The timing belt drive synchronizes the operation of the crankshaft and camshaft. The manufacturer recommends replacing it after 60,000 km. But it may well happen that the consumable will need to be replaced ahead of schedule.
It is imperative to diagnose this unit so as not to miss the moment when the belt reaches a state of wear and there is a threat of its breakage. By the way, along with the belt drive, it is recommended to change the tension roller, which is also a consumable item and gradually wears out.
The photo below shows valves that were bent as a result of a broken timing belt drive: The timing belt assembly should be inspected after 20,000 km. But what defects are critical, and if they occur, the belt needs to be changed:
- presence of cracks on the surface;
- obvious signs of wear (scuffs, etc.);
- the material began to delaminate;
- the teeth are worn out;
- the ends are frayed;
- oil stains are visible on the surface;
- The belt does not tighten because it is stretched.
During the inspection, pay attention to the condition of the tension roller and water pump. If it is unsatisfactory, they will also need to be replaced
You can replace the belt drive yourself, but you must follow the instructions. Incorrect installation of the belt can cause engine damage. Of course, it will be better if you invite an assistant who has experience in car repair. Many car enthusiasts do just this and do not seek the help of specialists, which, by the way, is not cheap.
So, if you decide to replace the belt yourself, first prepare yourself properly and prepare everything you need, namely:
- jack;
- keys and heads of the required size;
- screwdriver;
- mandrel for fixing camshafts;
- new consumable.
Be sure to buy new consumables only from trusted retail outlets. A low-quality consumable will not last long, and very soon it will also have to be replaced. In addition, a low-quality drive may break, and such “savings” will result in expensive repairs.
Tools for repairs
In order to replace the timing gear drive of a 16 valve engine, you will need the following tools:
- A set of spanners, sockets, ratchets and extensions.
- Several screwdrivers.
- Special mandrels for crankshafts and camshafts.
- Special key for belt tension.
Purchase a repair kit in advance. It includes the belt itself and rollers. If the pulleys on the shafts and the pump are heavily worn, then it is necessary to purchase these elements.
Replacement steps
It is better to carry out the entire procedure on an overpass. Before carrying out work, the vehicle must be de-energized by disconnecting the terminal from the battery. The vehicle must be securely secured.
1. Dismantle the drive of additional units. 2. After this, remove the pulley. To do this you will have to unscrew the mounting bolt. 3. Remove the engine mount located on the right. 4. We remove the timing covers and the entire mechanism appears before our eyes.
5. Scroll the crankshaft until the mark located on its pulley aligns with the vertical axis of the pulley. The alignment does not have to be complete, the mark should be 1 tooth away from the center of the pulley. After this, turn the crankshaft to the right until it stops. 6. Remove the plugs from the holes on the cylinder head, having previously dismantled the air collector. This is done so that you can check the alignment of the marks on the camshafts. 7. Turn the crankshaft until the grooves on it are horizontal. 8. Fix the camshafts using a mandrel. 9. Loosen the tensioner fasteners and begin to turn the tension roller to the left to loosen the tension of the belt drive. 10. After this you can remove the belt. 11. The tension roller should be carefully inspected and, if necessary, replaced. 12. When installing the tensioner, make sure that the groove located on the motor aligns with the same mark on the roller.
13. We install and tension the new belt drive. The tension should be normal. 14. We get rid of all the fasteners and install new plugs on the cylinder head. 15. Other parts are installed in reverse order.
Separately, I would like to say about the tension of the belt drive. If it is not sufficient, the belt may come off. A loose belt will slip. Friction will cause early wear of the rubber. And if the belt is overtightened, bearings and other mechanisms may suffer.
To determine the correct gear tension, you need to pay attention to the tension roller. It has movable and fixed indicators
If the movable one is located slightly to the left of the stationary one, the belt needs to be tightened, if it is to the right, loosen it. To adjust the tension, you need to loosen the tension roller and turn it clockwise until the indicators are completely aligned. Then the crankshaft will have to be turned 2 turns to the right. After the adjustment process is completed, it must be tightened again.
How to remove the belt drive?
First you need to tighten the crankshaft pulley bolt until it stops. Then the pulley is rotated until the marks coincide. Please note that they should be no more than one tooth away from the vertical. Then perform the following manipulations:
- Install a special post to secure the crankshaft.
- After this, you need to turn it counterclockwise until it stops.
- Check if all marks on the camshafts match. To do this, remove the plugs located in the inspection windows at the end of the cylinder head. Before doing this, be sure to remove the air purification filter housing. The plugs are removed using a simple screwdriver or a thin awl.
- Then you need to turn the crankshaft so that the grooves on the camshafts are horizontal. Use mandrels for fixation.
- Loosen the tensioning mechanism mounting nut. Then you need to turn the roller counterclockwise.
The drive belt will then loosen and can be easily removed. On Largus, replacement is carried out in approximately the same way as on most modern cars.
Conclusion
You can get additional useful information on the discussed topic from the video in this article.
A note about what kind of lighting lamps are installed in the Largus headlights; which of them are low/high beam, and which are responsible for the side lights. How to change lamps yourself. How much do originals and analogues cost in Yaroslavl?
Good day, future and aspiring gentlemen Largusovod!
On Largus, the low/high beam and headlight lamps often burn out. At least for 70 thousand I have already changed it five times on each side.
The following light bulbs were installed on my car:
1. Low/high beam: halogen, Osram H4 12v 60/55w. (art. 64193). Price from 109 rub.
There are many analogues. Here are some of them:
370 rub. General Electric (34454)
117 rub. Valeo (032007)
2. Front dimensions: halogen baseless 12V Osram (art. 2825). Price from 17 rub.
26 rub. Lynx (L12805)
9 rub. Fortluft (2825)
3. Rear dimensions: two-pin with filament, base BAY15D. Beacon 12V P21/5W.
from 56 rub. Fortluft (7528)
They burn out less often. I changed it only once in the right lamp. This is what she looks like:
How to replace headlight bulbs
1. First, remove the protective cover. It turns a little, then a small latch is released.
2. The block with wires is removed.
3. Remove the rubber protective sleeve.
4. The lamp is pressed with a U-shaped clamp. It needs to be pulled to the side and back.
5. Take out the lamp. Remember its orientation. Two teeth at the bottom, one at the top. And if you look at it from the side of the headlight, the inscription (marking) will be on top.
6. Install a new lamp. You should not take it with your bare hands, as greasy marks from the pores will remain on the bulb and the lamp will fail faster. This applies to all halogen lamps. It is better to hold it by the plinth or use a microfiber cloth.
7. Assembly is carried out in reverse order. First the clamping clamp, then the rubber bushing and finally the top cover.


